Quiz prompts
You can combine any of the different prompt blocks below.
1. Single-select question
Your audience picks one answer from a list of choices.
- Click on ADD A BLOCK and select Single choice.
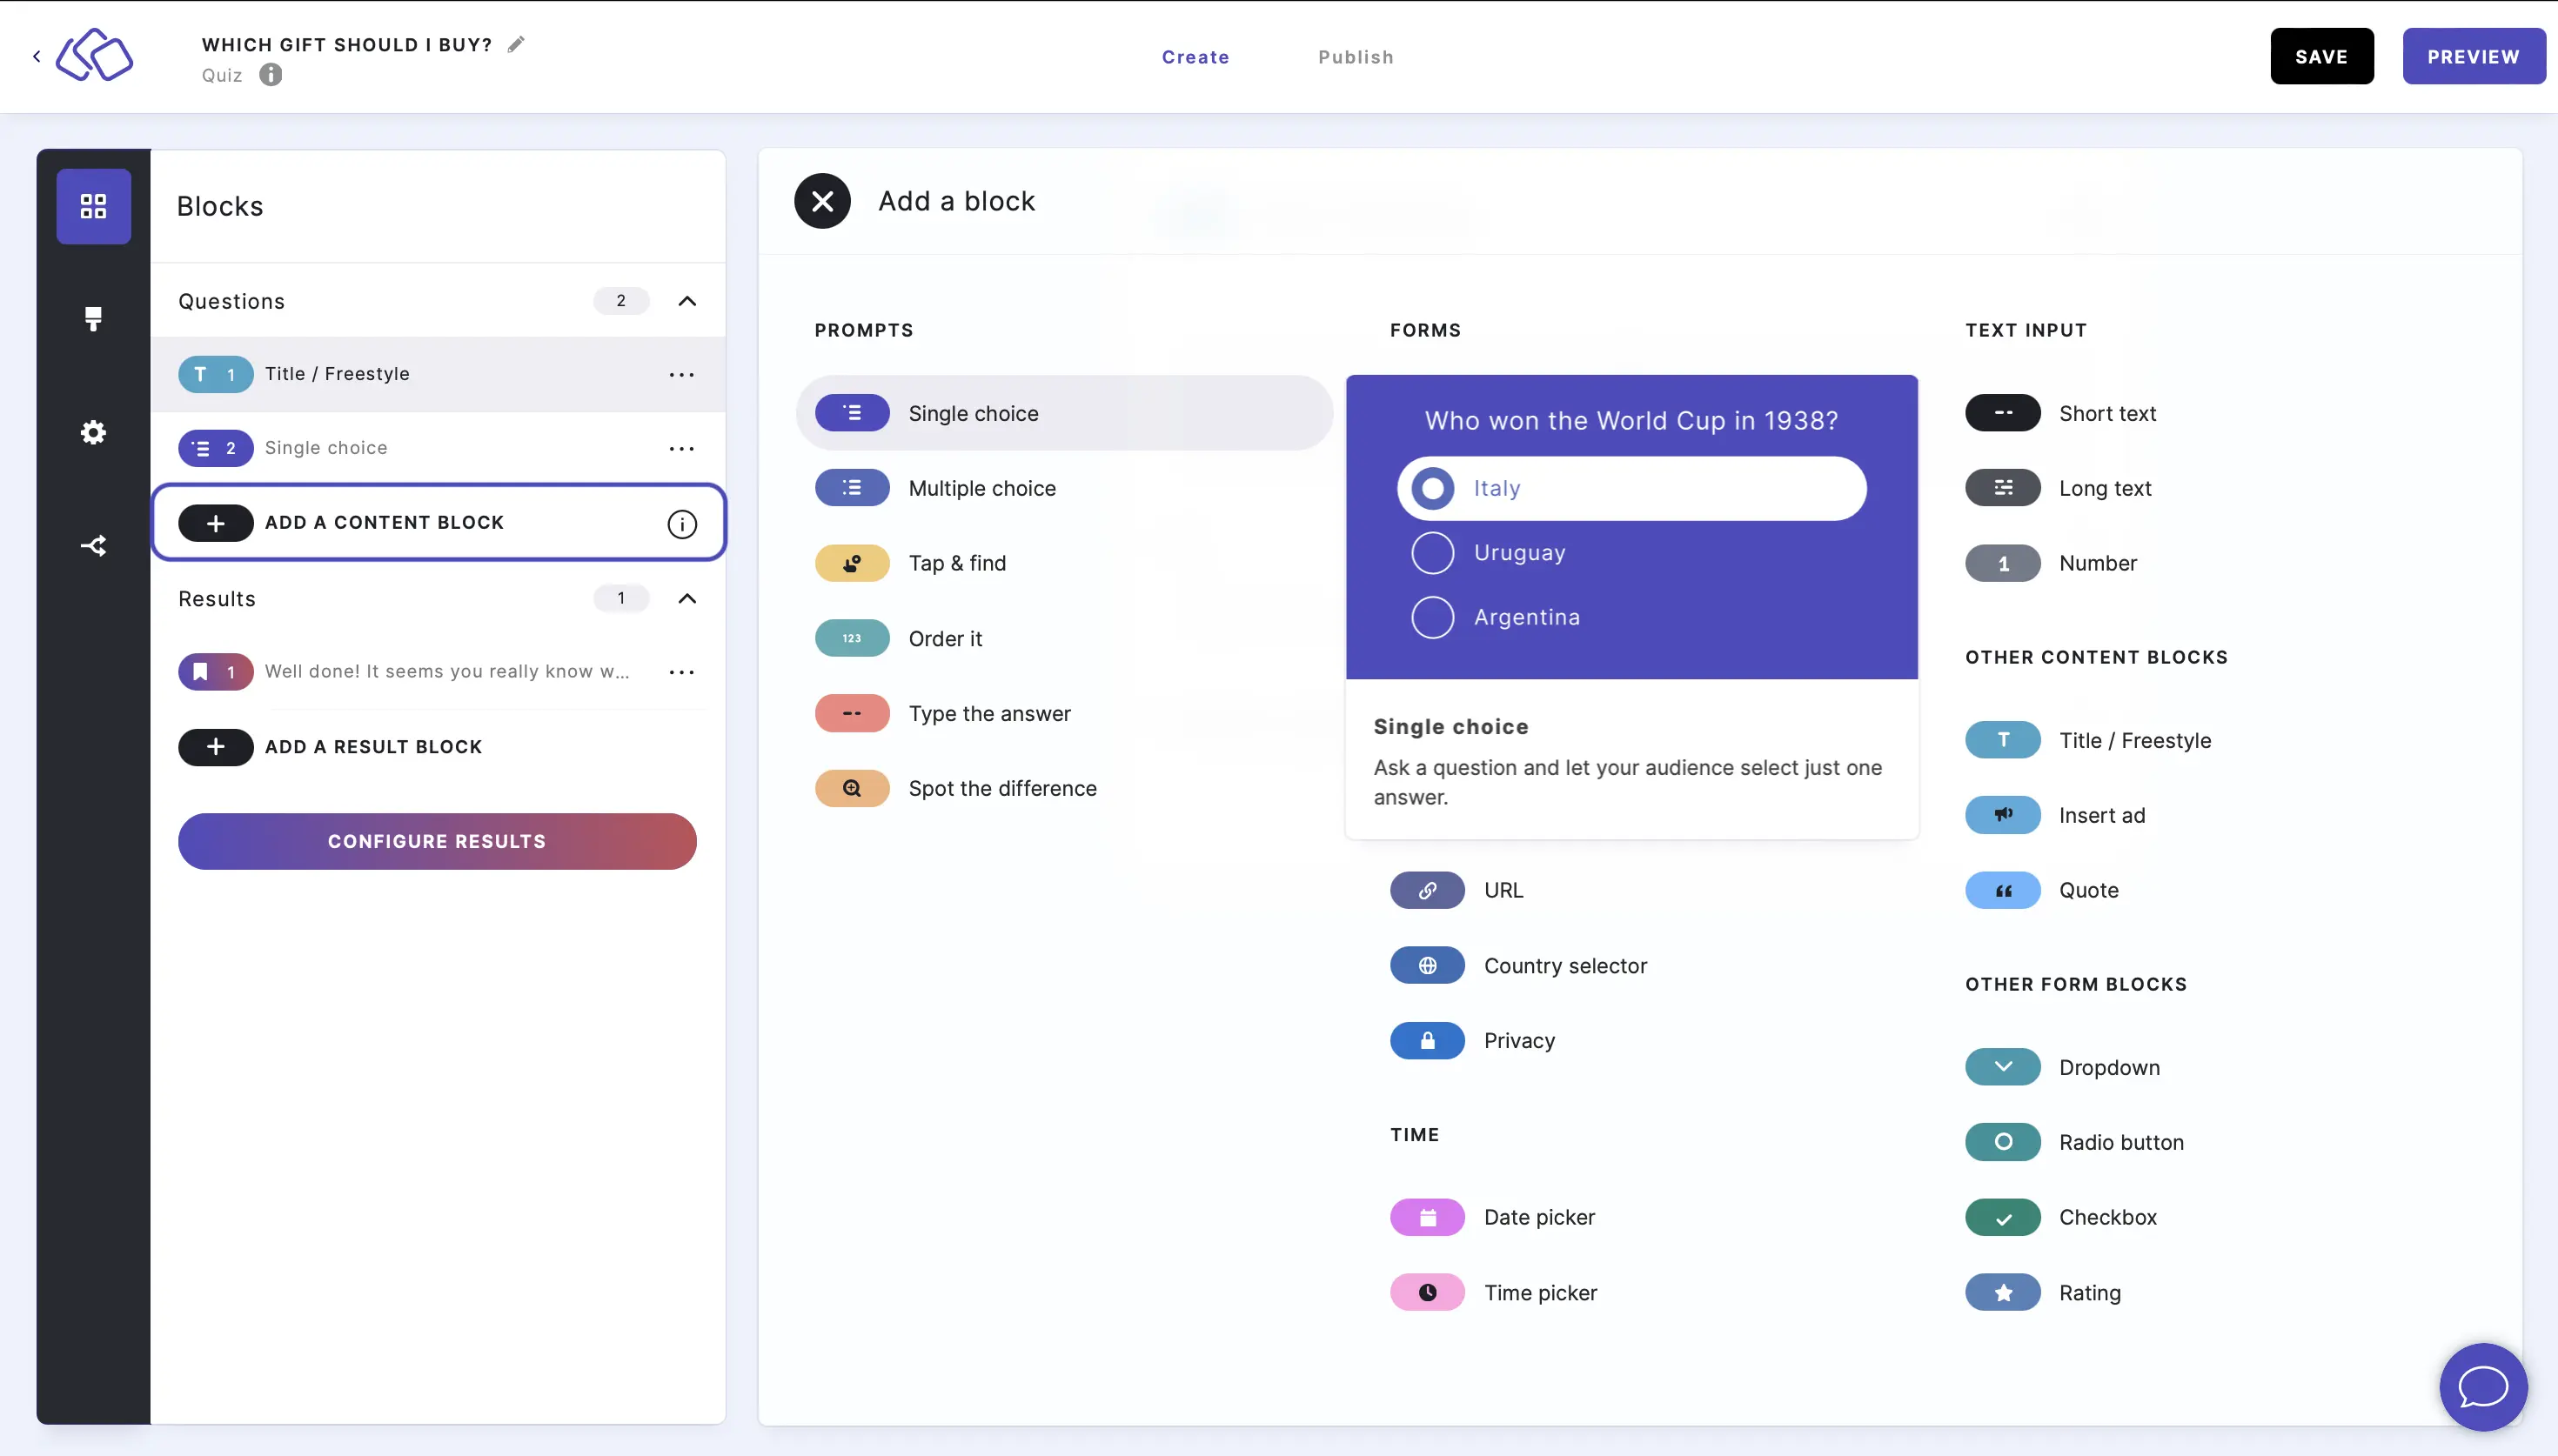
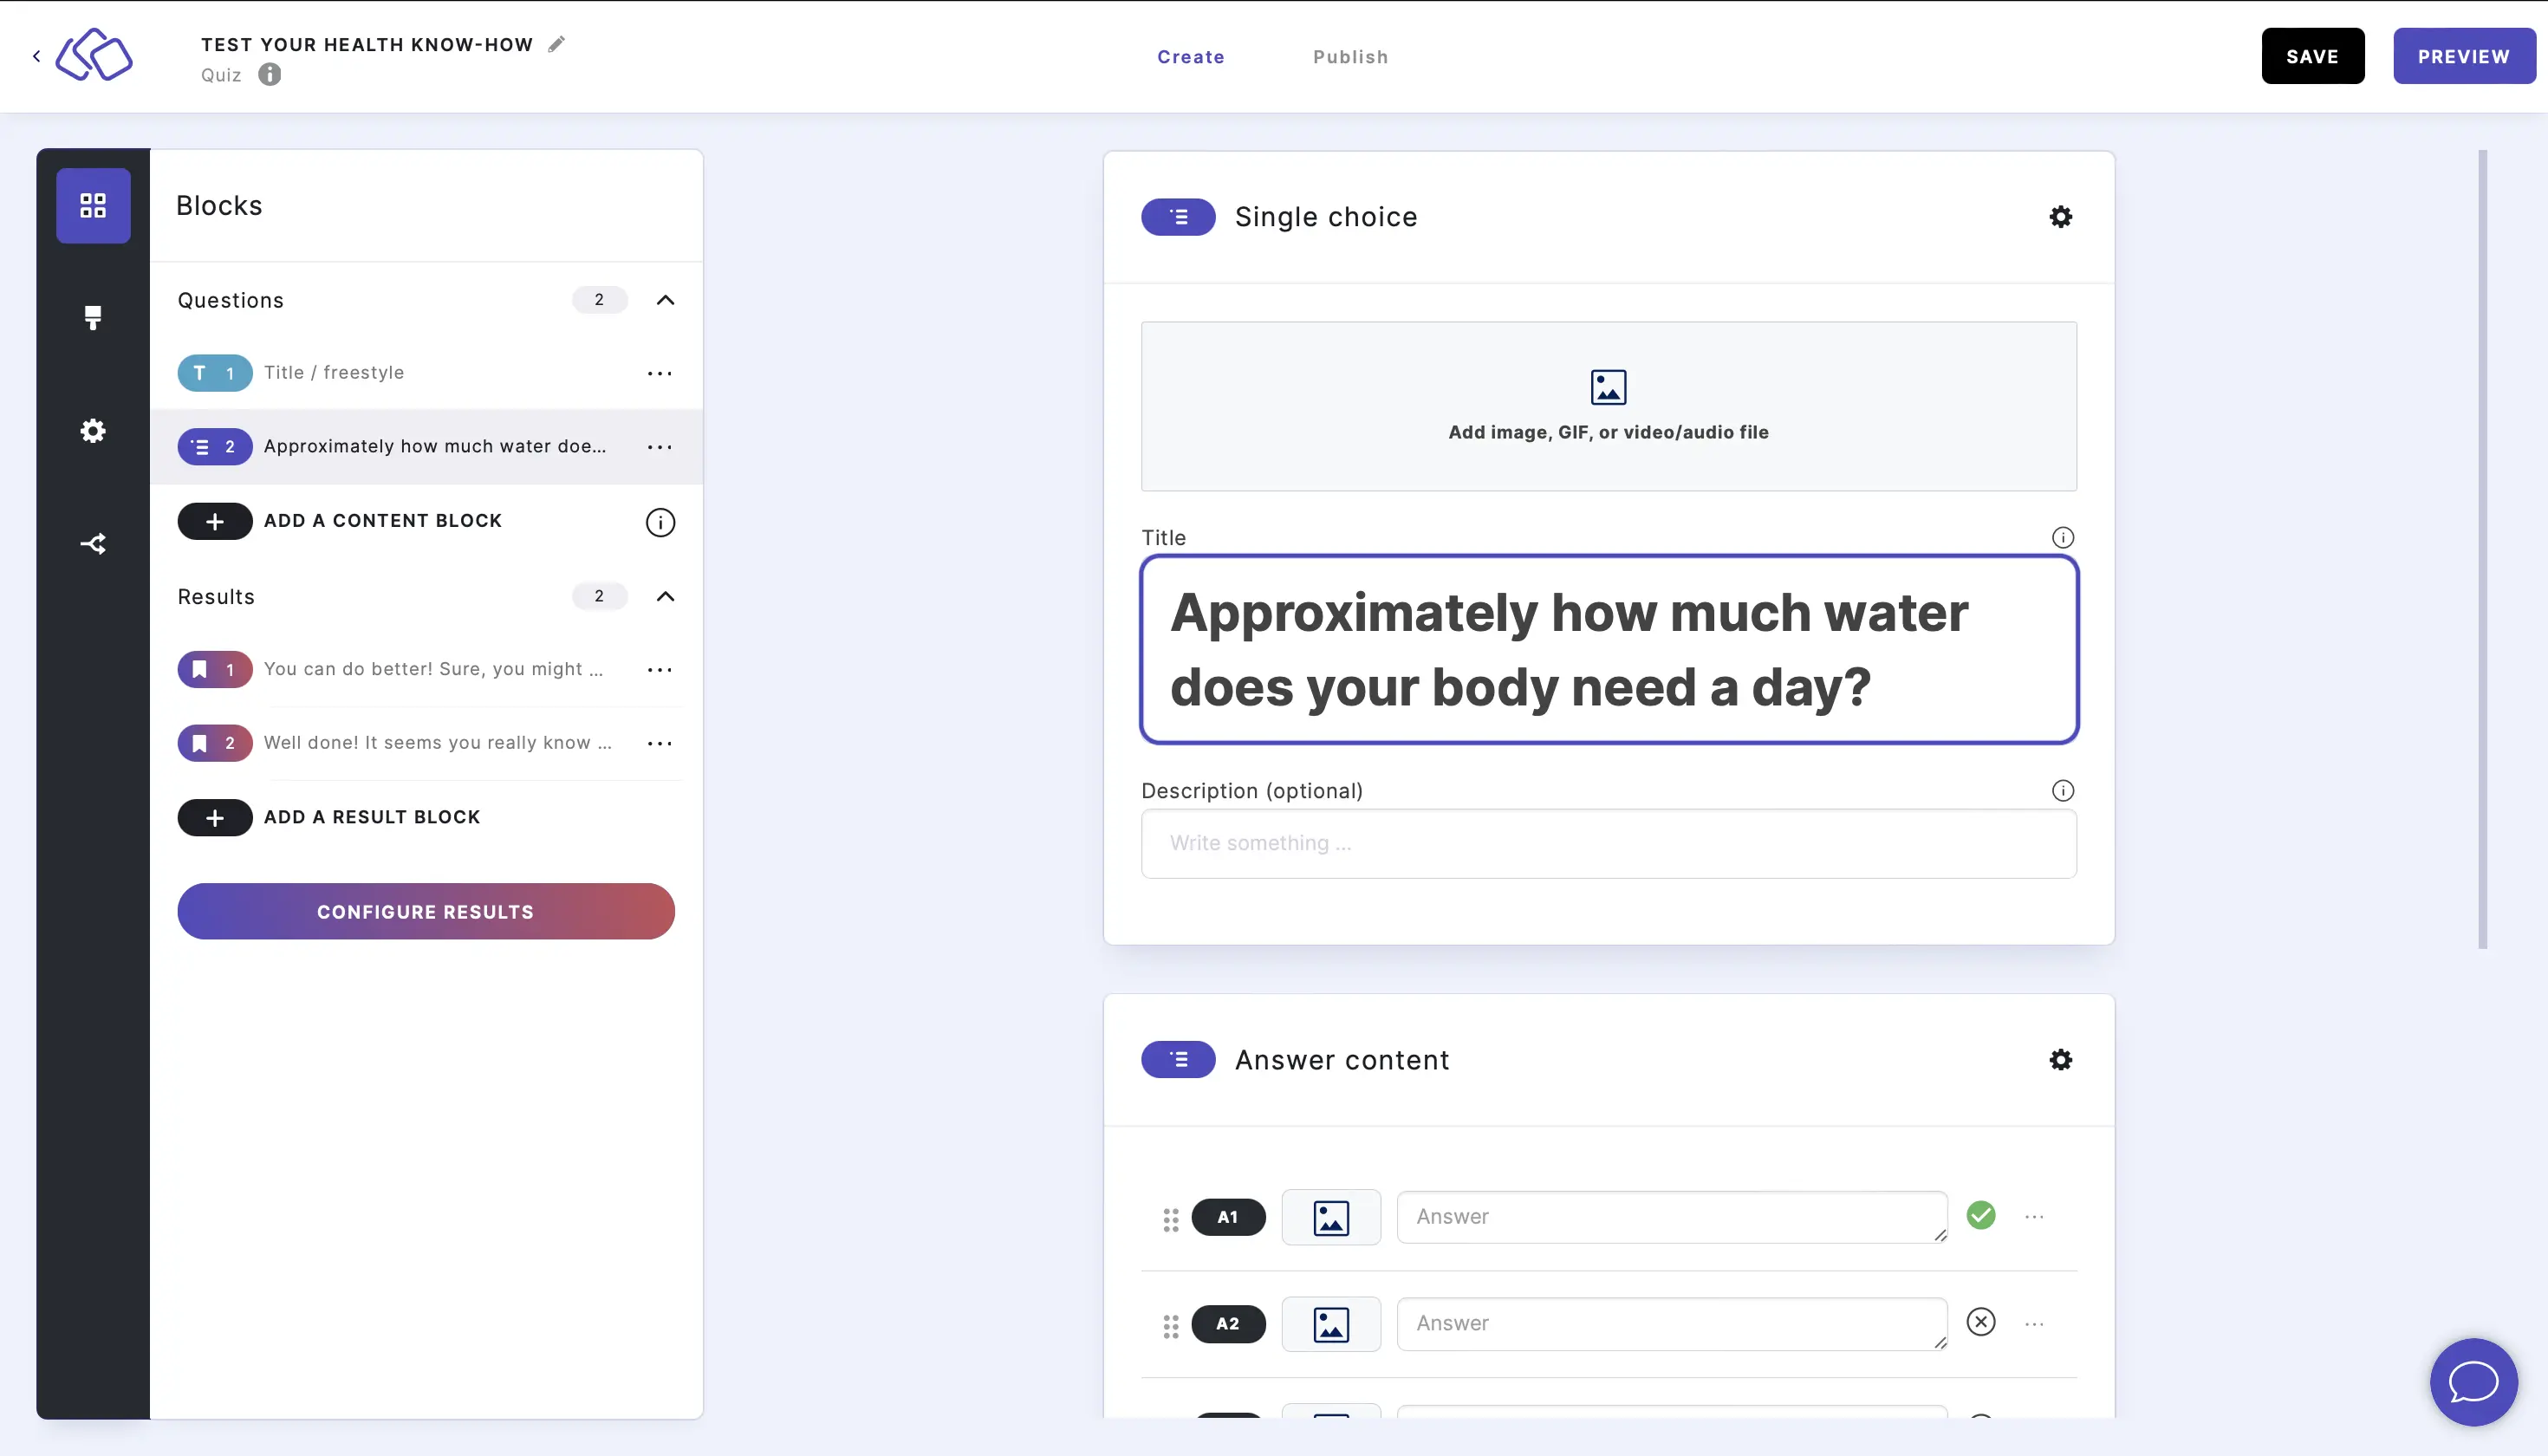
- Insert a question into the Title field.
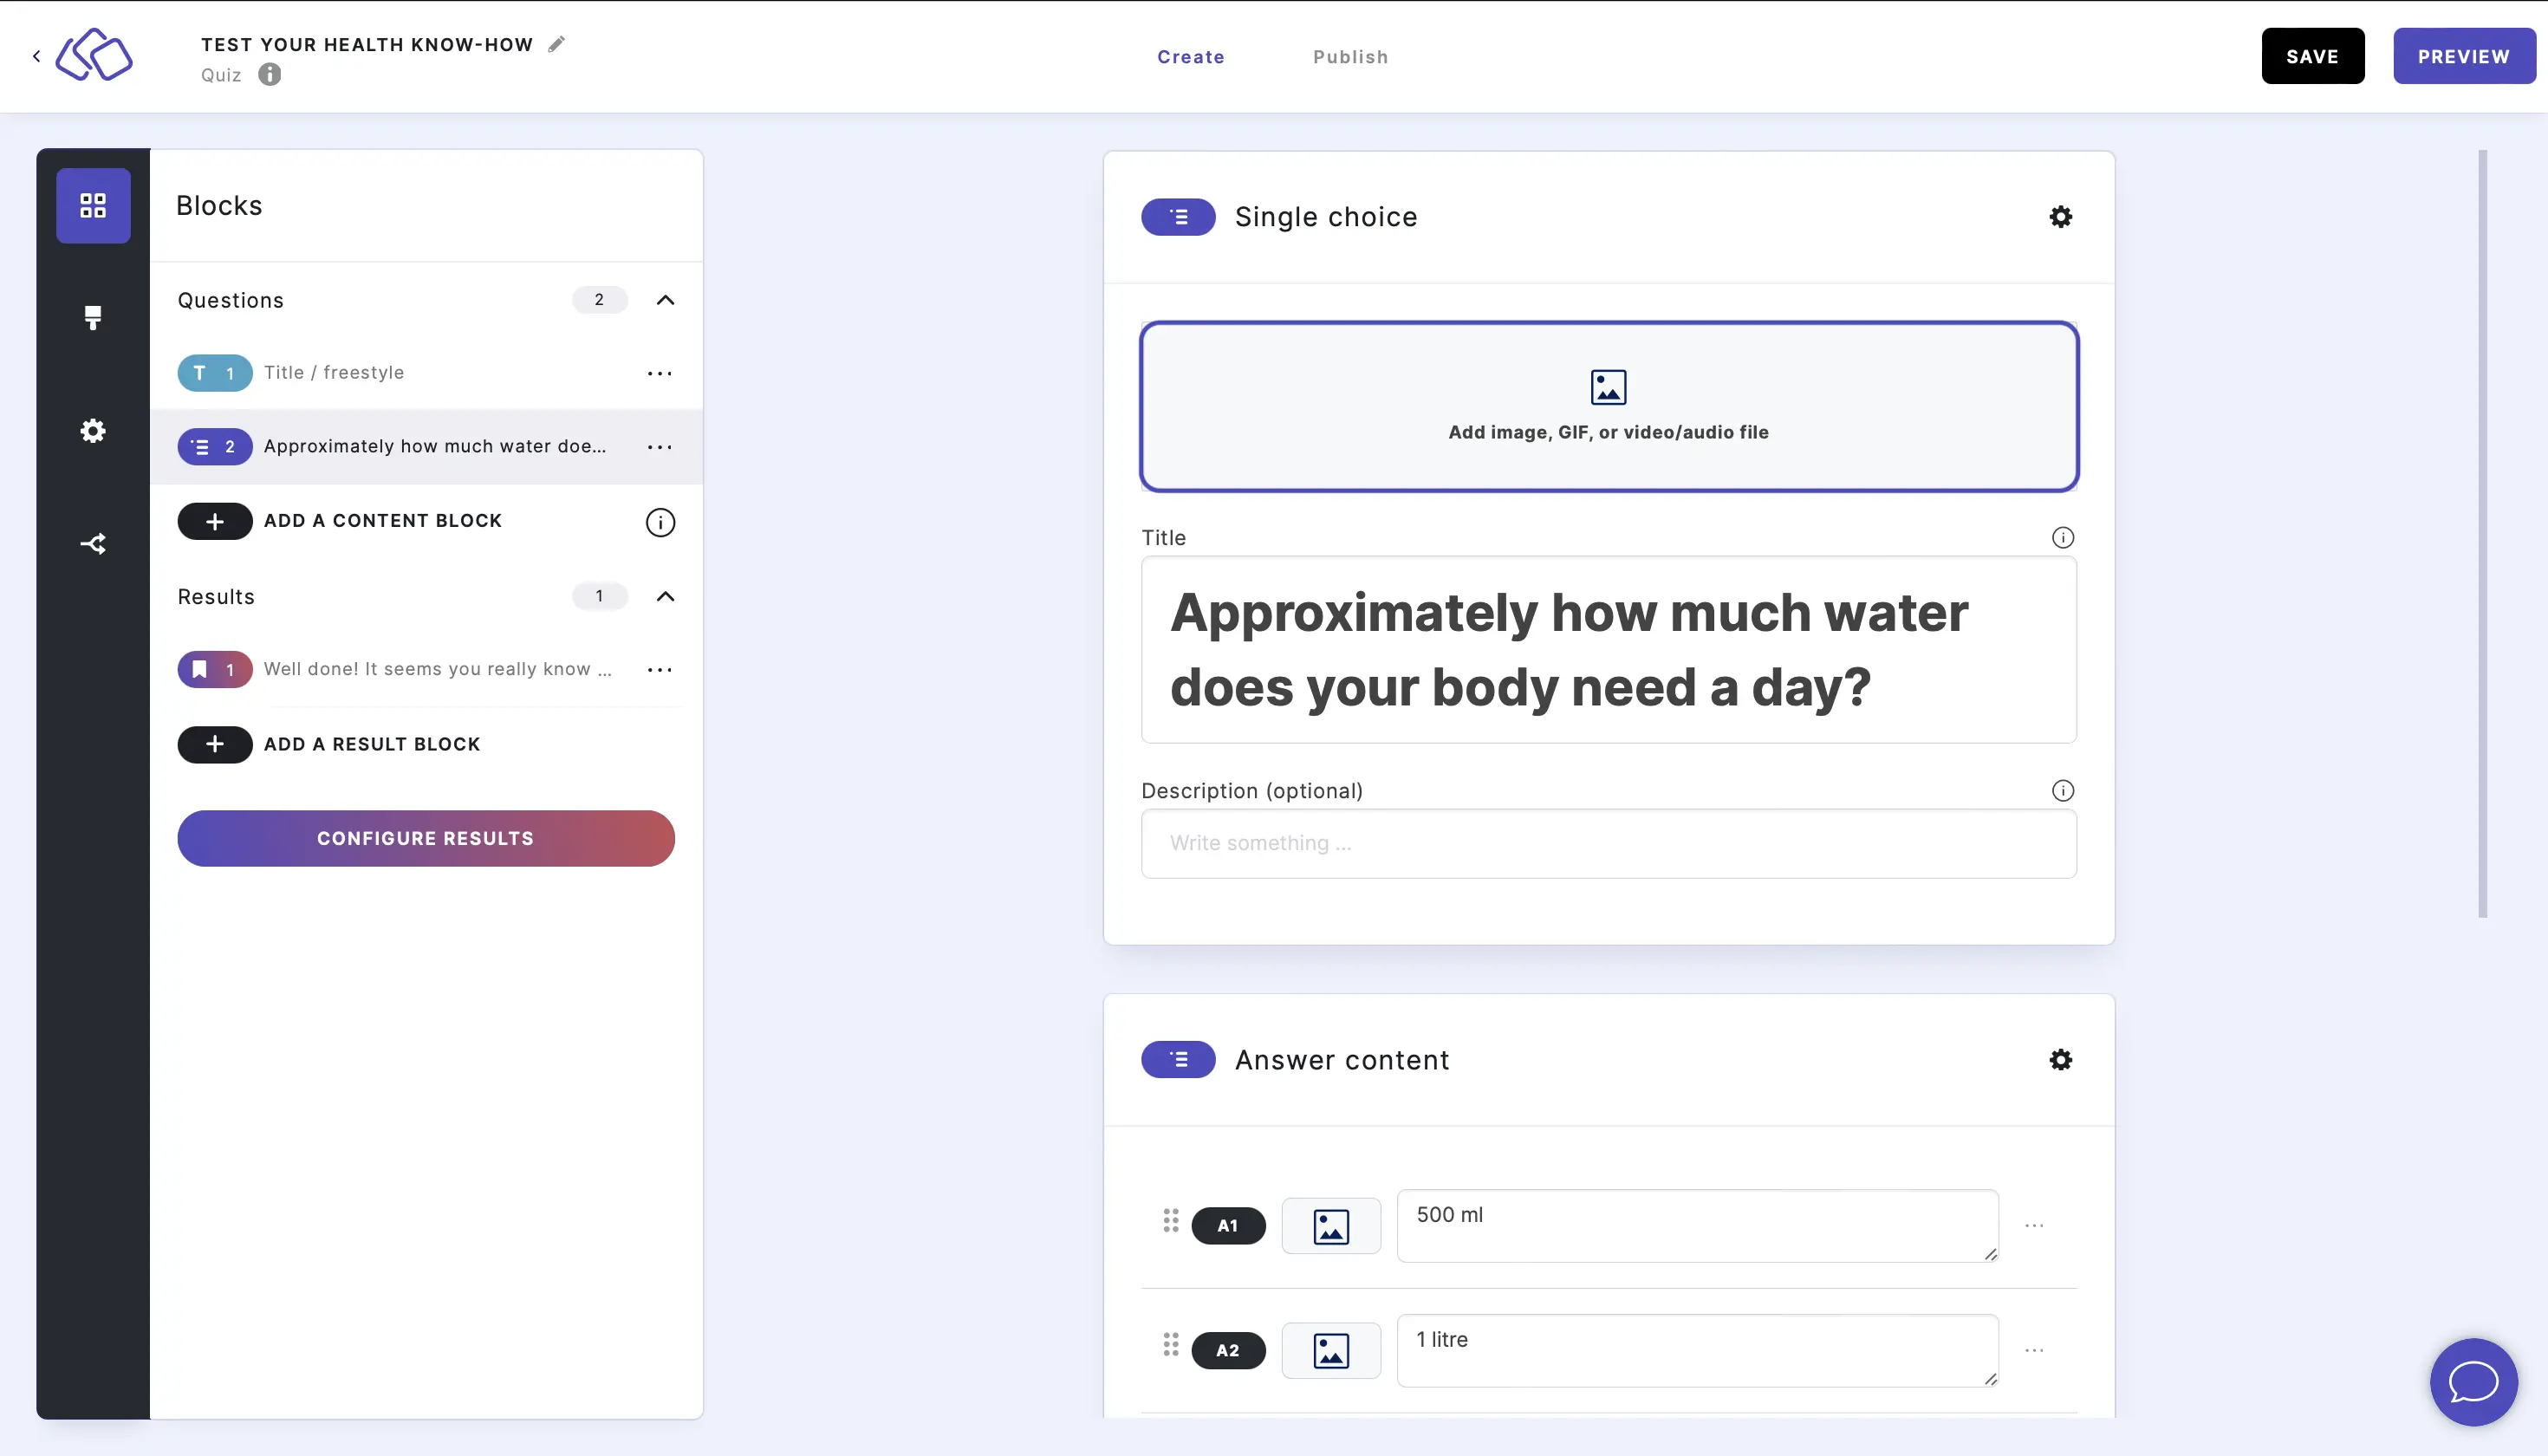
- Add an image by clicking on Add image, GIF, or video/audio file.
- Insert the answers into the Answer content fields.
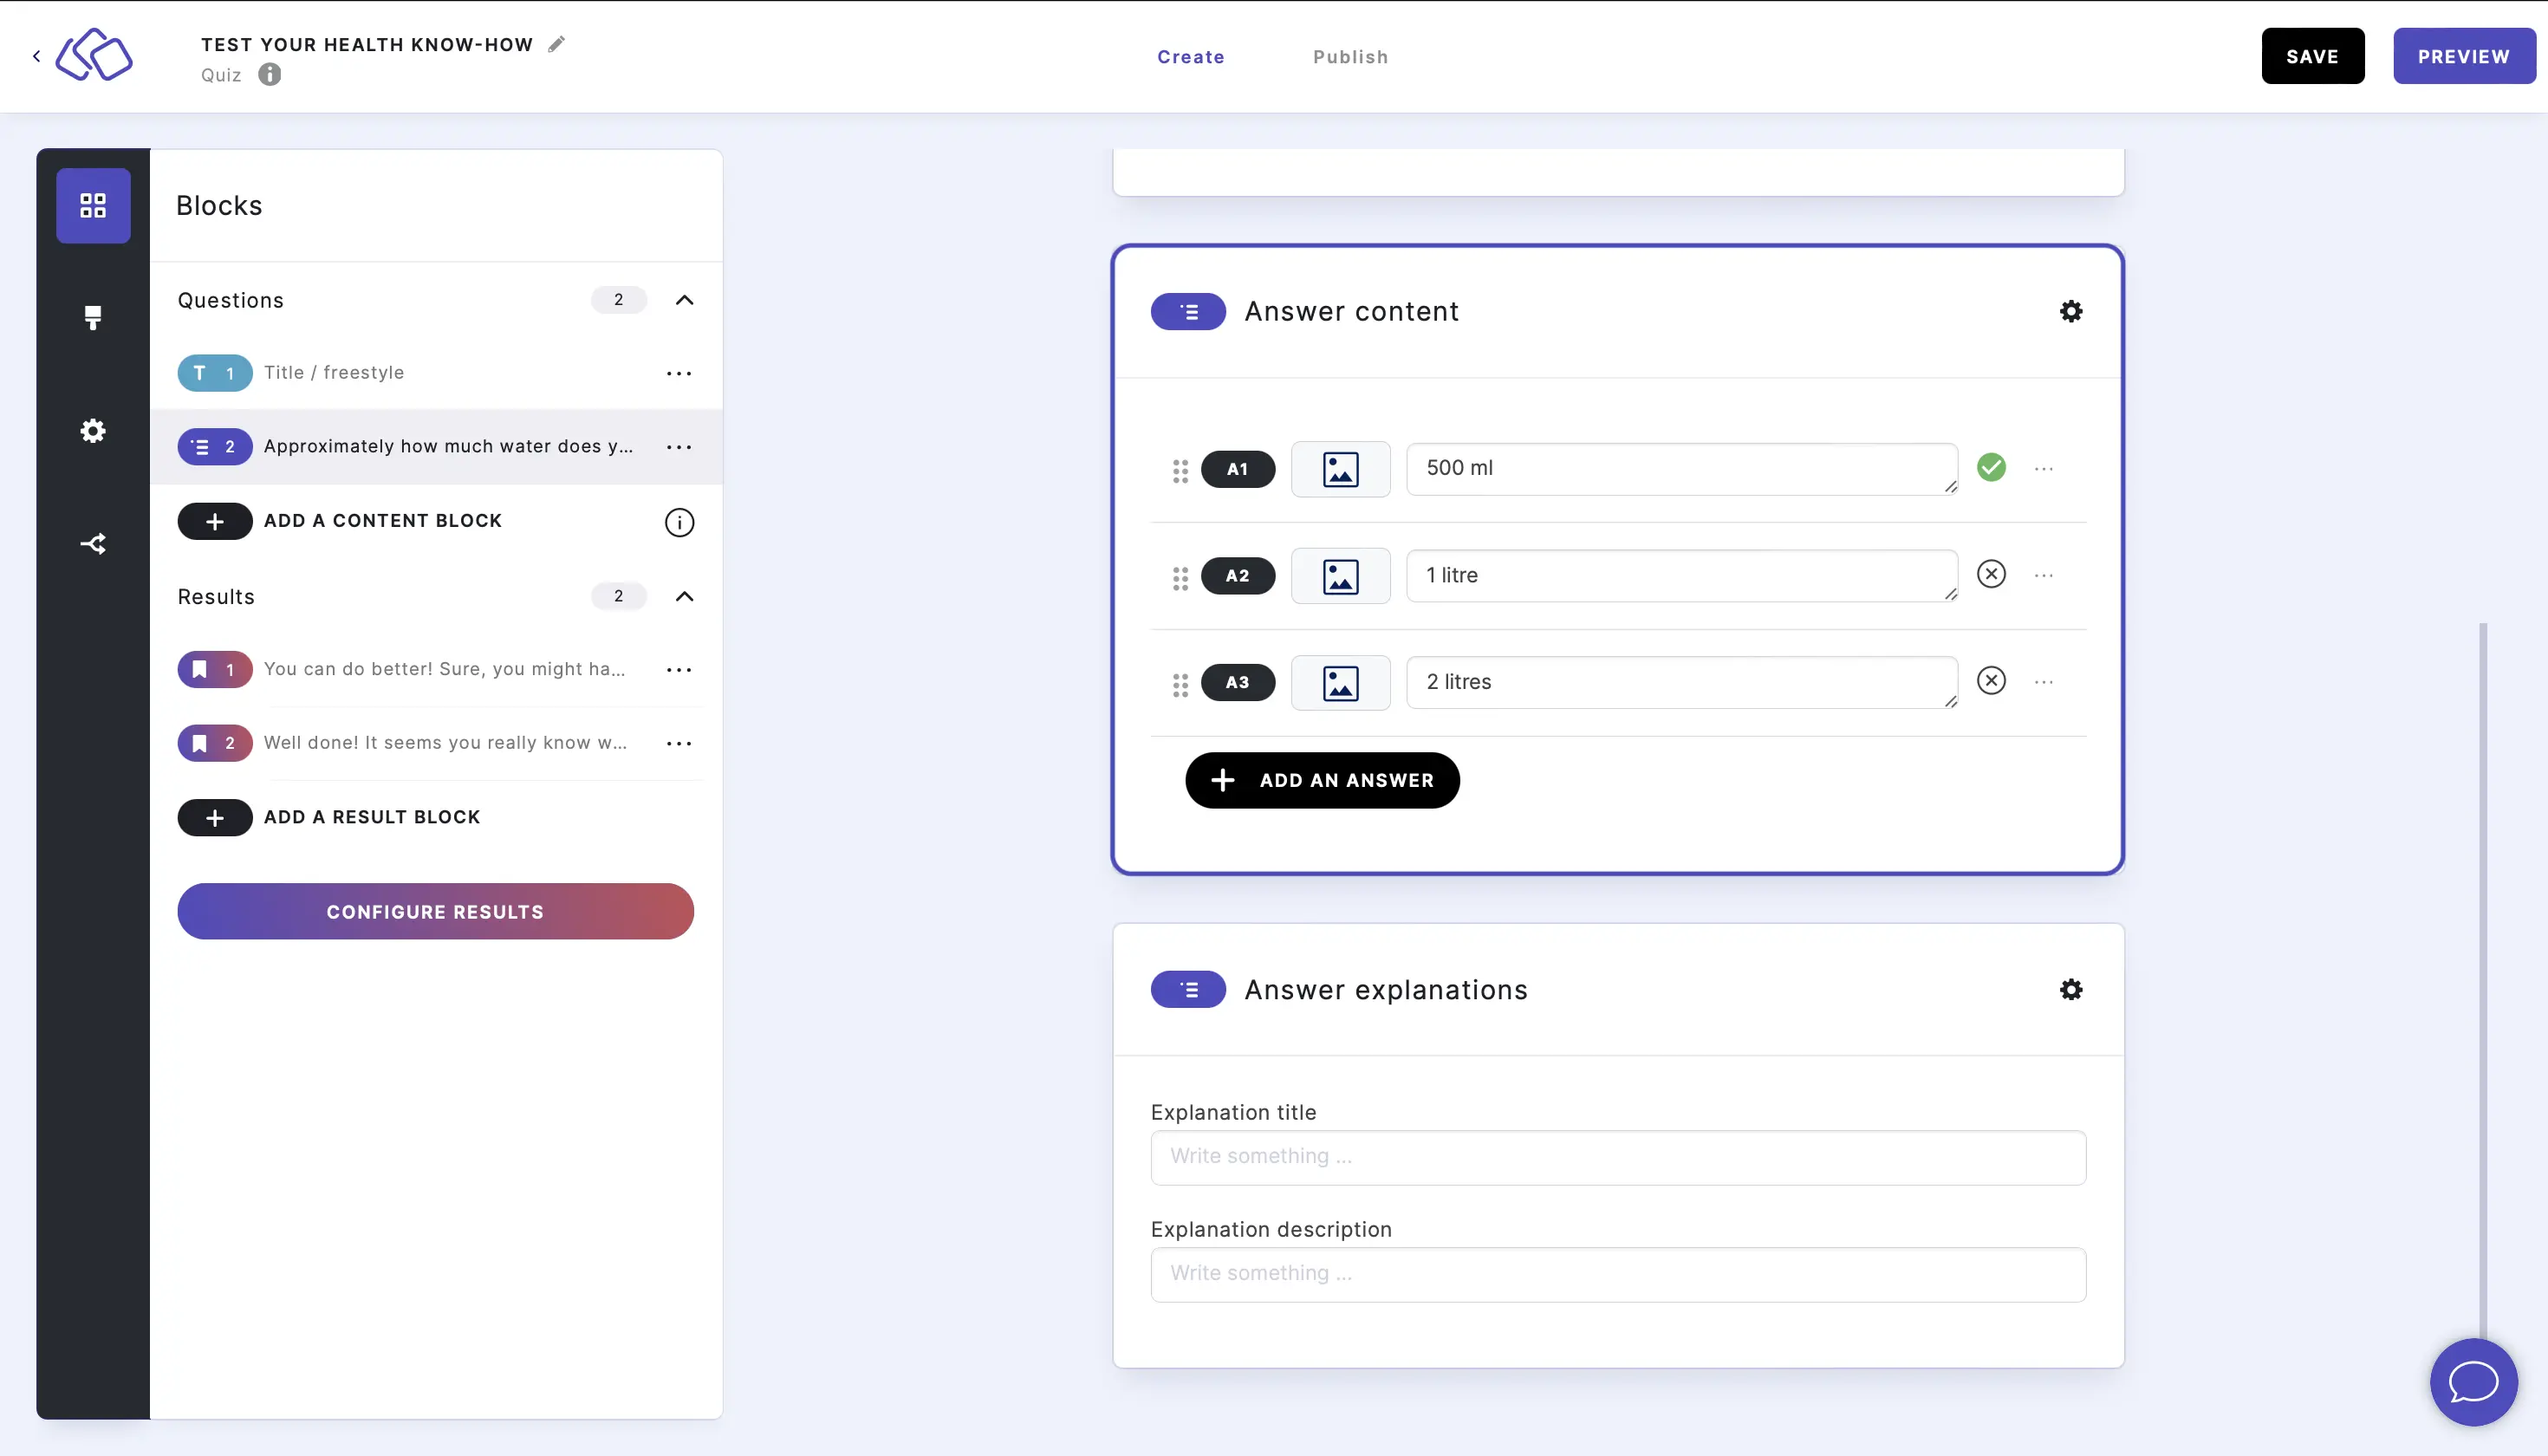
- Insert explanations into the Answer explanations field(s) (optional).
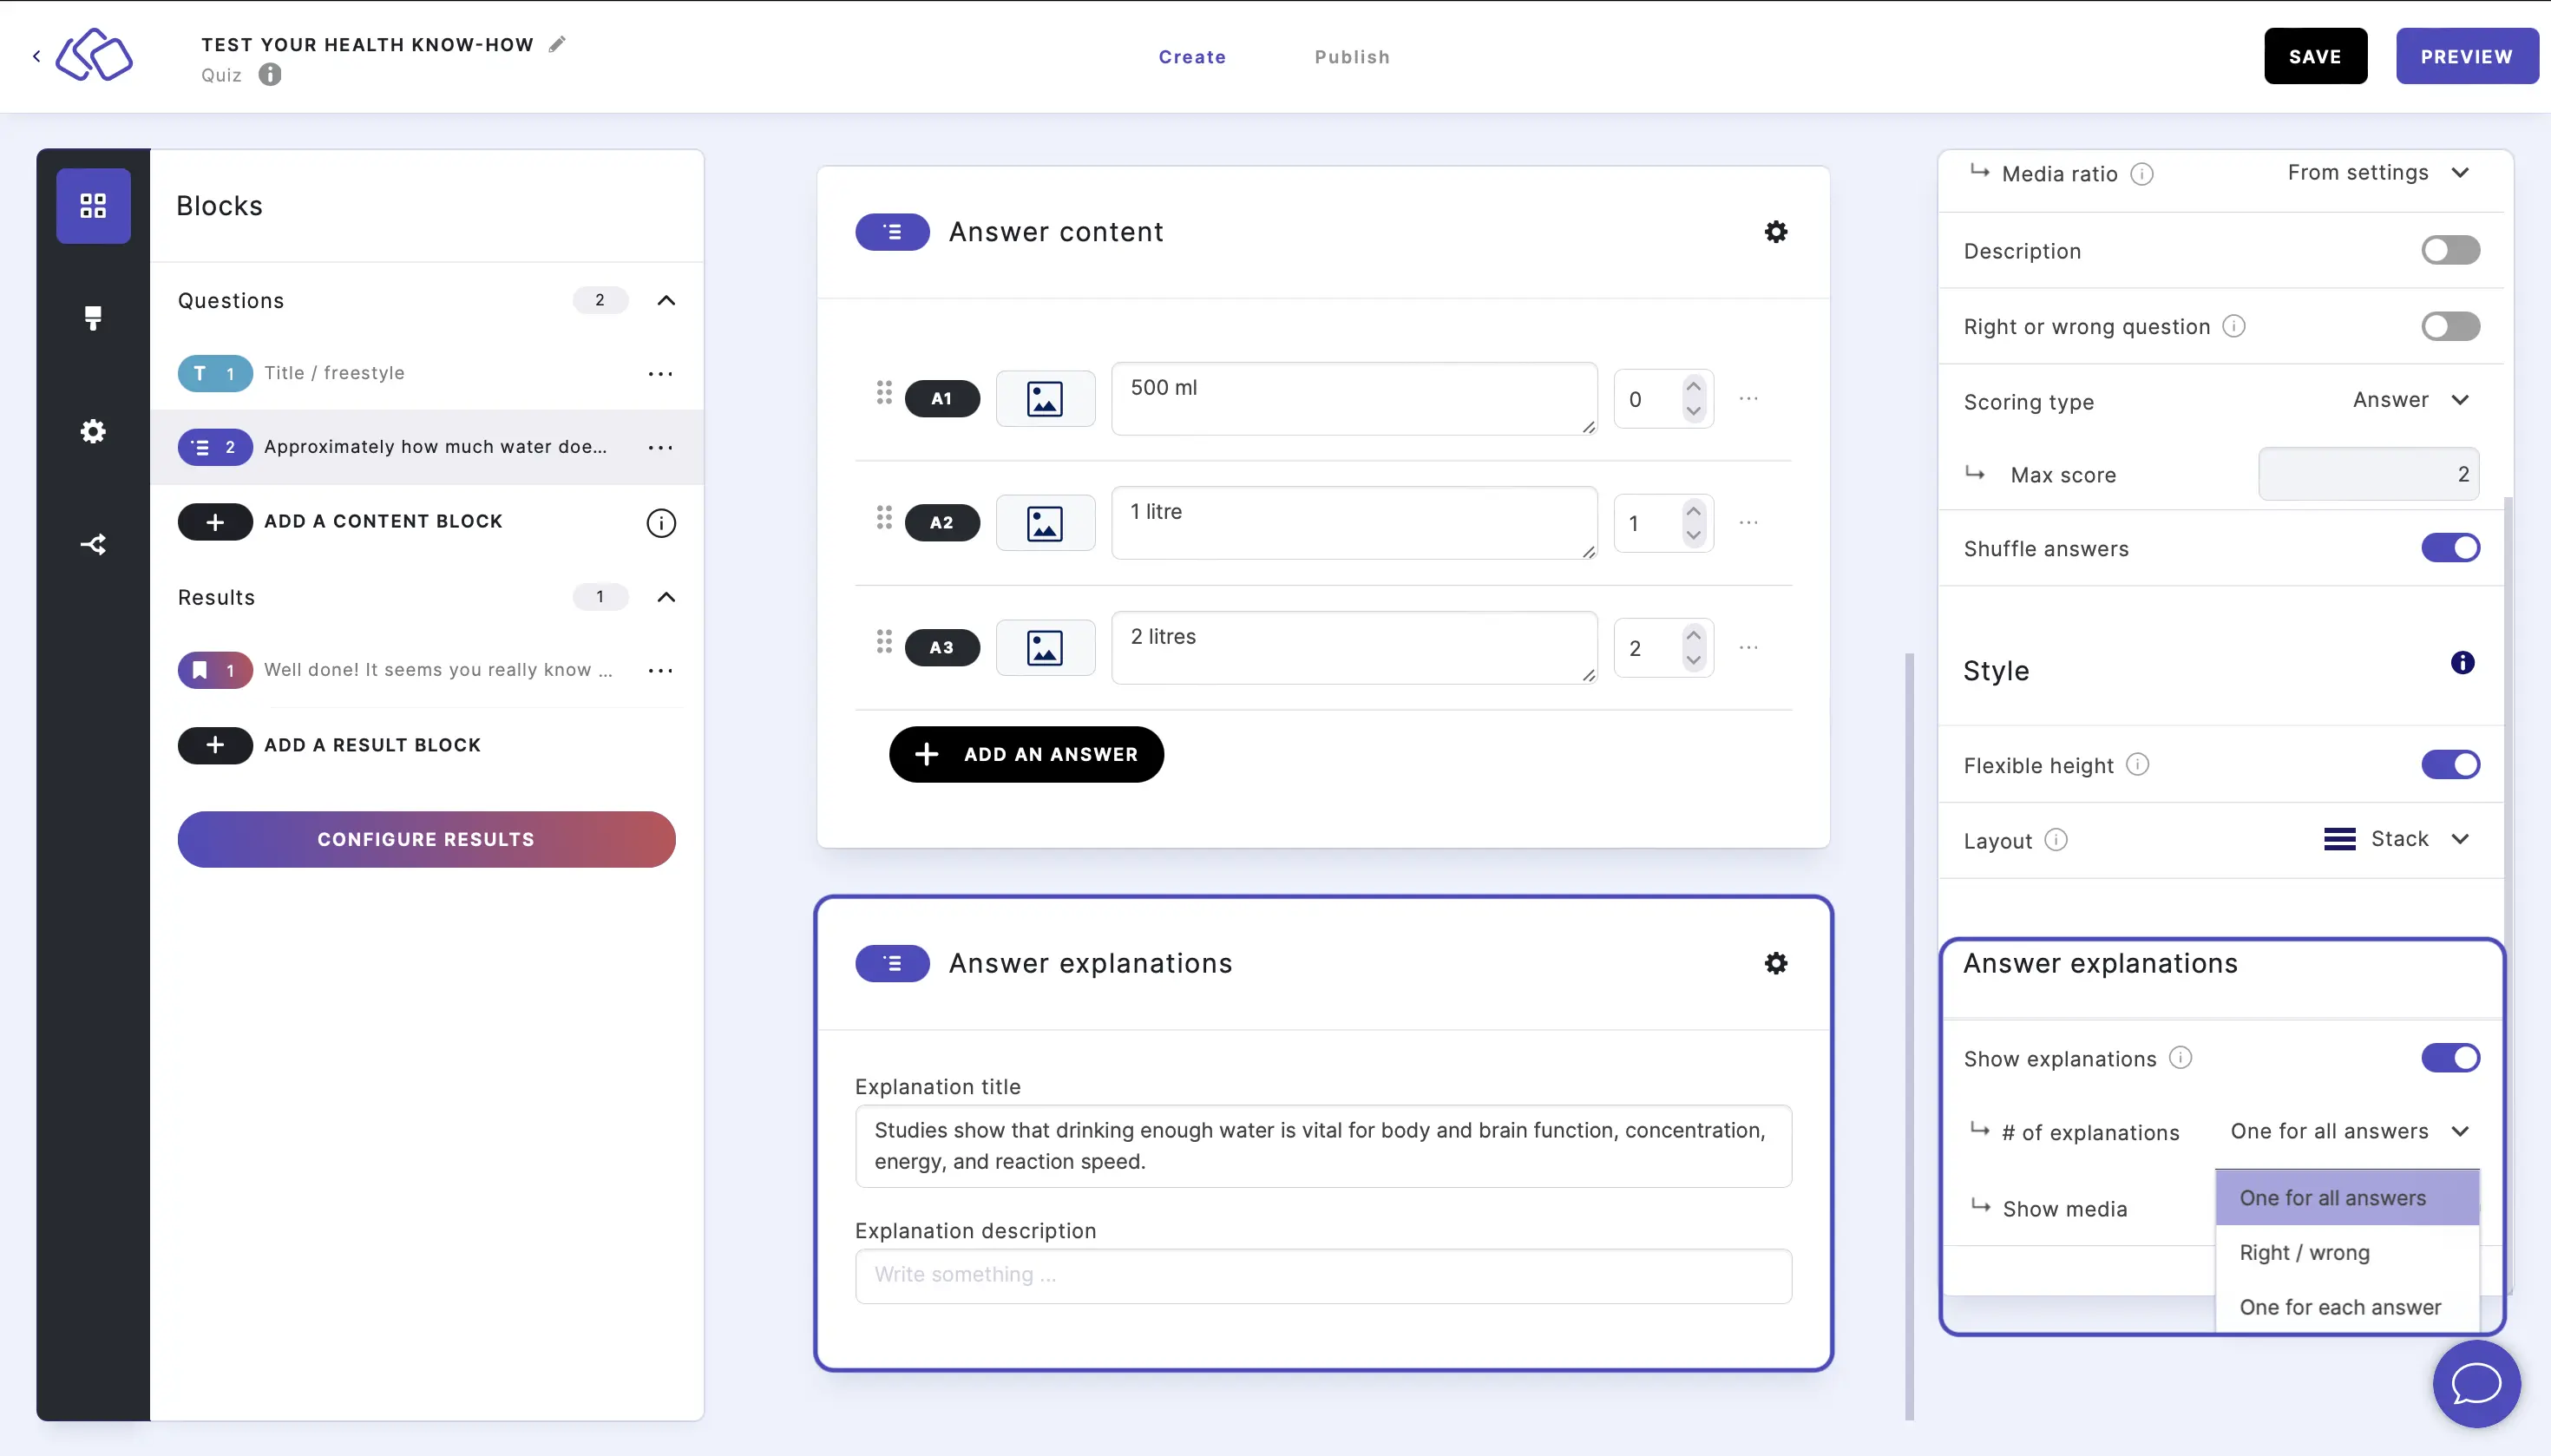
- Select a correct answer.
2. Multi-select question
Your audience can pick more than one answer.
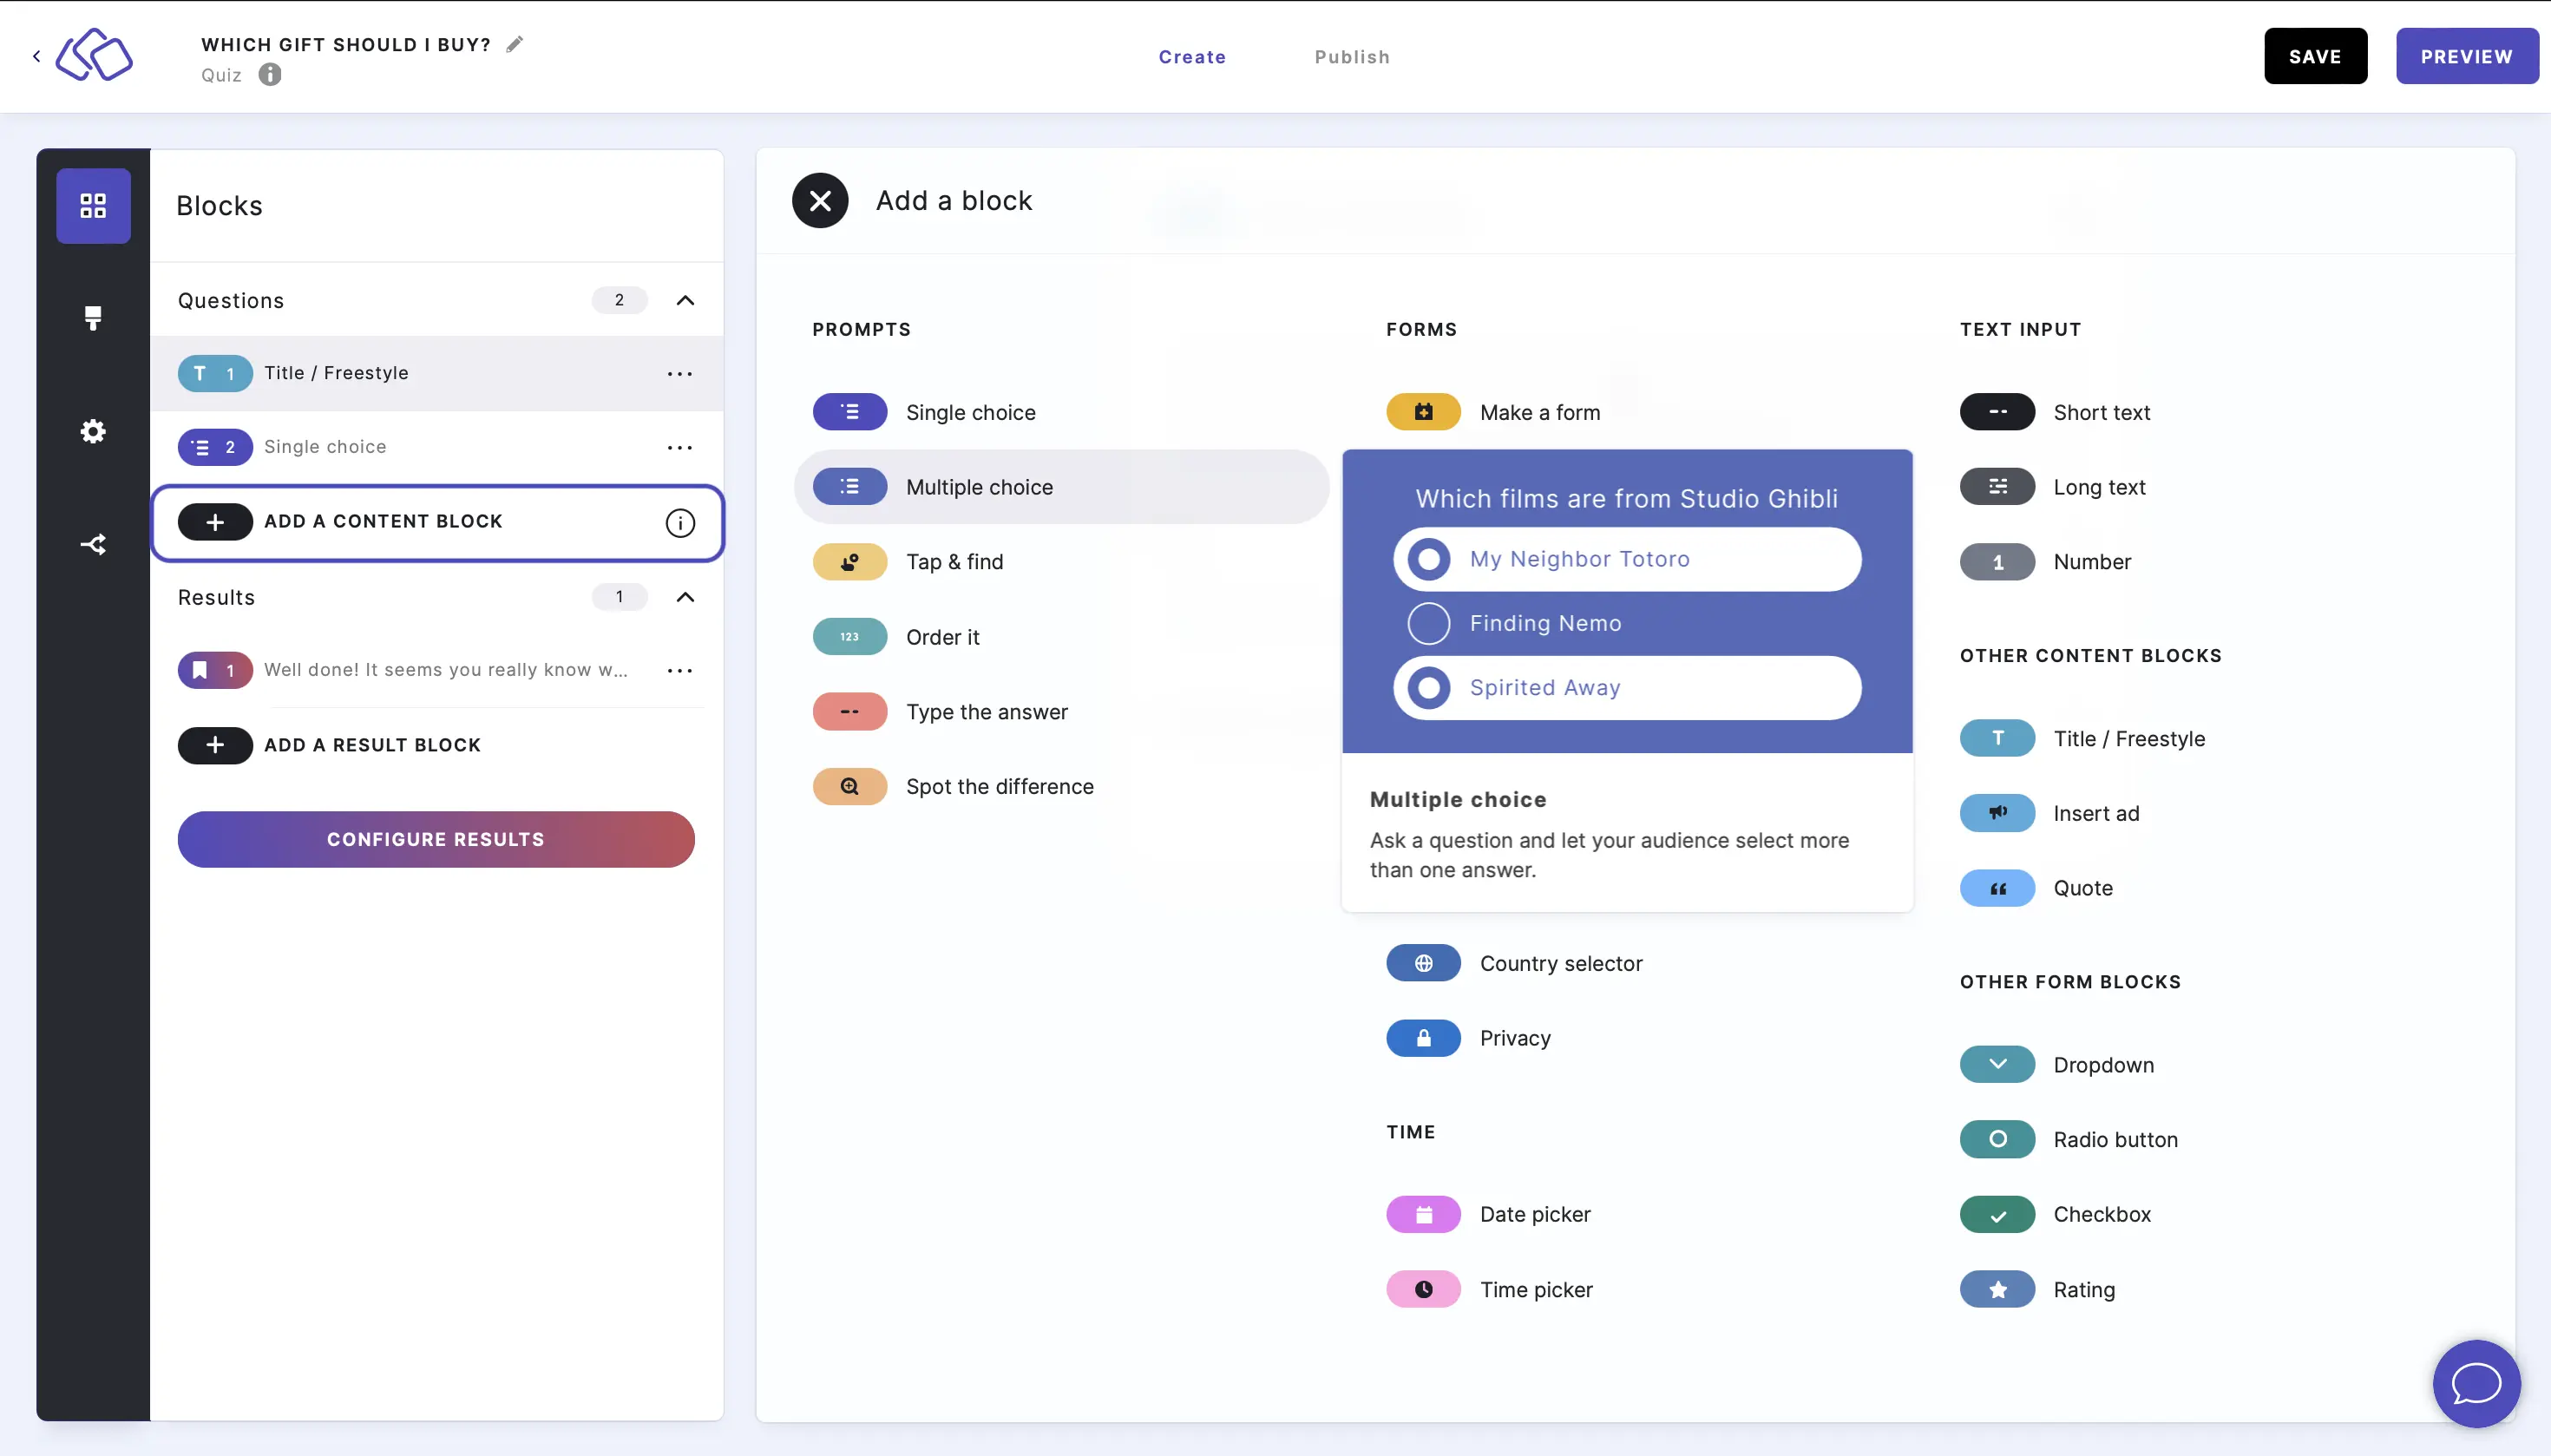
- Click on ADD A BLOCK and select Multi-select.
- Insert a question into the Title field.
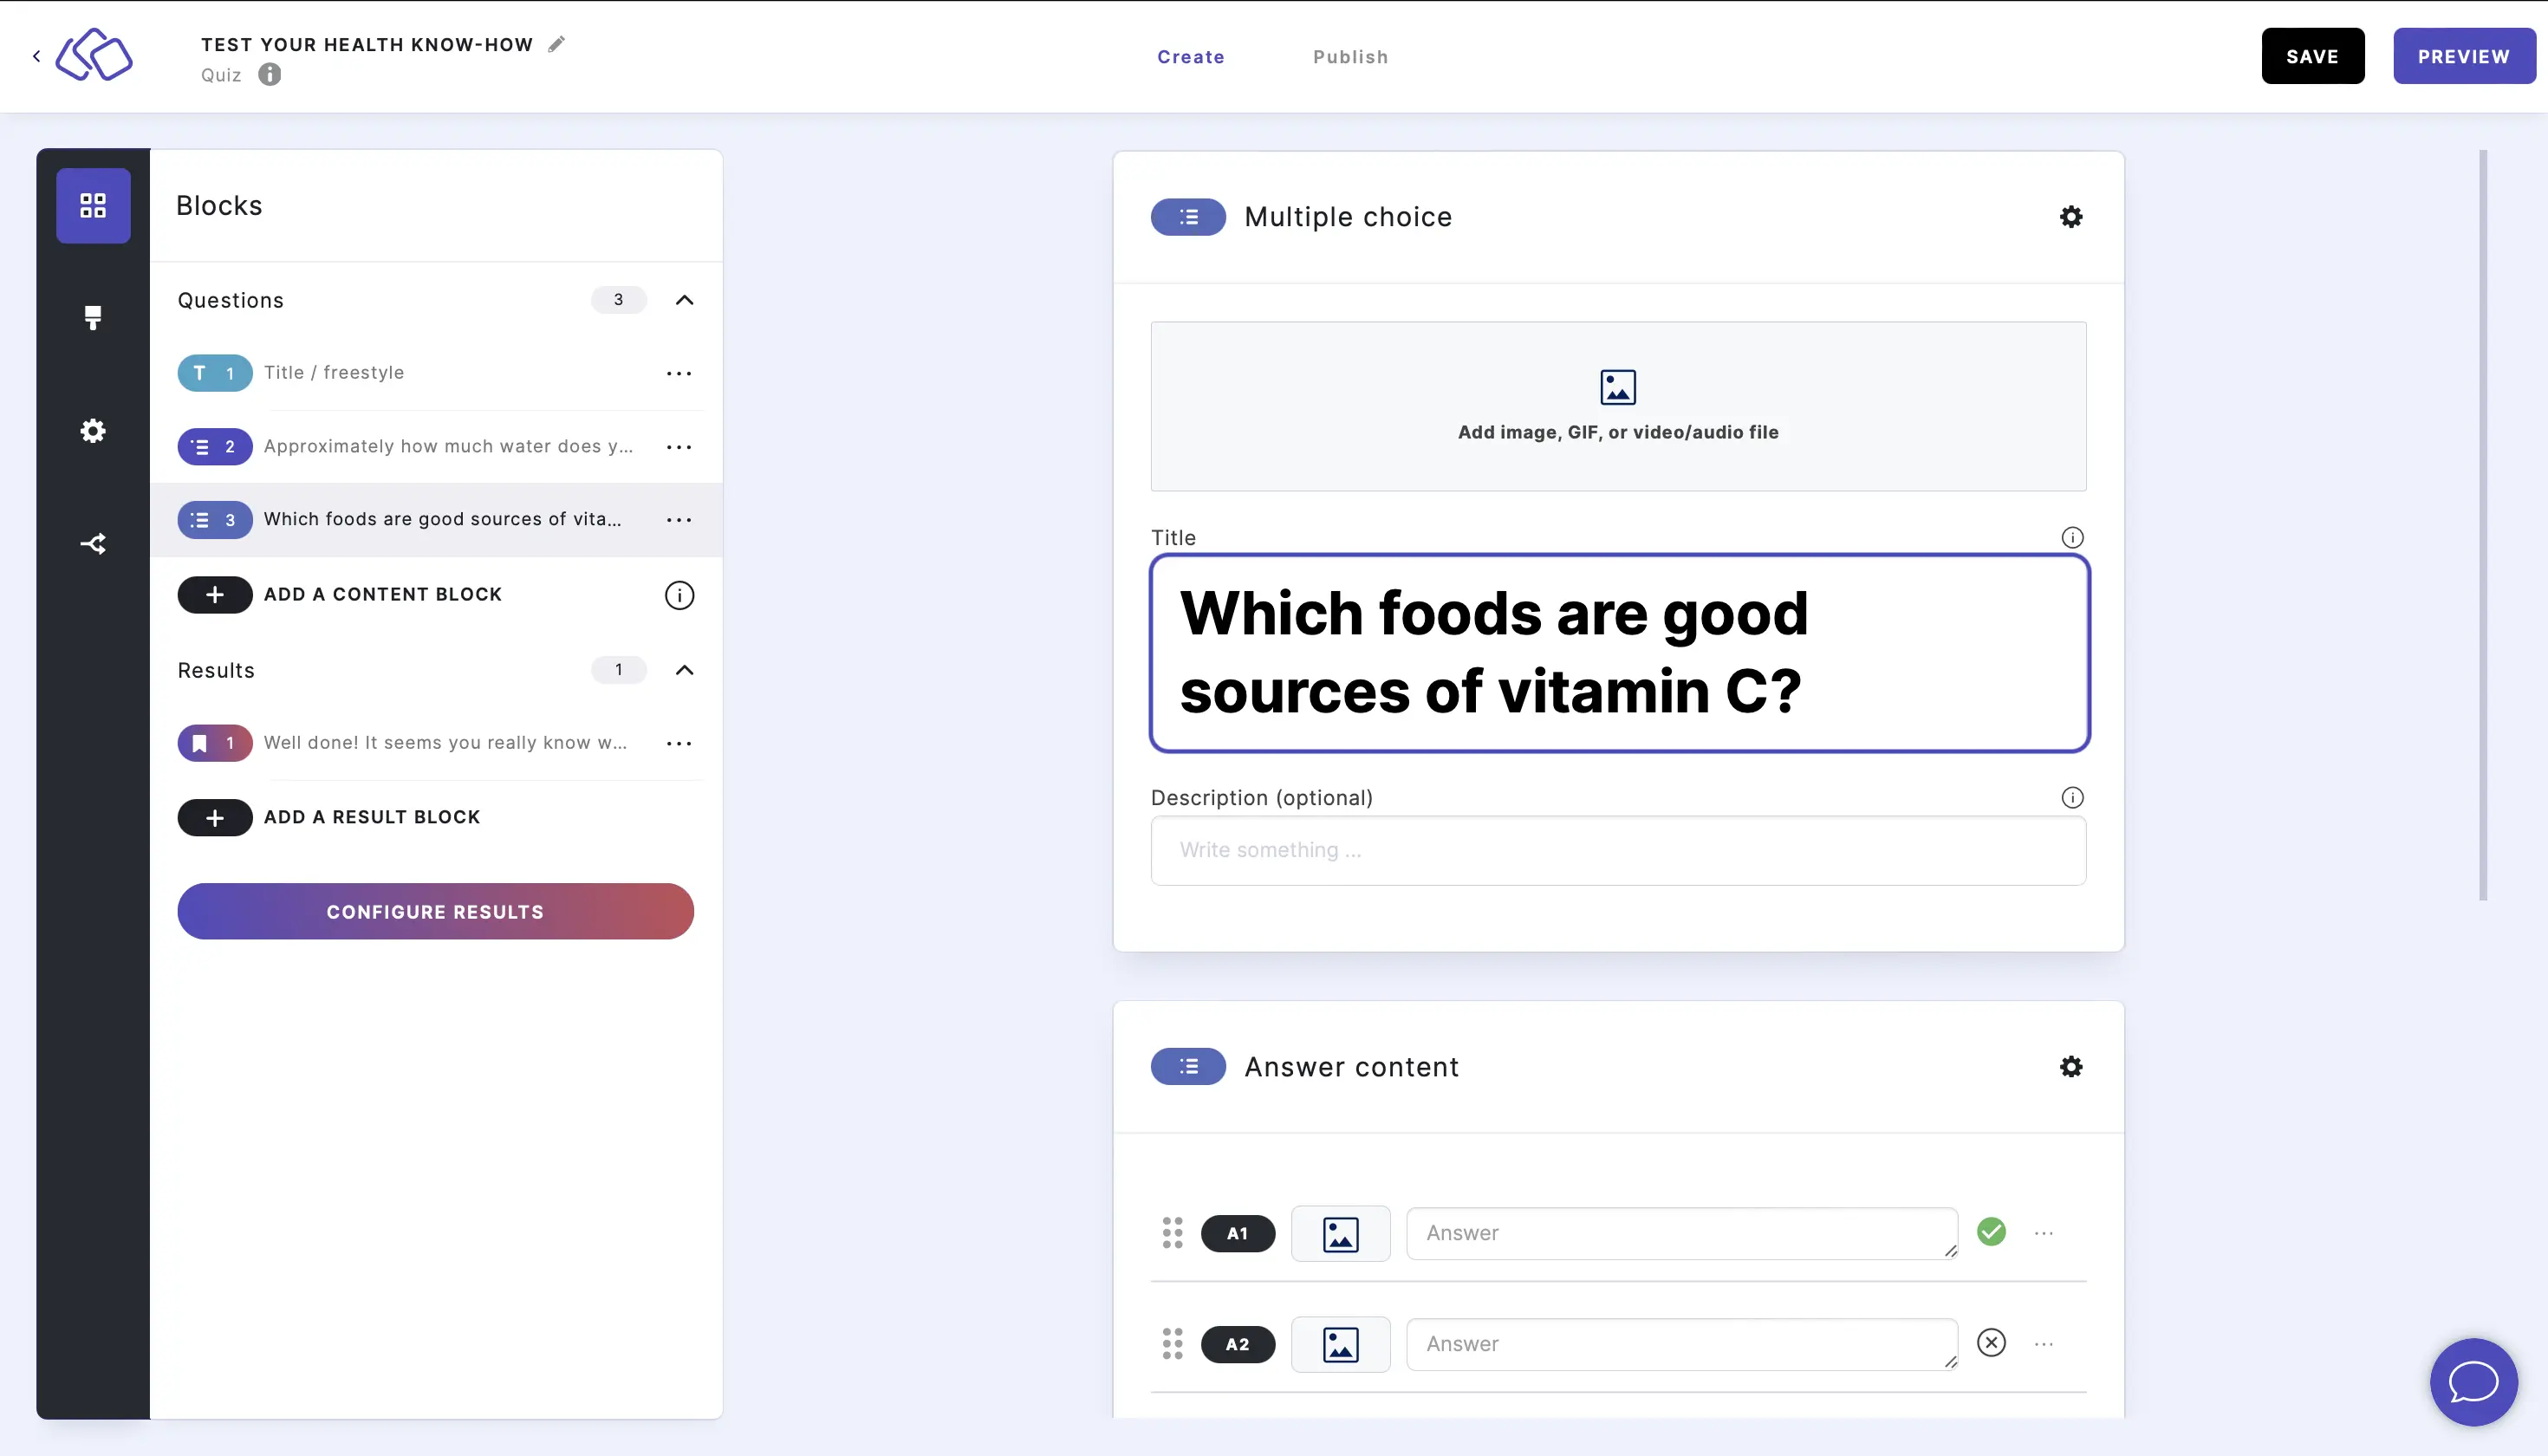
- Add an image by clicking on Add image, GIF, or video/audio file.
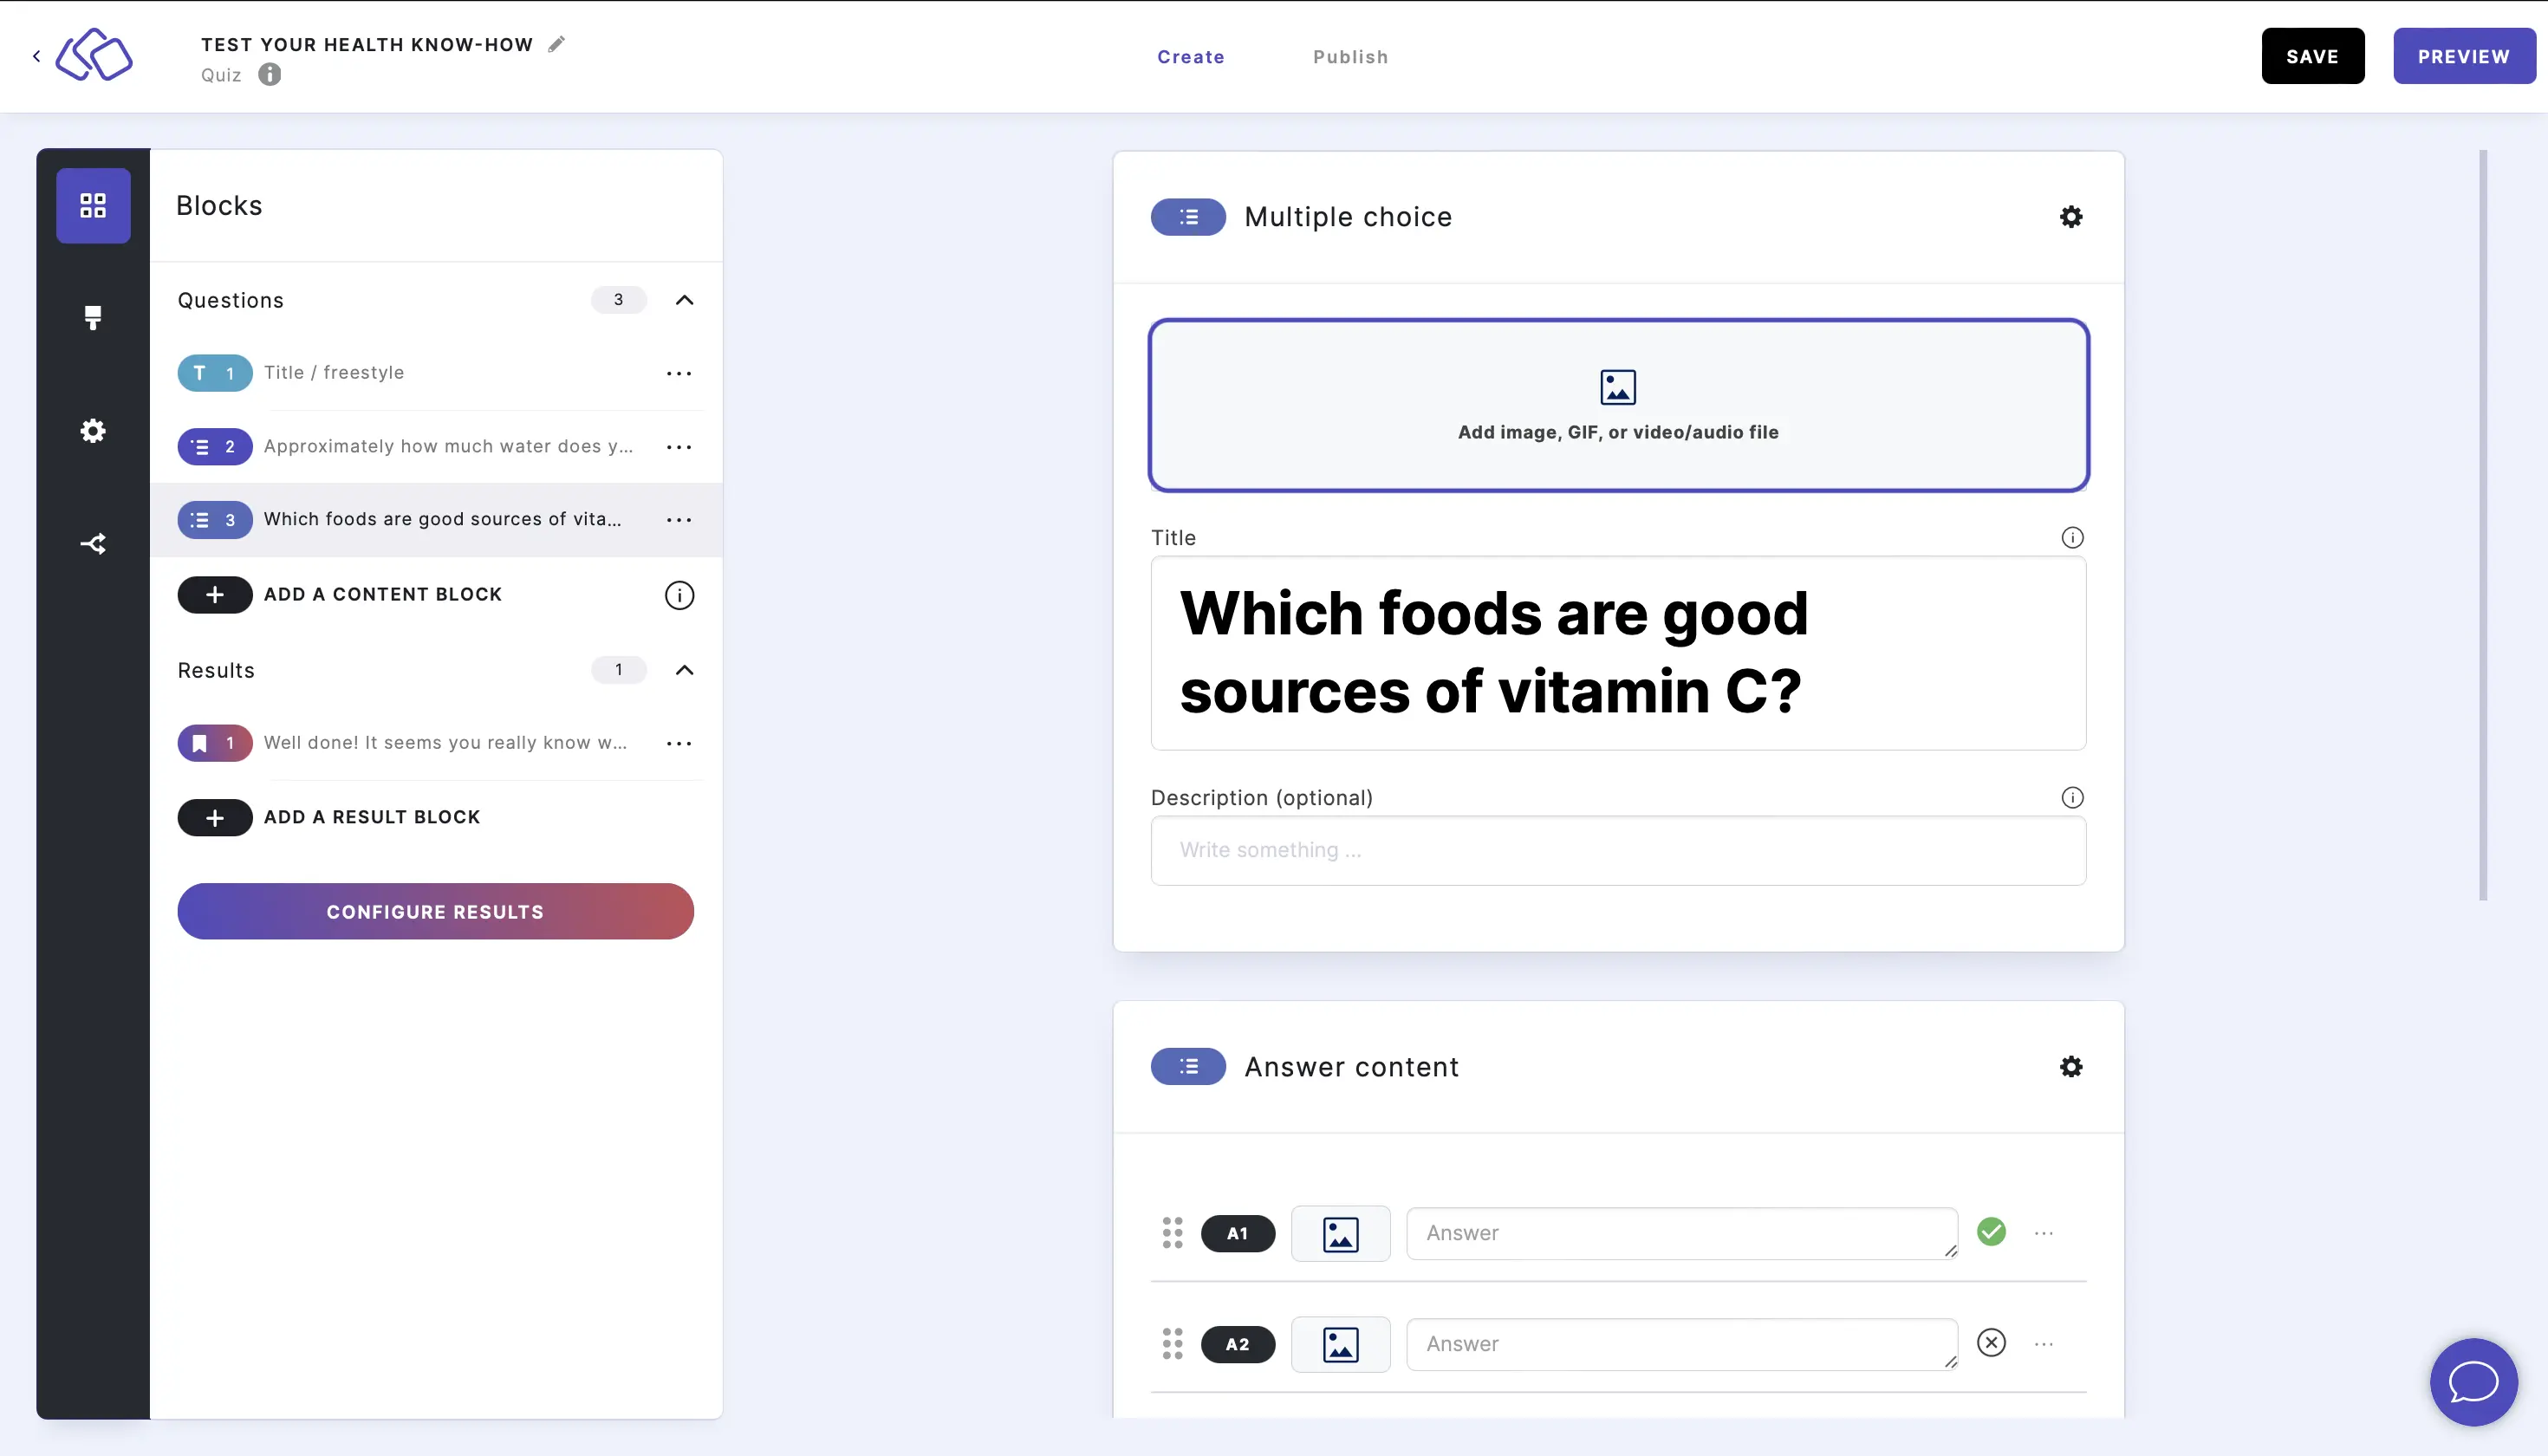
- Insert the answers. Add as many answers as you want by clicking on Add an answer.
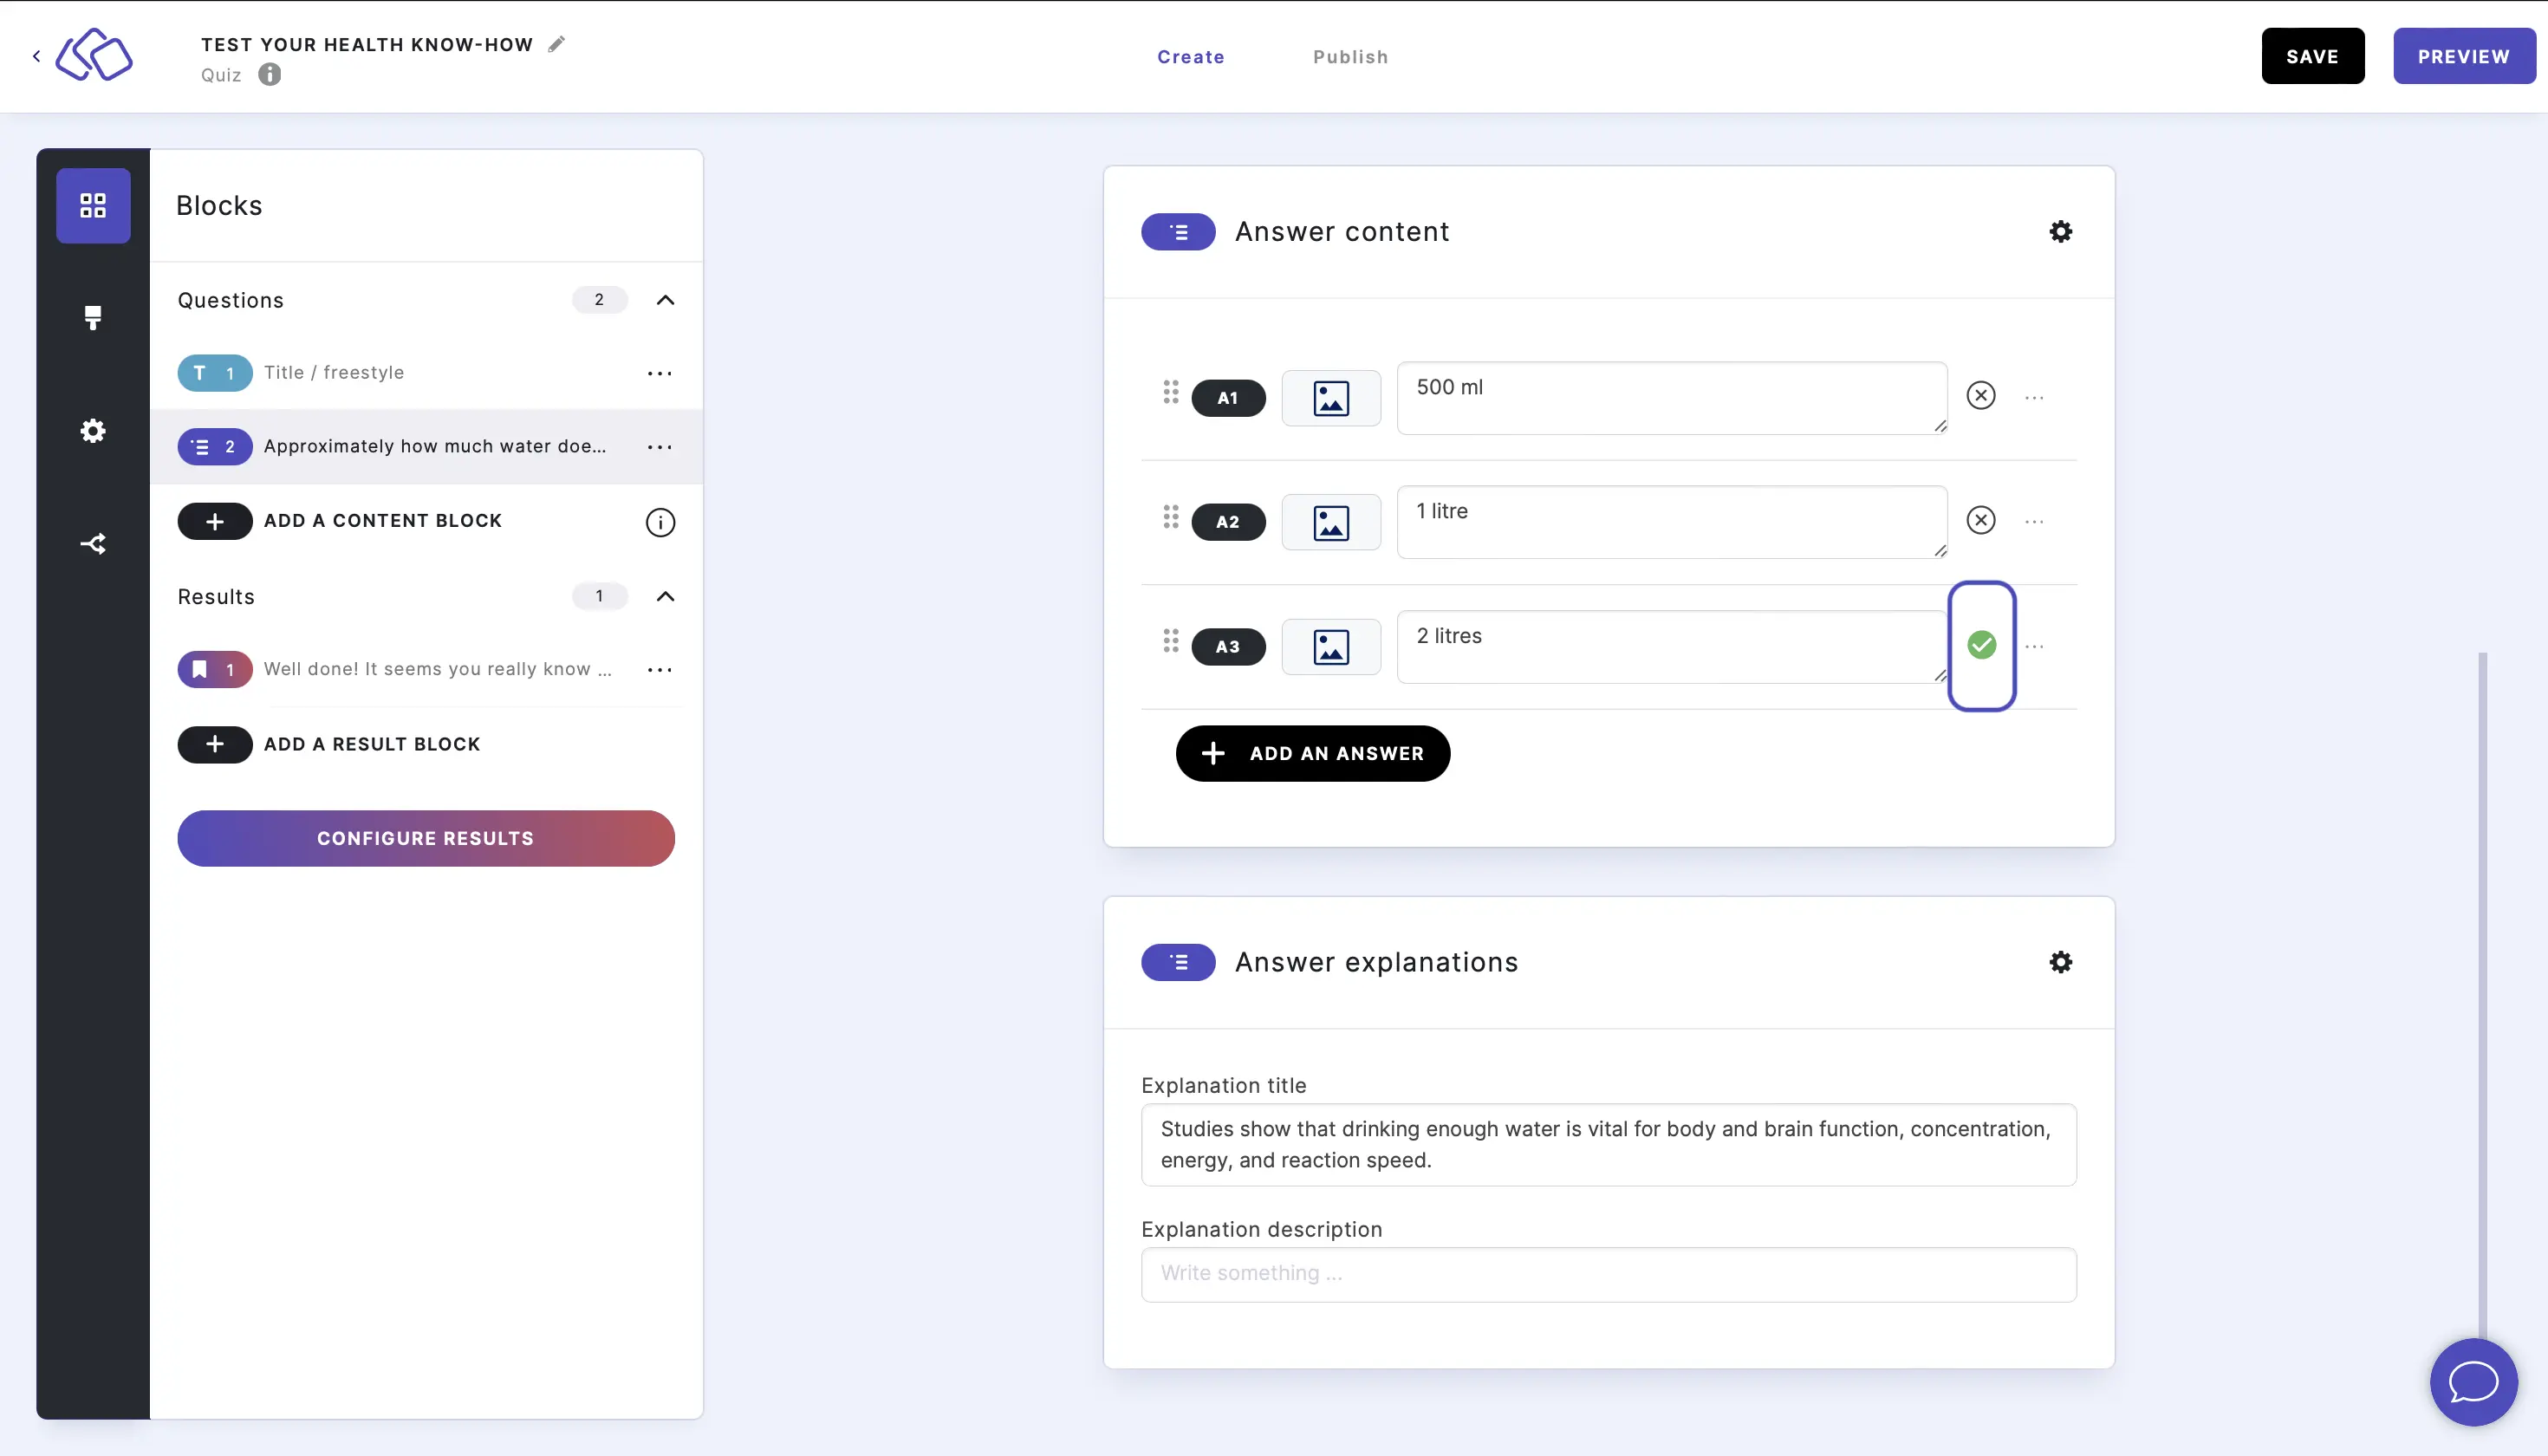
Click on the cross next to the answer to make it into a correct answer.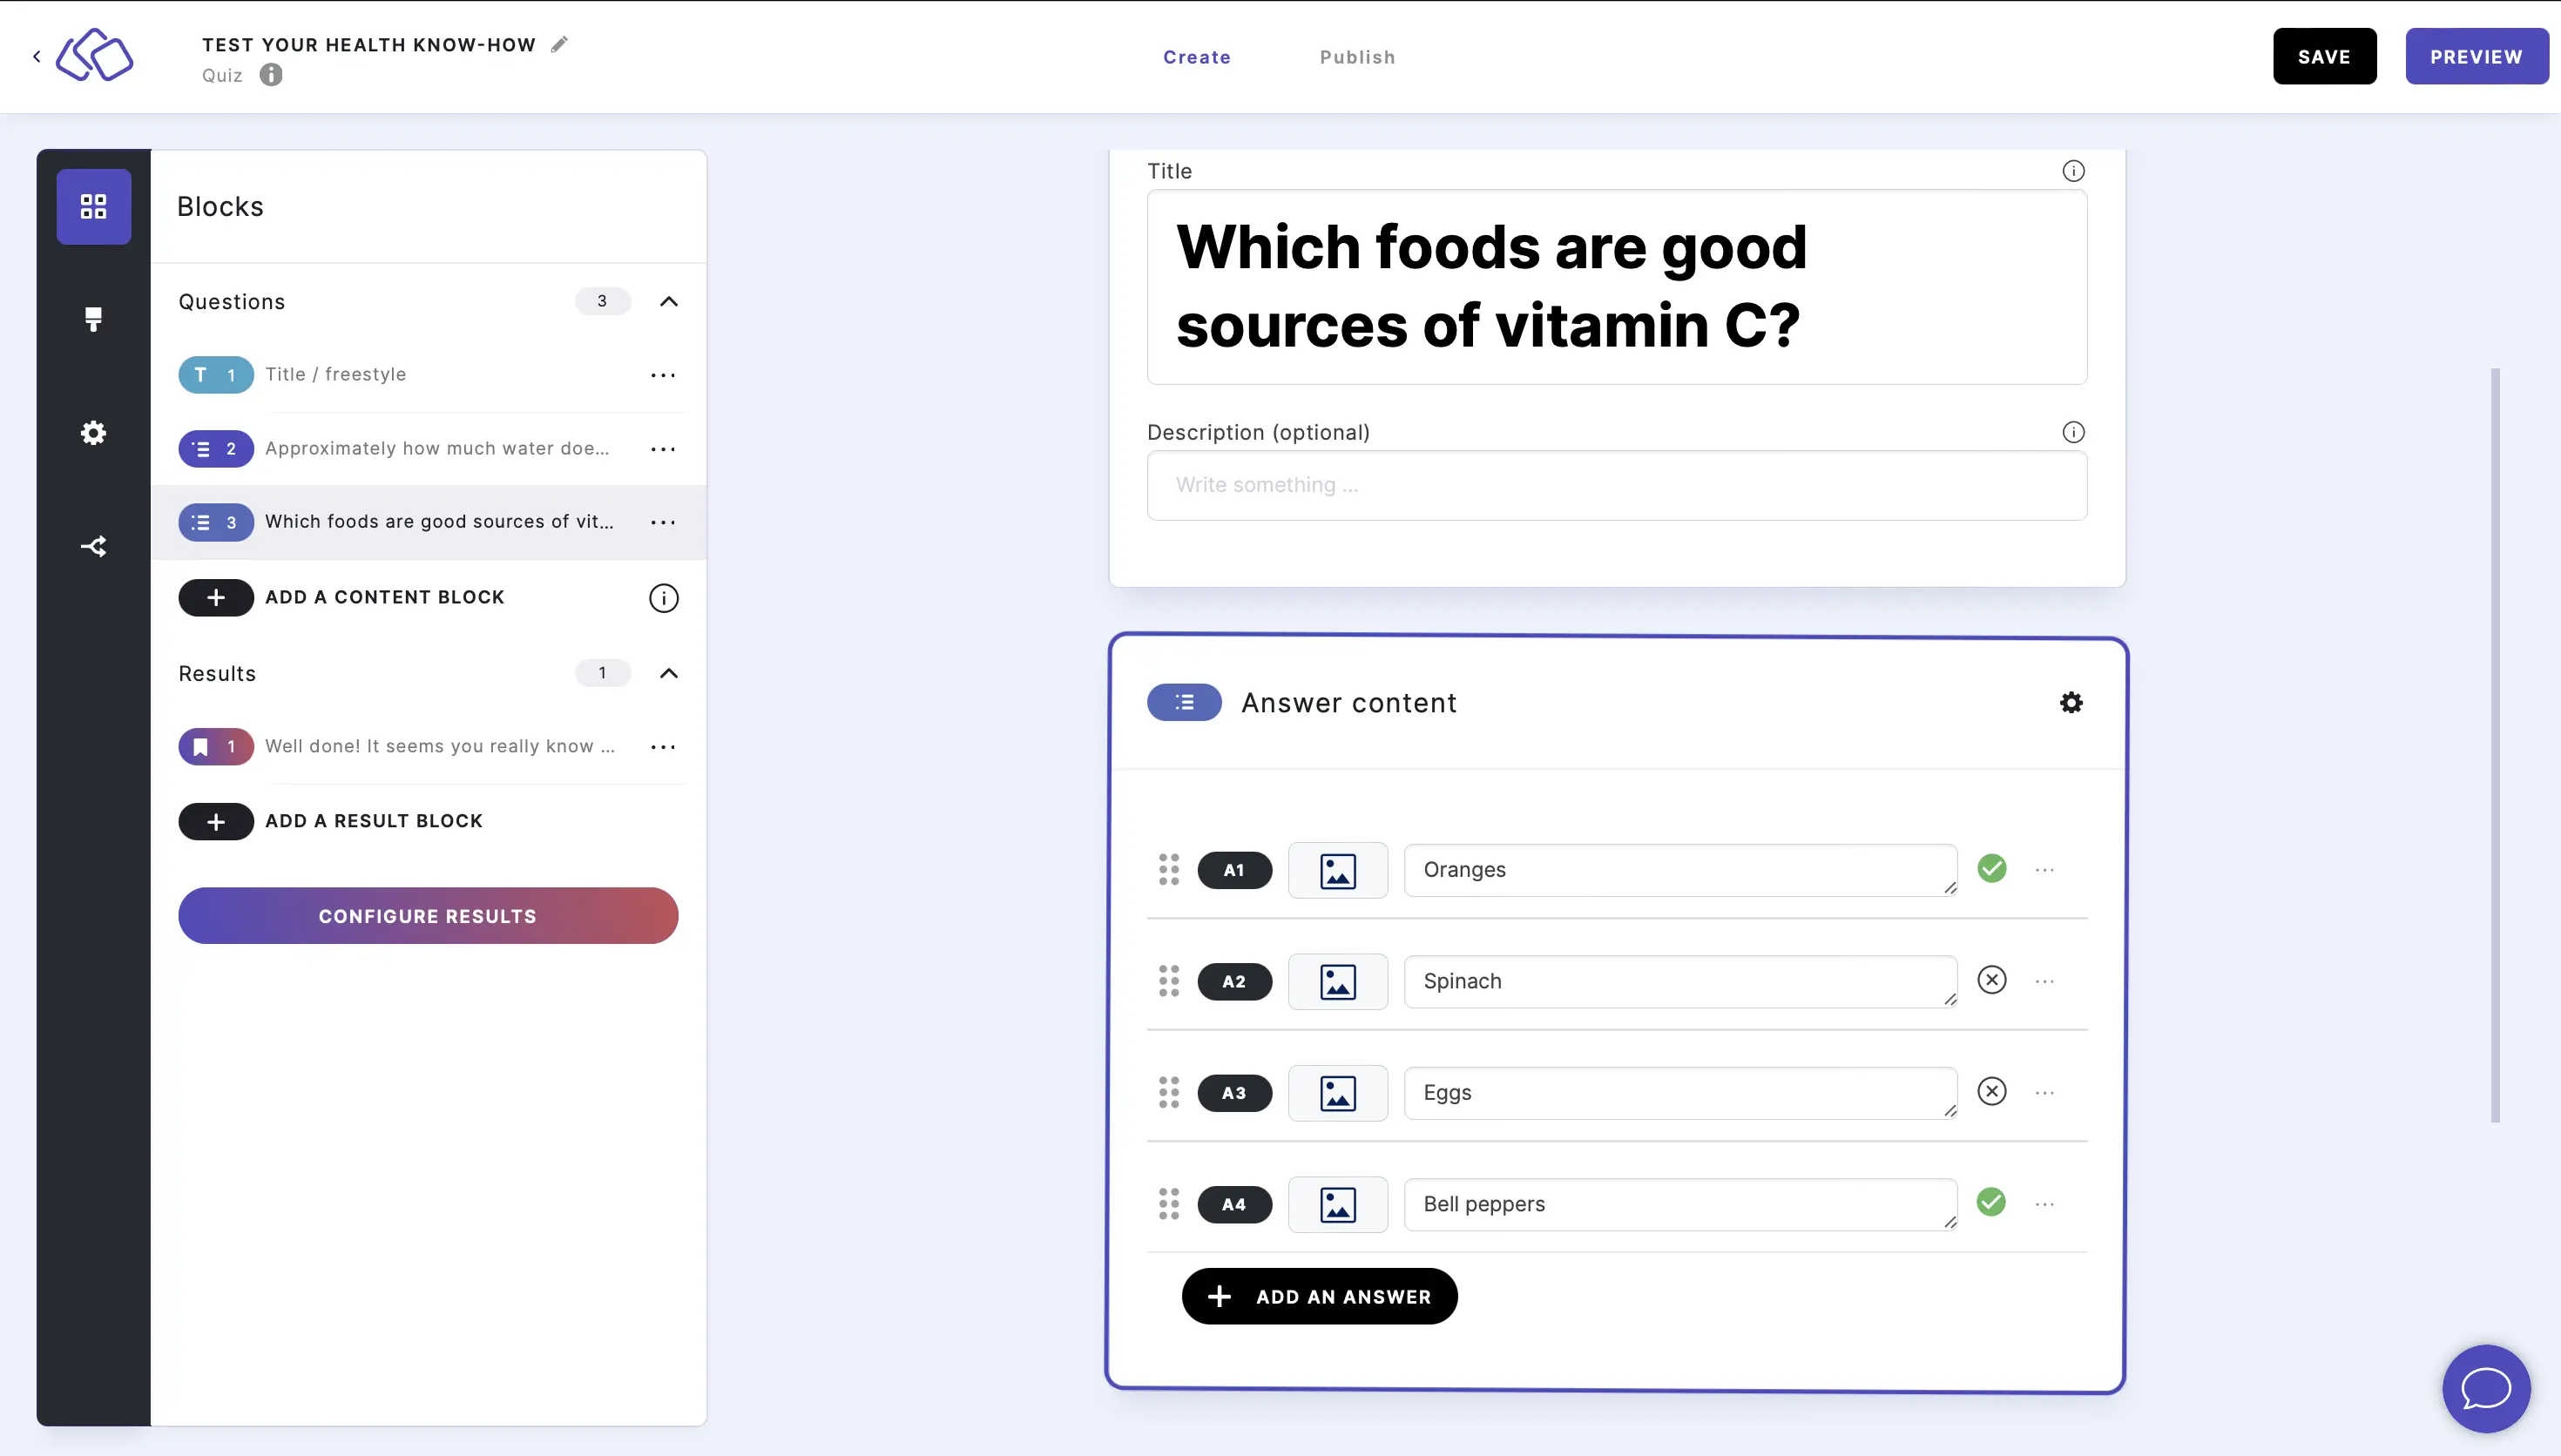
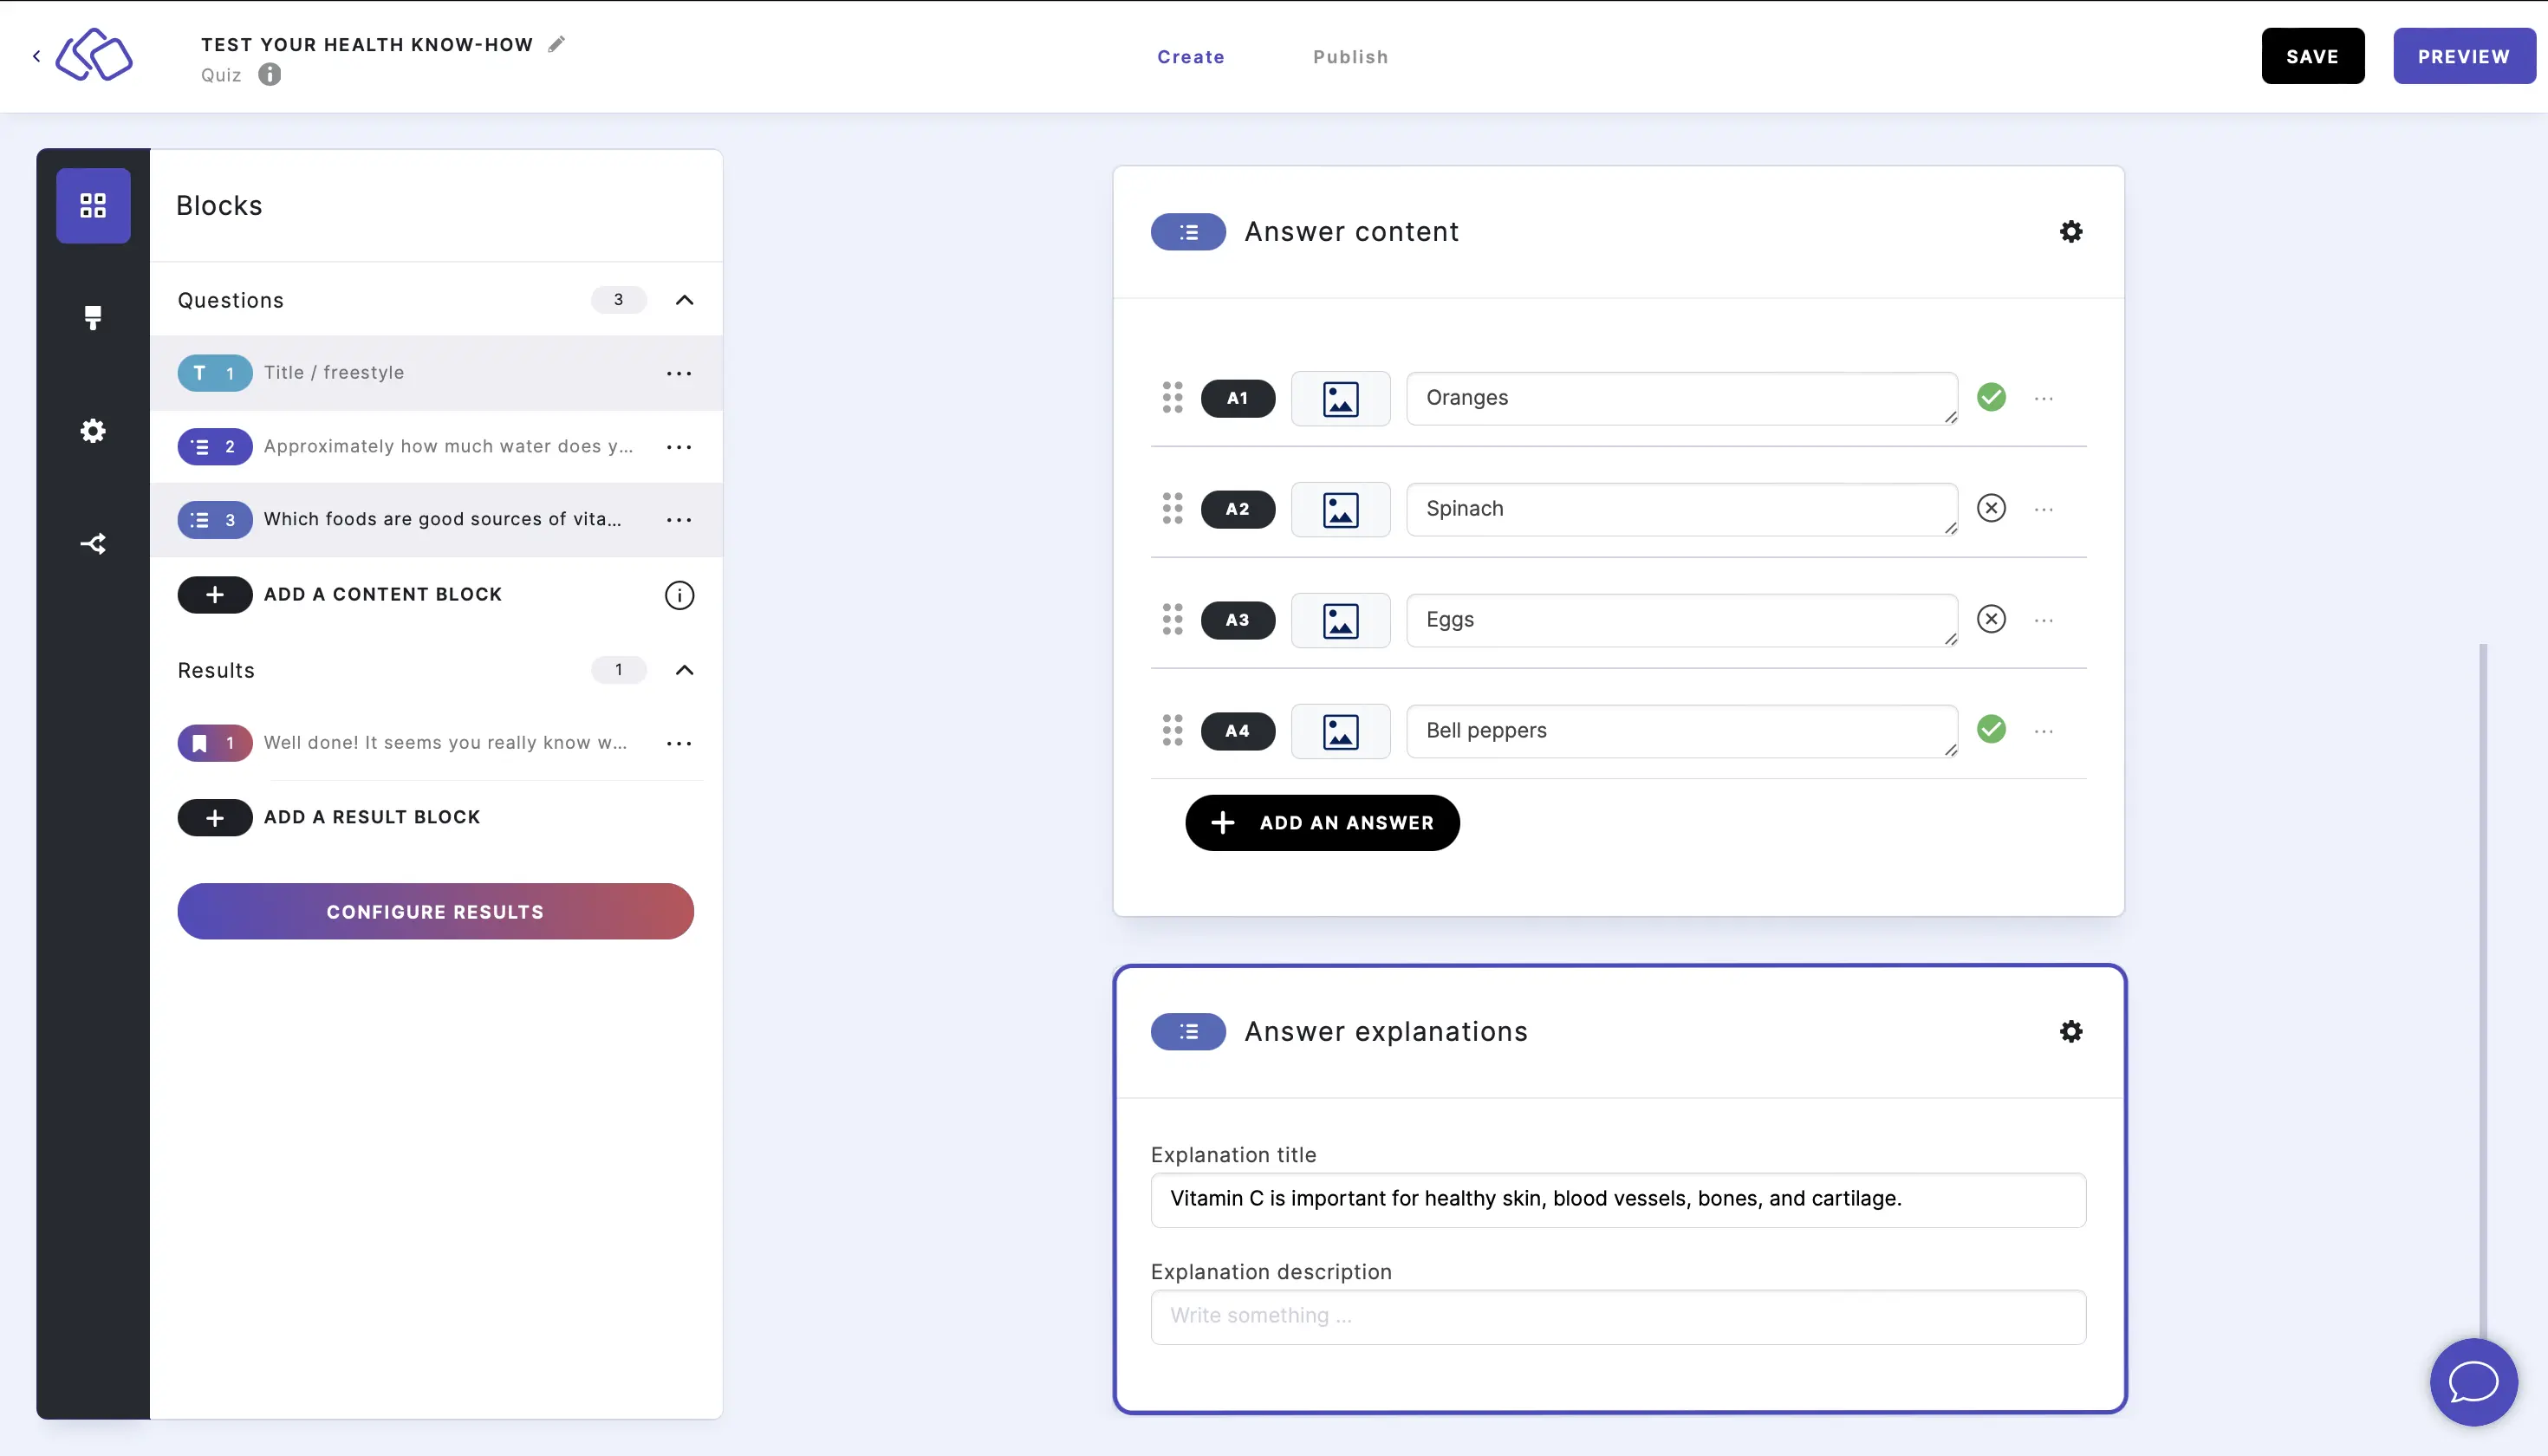
- Insert explanations into the Answer explanation field(s) (optional).
CHANGE SCORING:
By default, every correct answer is worth one point with one correct answer needed to get the point, and the audience has an unlimited number of answer selections.
To change the score per question, go to the options icon on the right of Answer content.
To have a score per question, enter your preferred Score and # correct answers to get "correct" message.
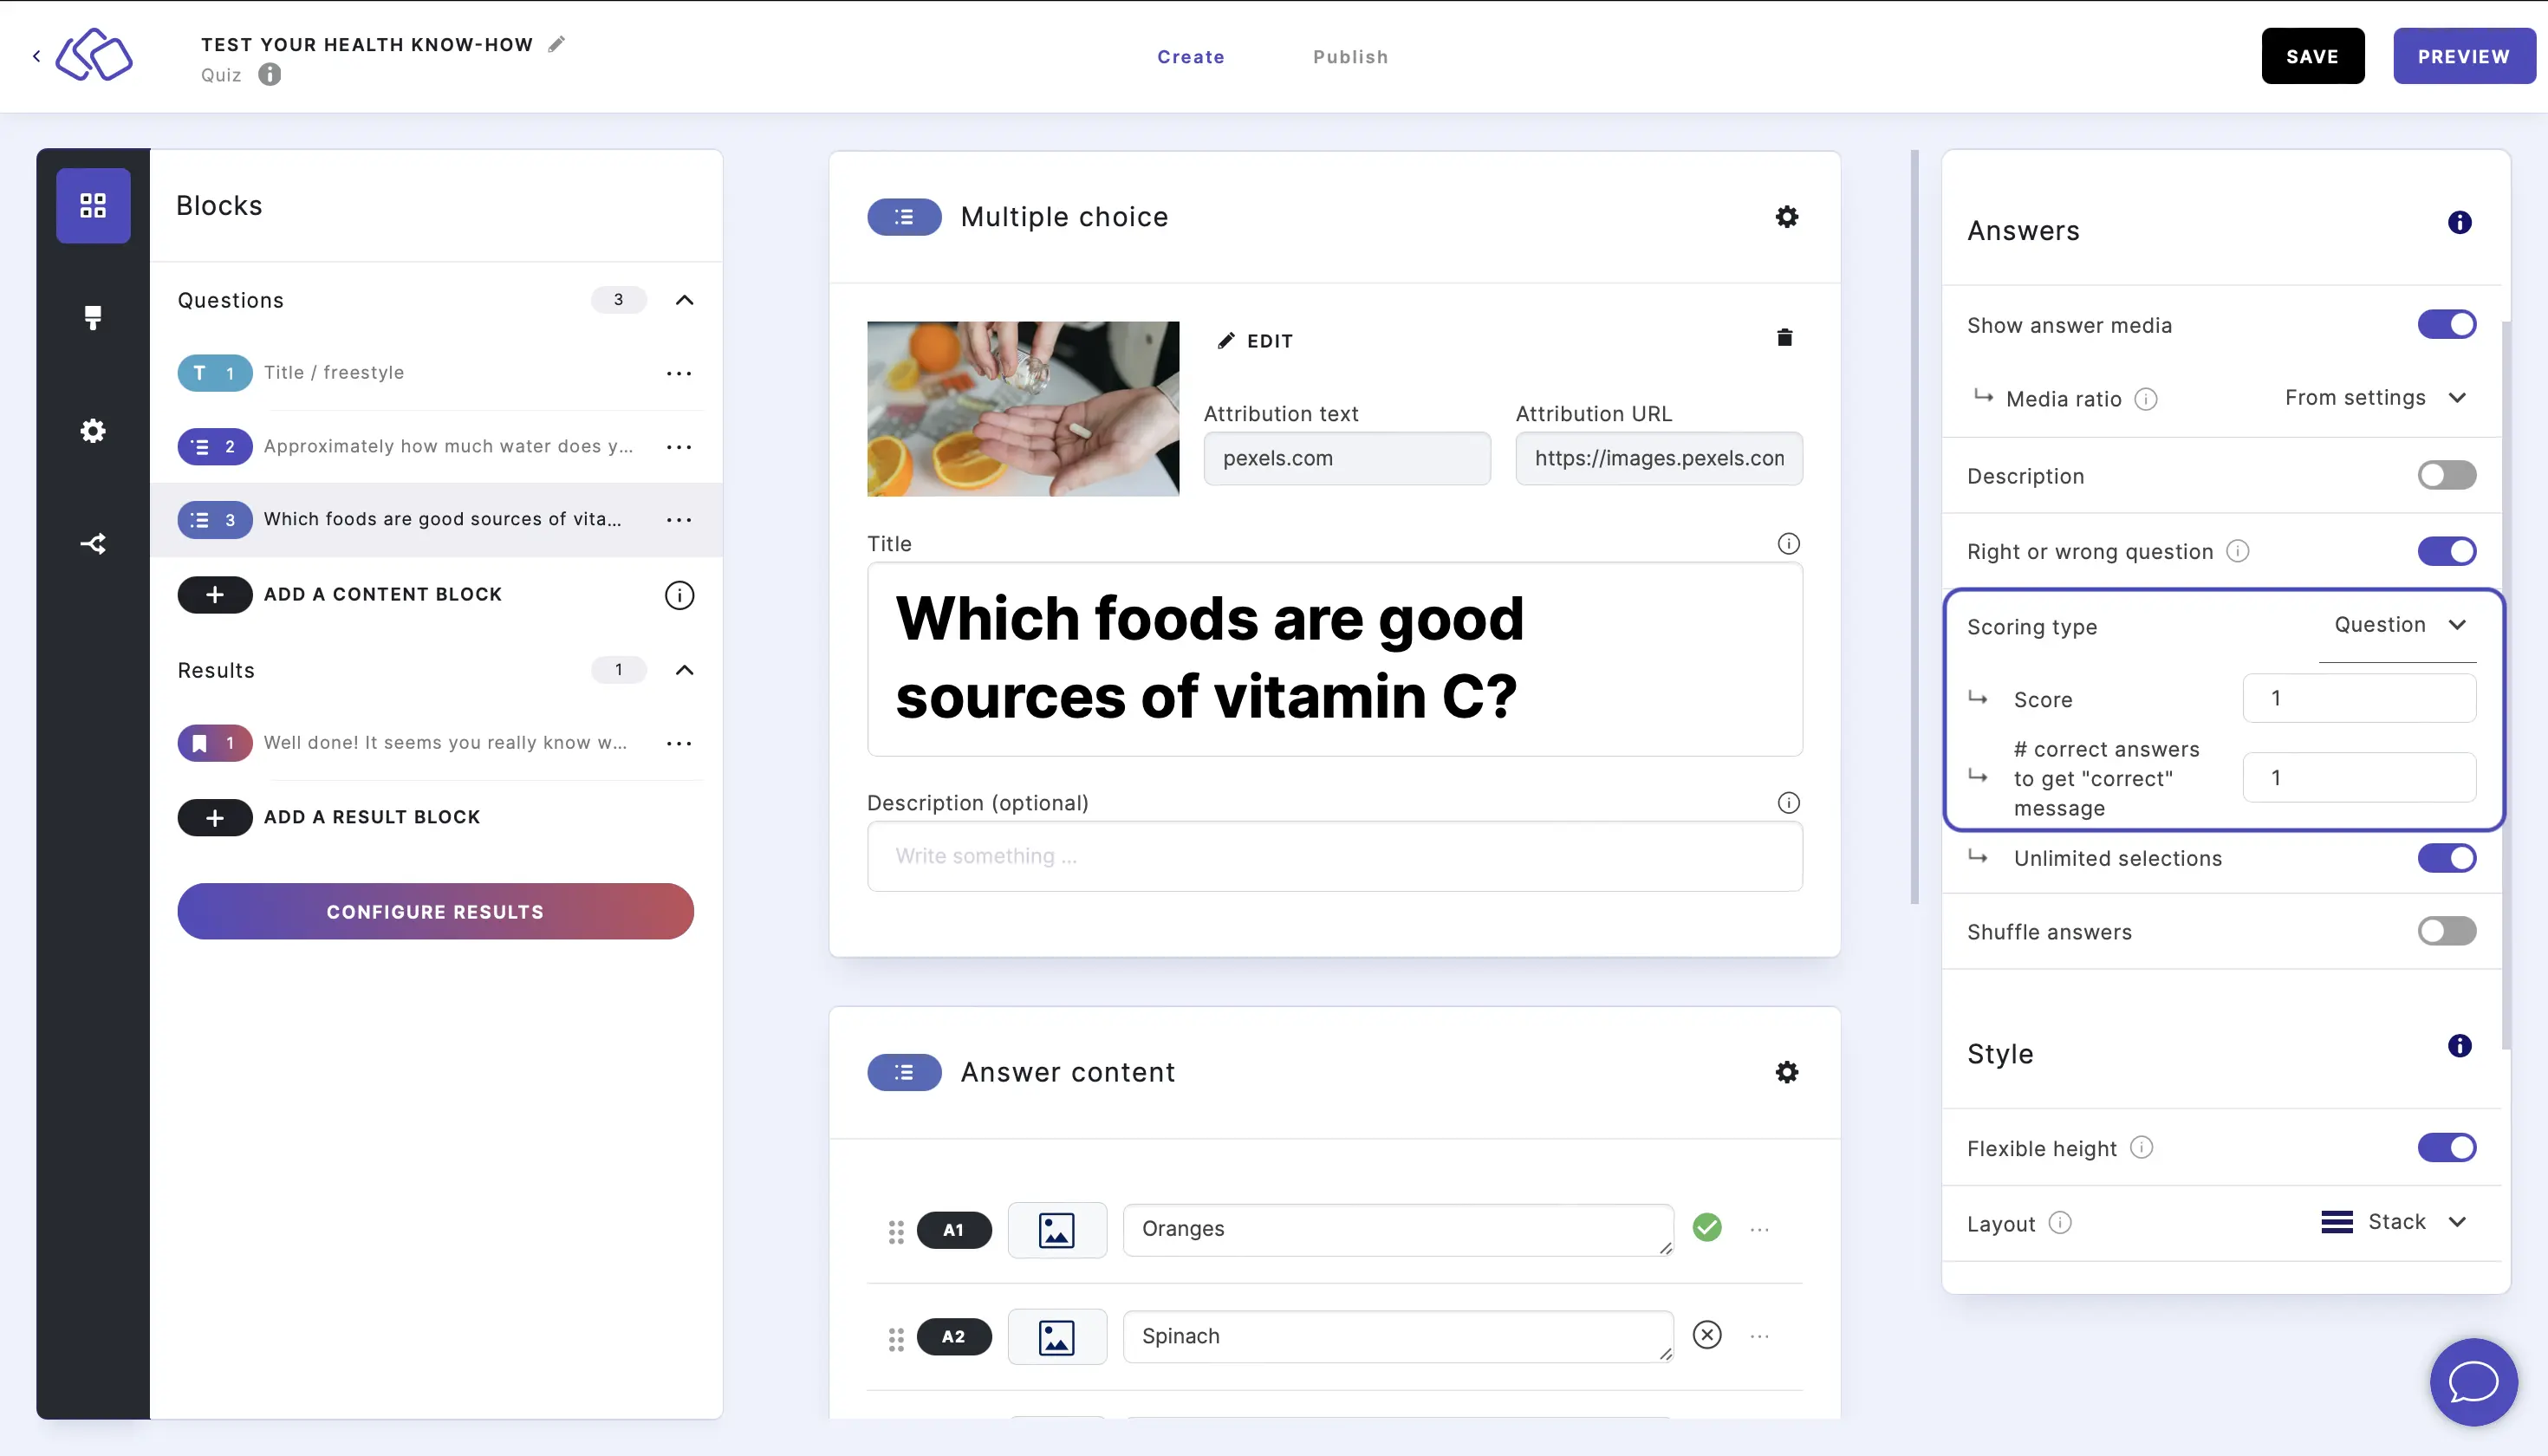
To change the score per answer, change Scoring type to Answer and adjust the scores next to the answers.
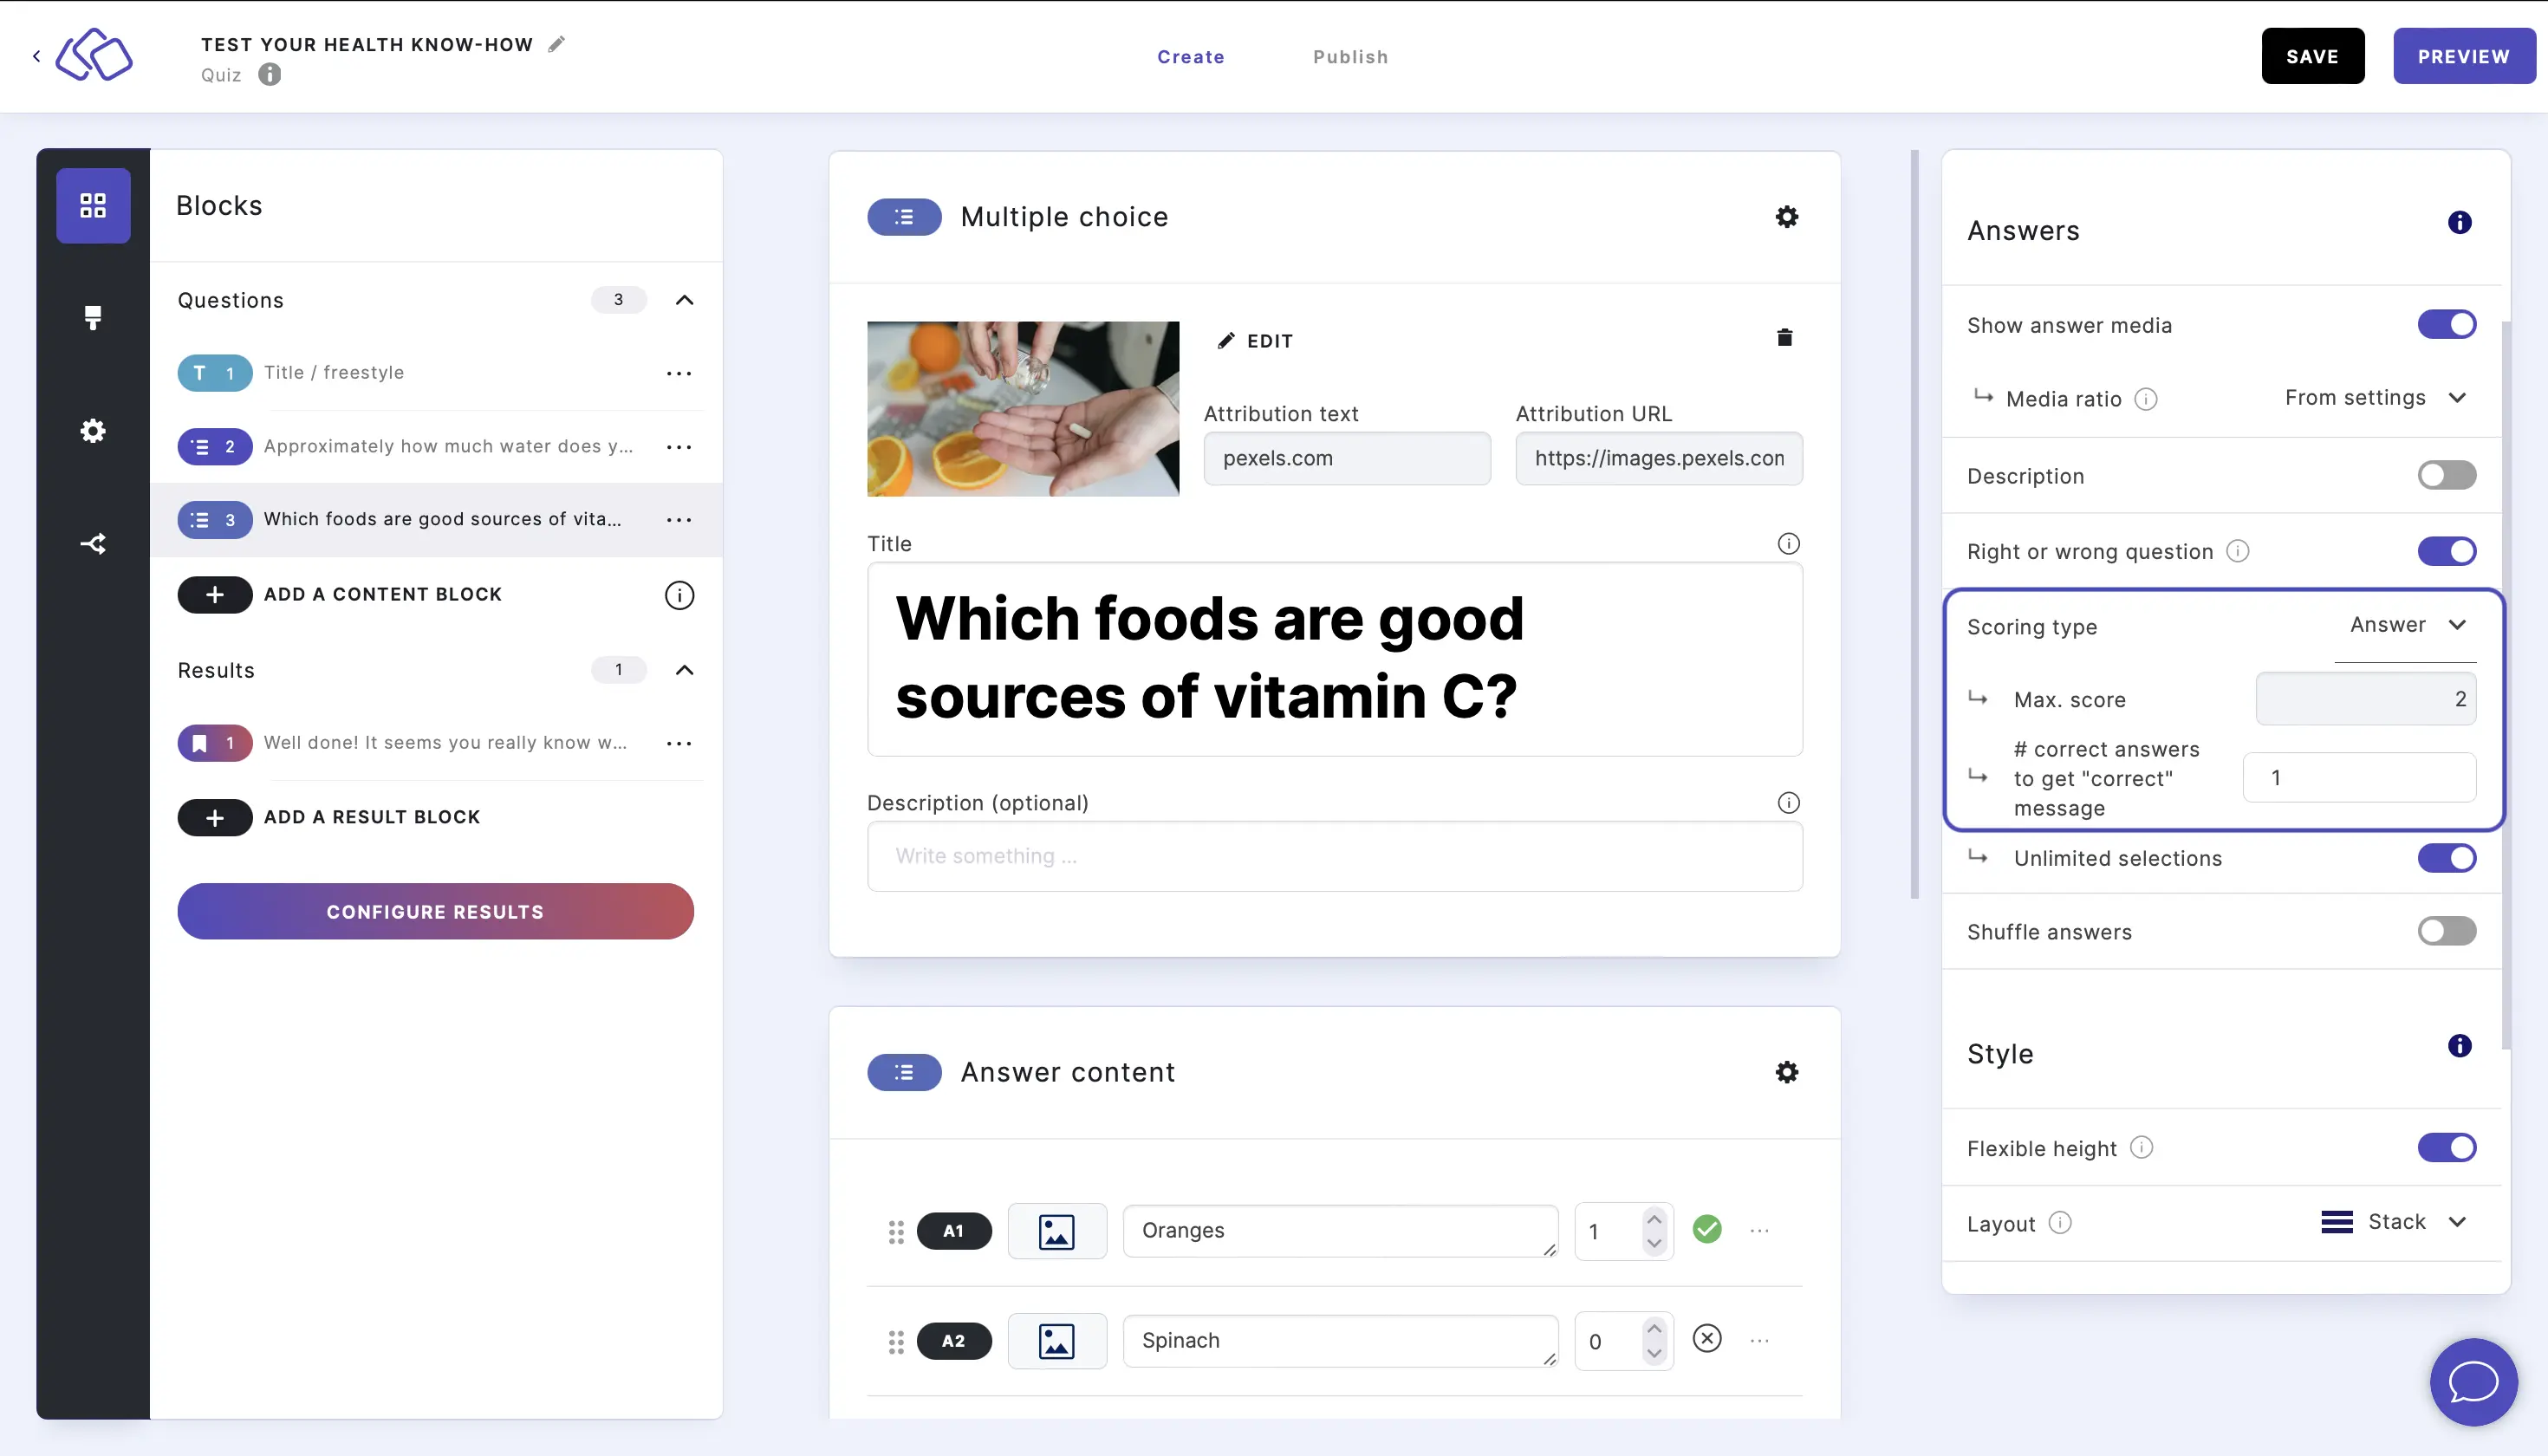
To limit the number of selections, disable Unlimited number of selections and then enter your chosen maximum.
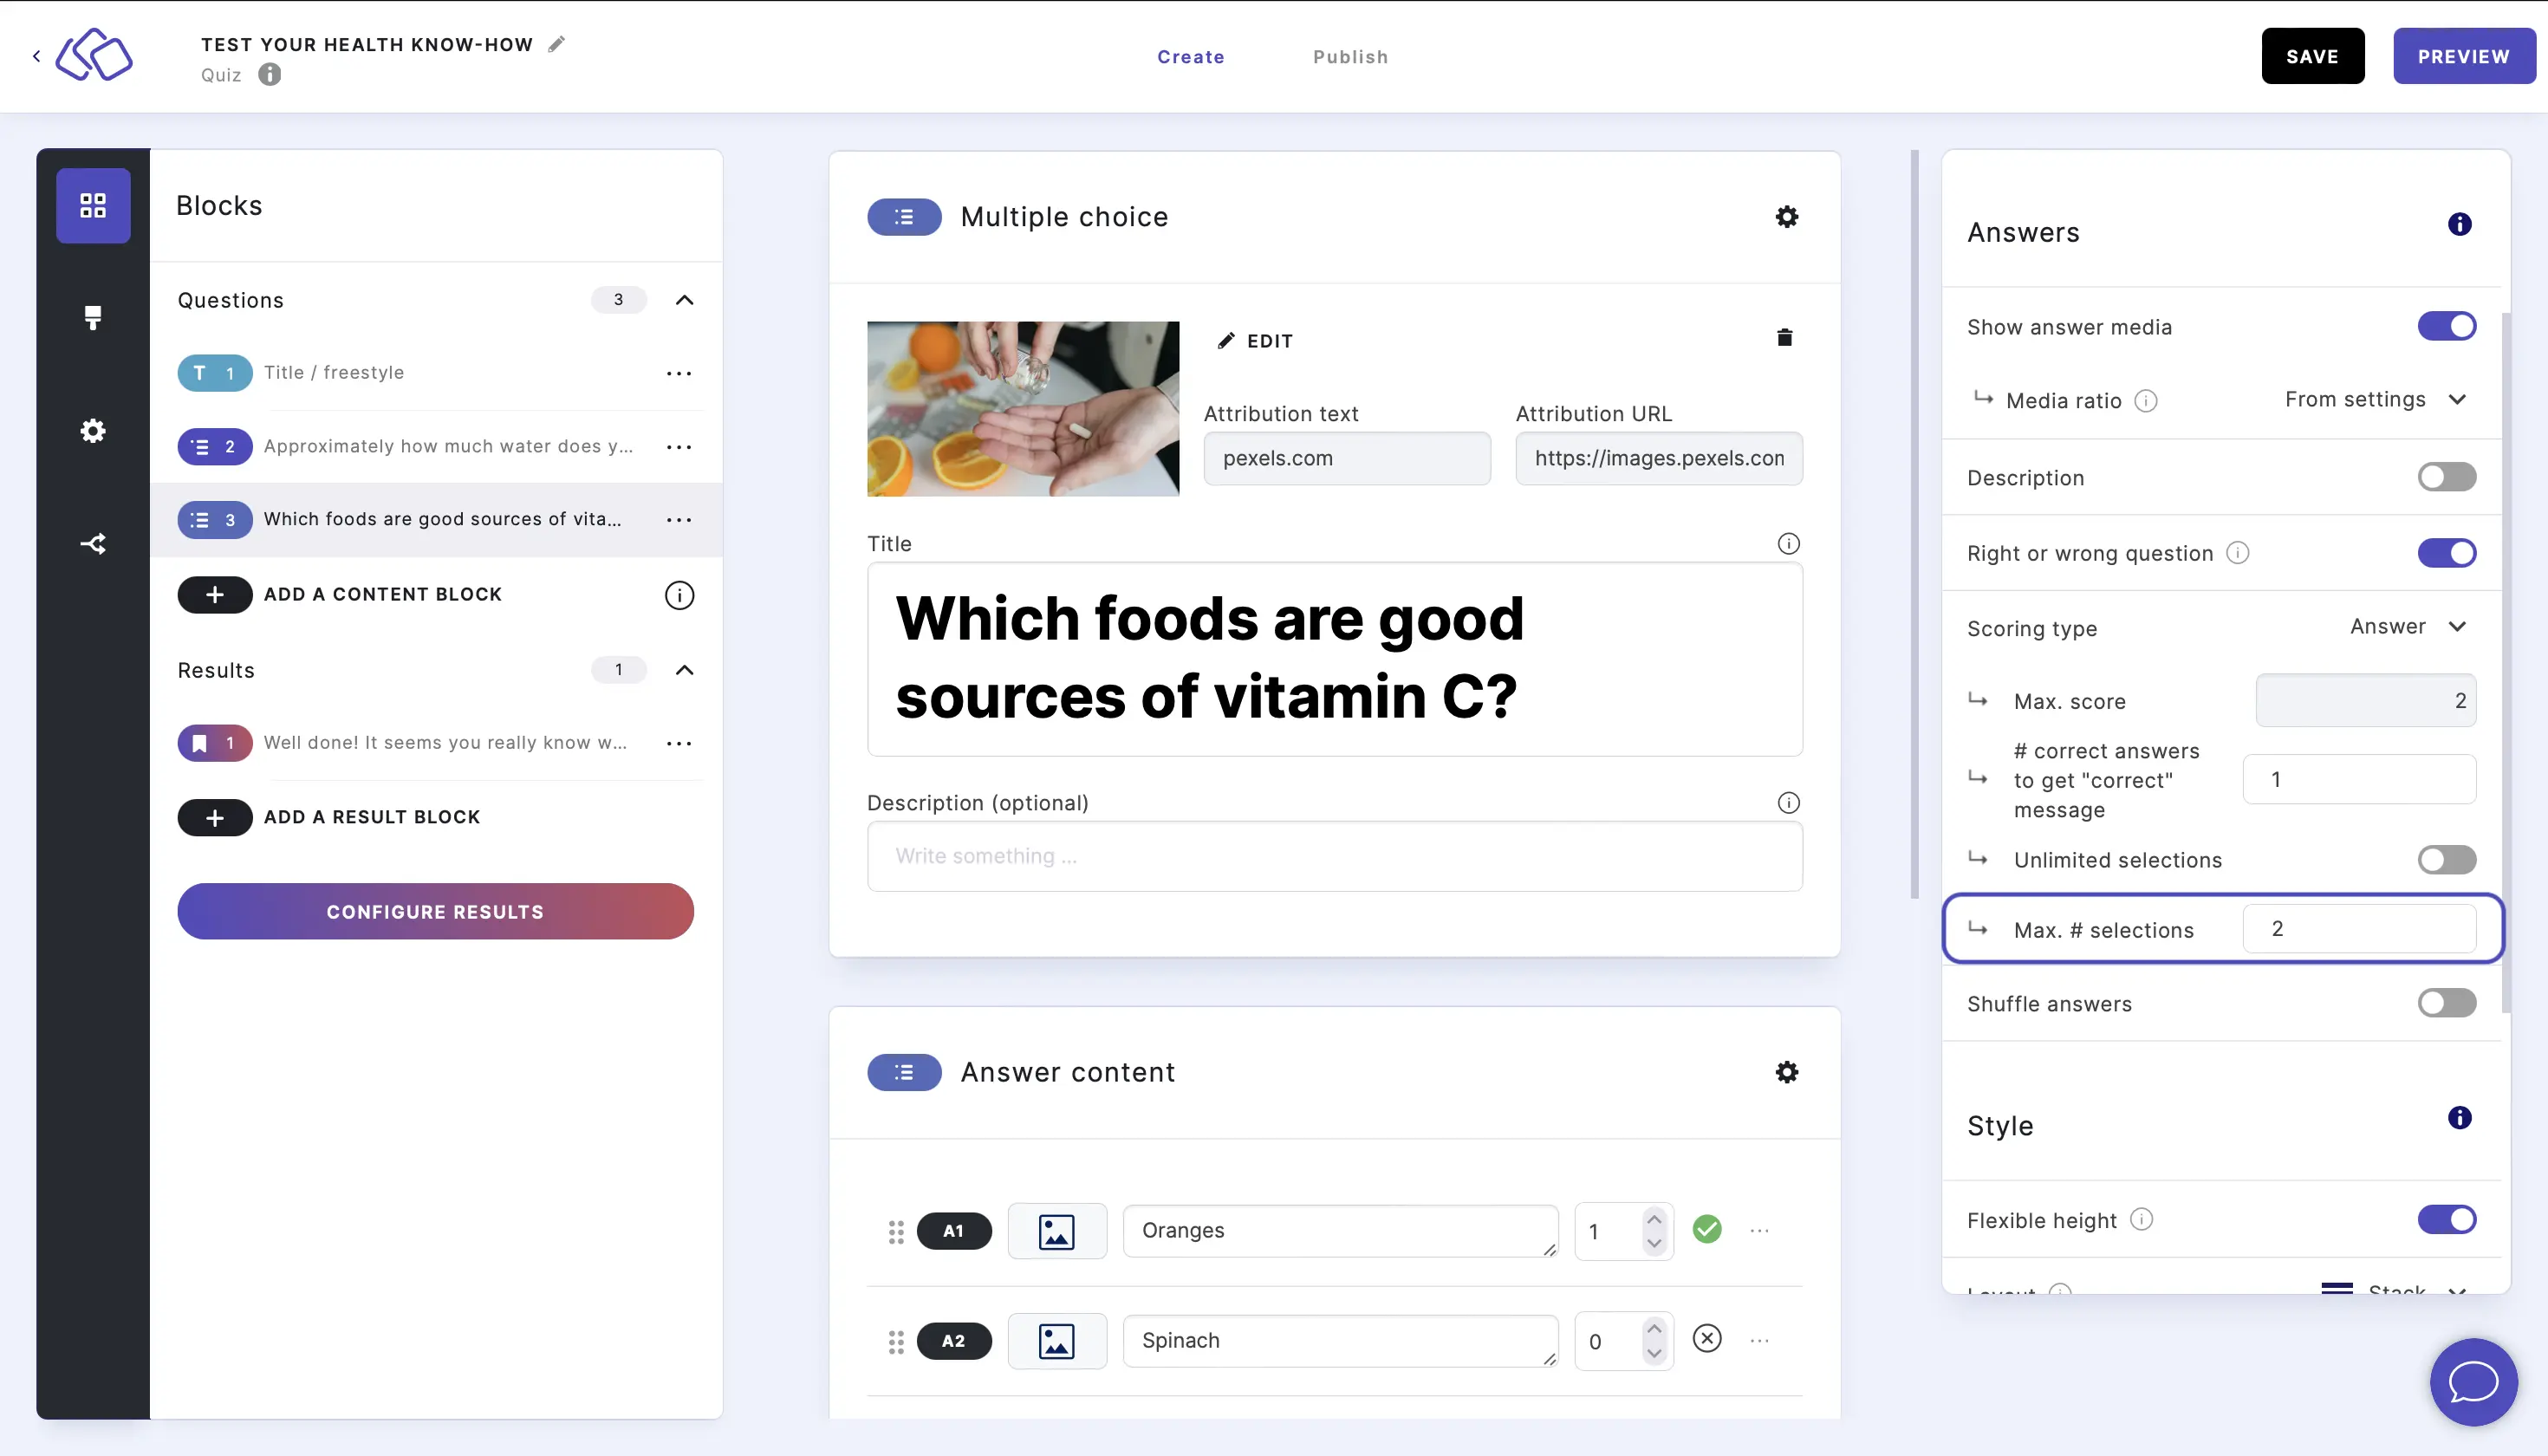
SHOW AMOUNT OF POSSIBLE CHOICES:
To show your audience how many remainings options they can still select, go to the options icon on the right of Answer content and enable Show amount of possible choices.
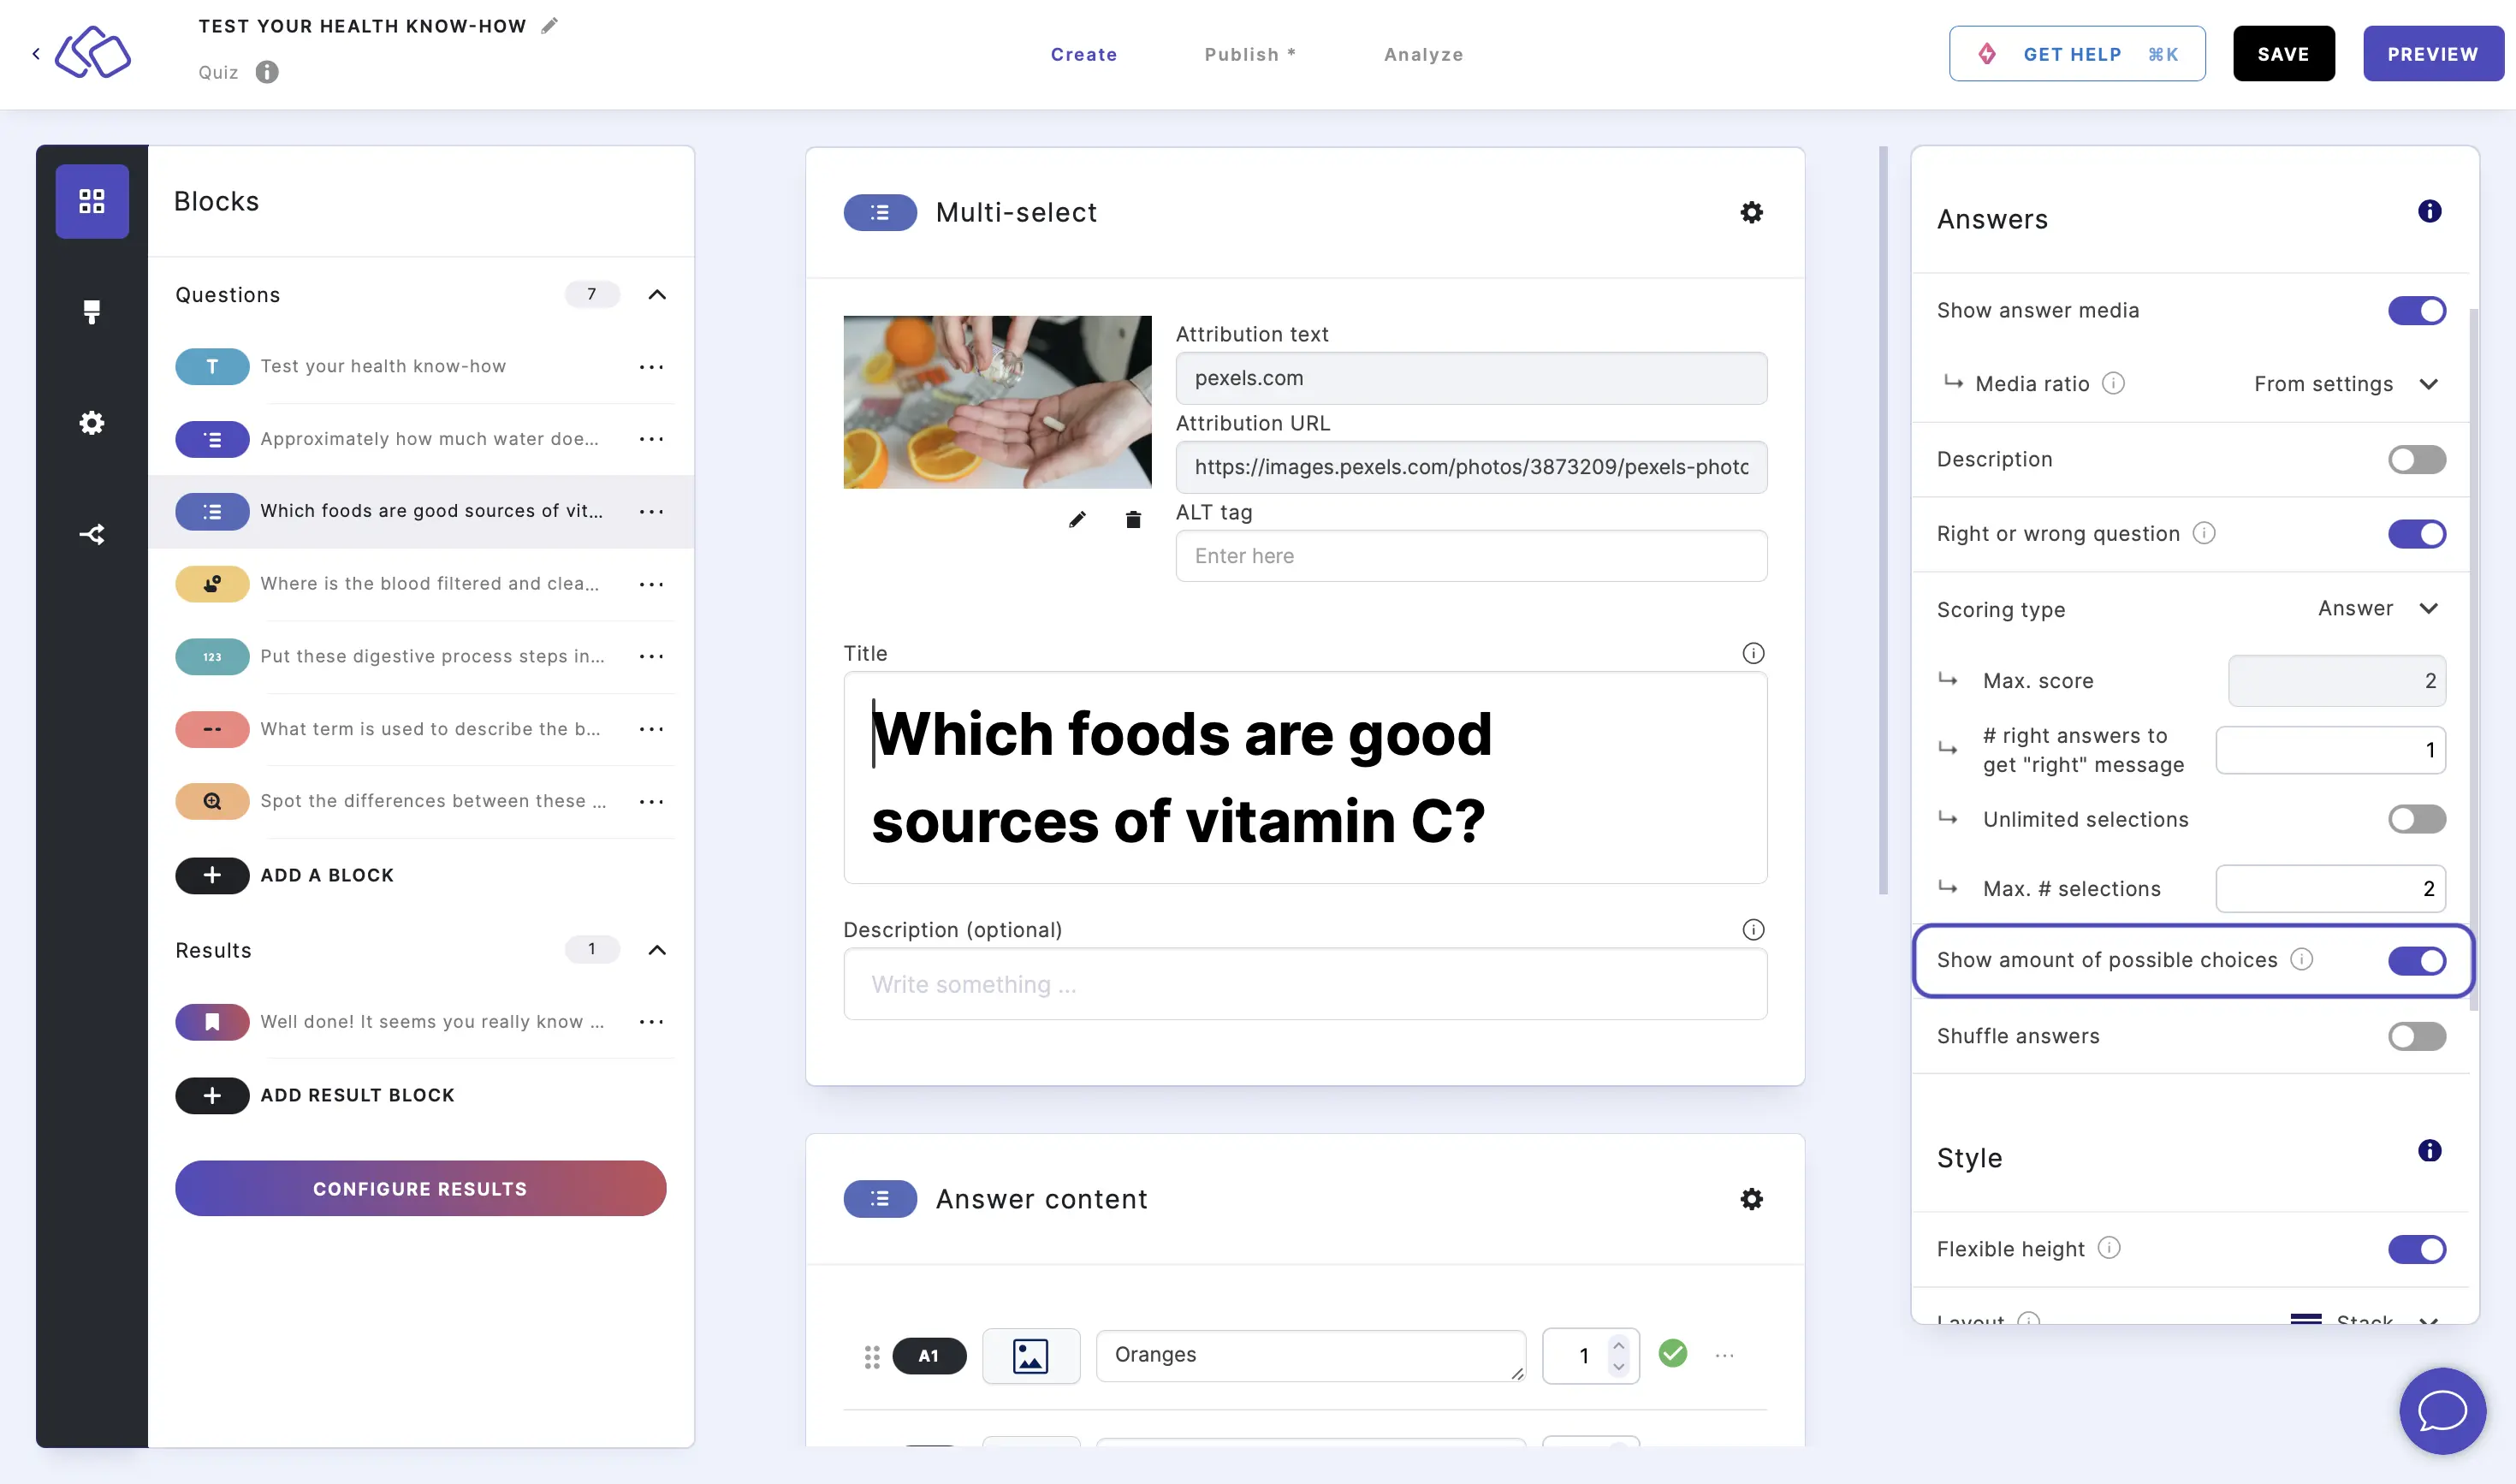
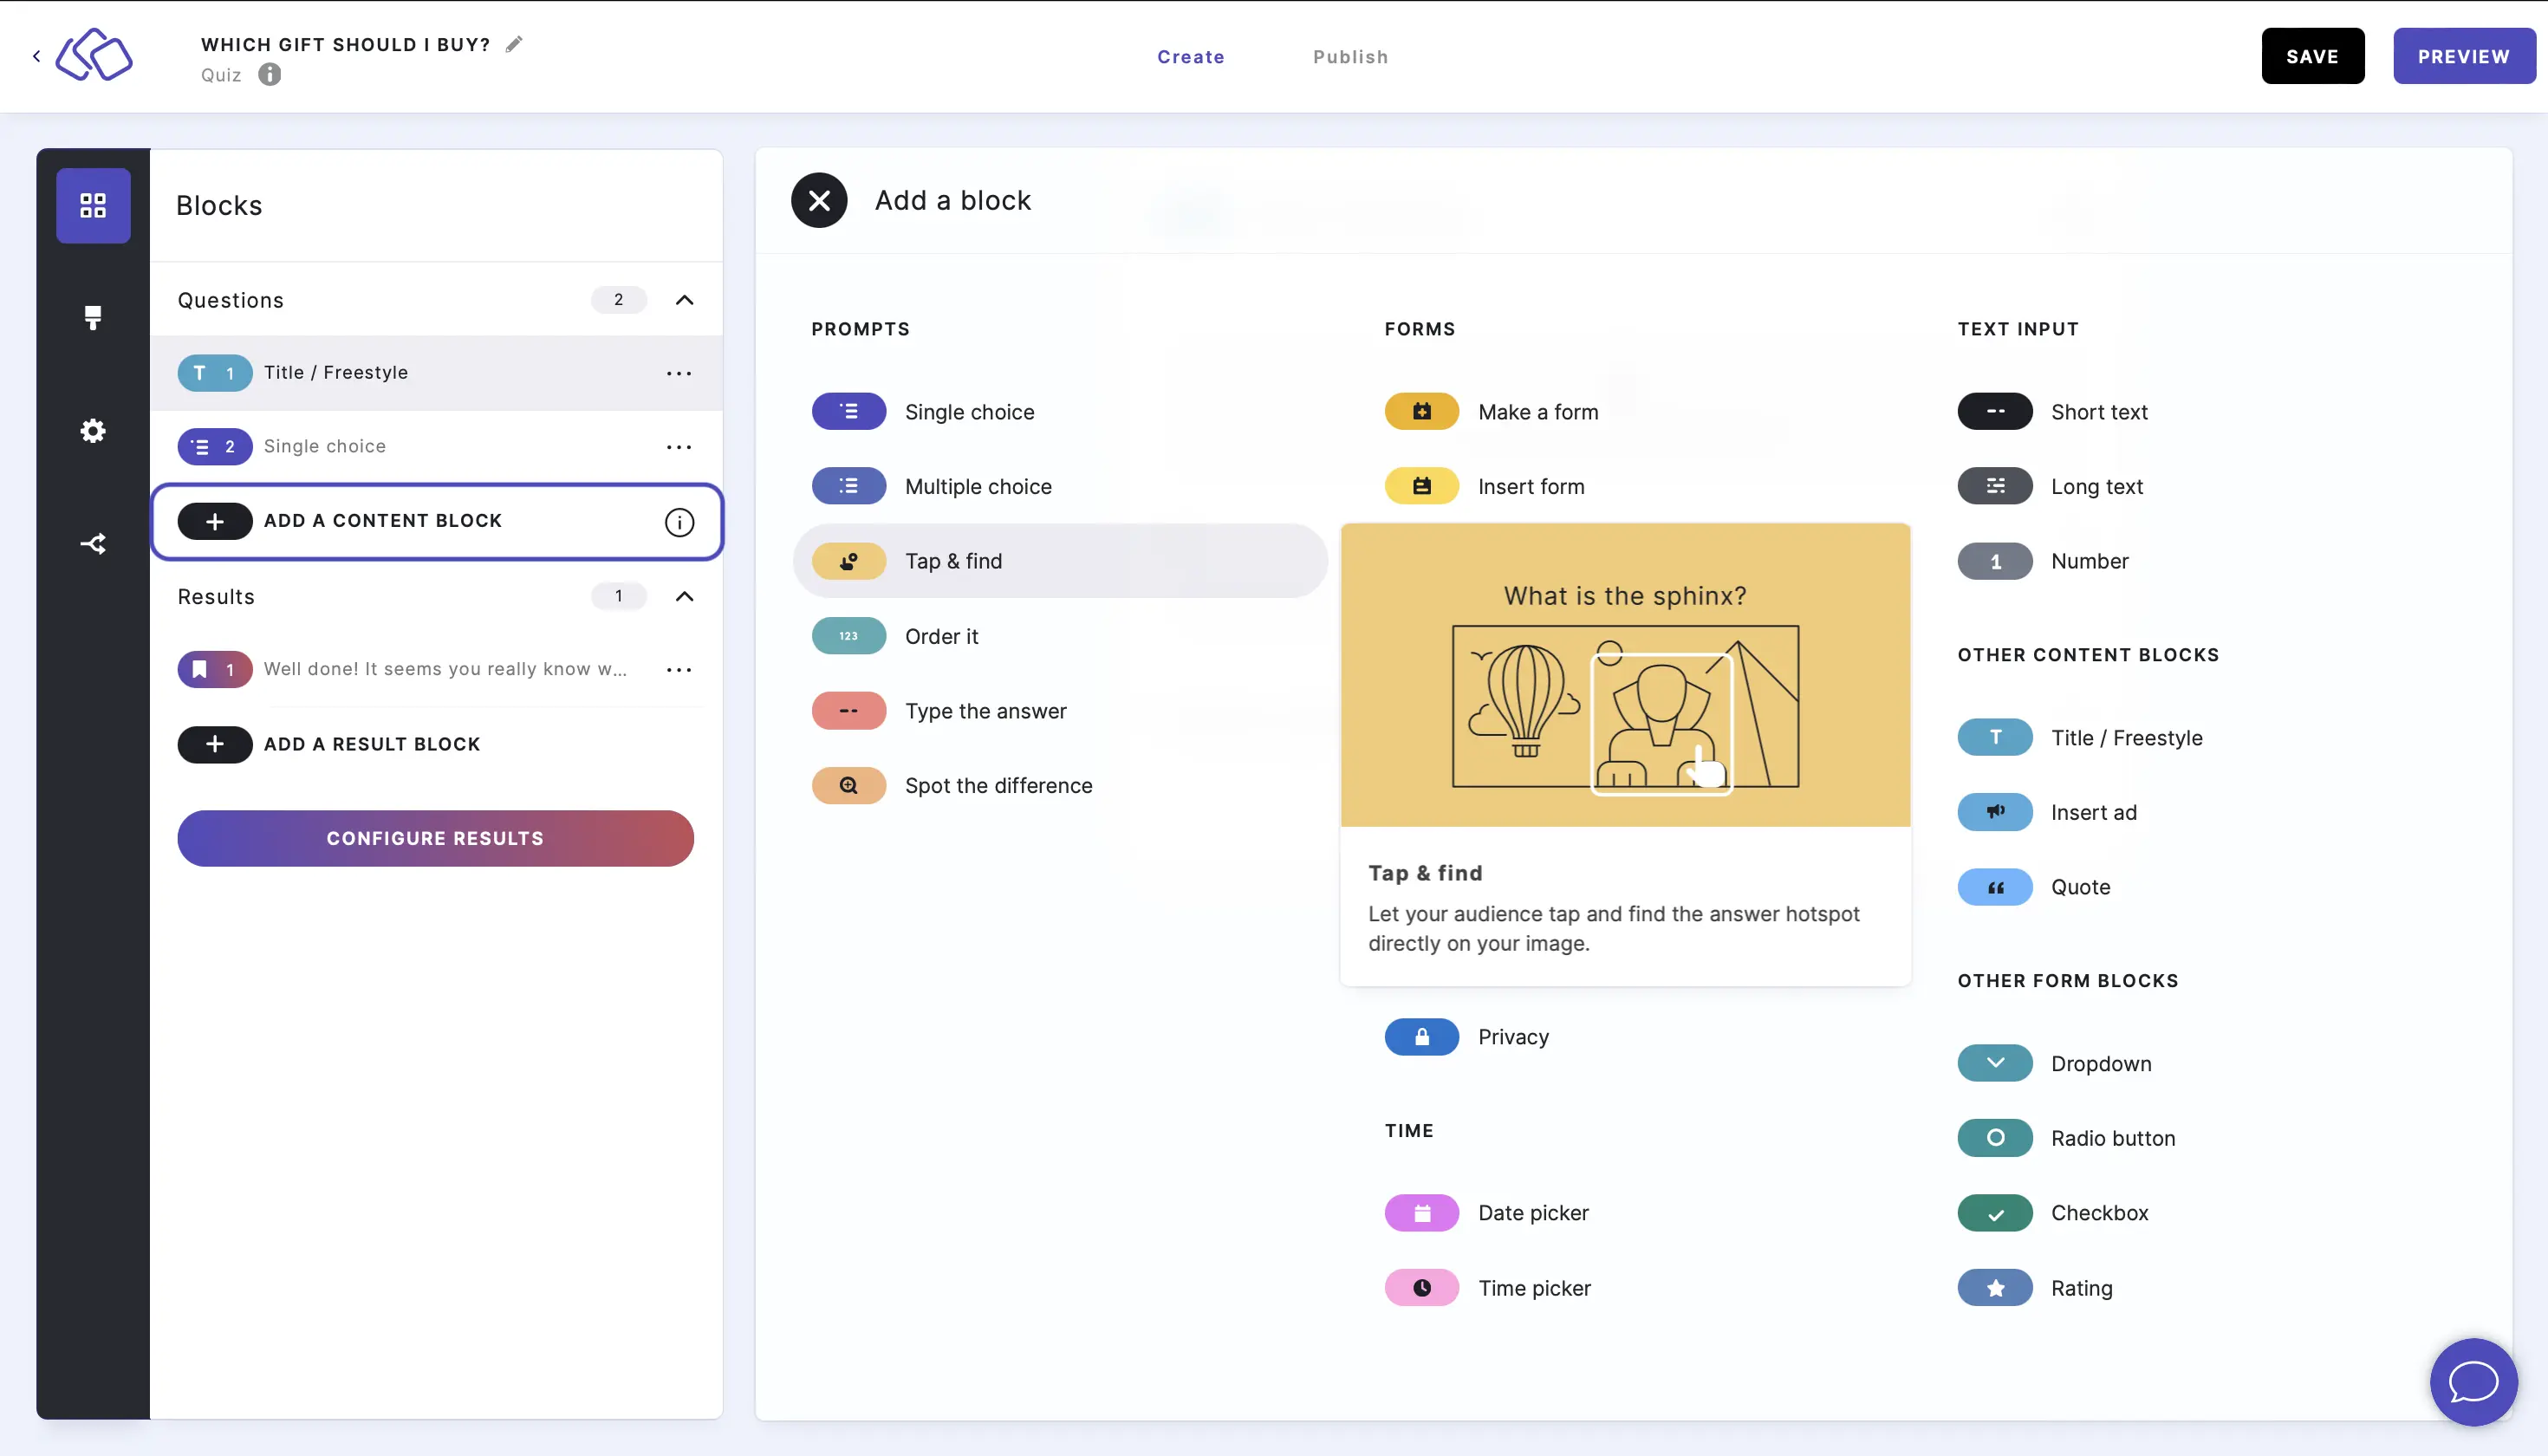
3. Tap and find
The answers are displayed as hotspots directly in the question image. Users tap the image to find the answers and a green circle appears when a correct point is found.
- Click on ADD A BLOCK and select Tap and find.
- Insert a question into the Title field.
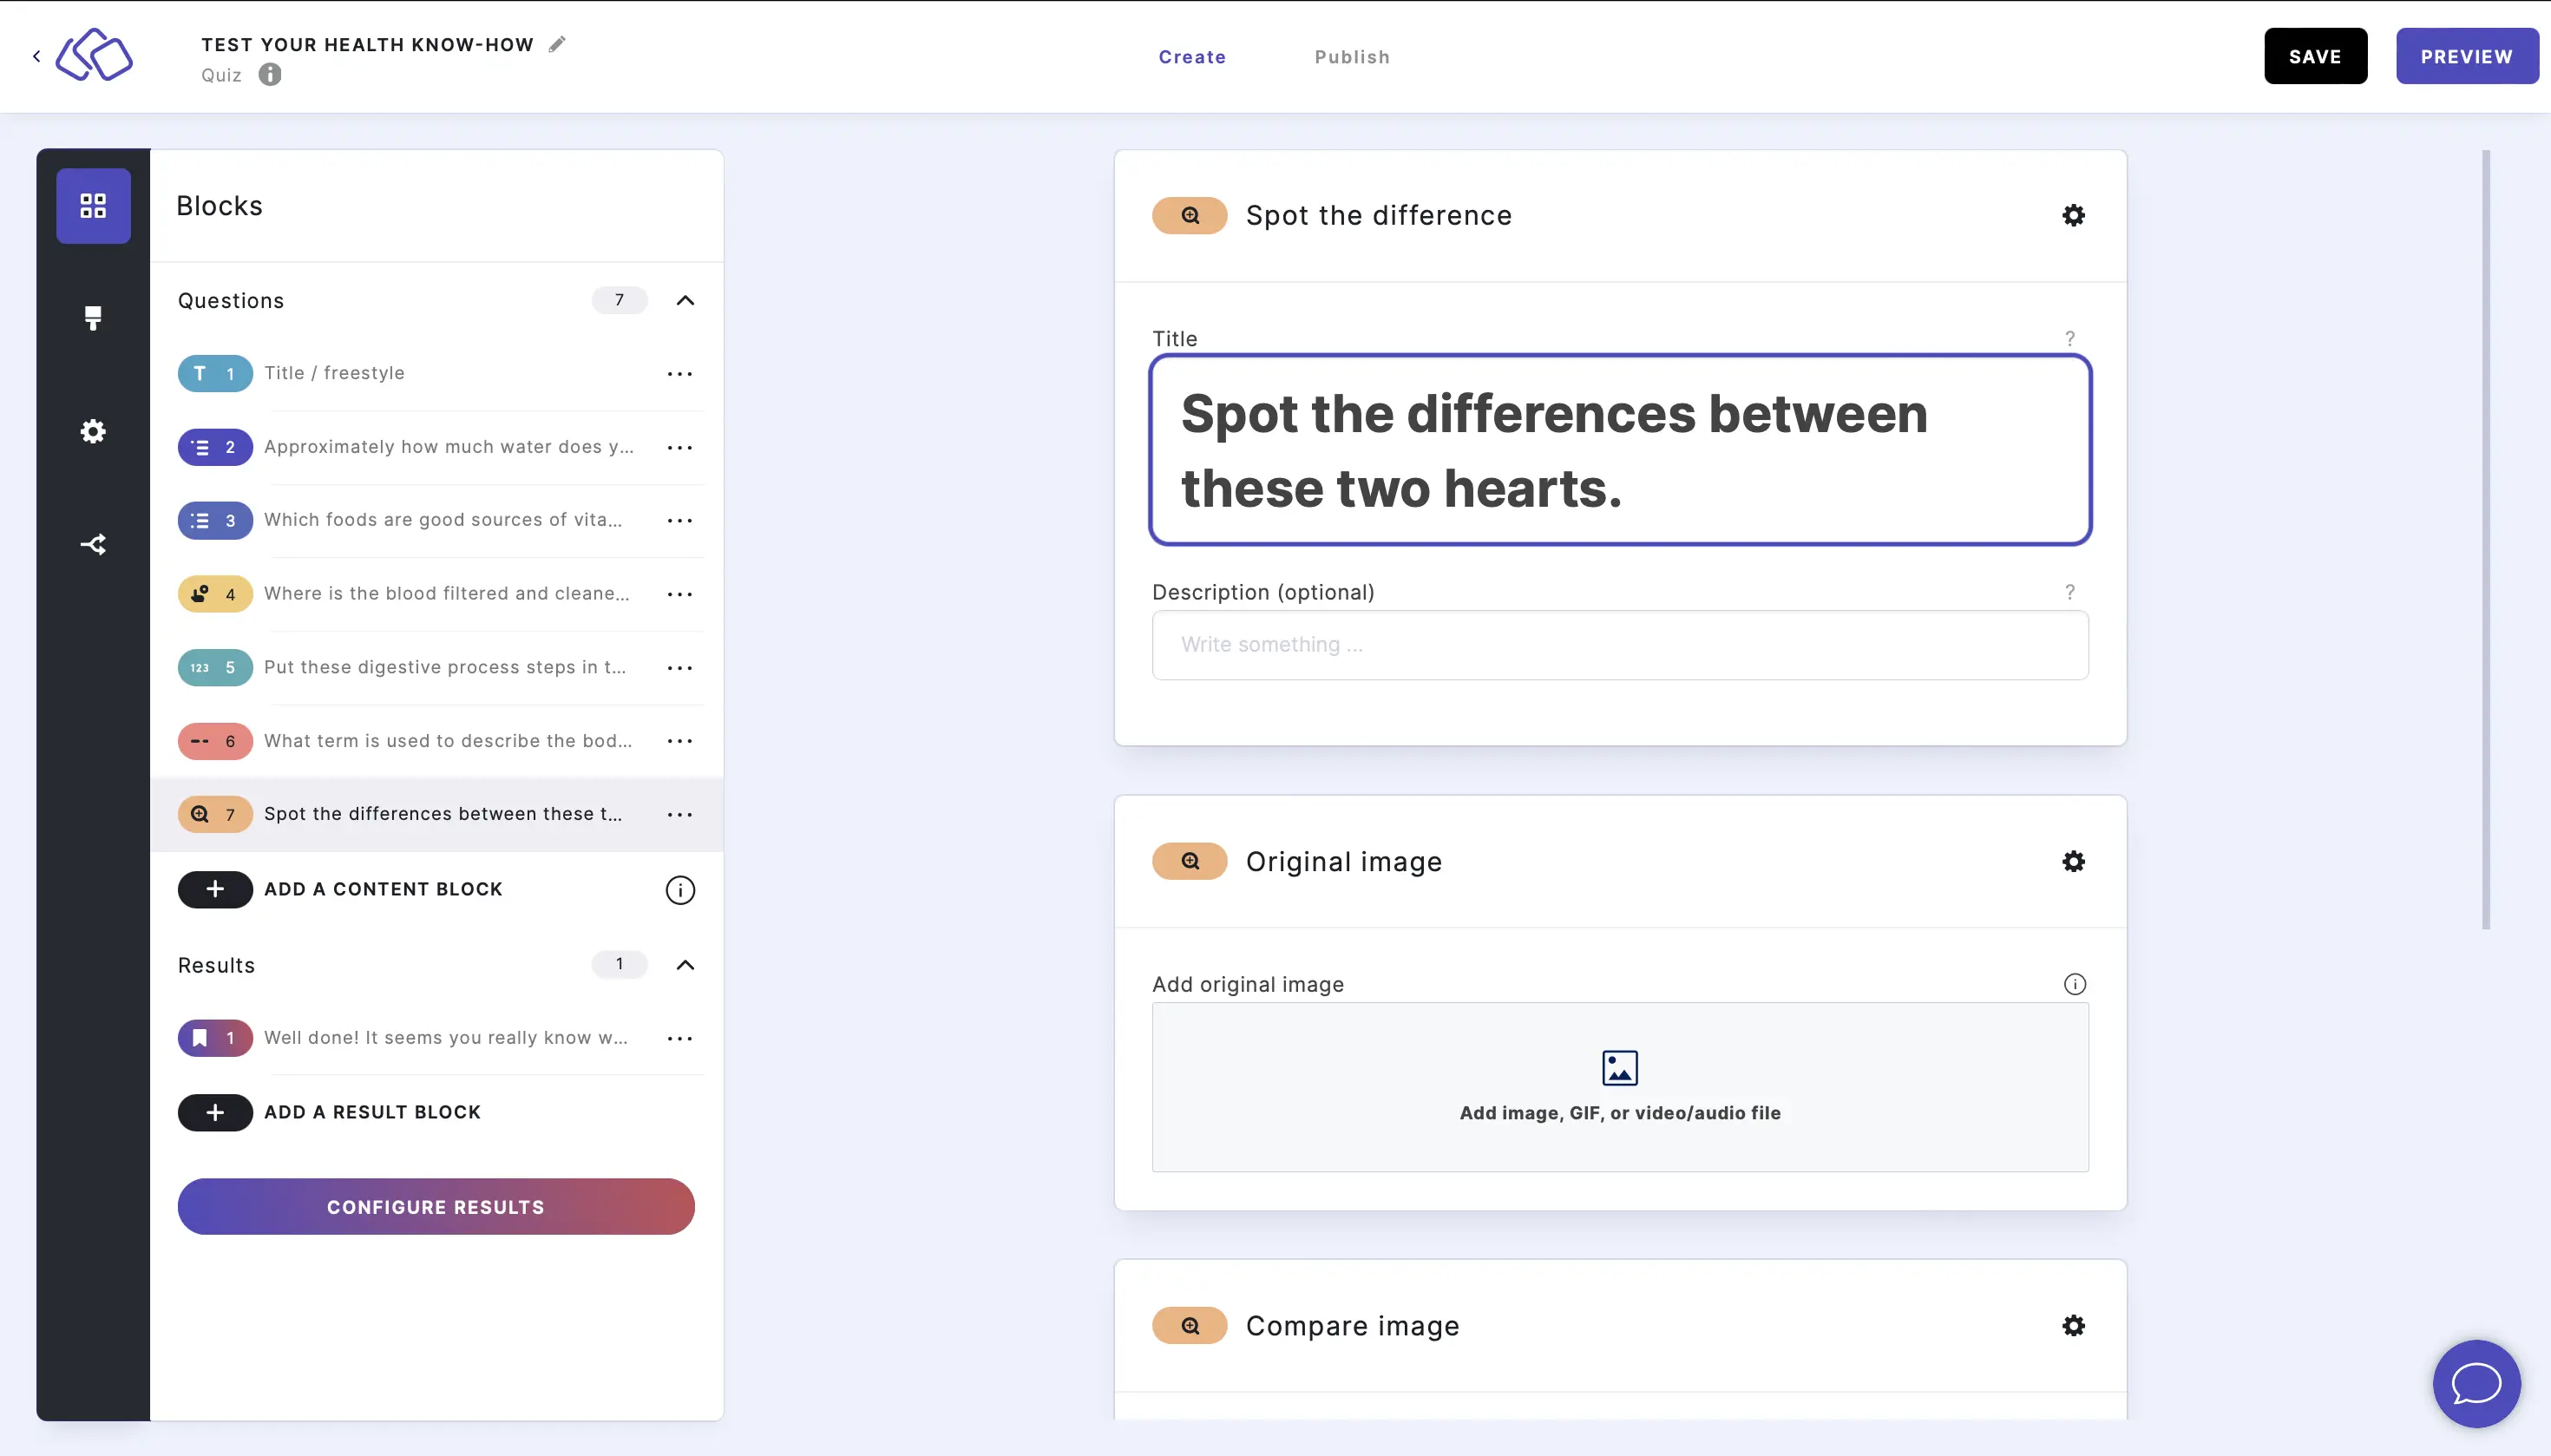
- Insert an image into the Image field.
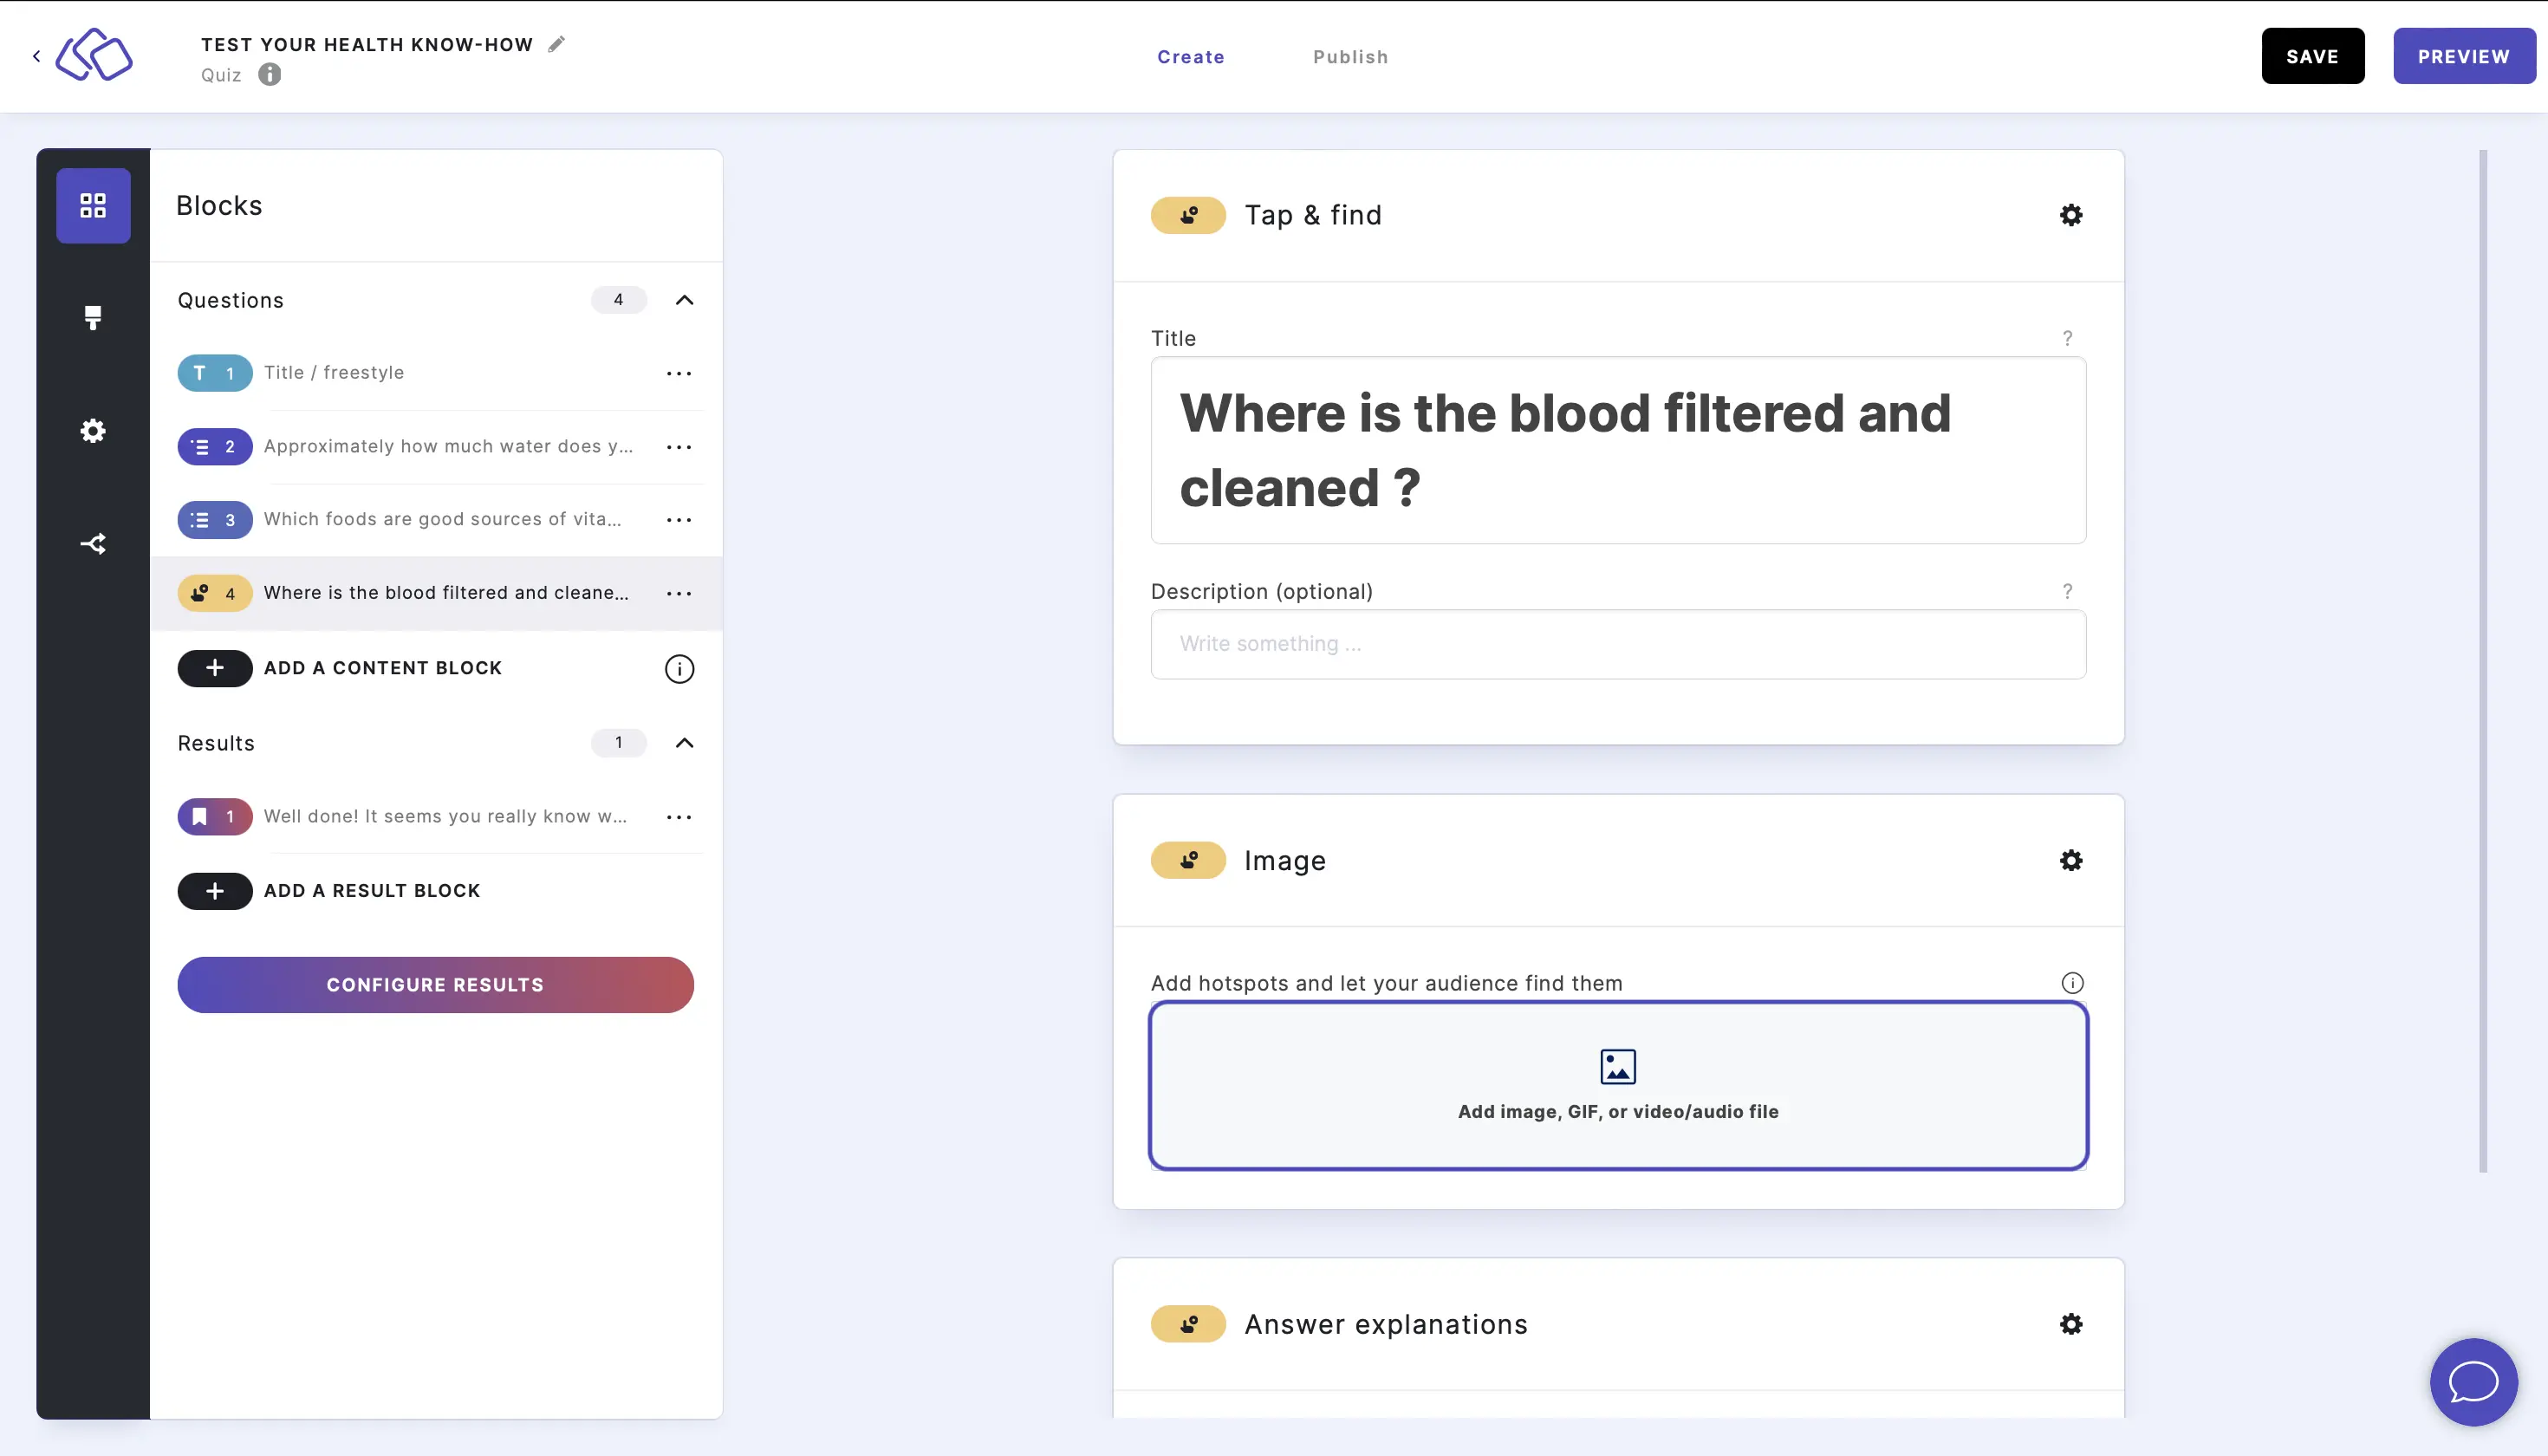
A circular hotspot will appear which you can click and drag to the right place for a correct answer. - Click on Add a hotspot and repeat the process for as many points on the picture as you like. To delete a hotspot, click on the three dots next to the hotspot and then DELETE.
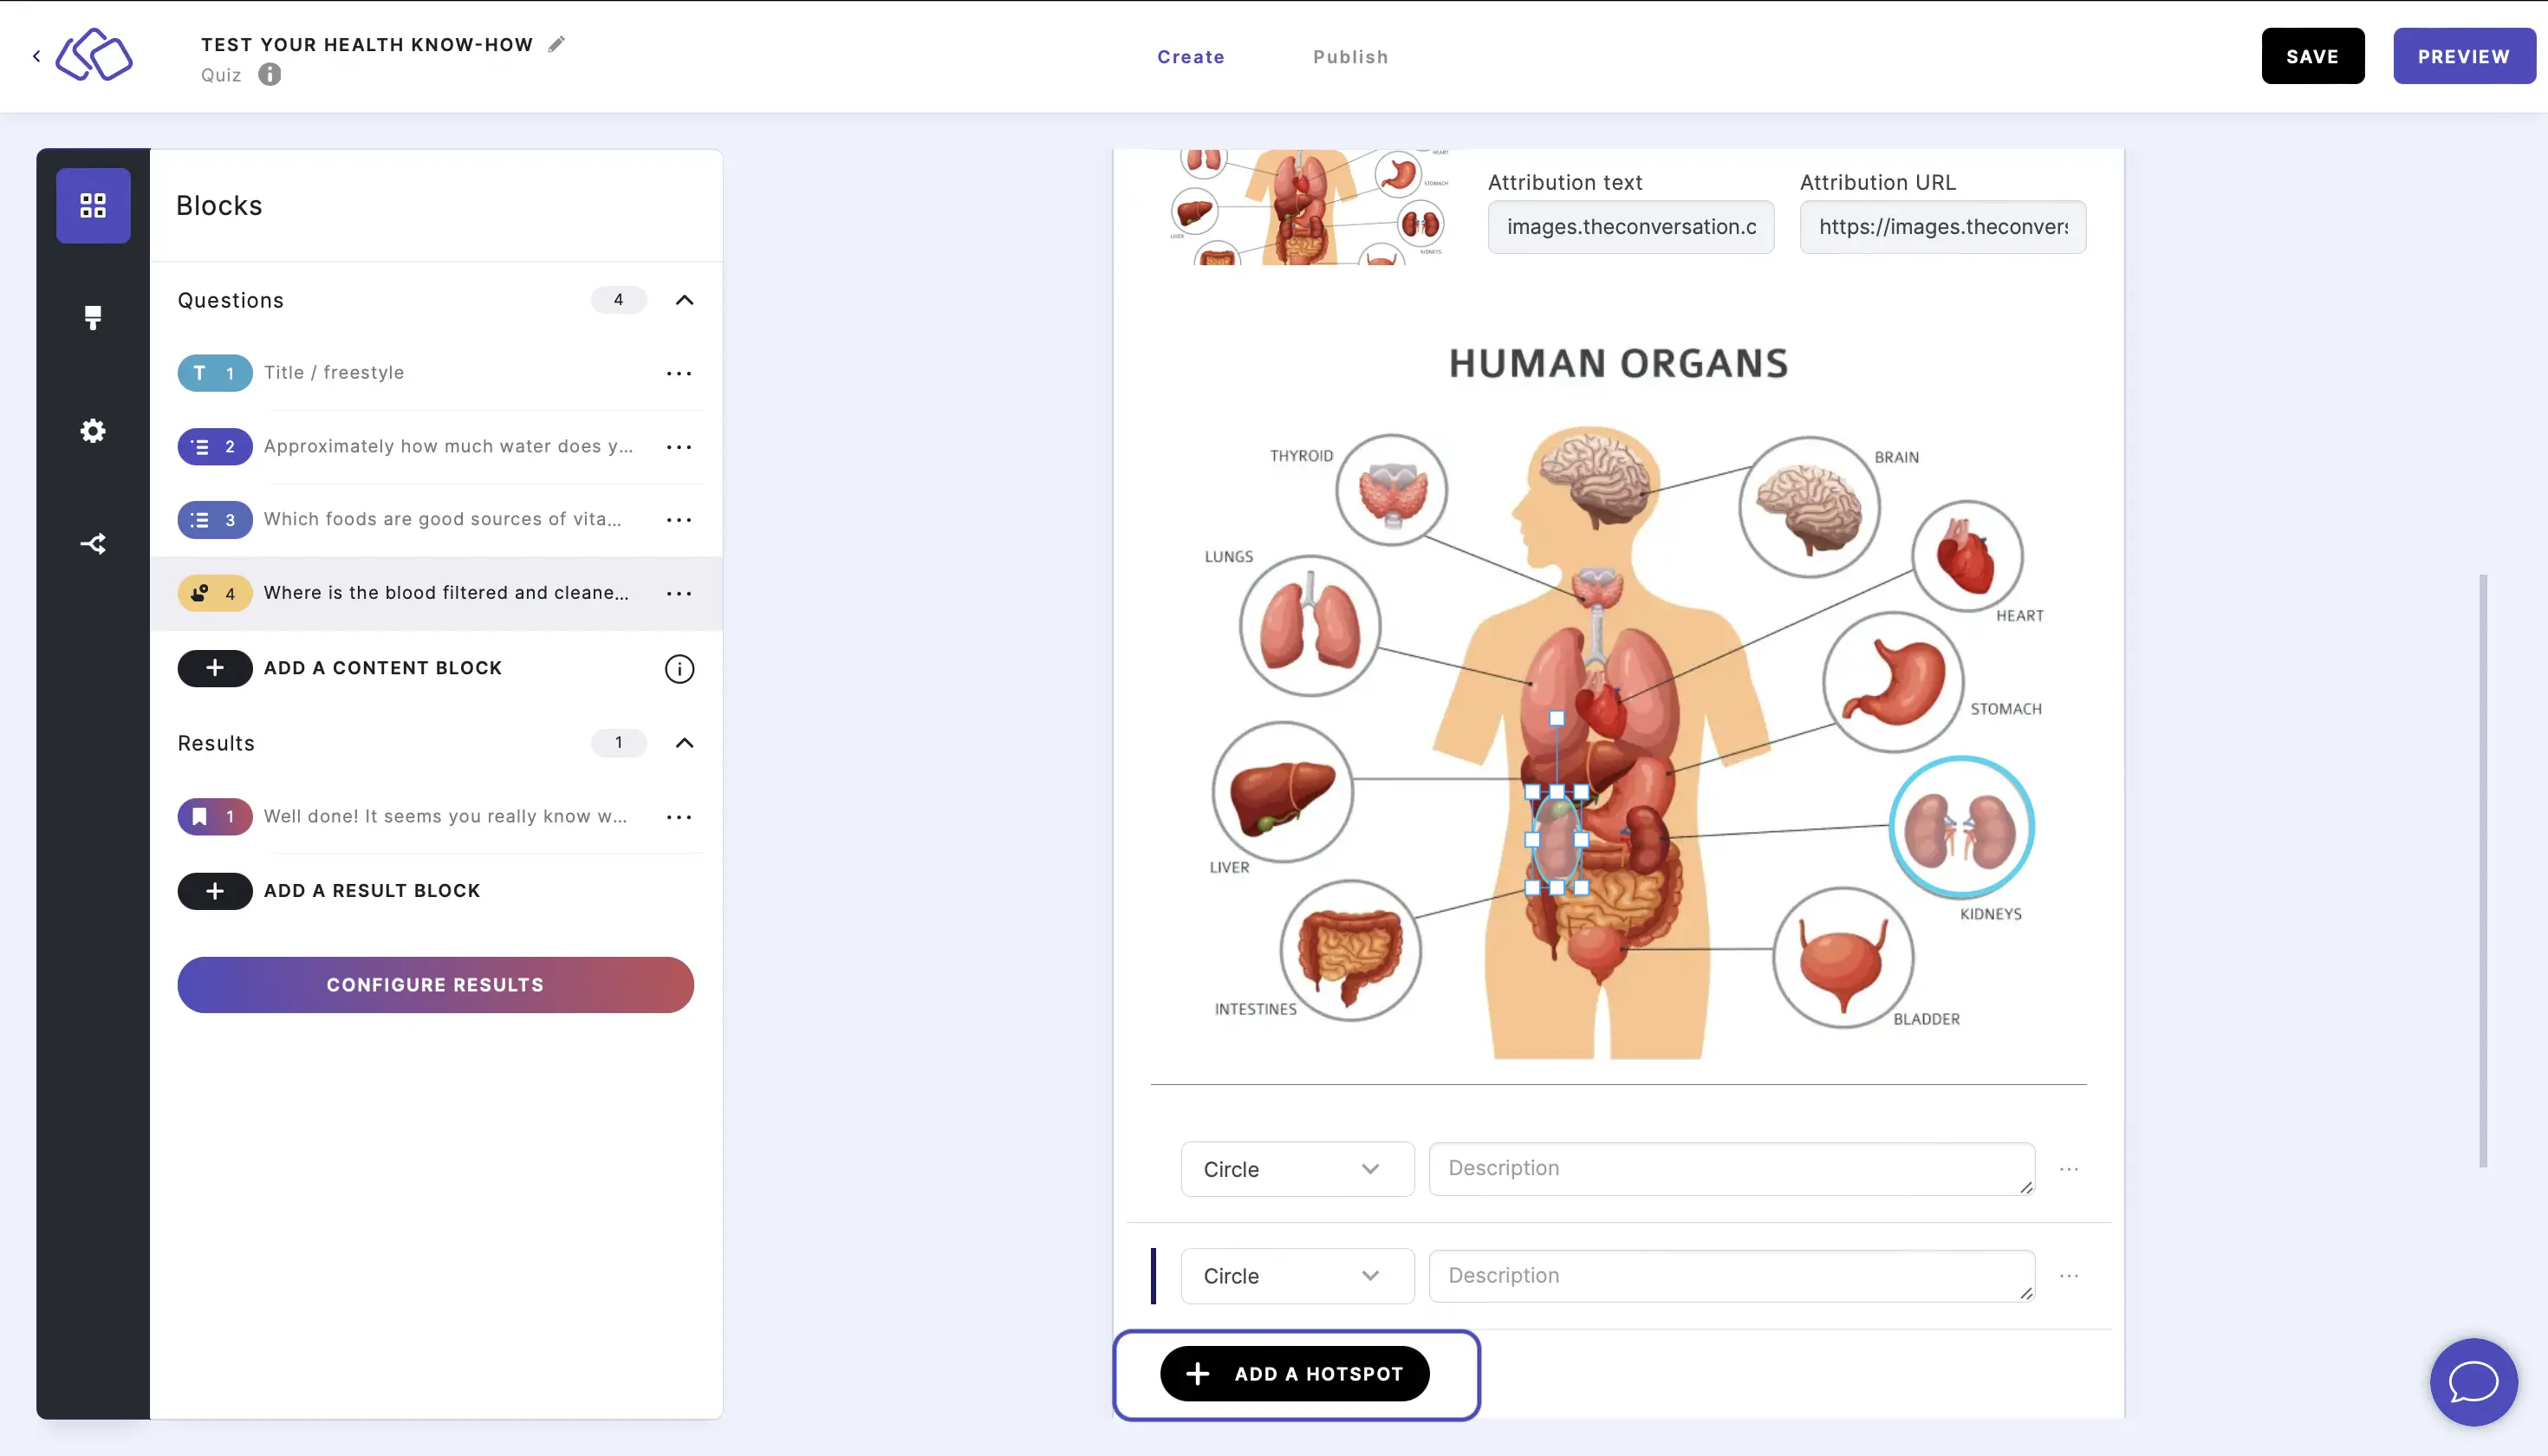
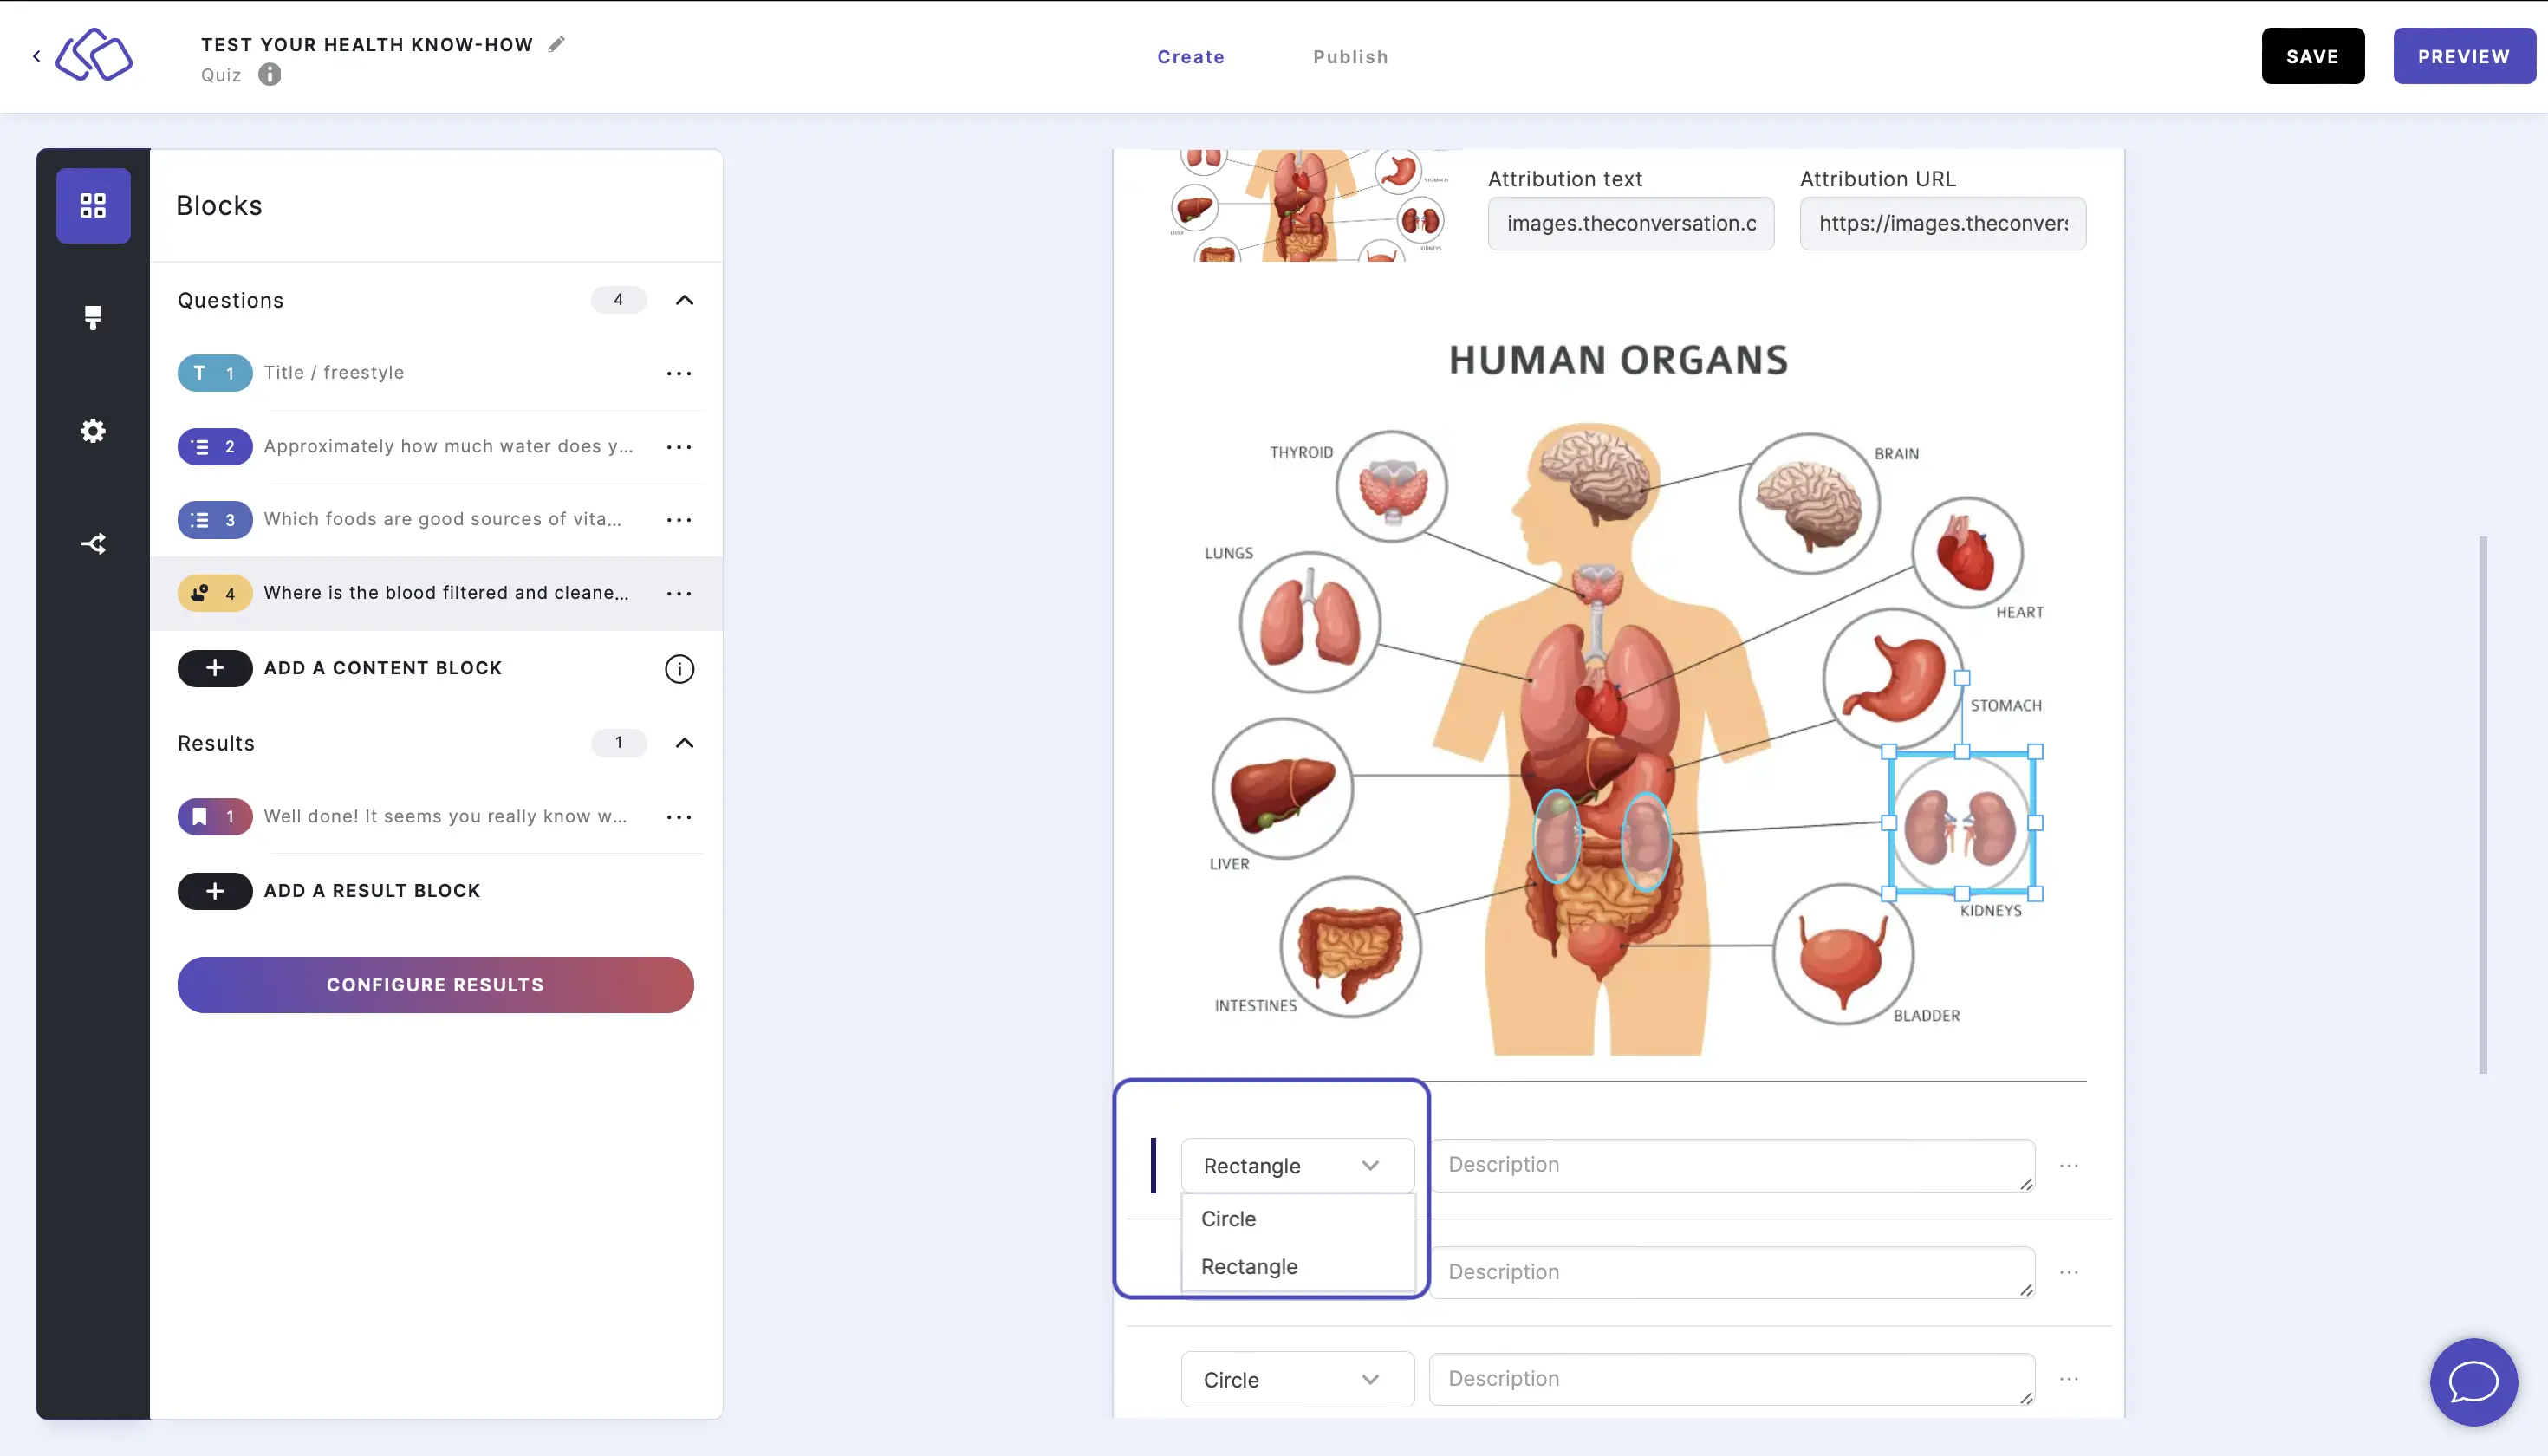
- Change the hotspot from a circle to a rectangle by selecting Rectangle from the dropdown menu under the image.
GUESSES:
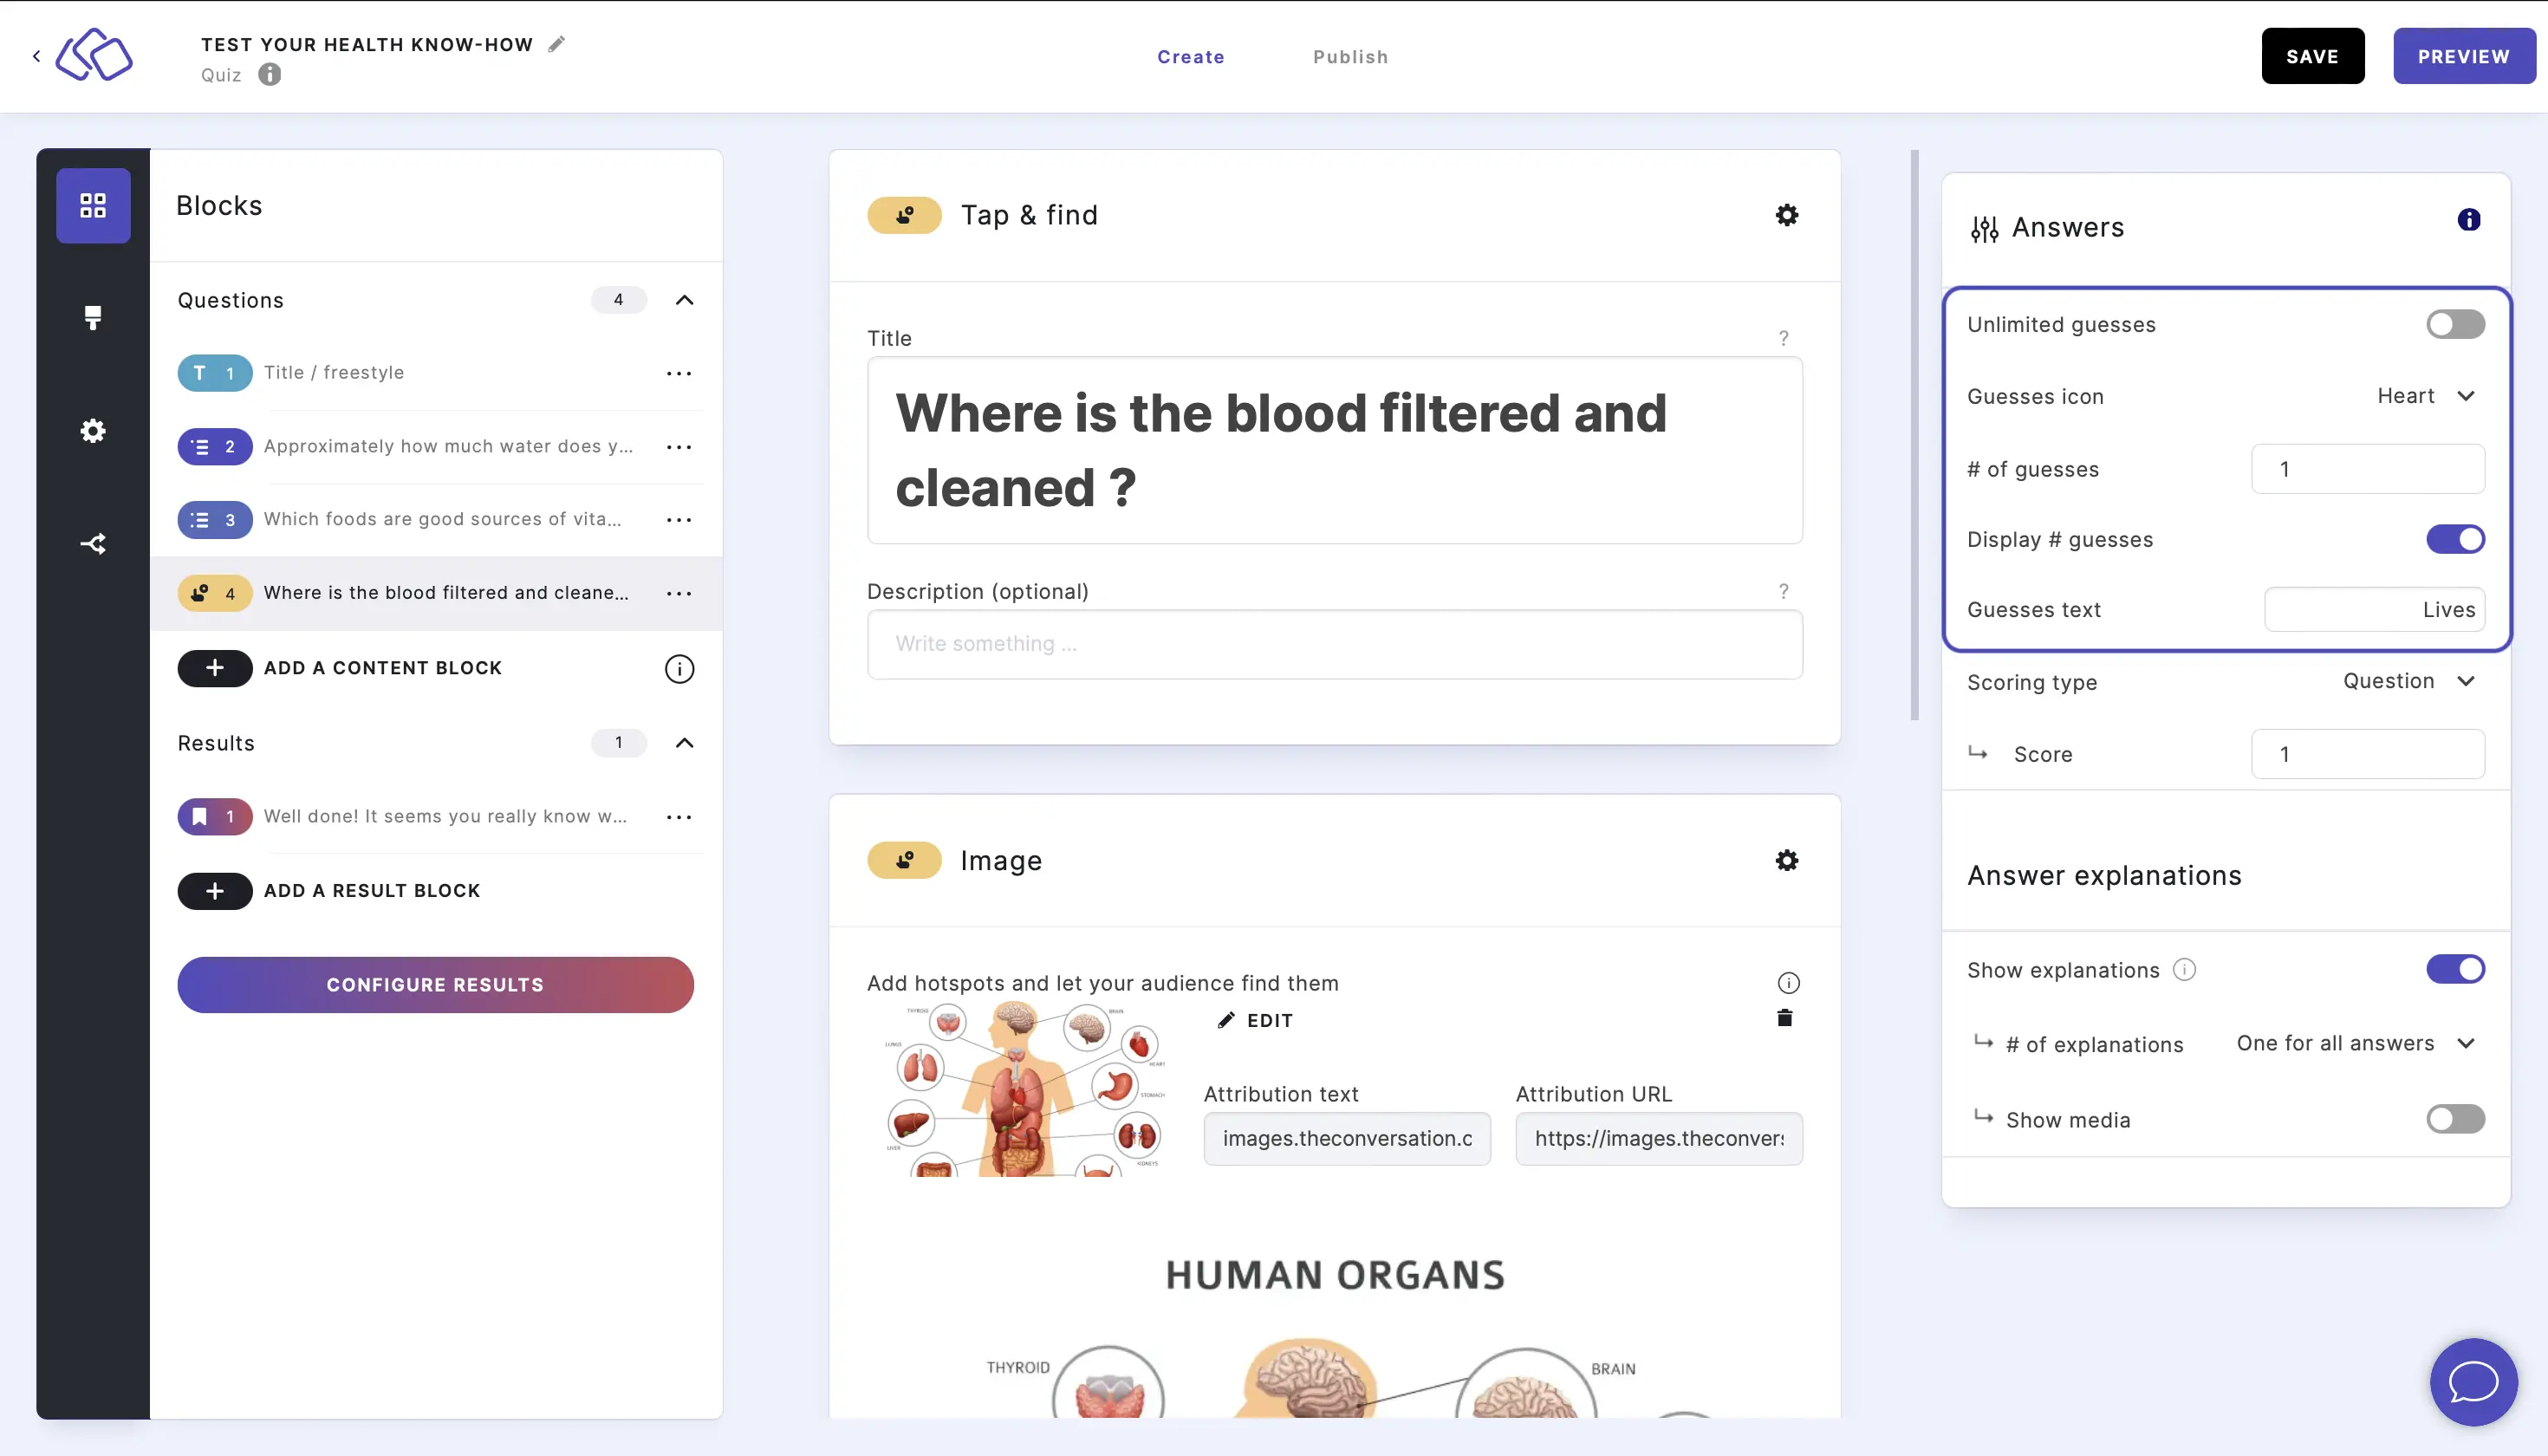
By default, your audience has one guess. To change this, go to the options icon on the right of Answer Content.
To change the number of guesses, type a number in the # of guesses or enable Unlimited guesses. To change the icon or text, select a Guesses icon and enter a Guesses text.
HINTS: You can add hints in the HINT (OPTIONAL) field. Users can choose to reveal the hint at any time.
4. Order it
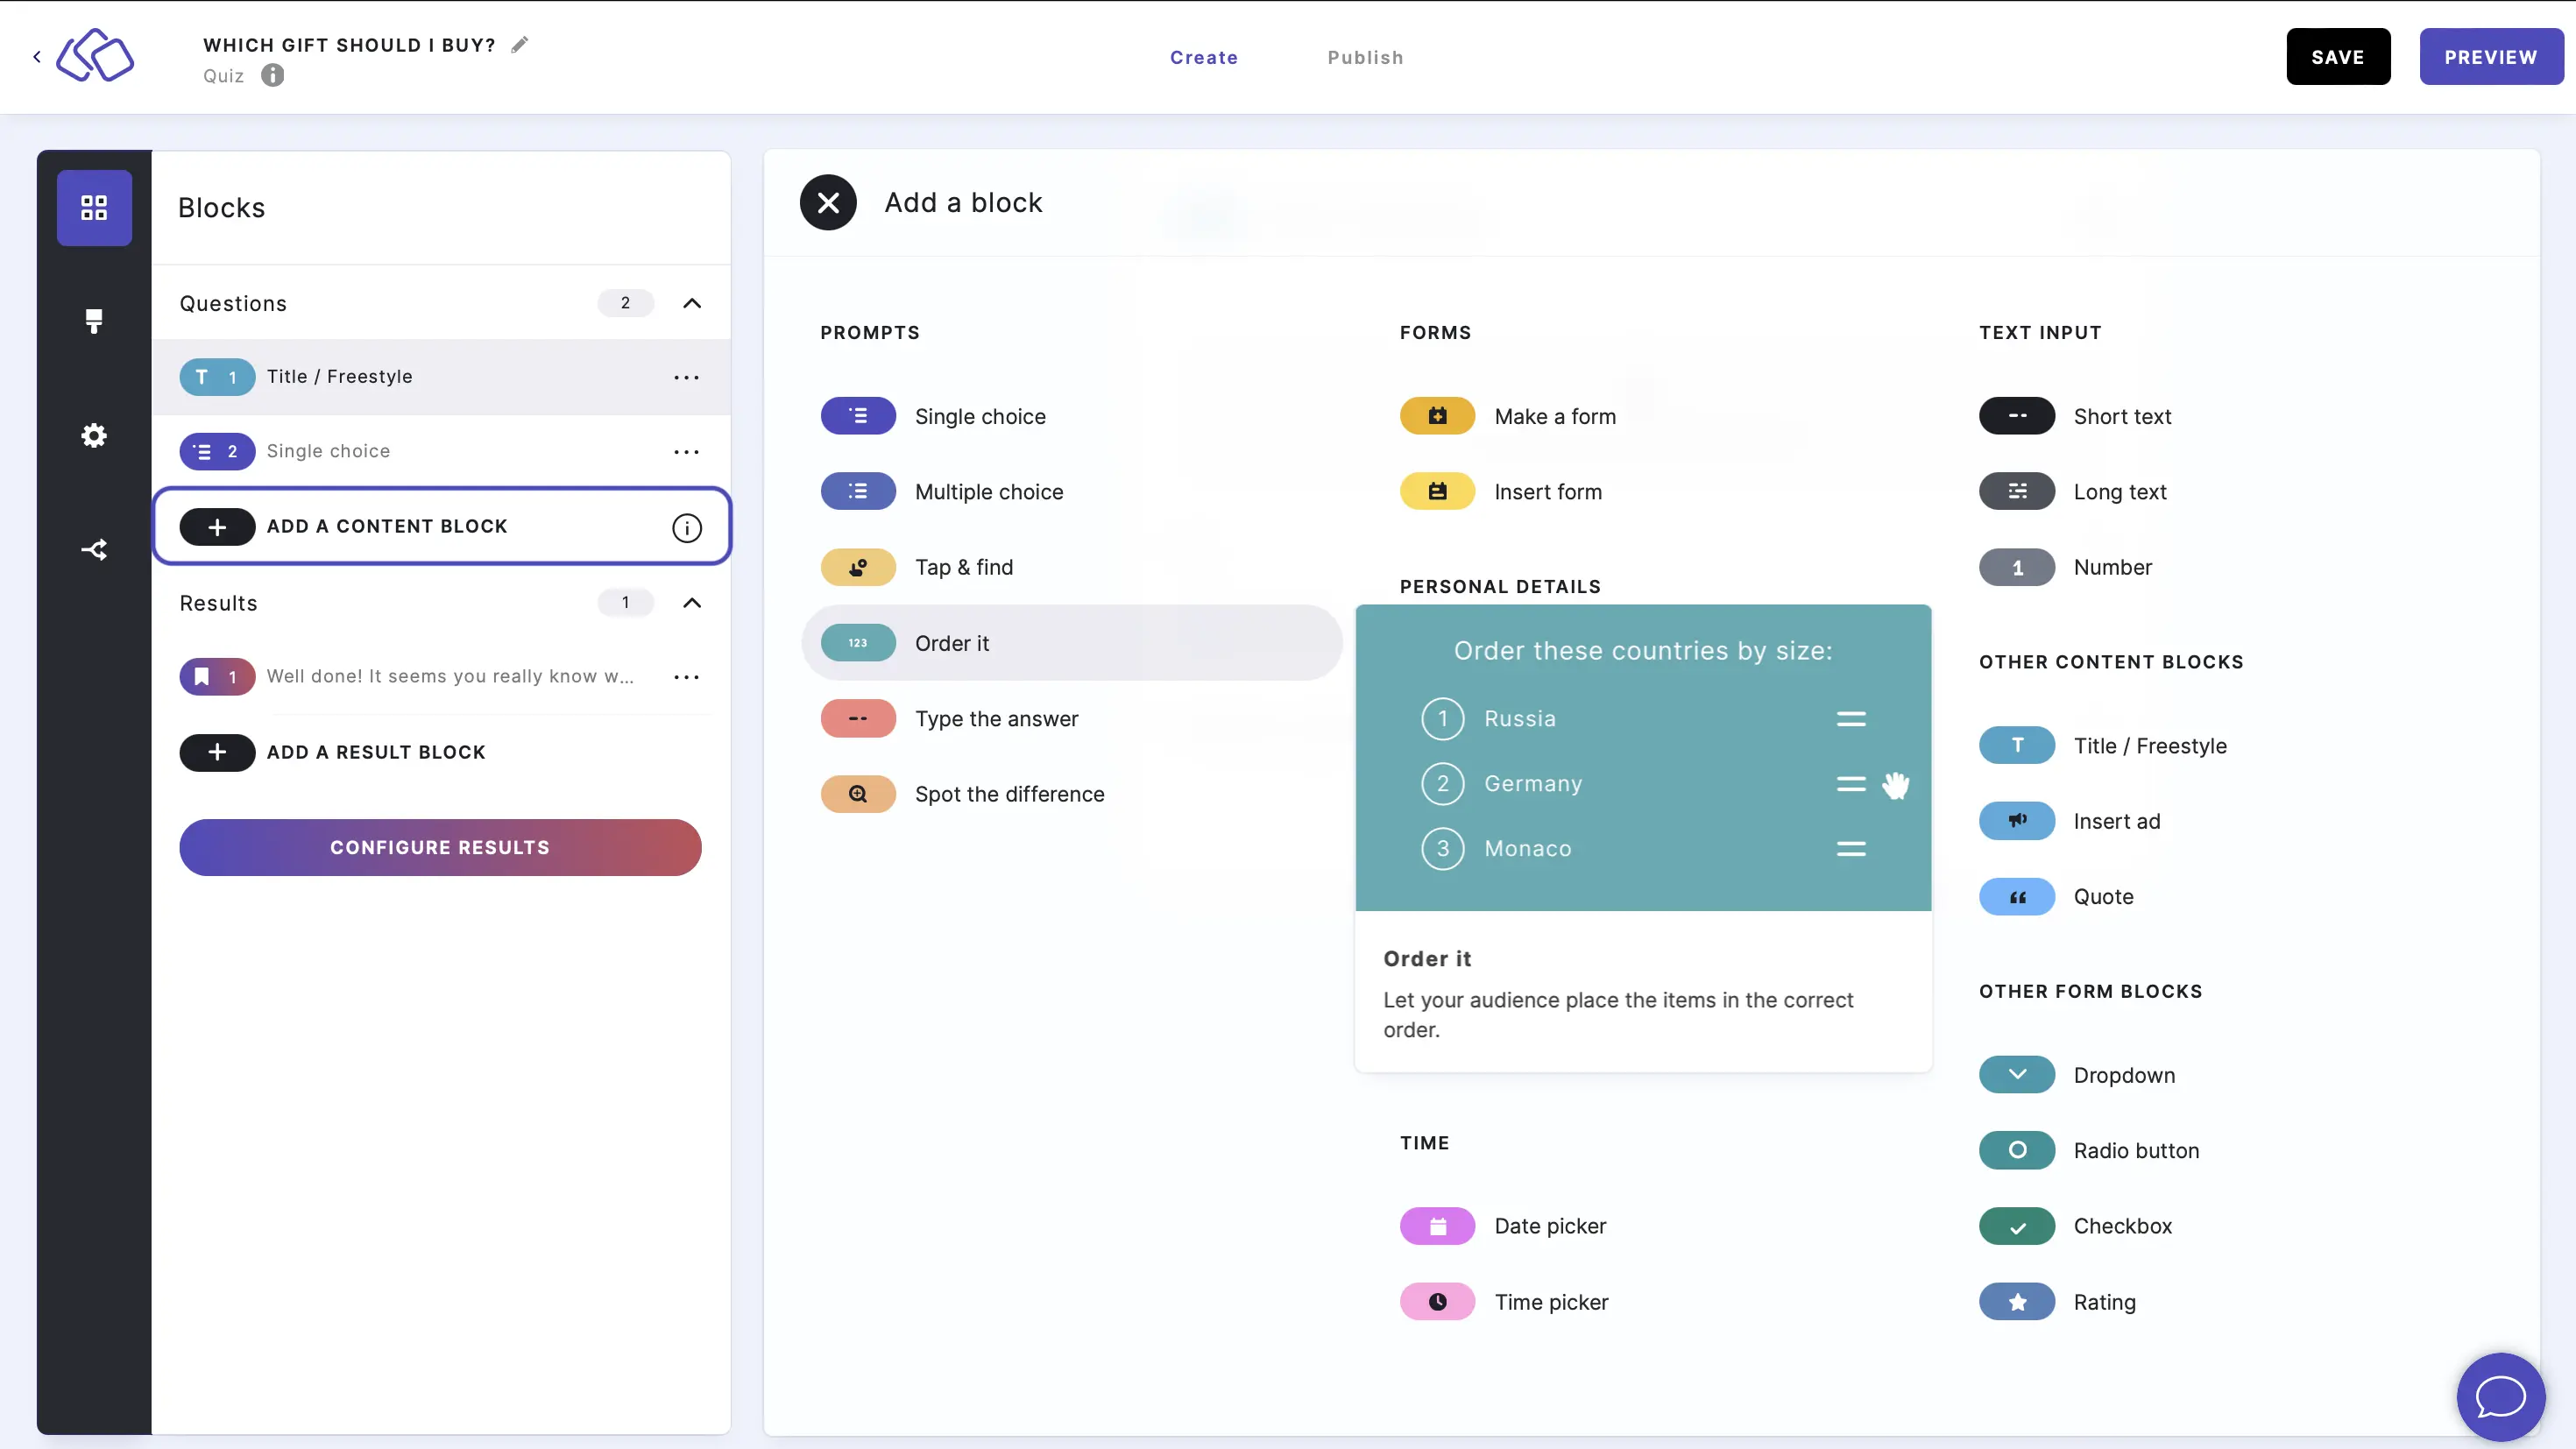
Users have to put the answers in the correct order (e.g. 'Rank these players from lowest to highest scoring.') or order of their choice (e.g. 'Tell us what the best to worst workplace benefits are for employees.').
- Click on ADD A BLOCK and select Order-it block.
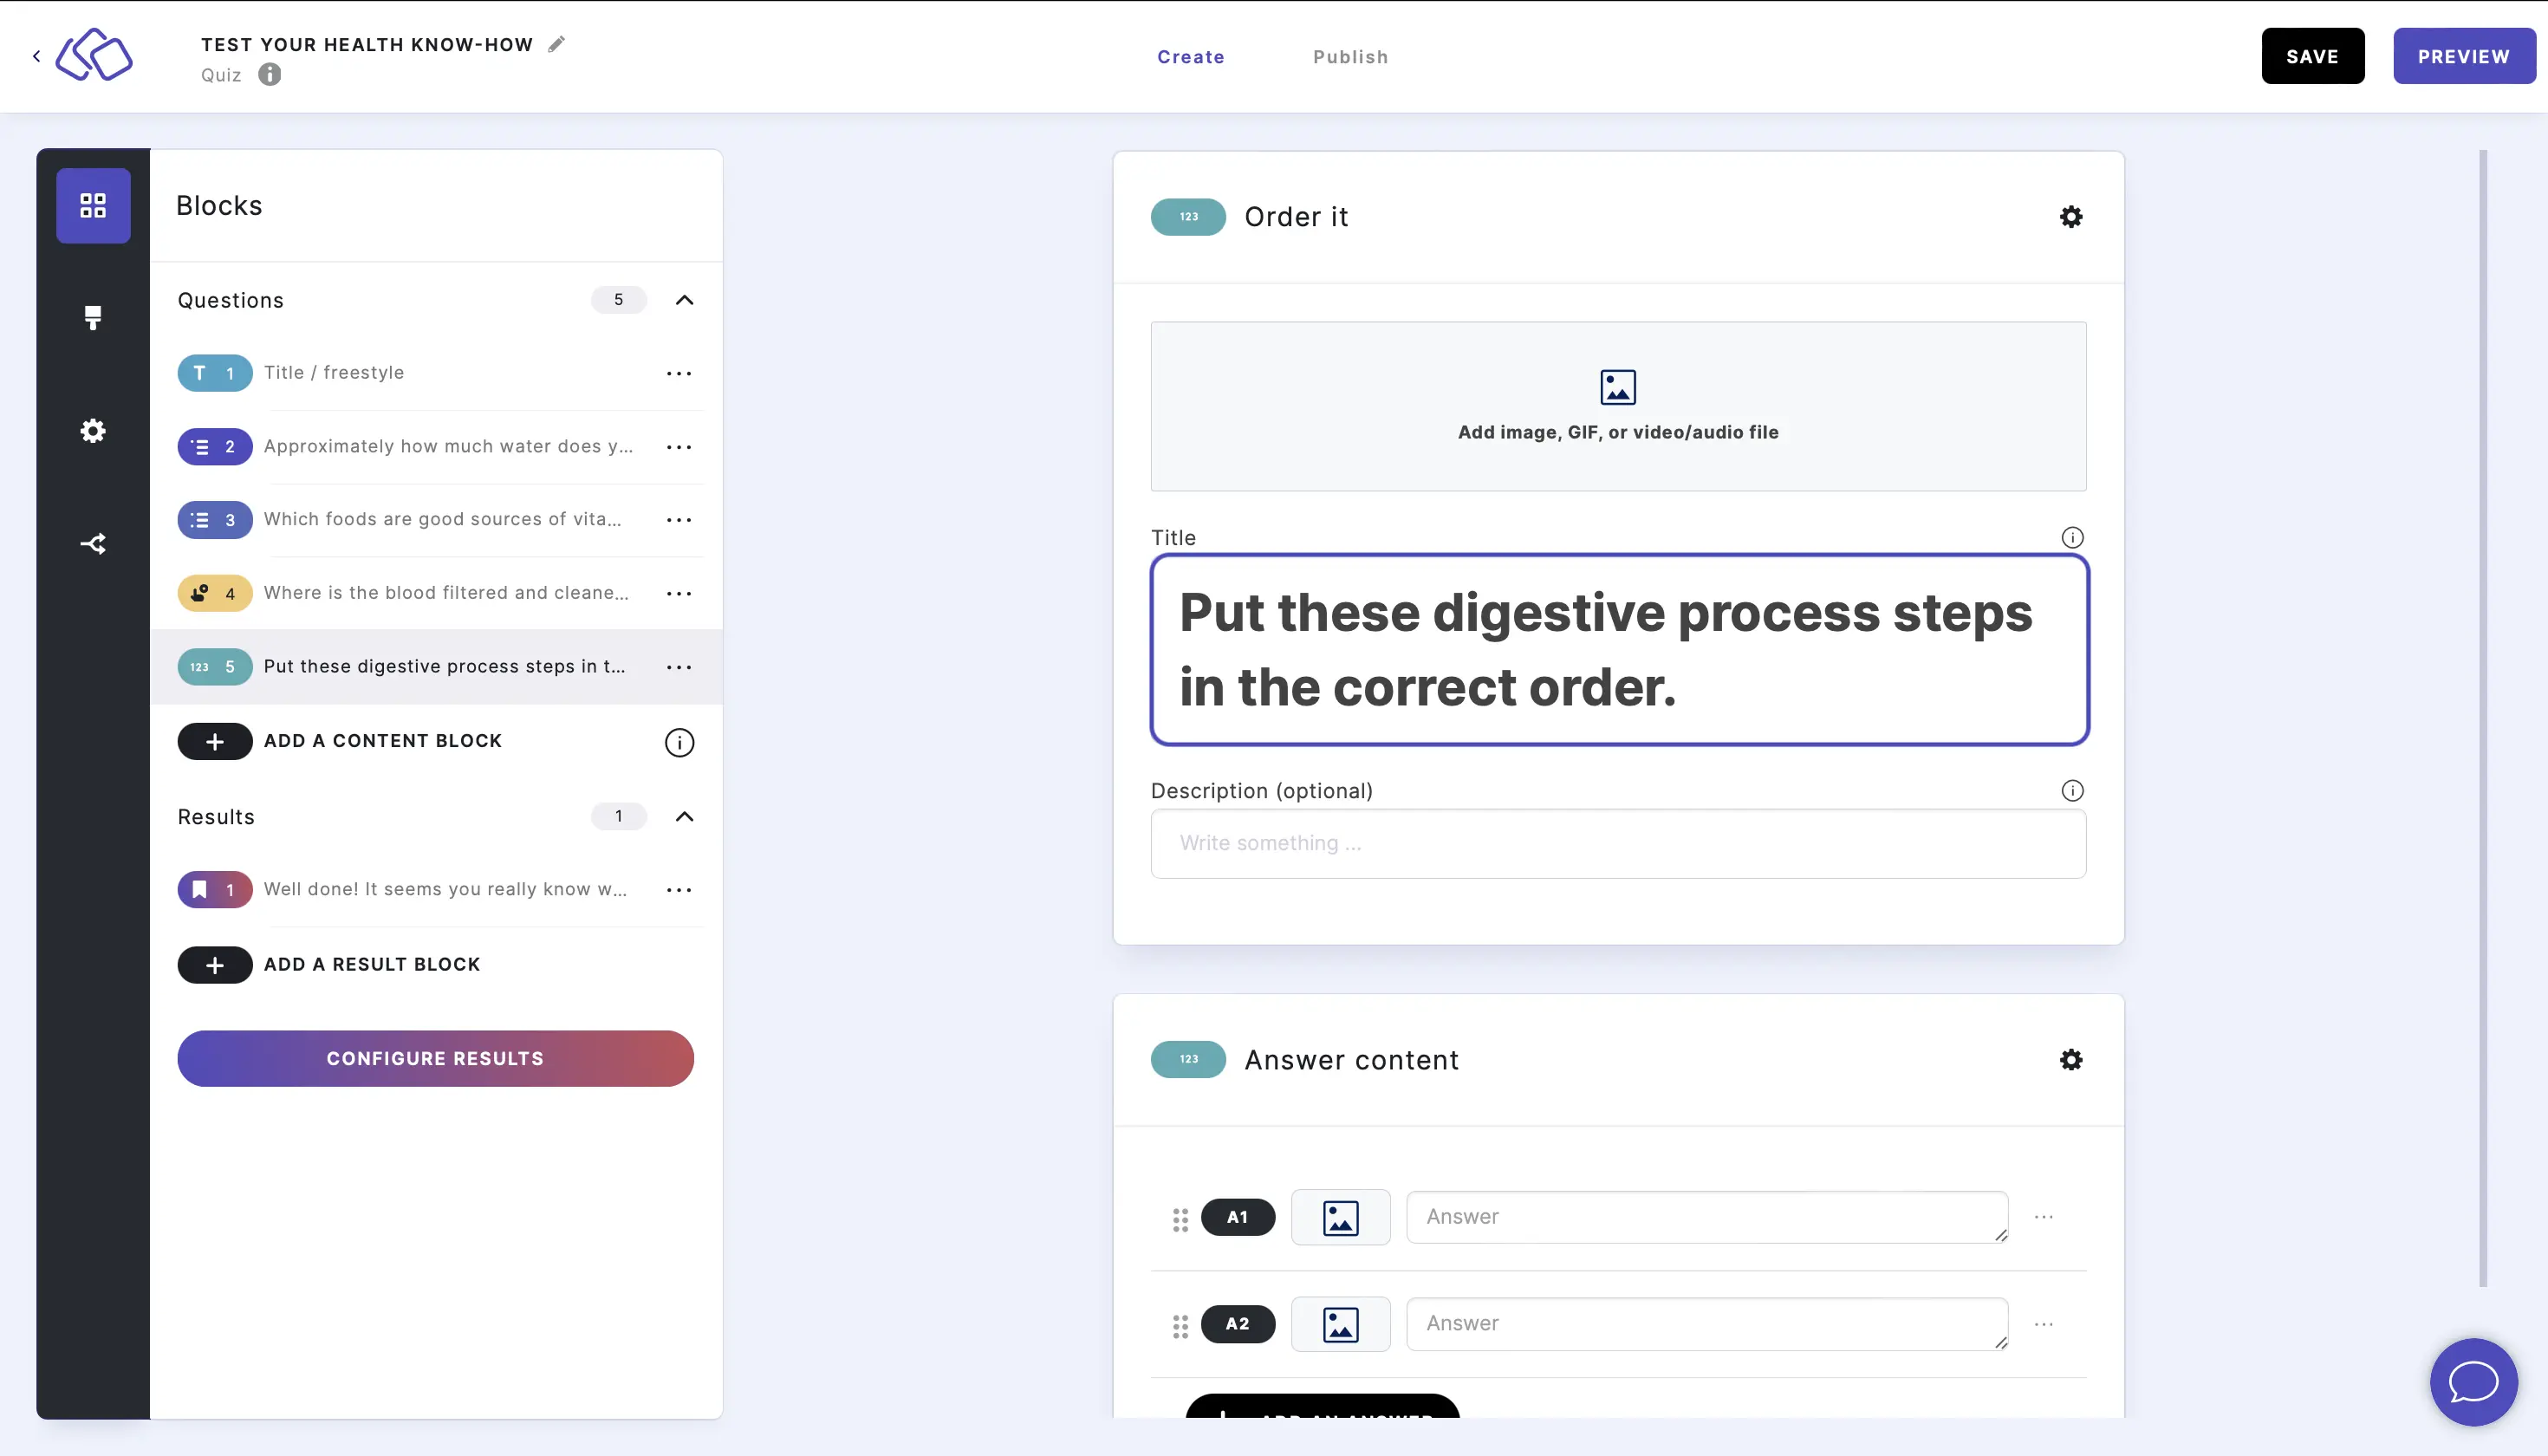
- Insert a question into the Title field.
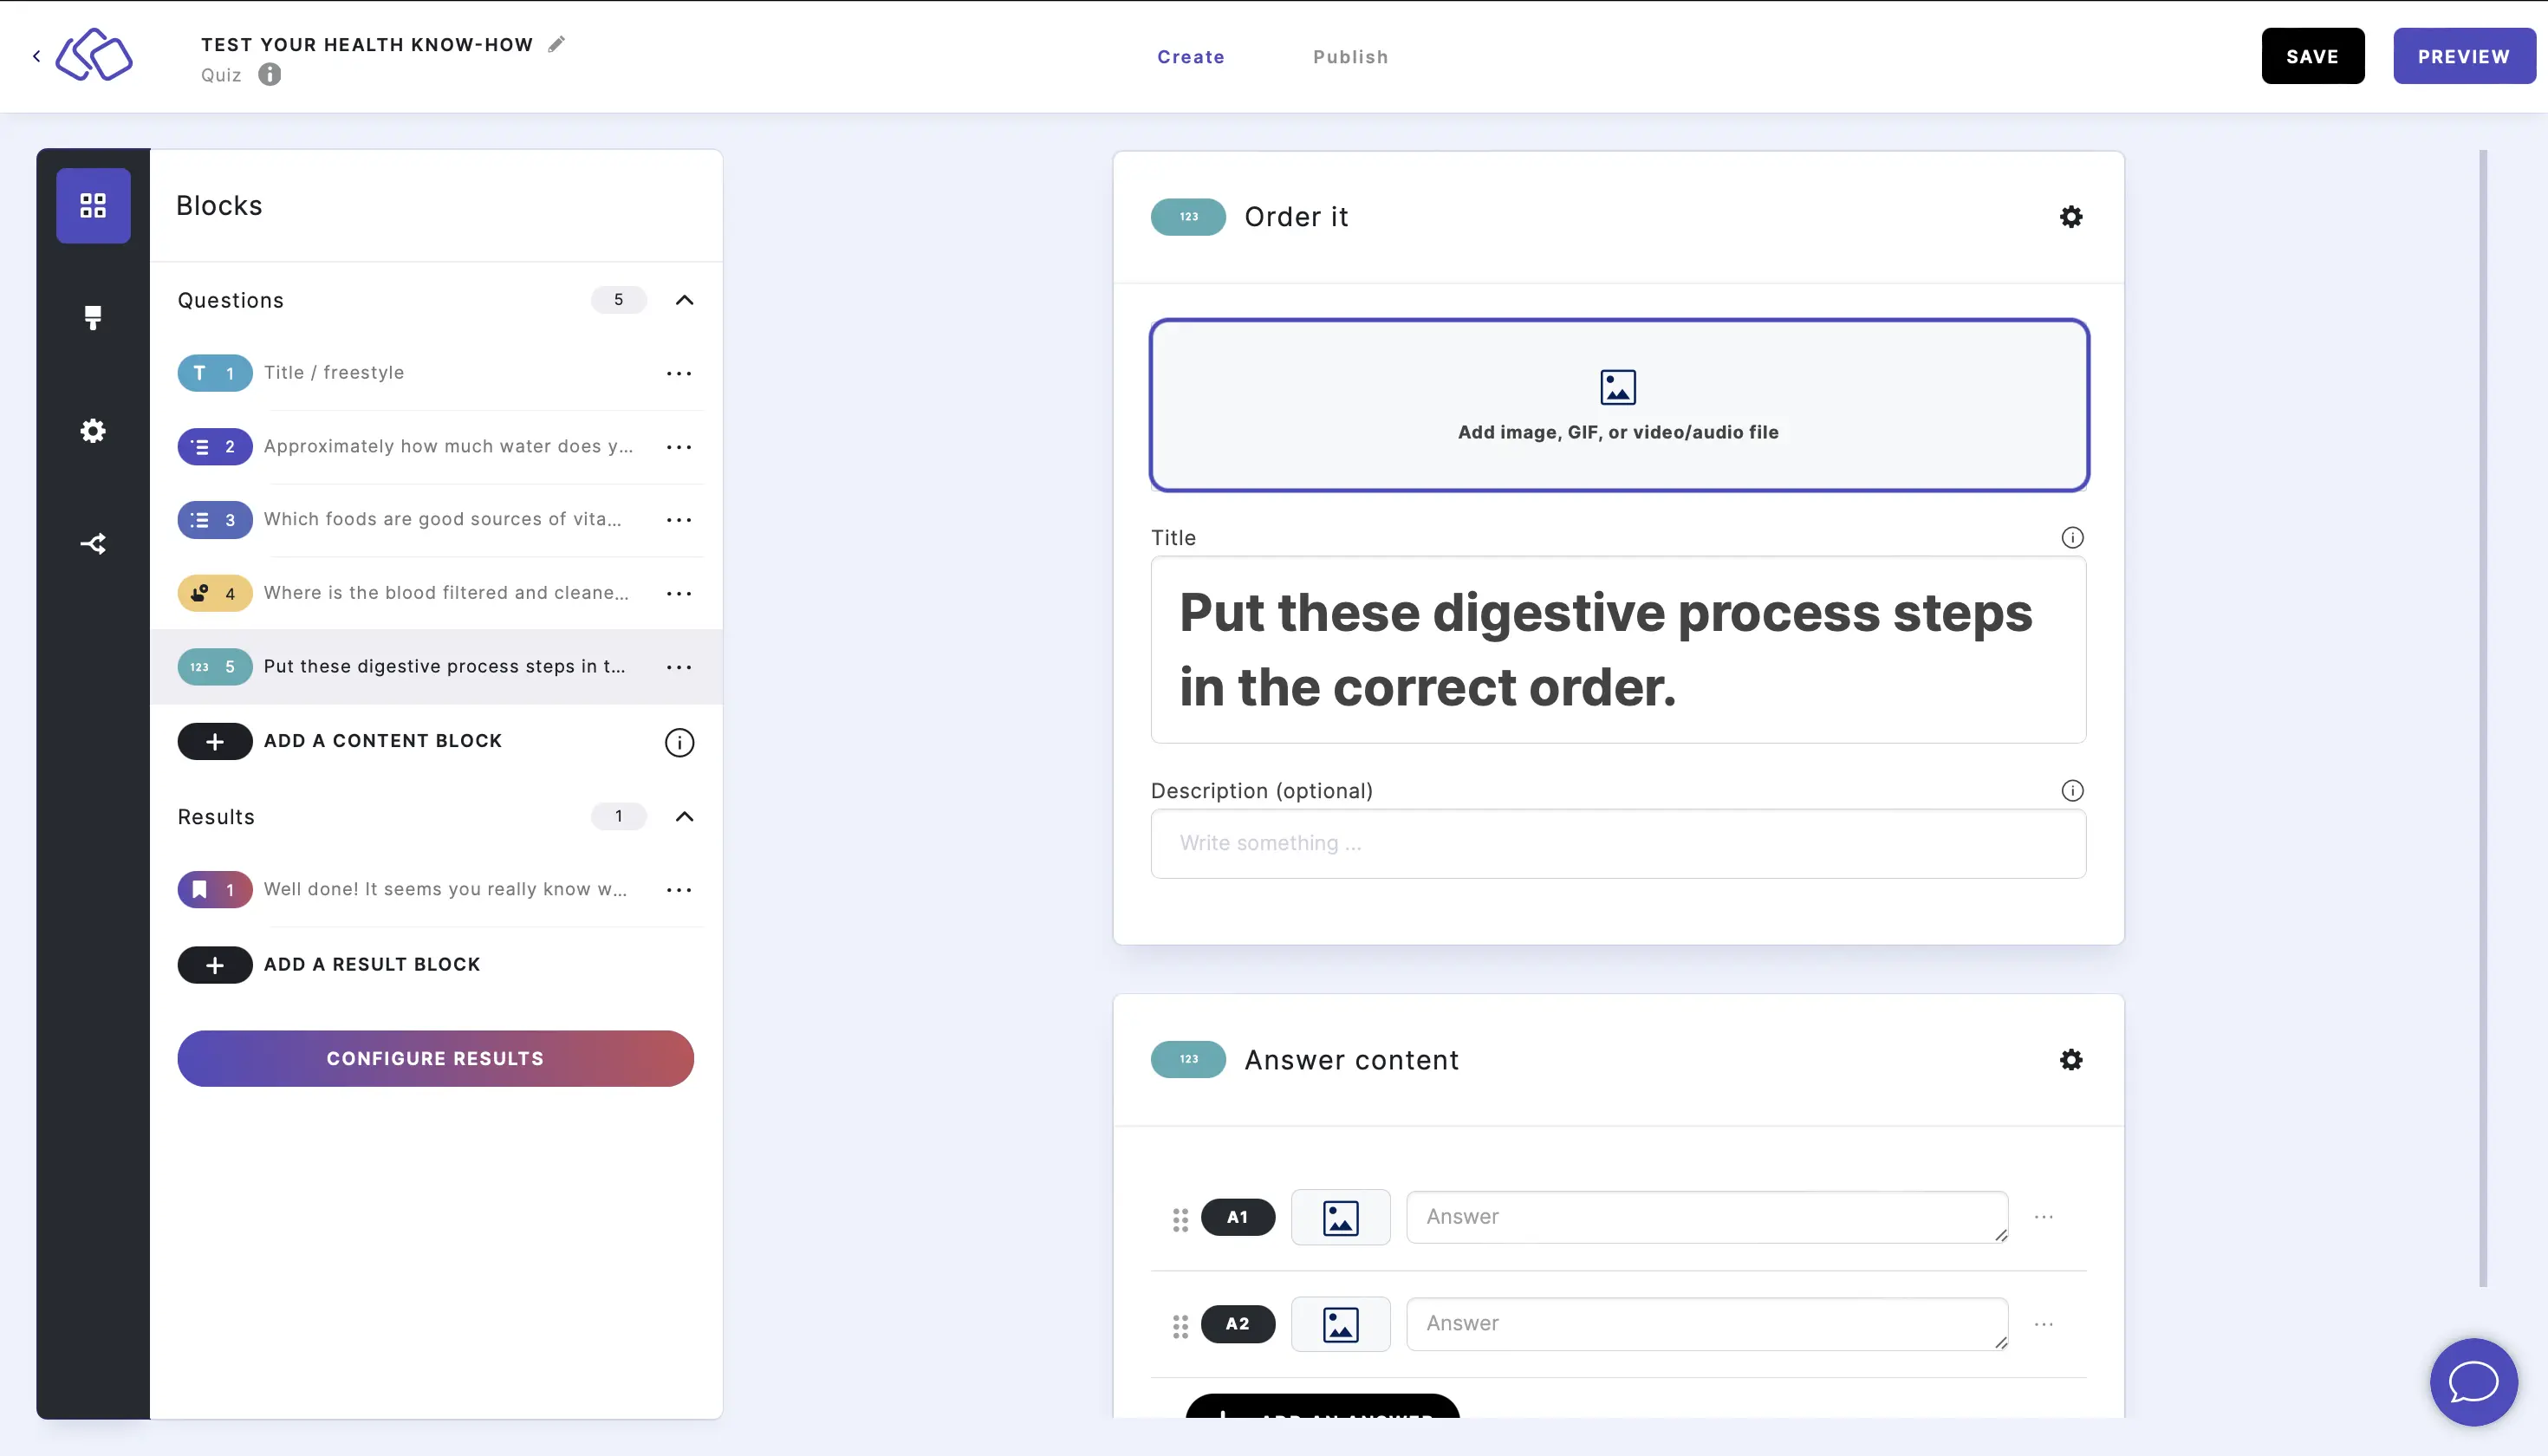
- Add an image by clicking on Add image, GIF, or video/audio file.
- Insert the answers. Add as many answers as you want by clicking on Add an answer.
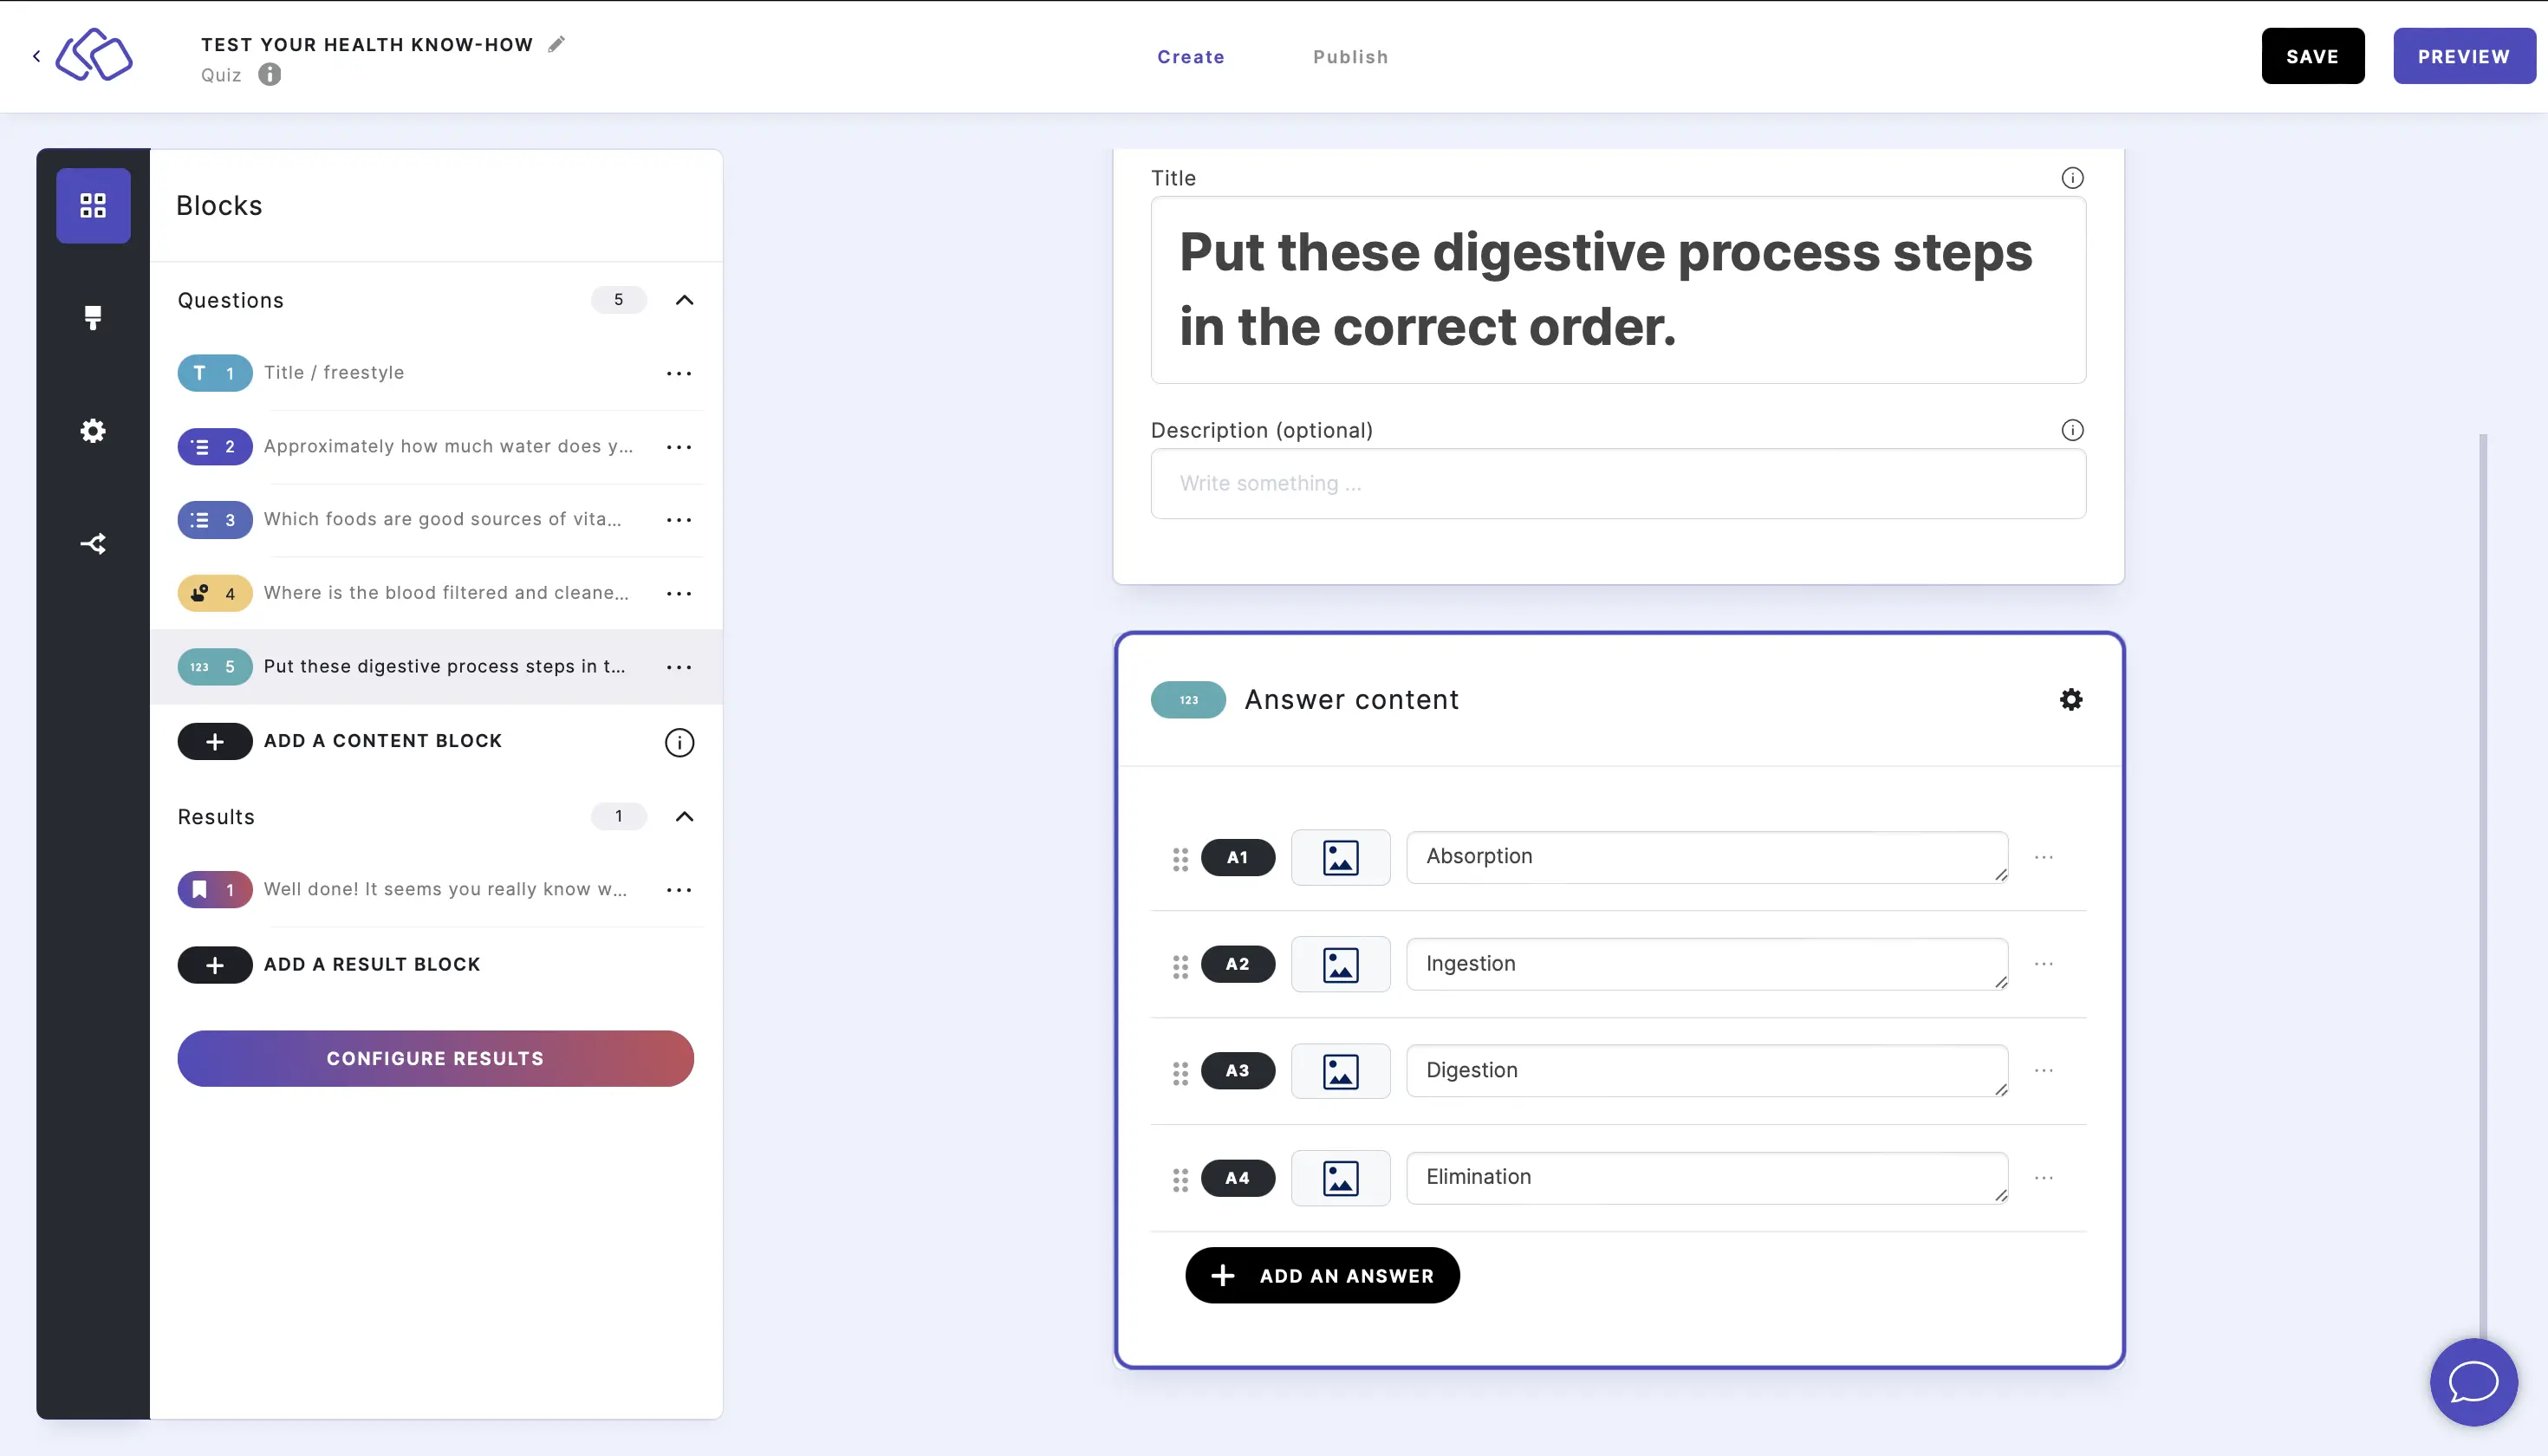
RANK:
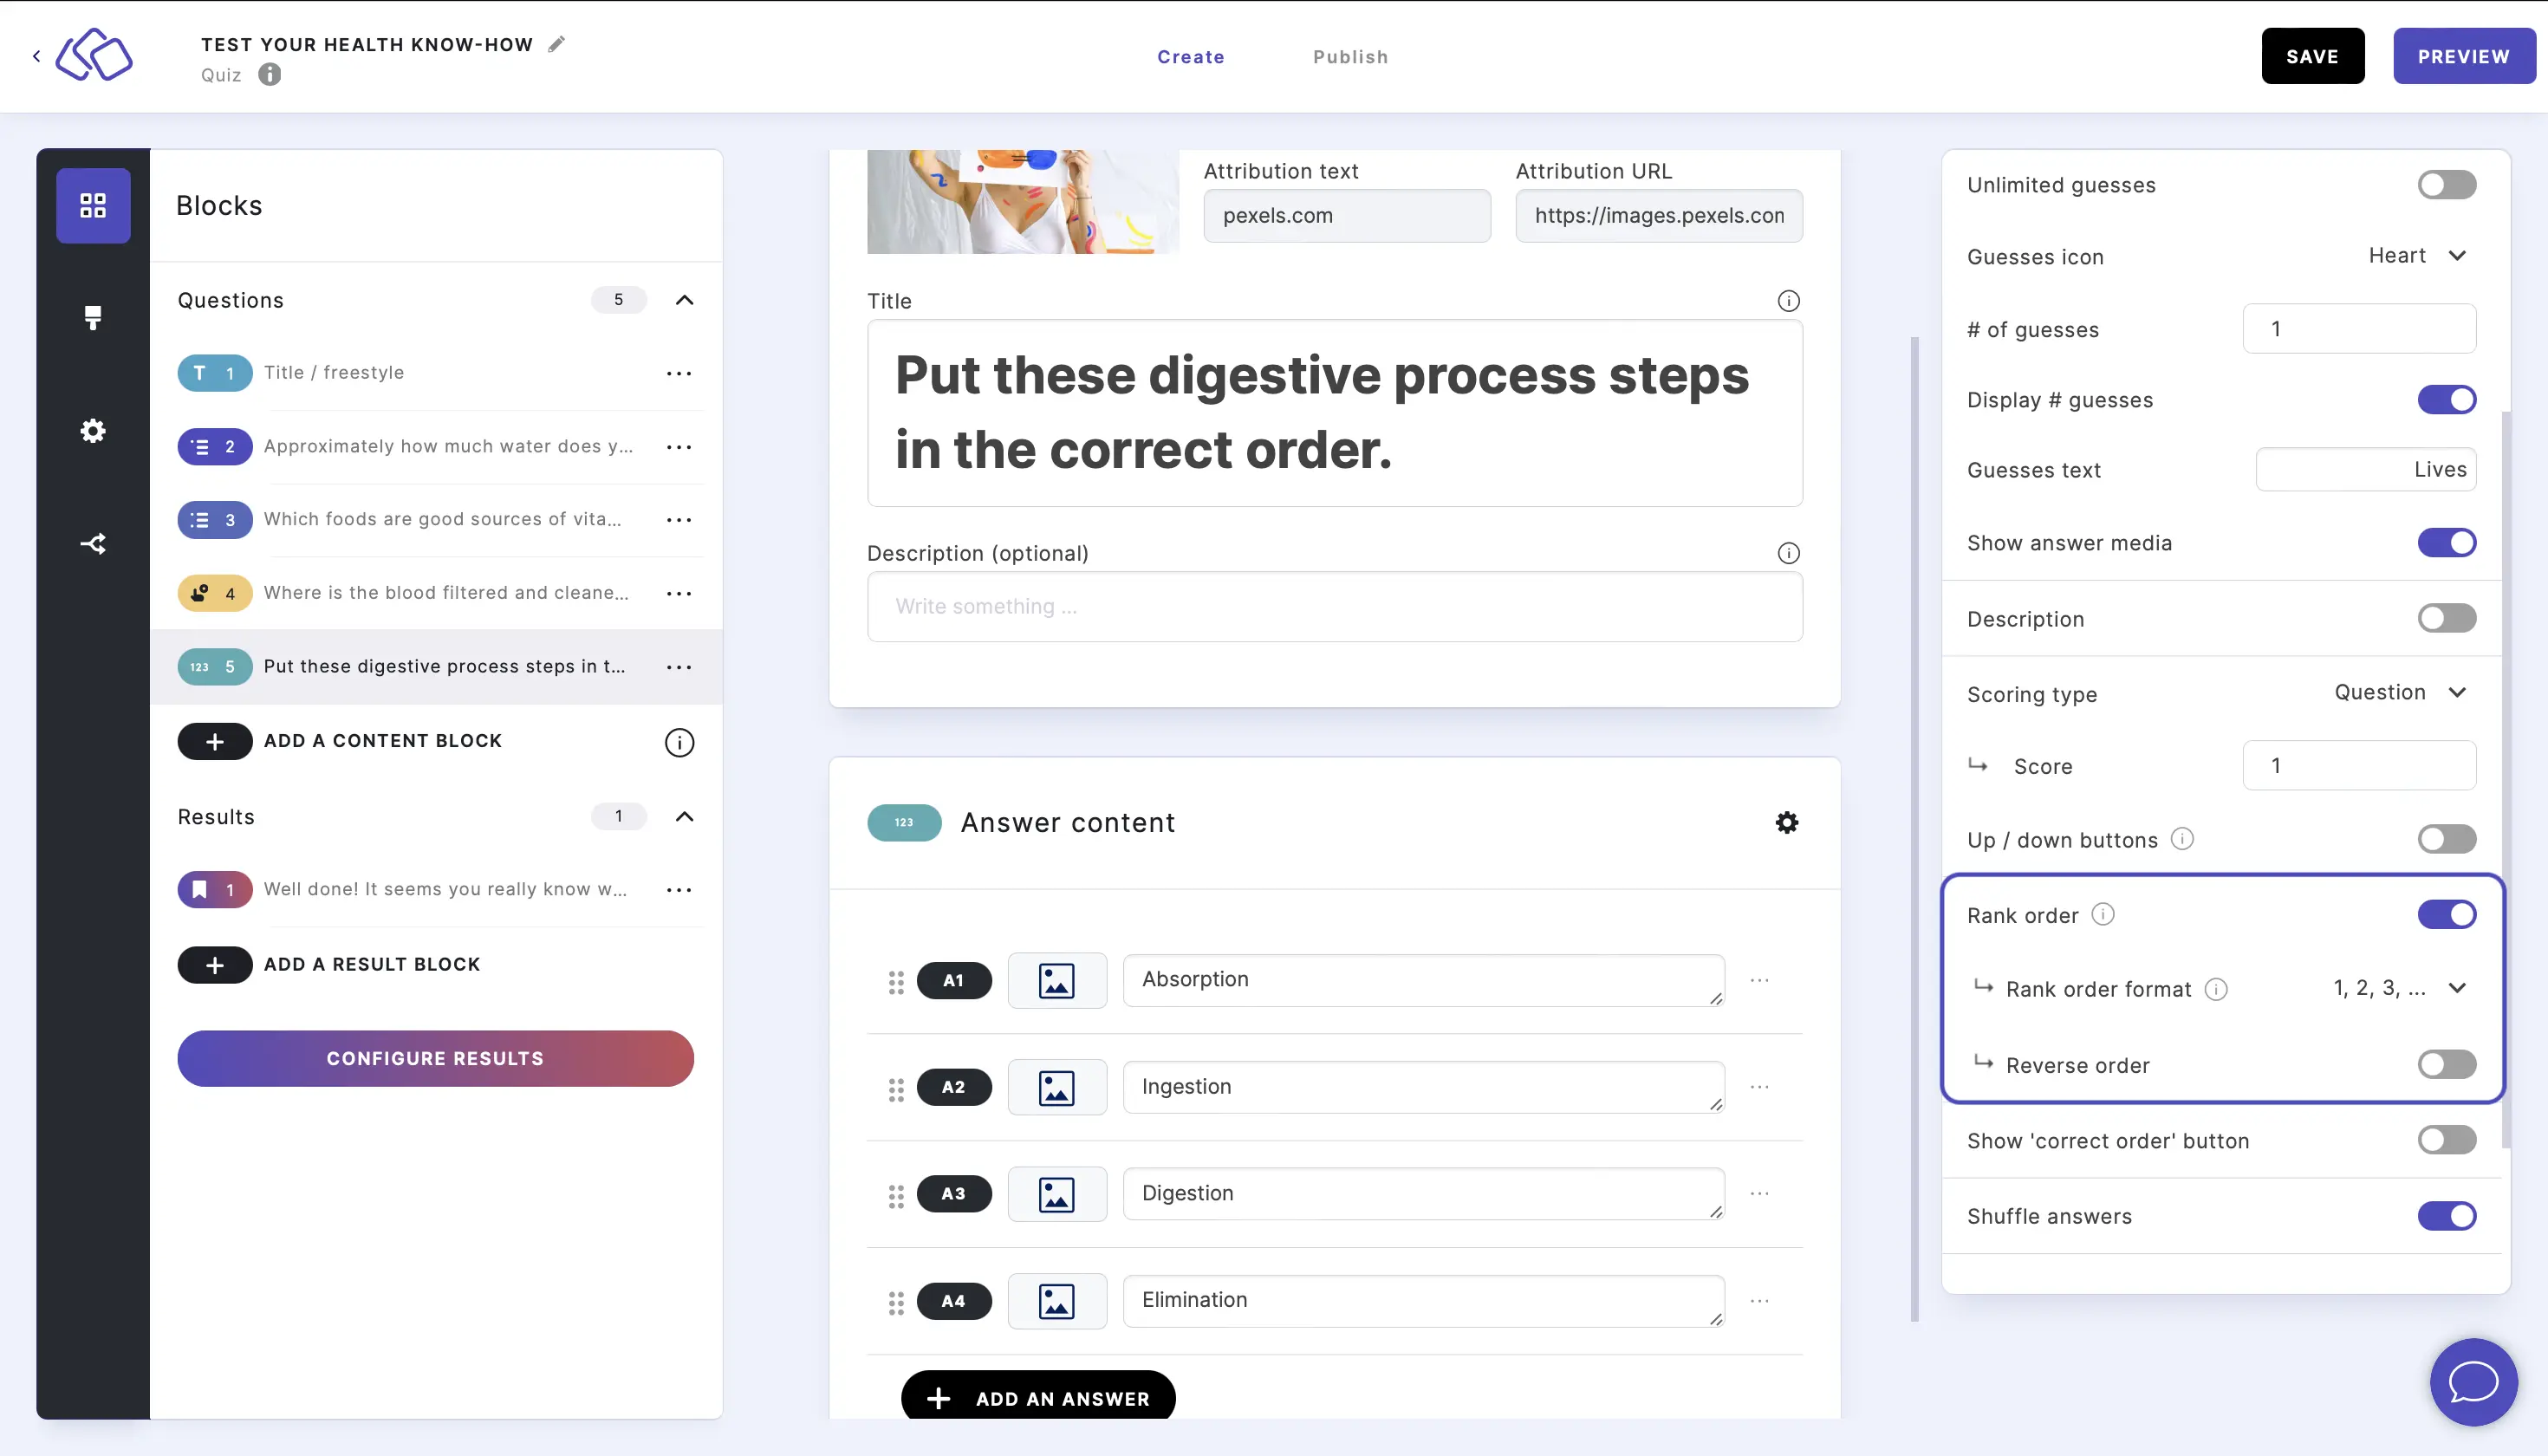
Go to the options icon on the right of Answer Content and enable Rank order. Select a format and order.
RESHUFFLE CHOICES AFTER EACH SUBMISSION:
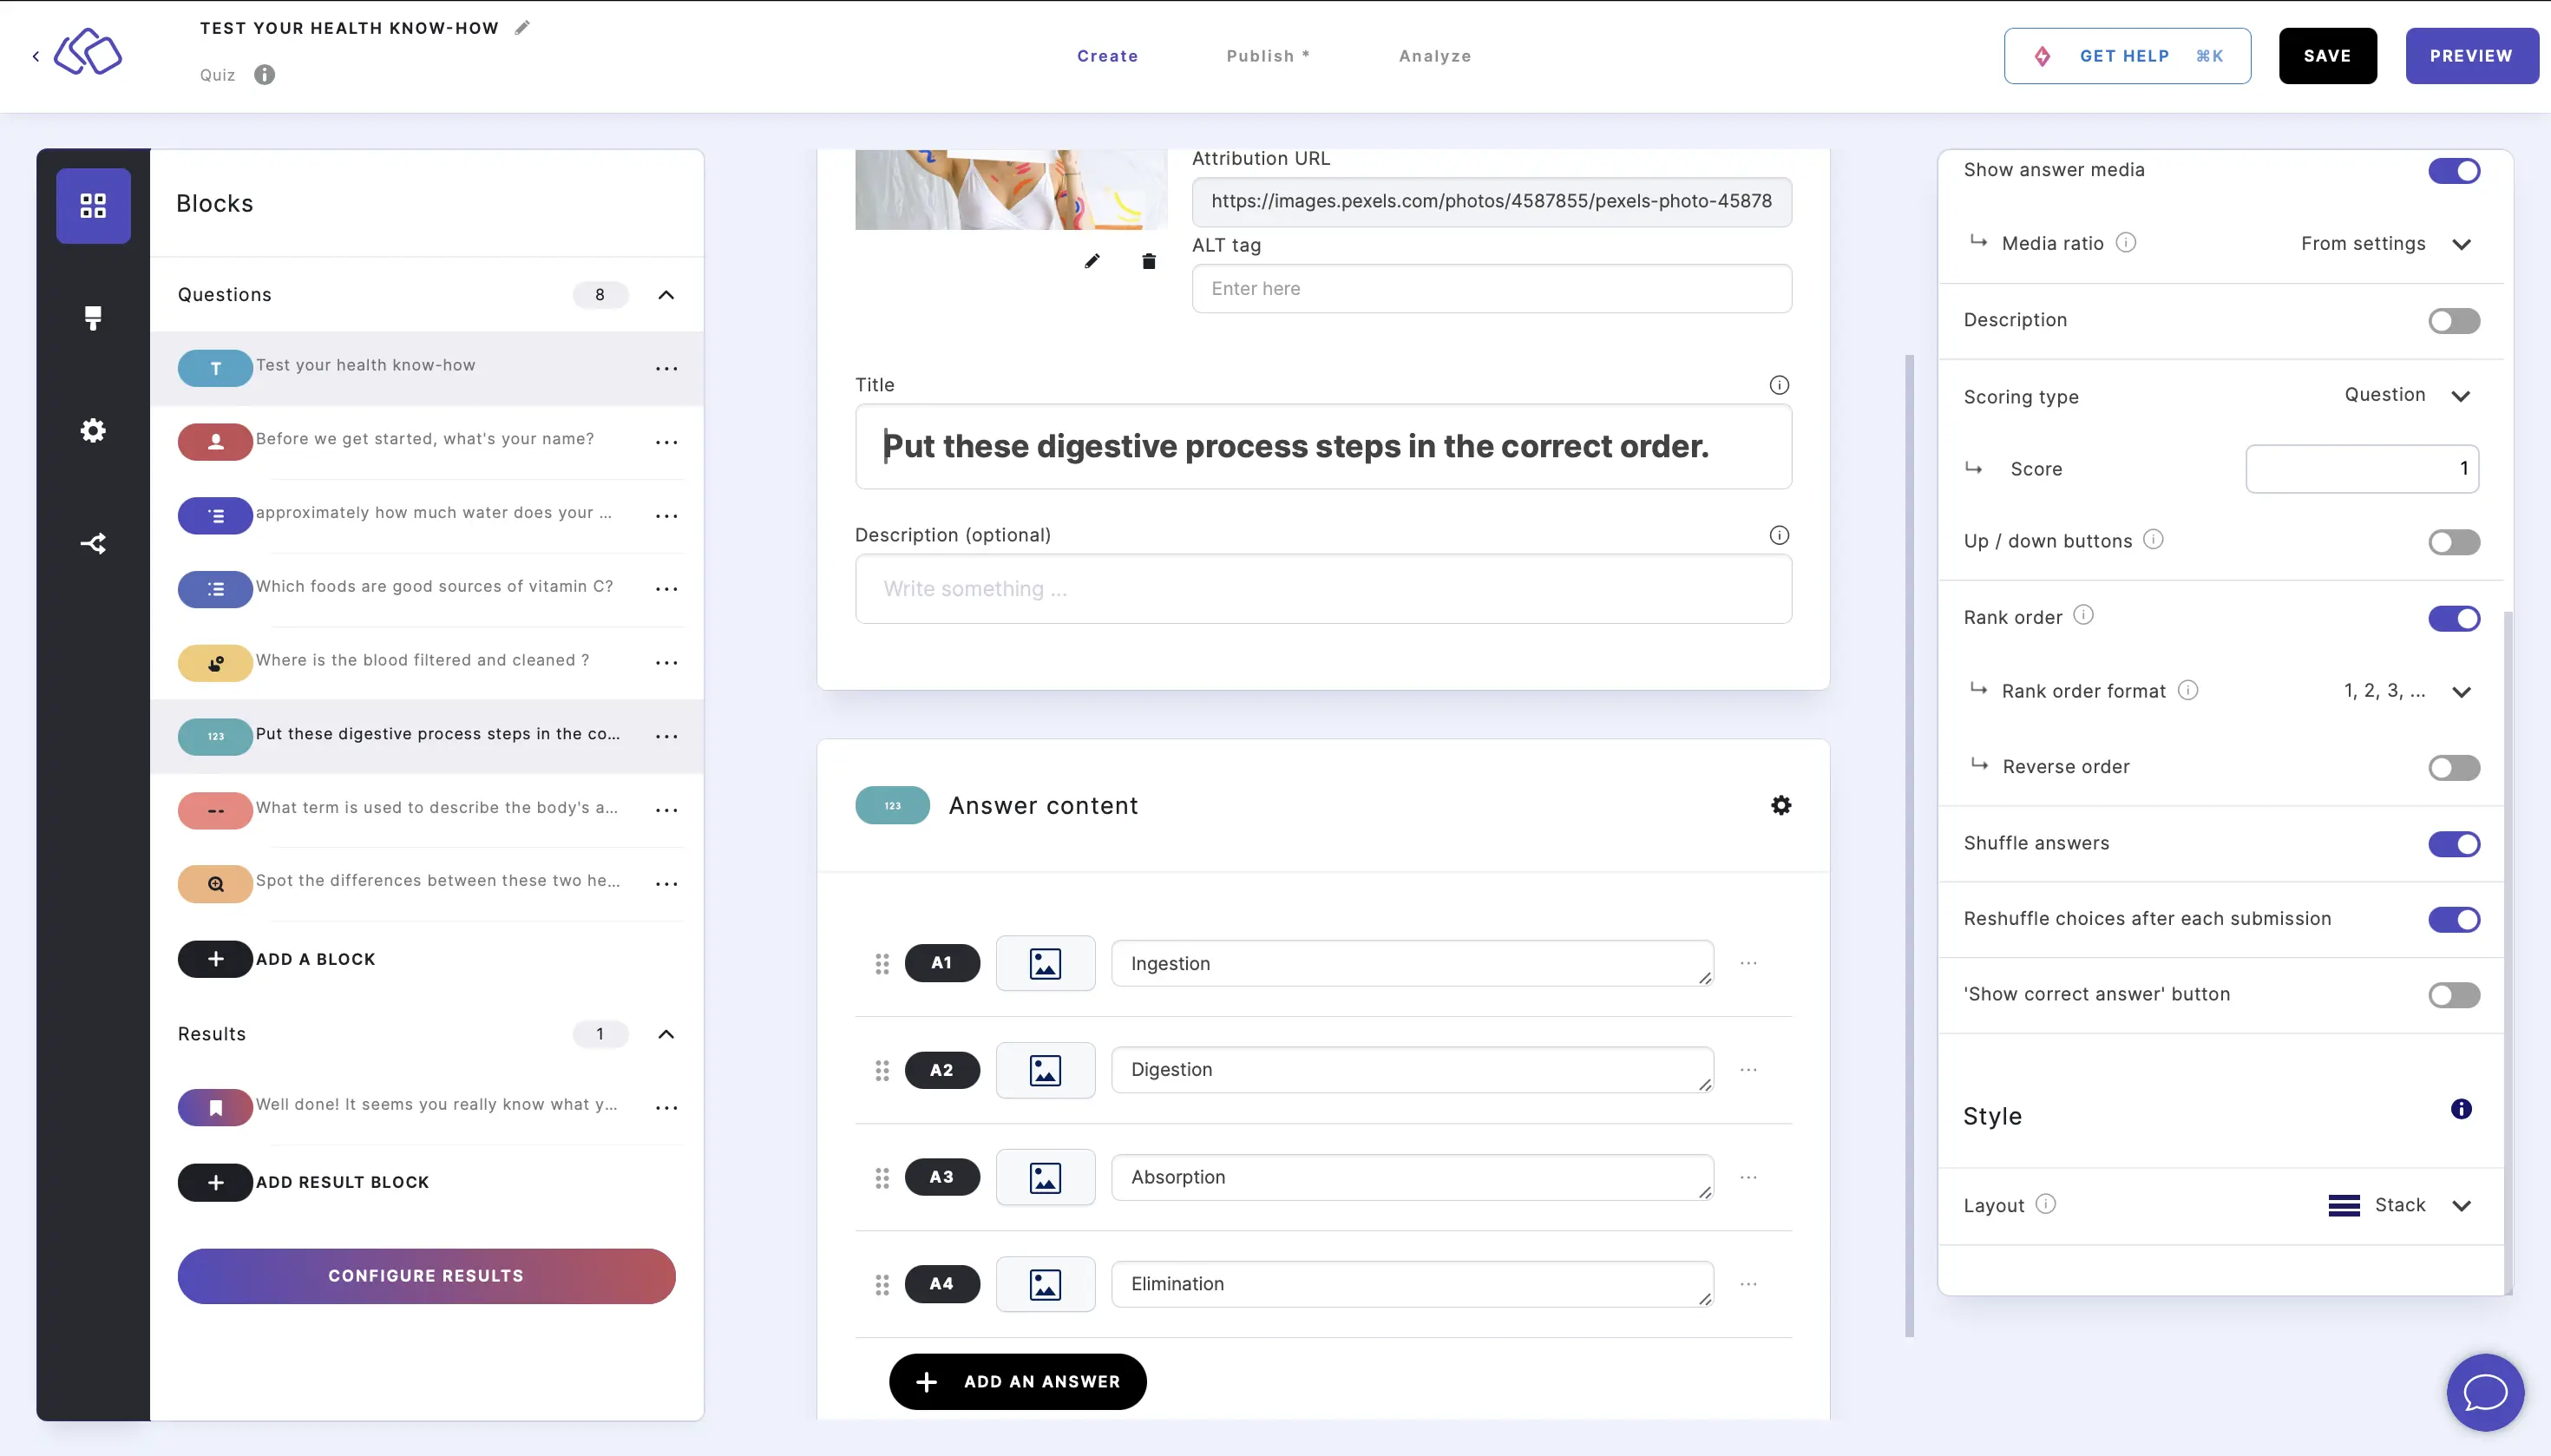
Go to the options icon on the right of Answer Content and enable Reshuffle choices after each submission.
SHOW CORRECT ORDER:
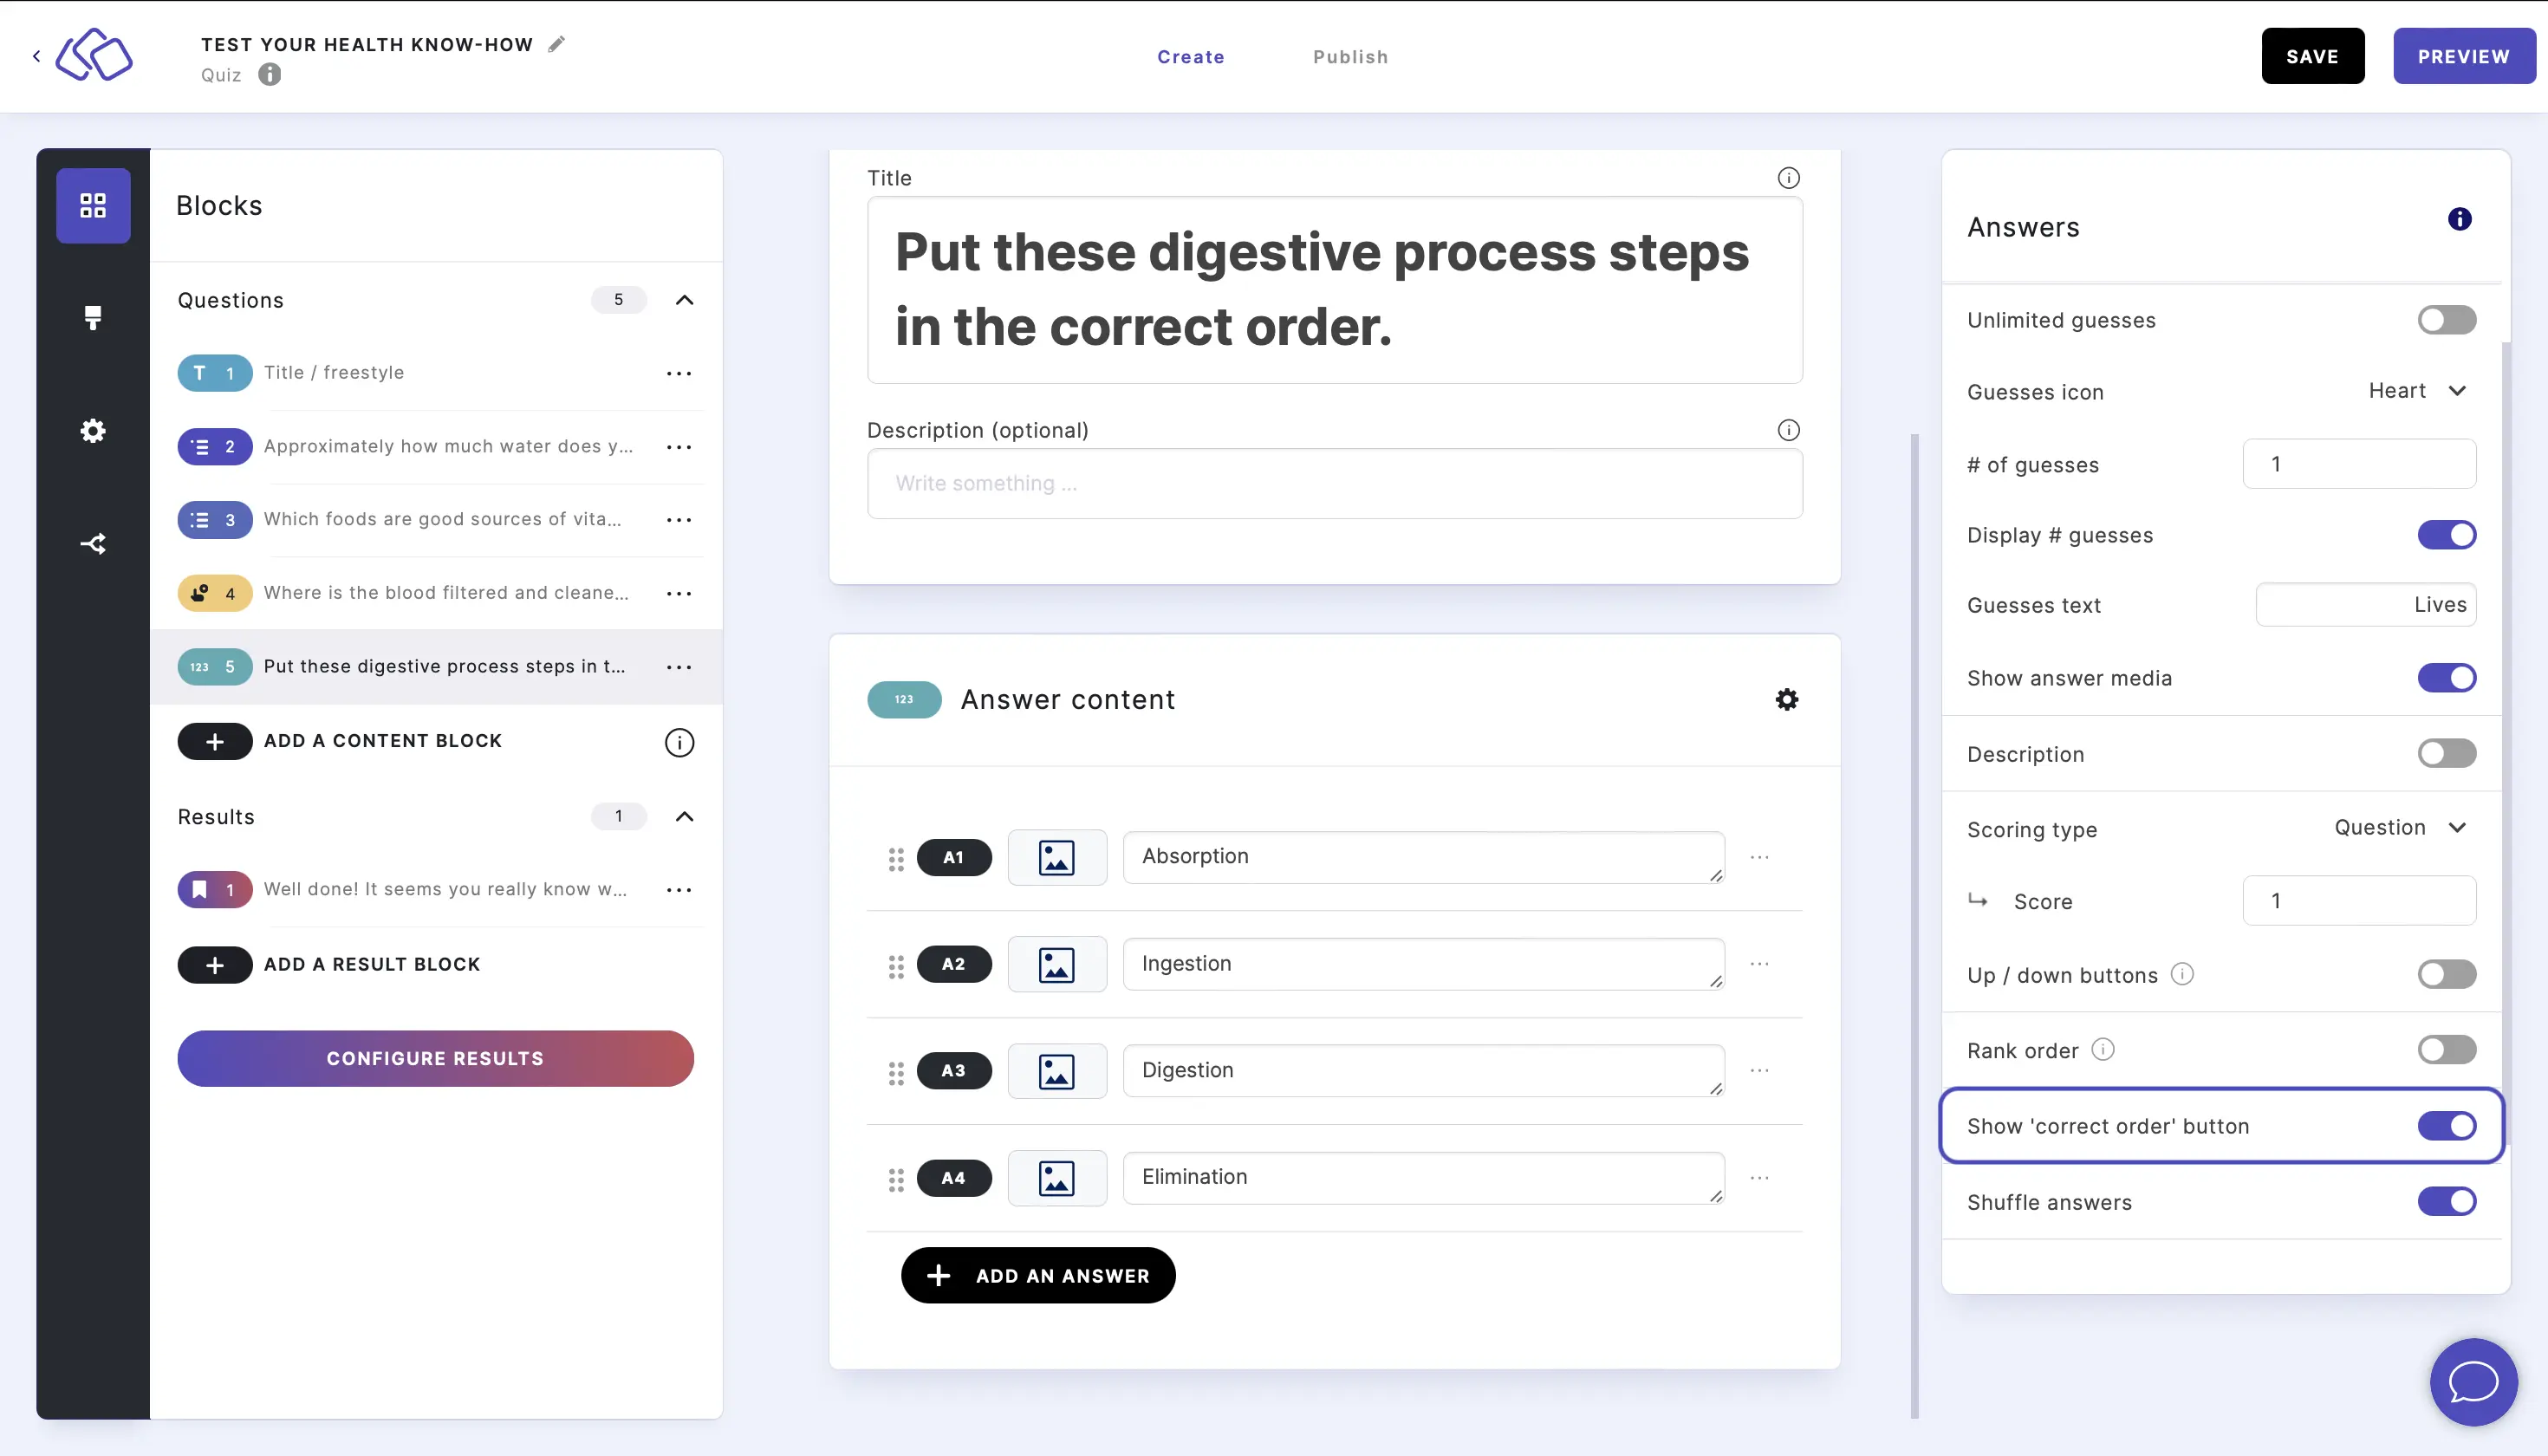
Go to the options icon on the right of Answer Content and enable Show 'correct order' button.
HINTS: You can add hints in the HINT (OPTIONAL) field. Users can choose to reveal the hint at any time.
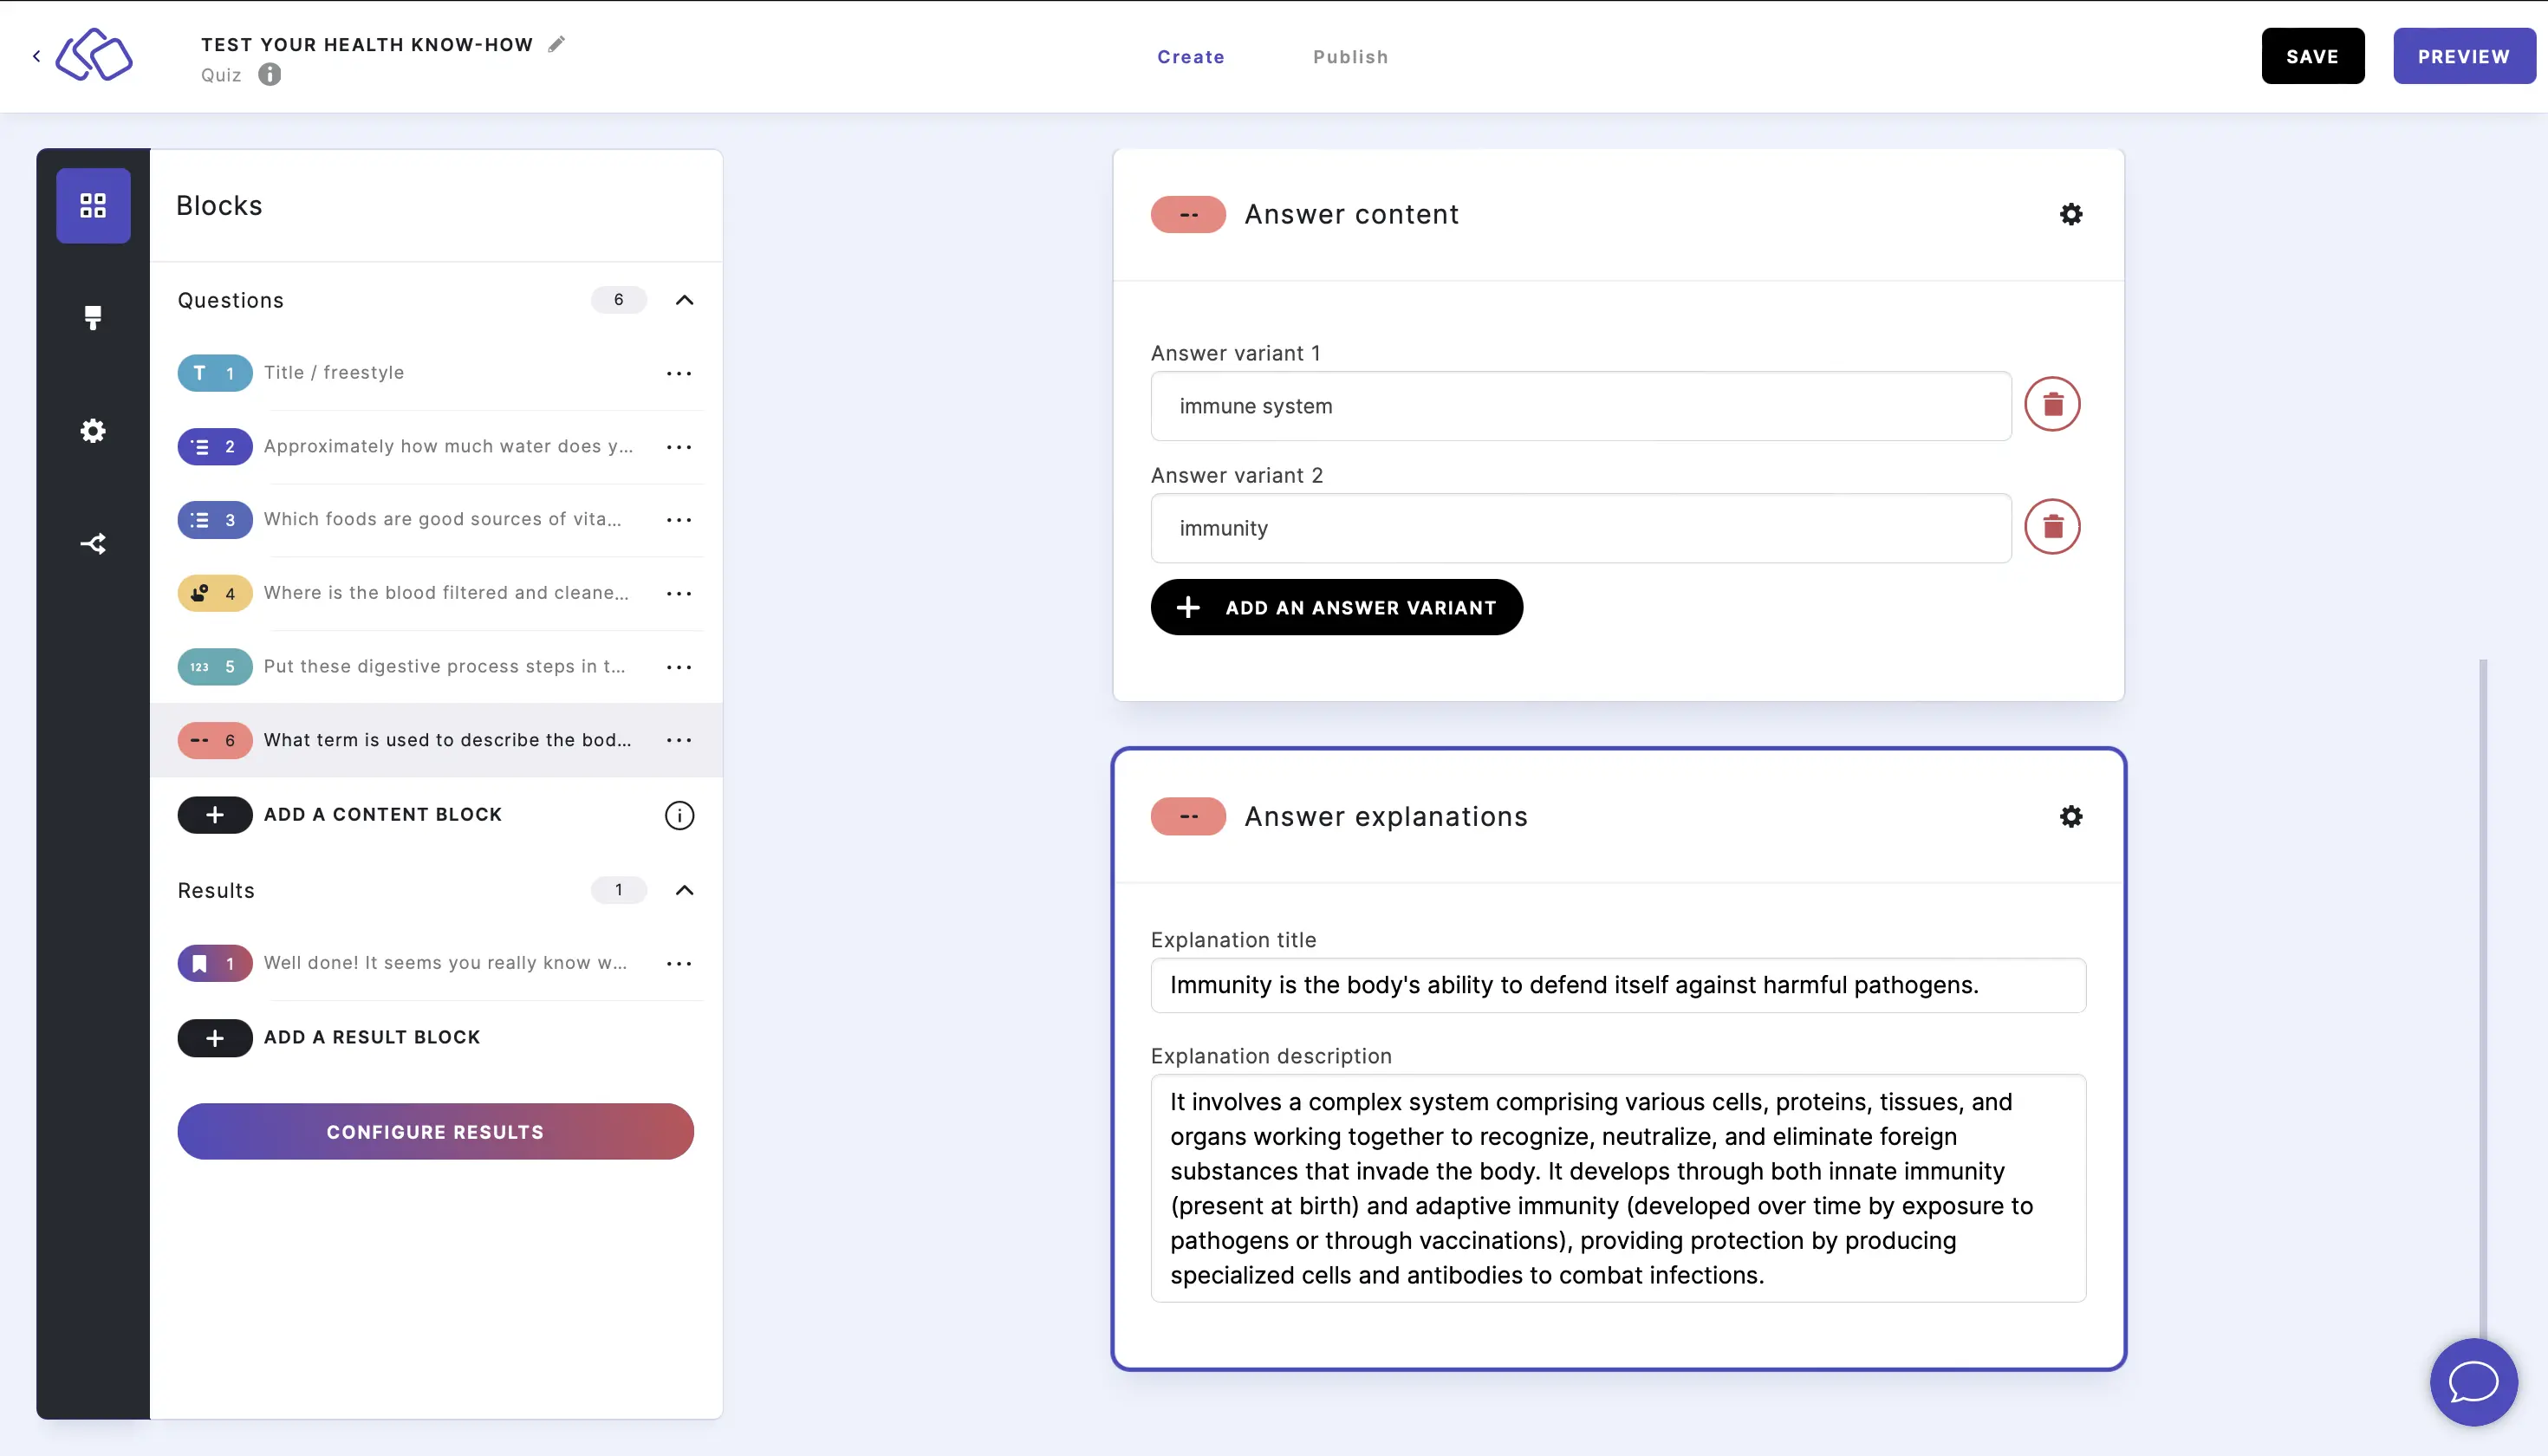
5. Type the answer
Users write their own answer to your question in a free text box, which replaces the answer buttons.
- Click on ADD A BLOCK and select Type the answer.
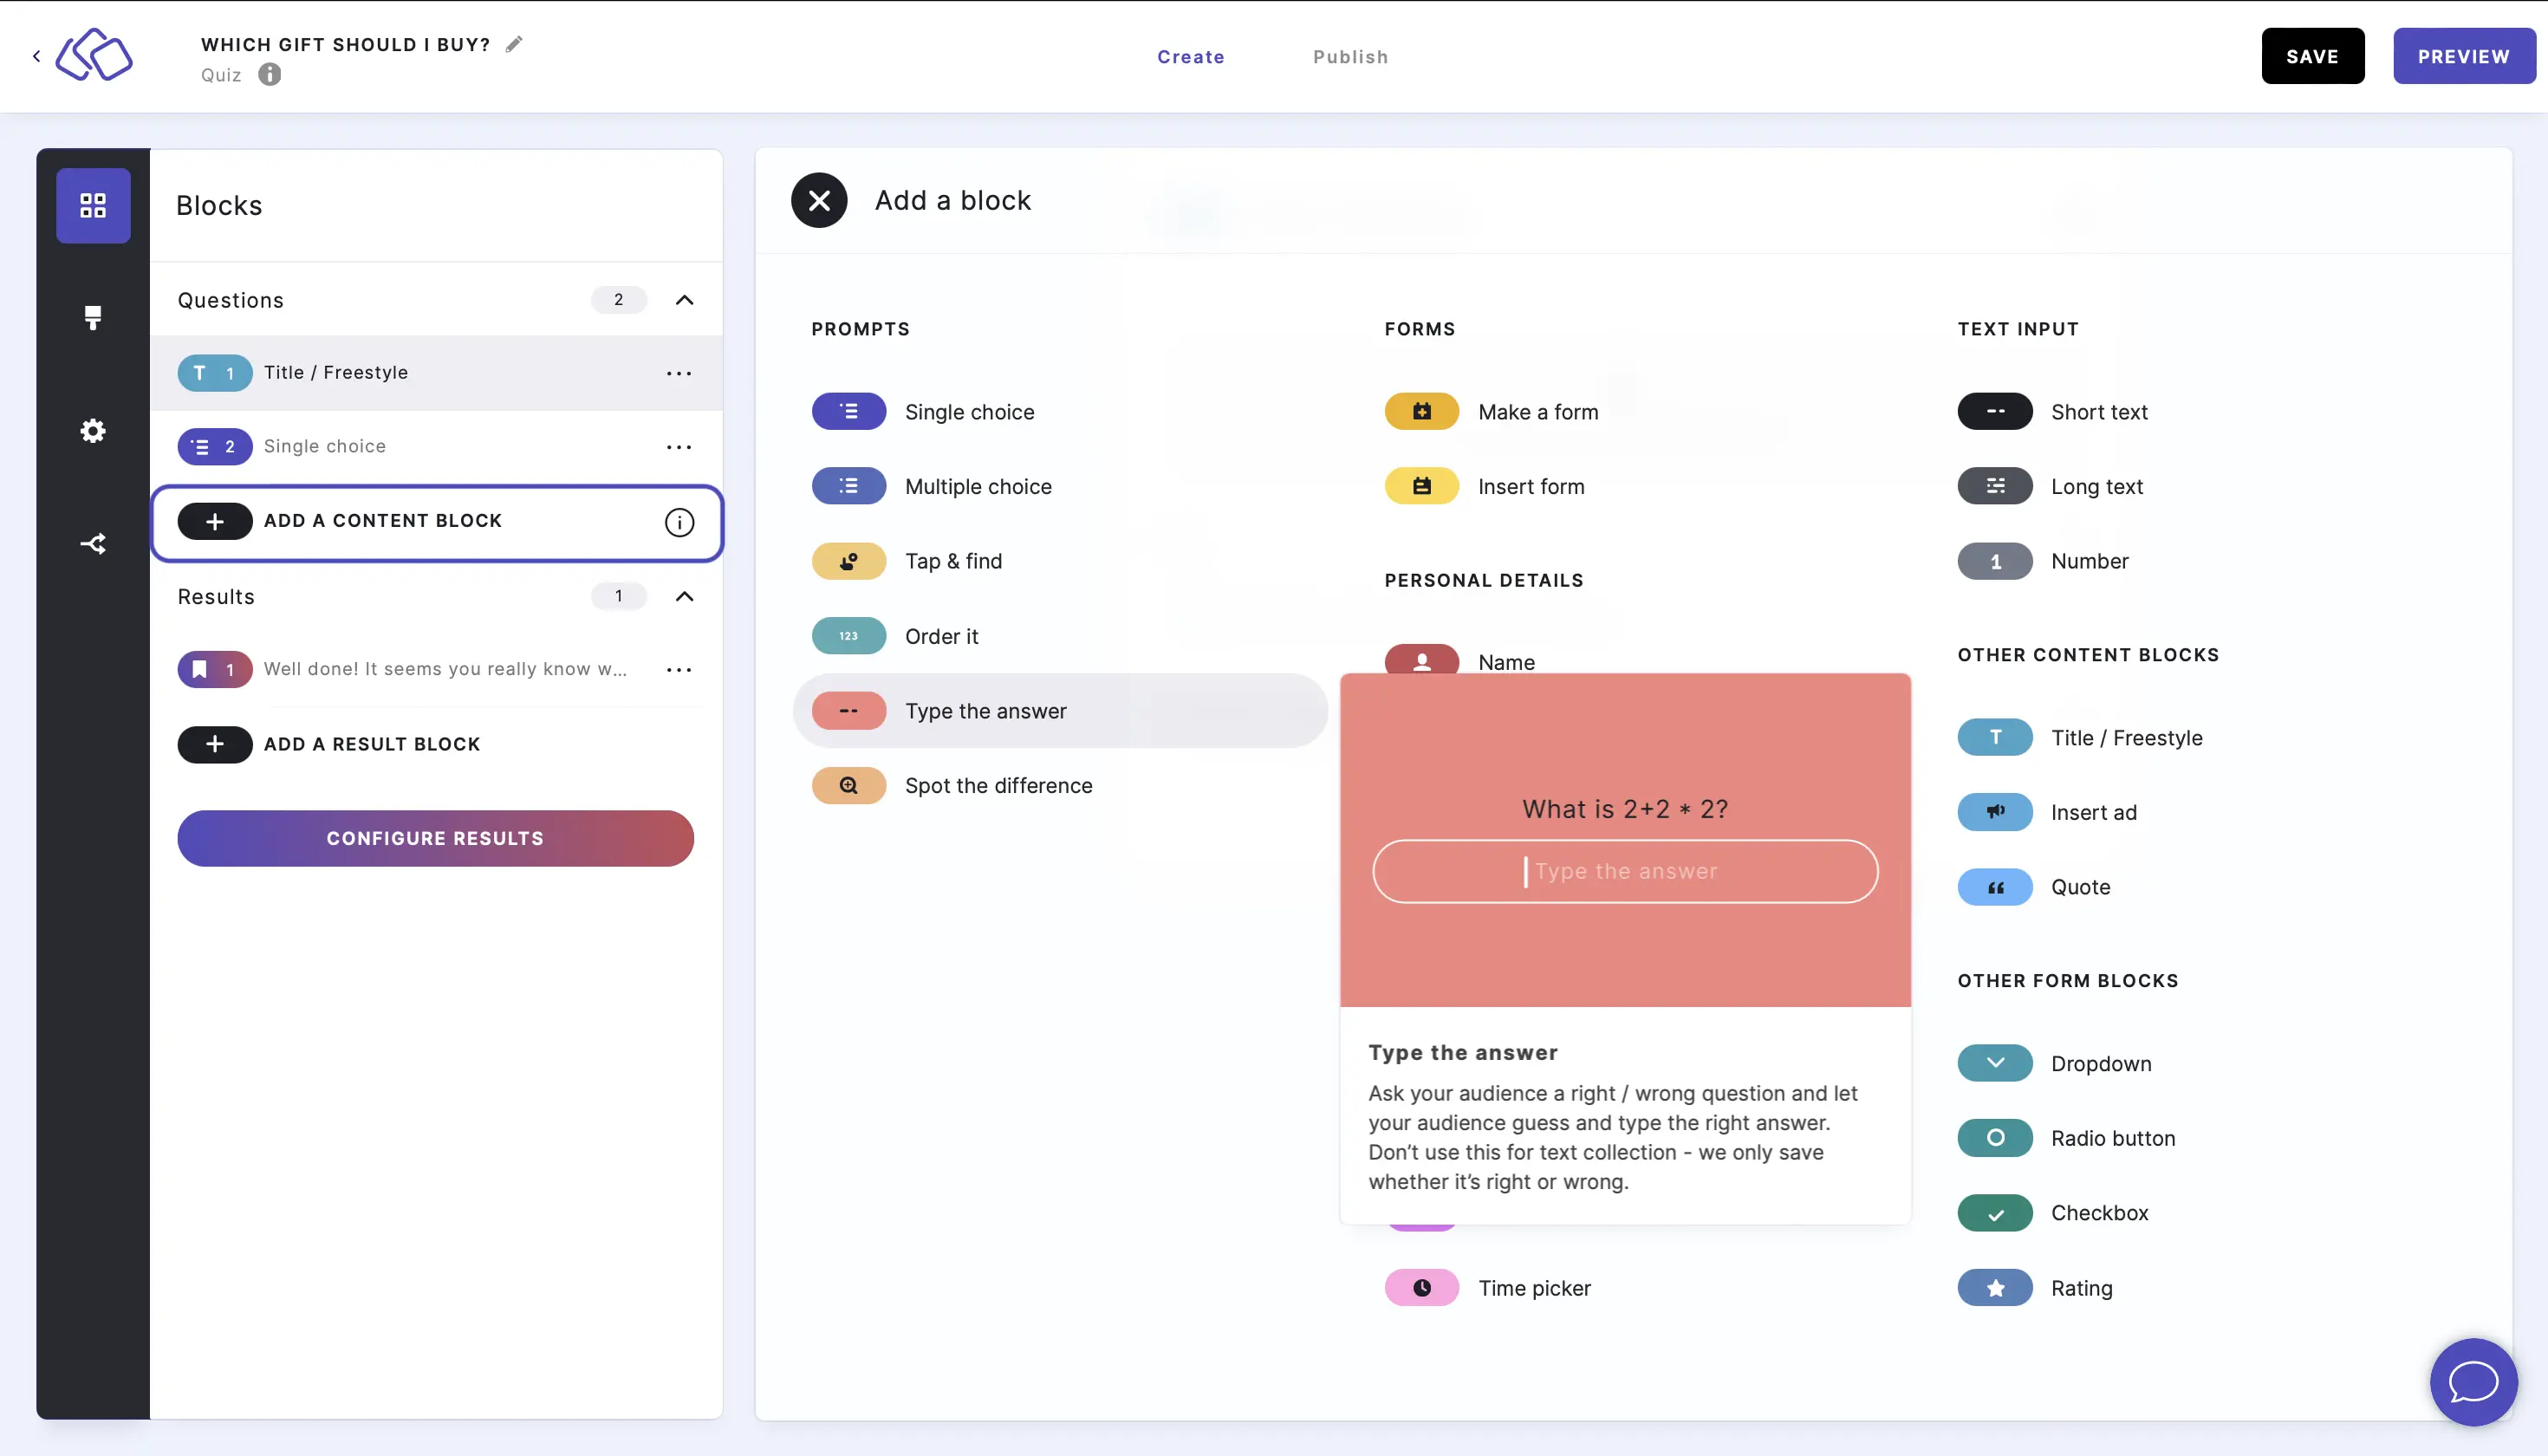
- Insert a text into the Title field.
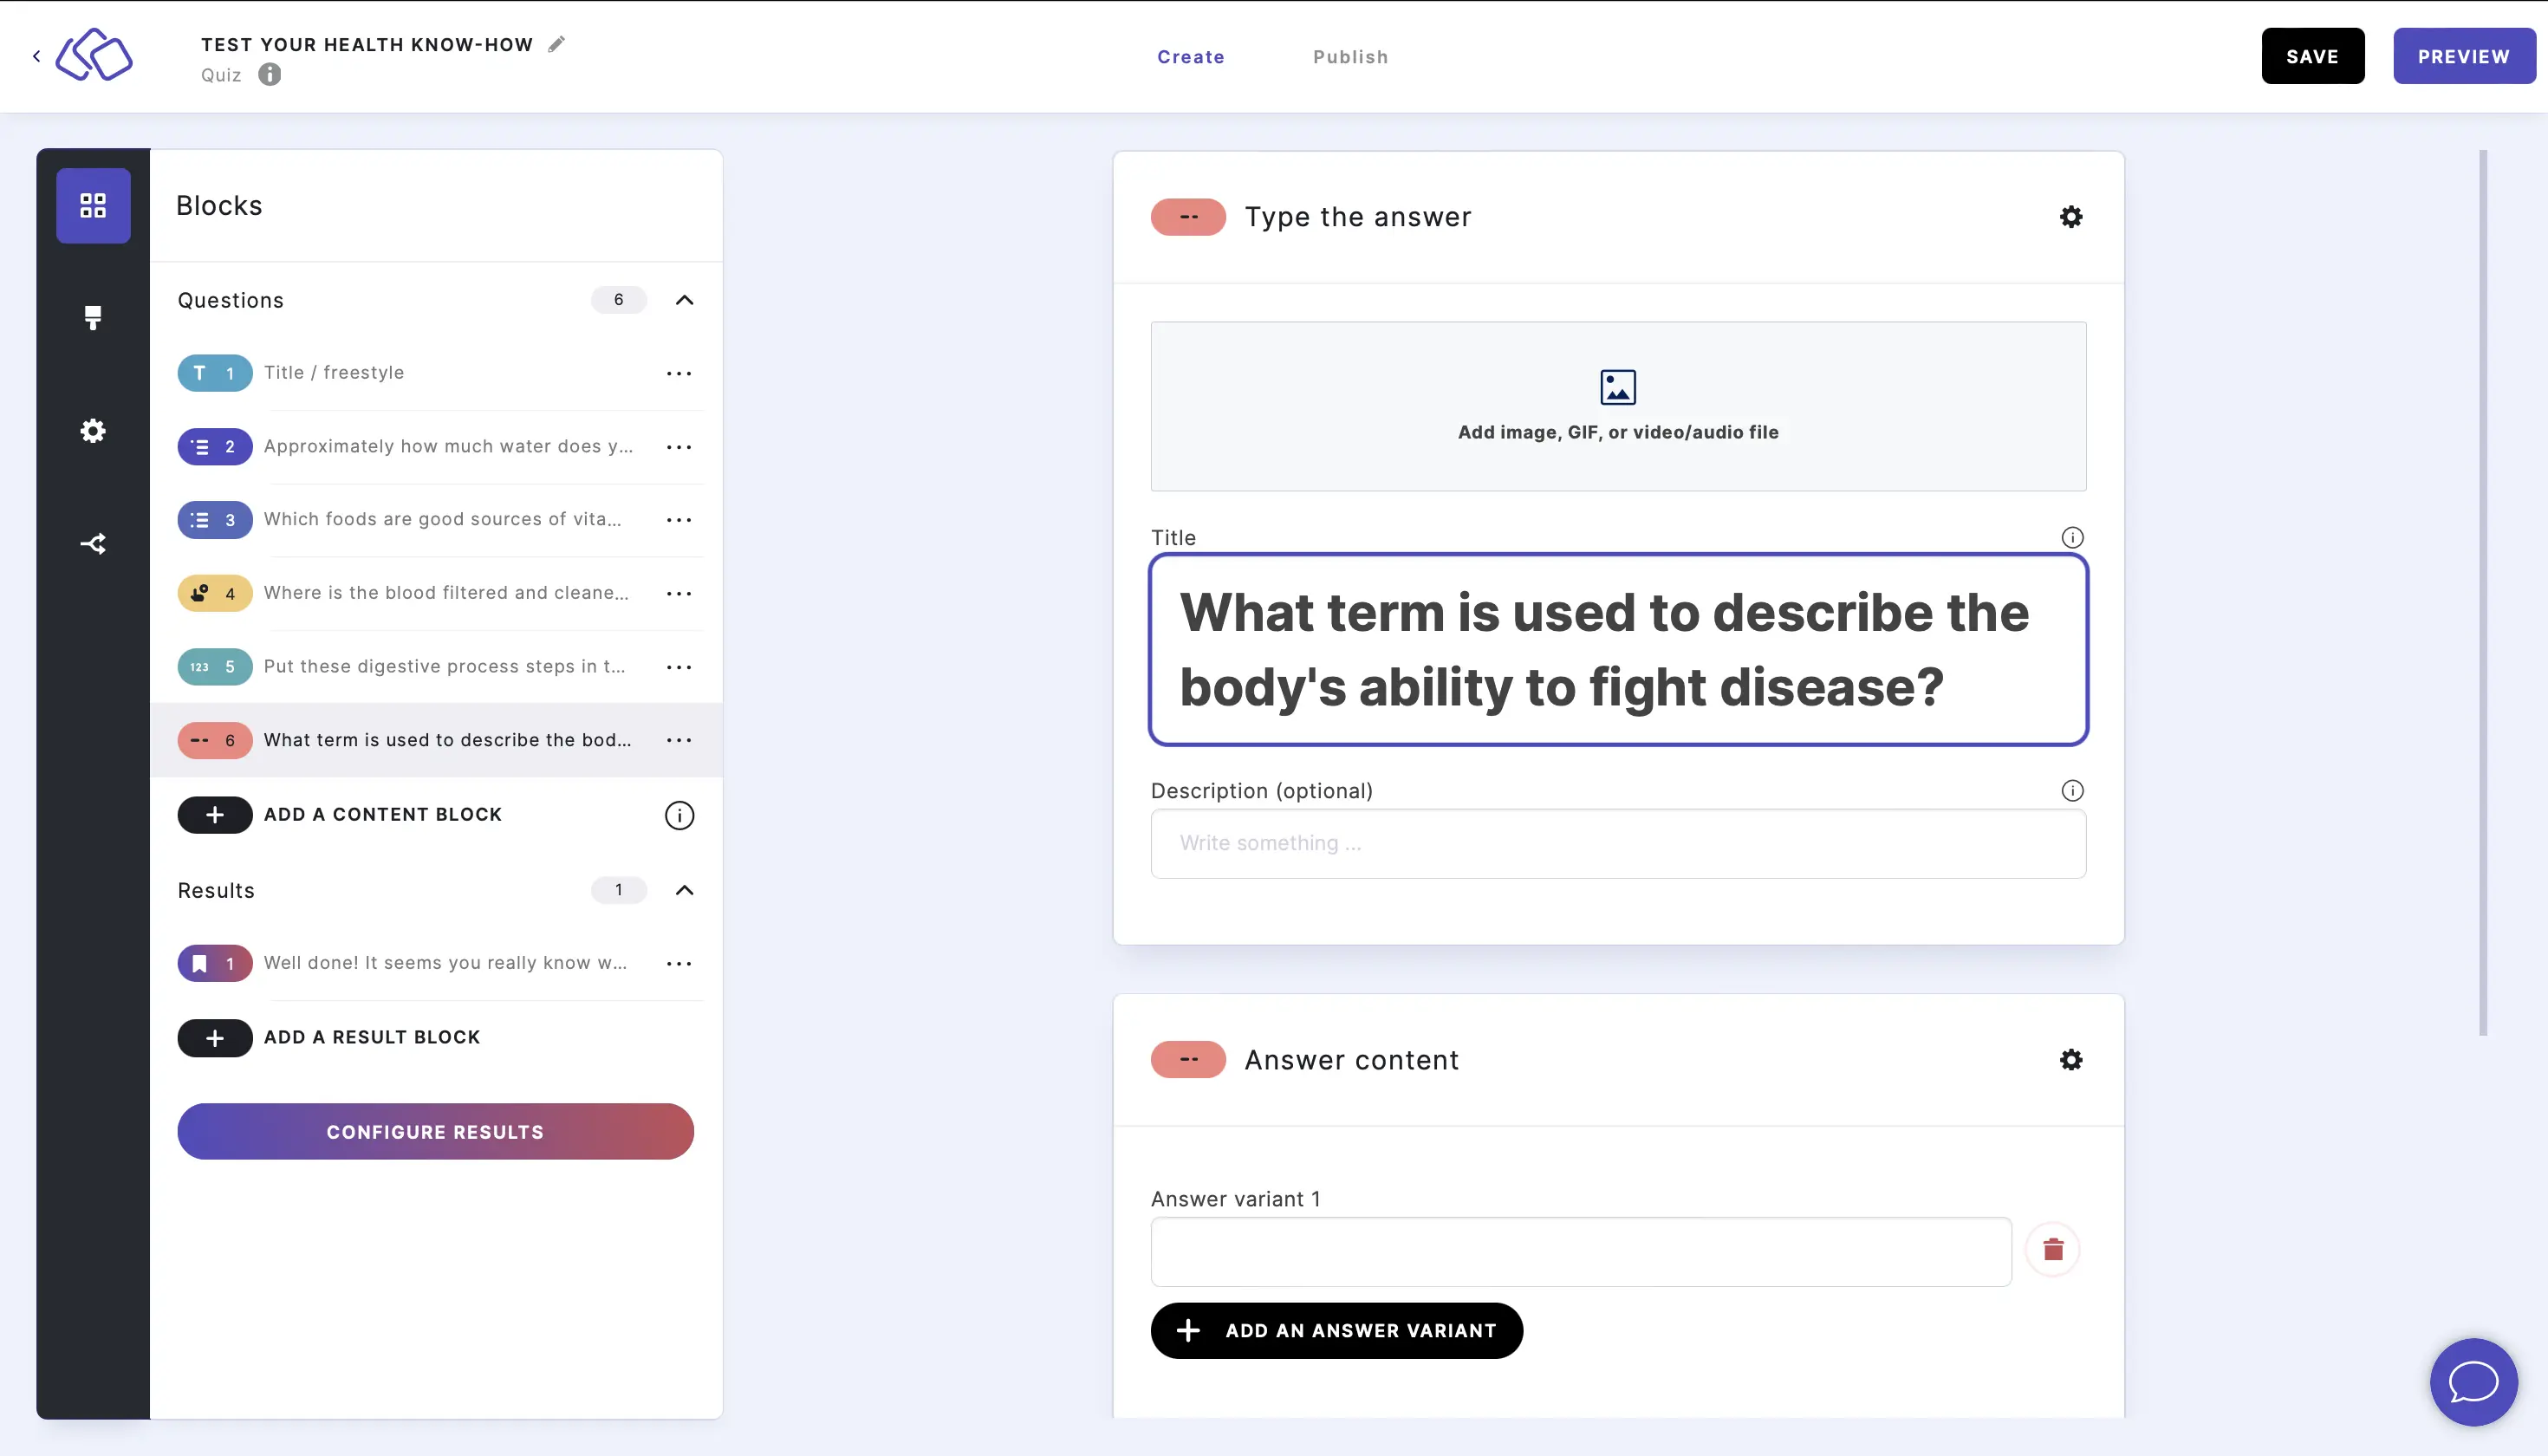
- Add an image by clicking on Add image, GIF, or video/audio file.
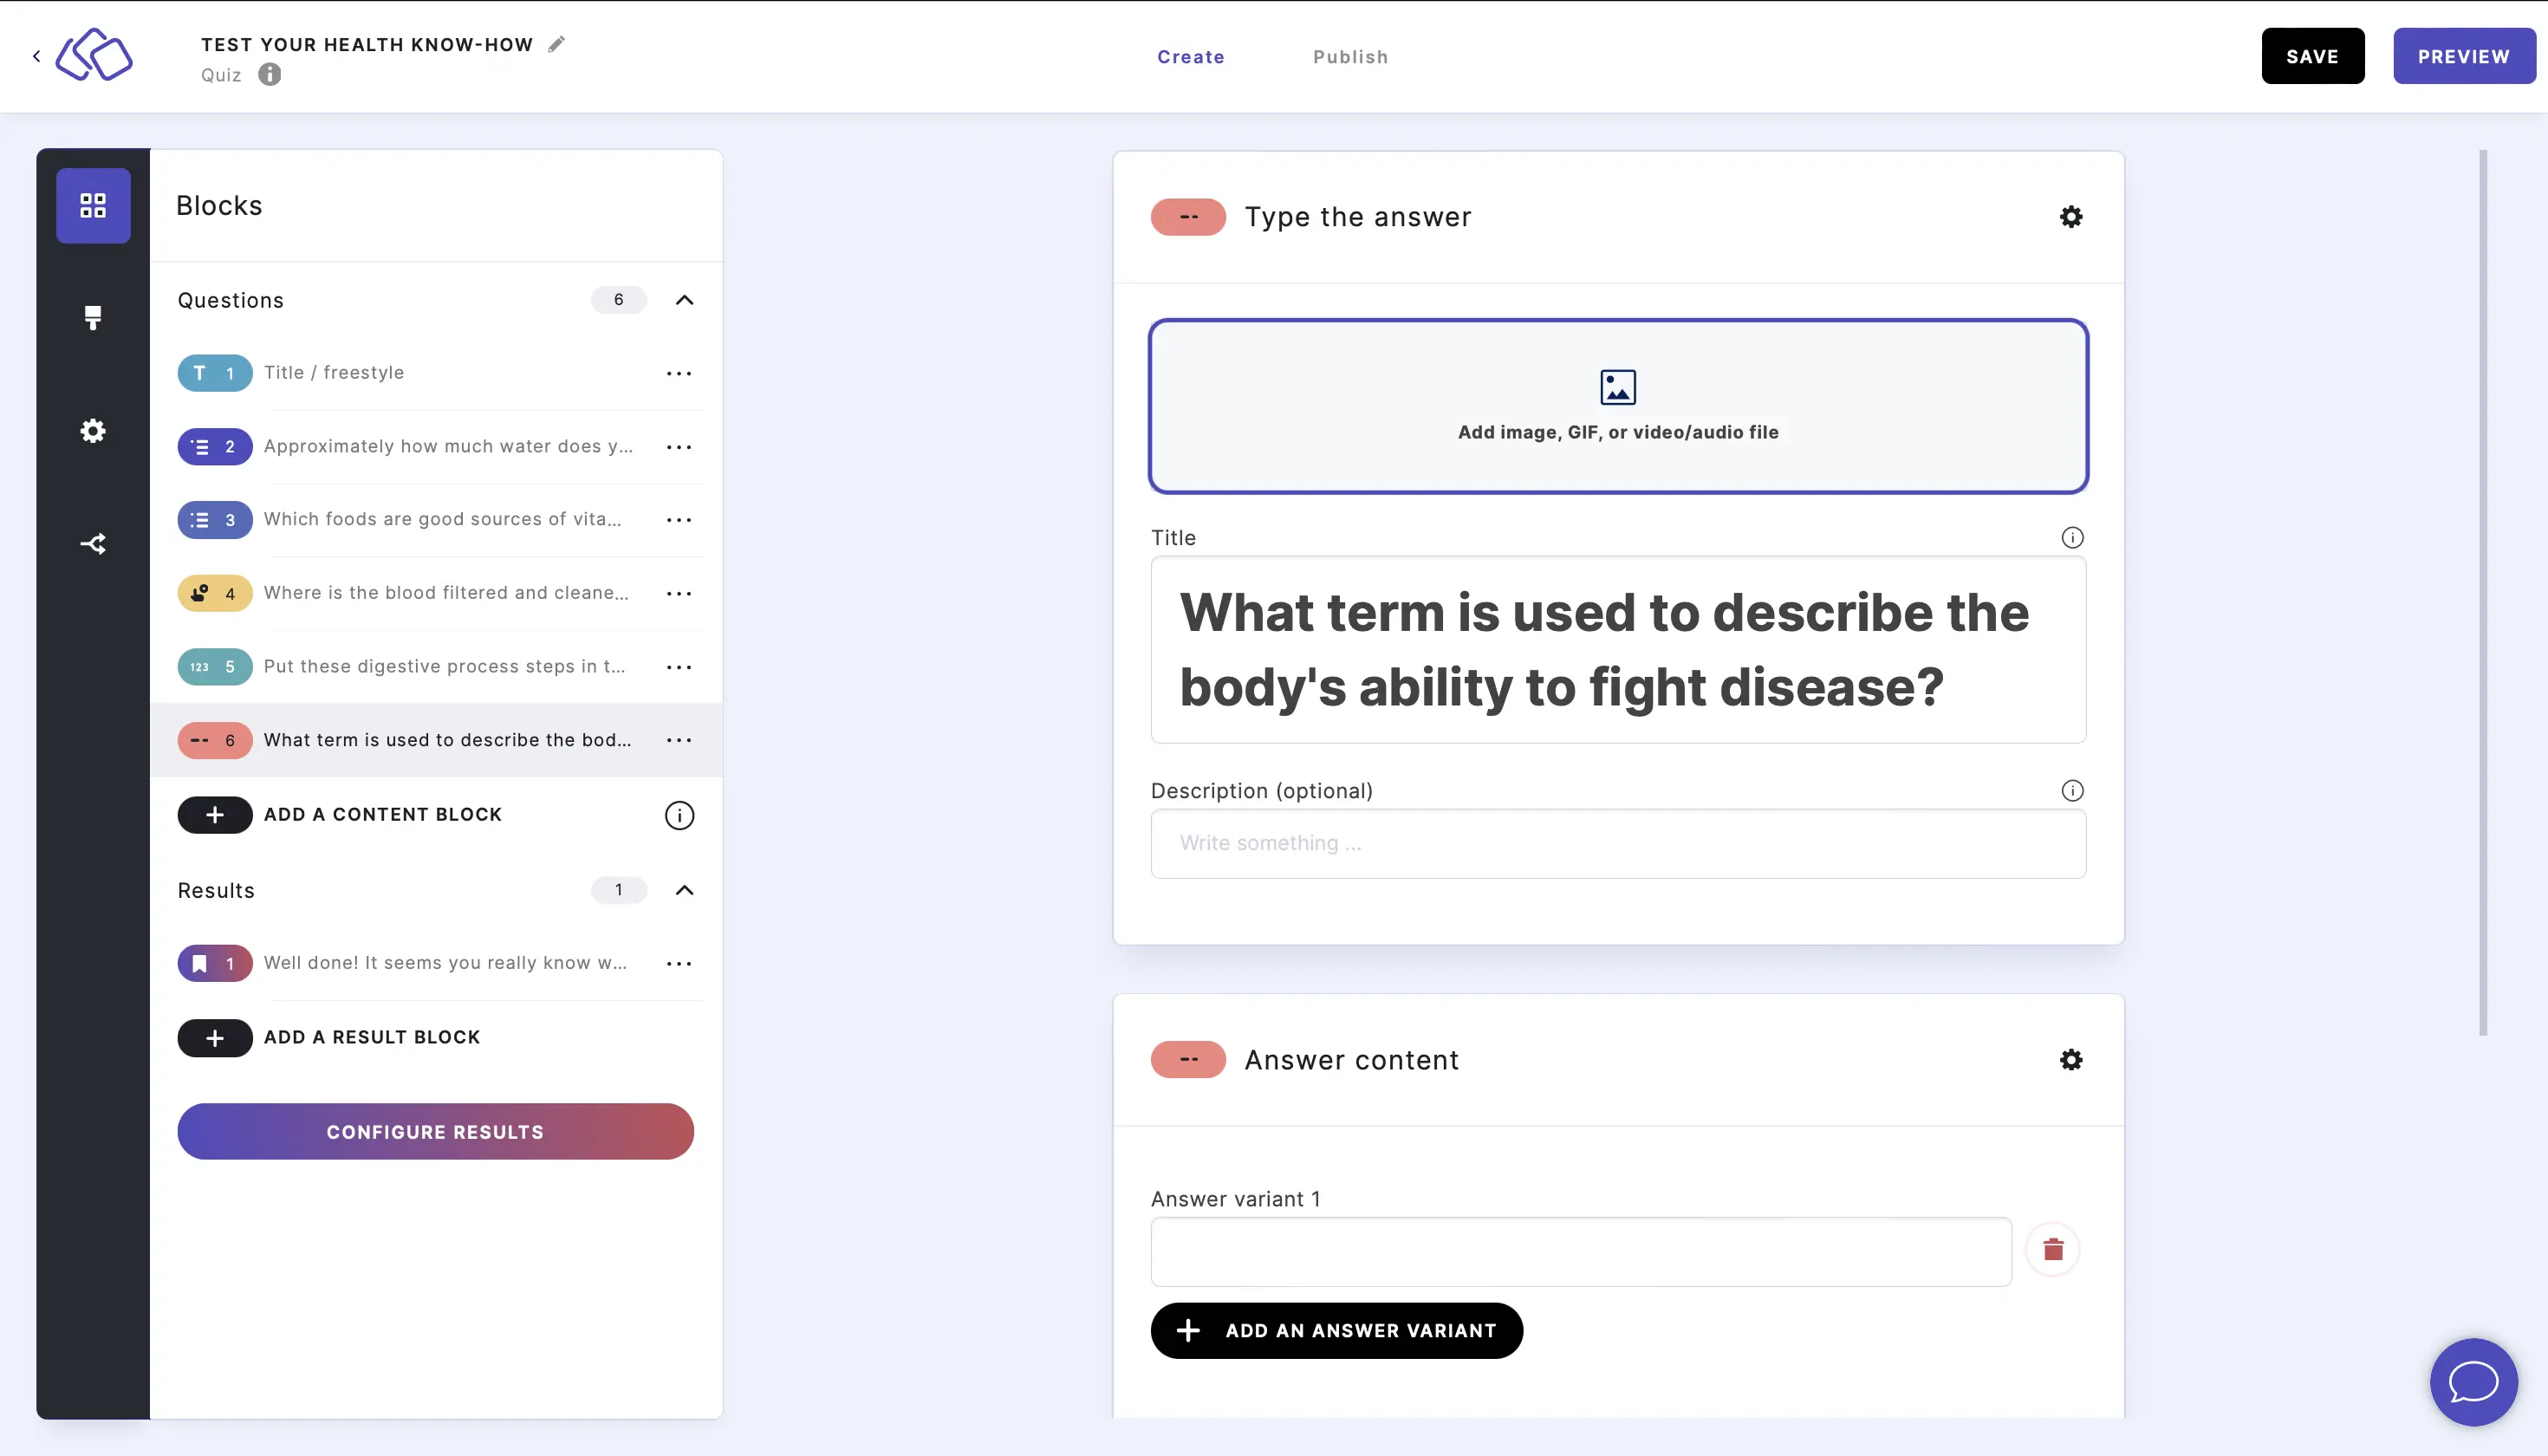
- Insert the answers. Add as many answers as you want by clicking on Add an answer variant.
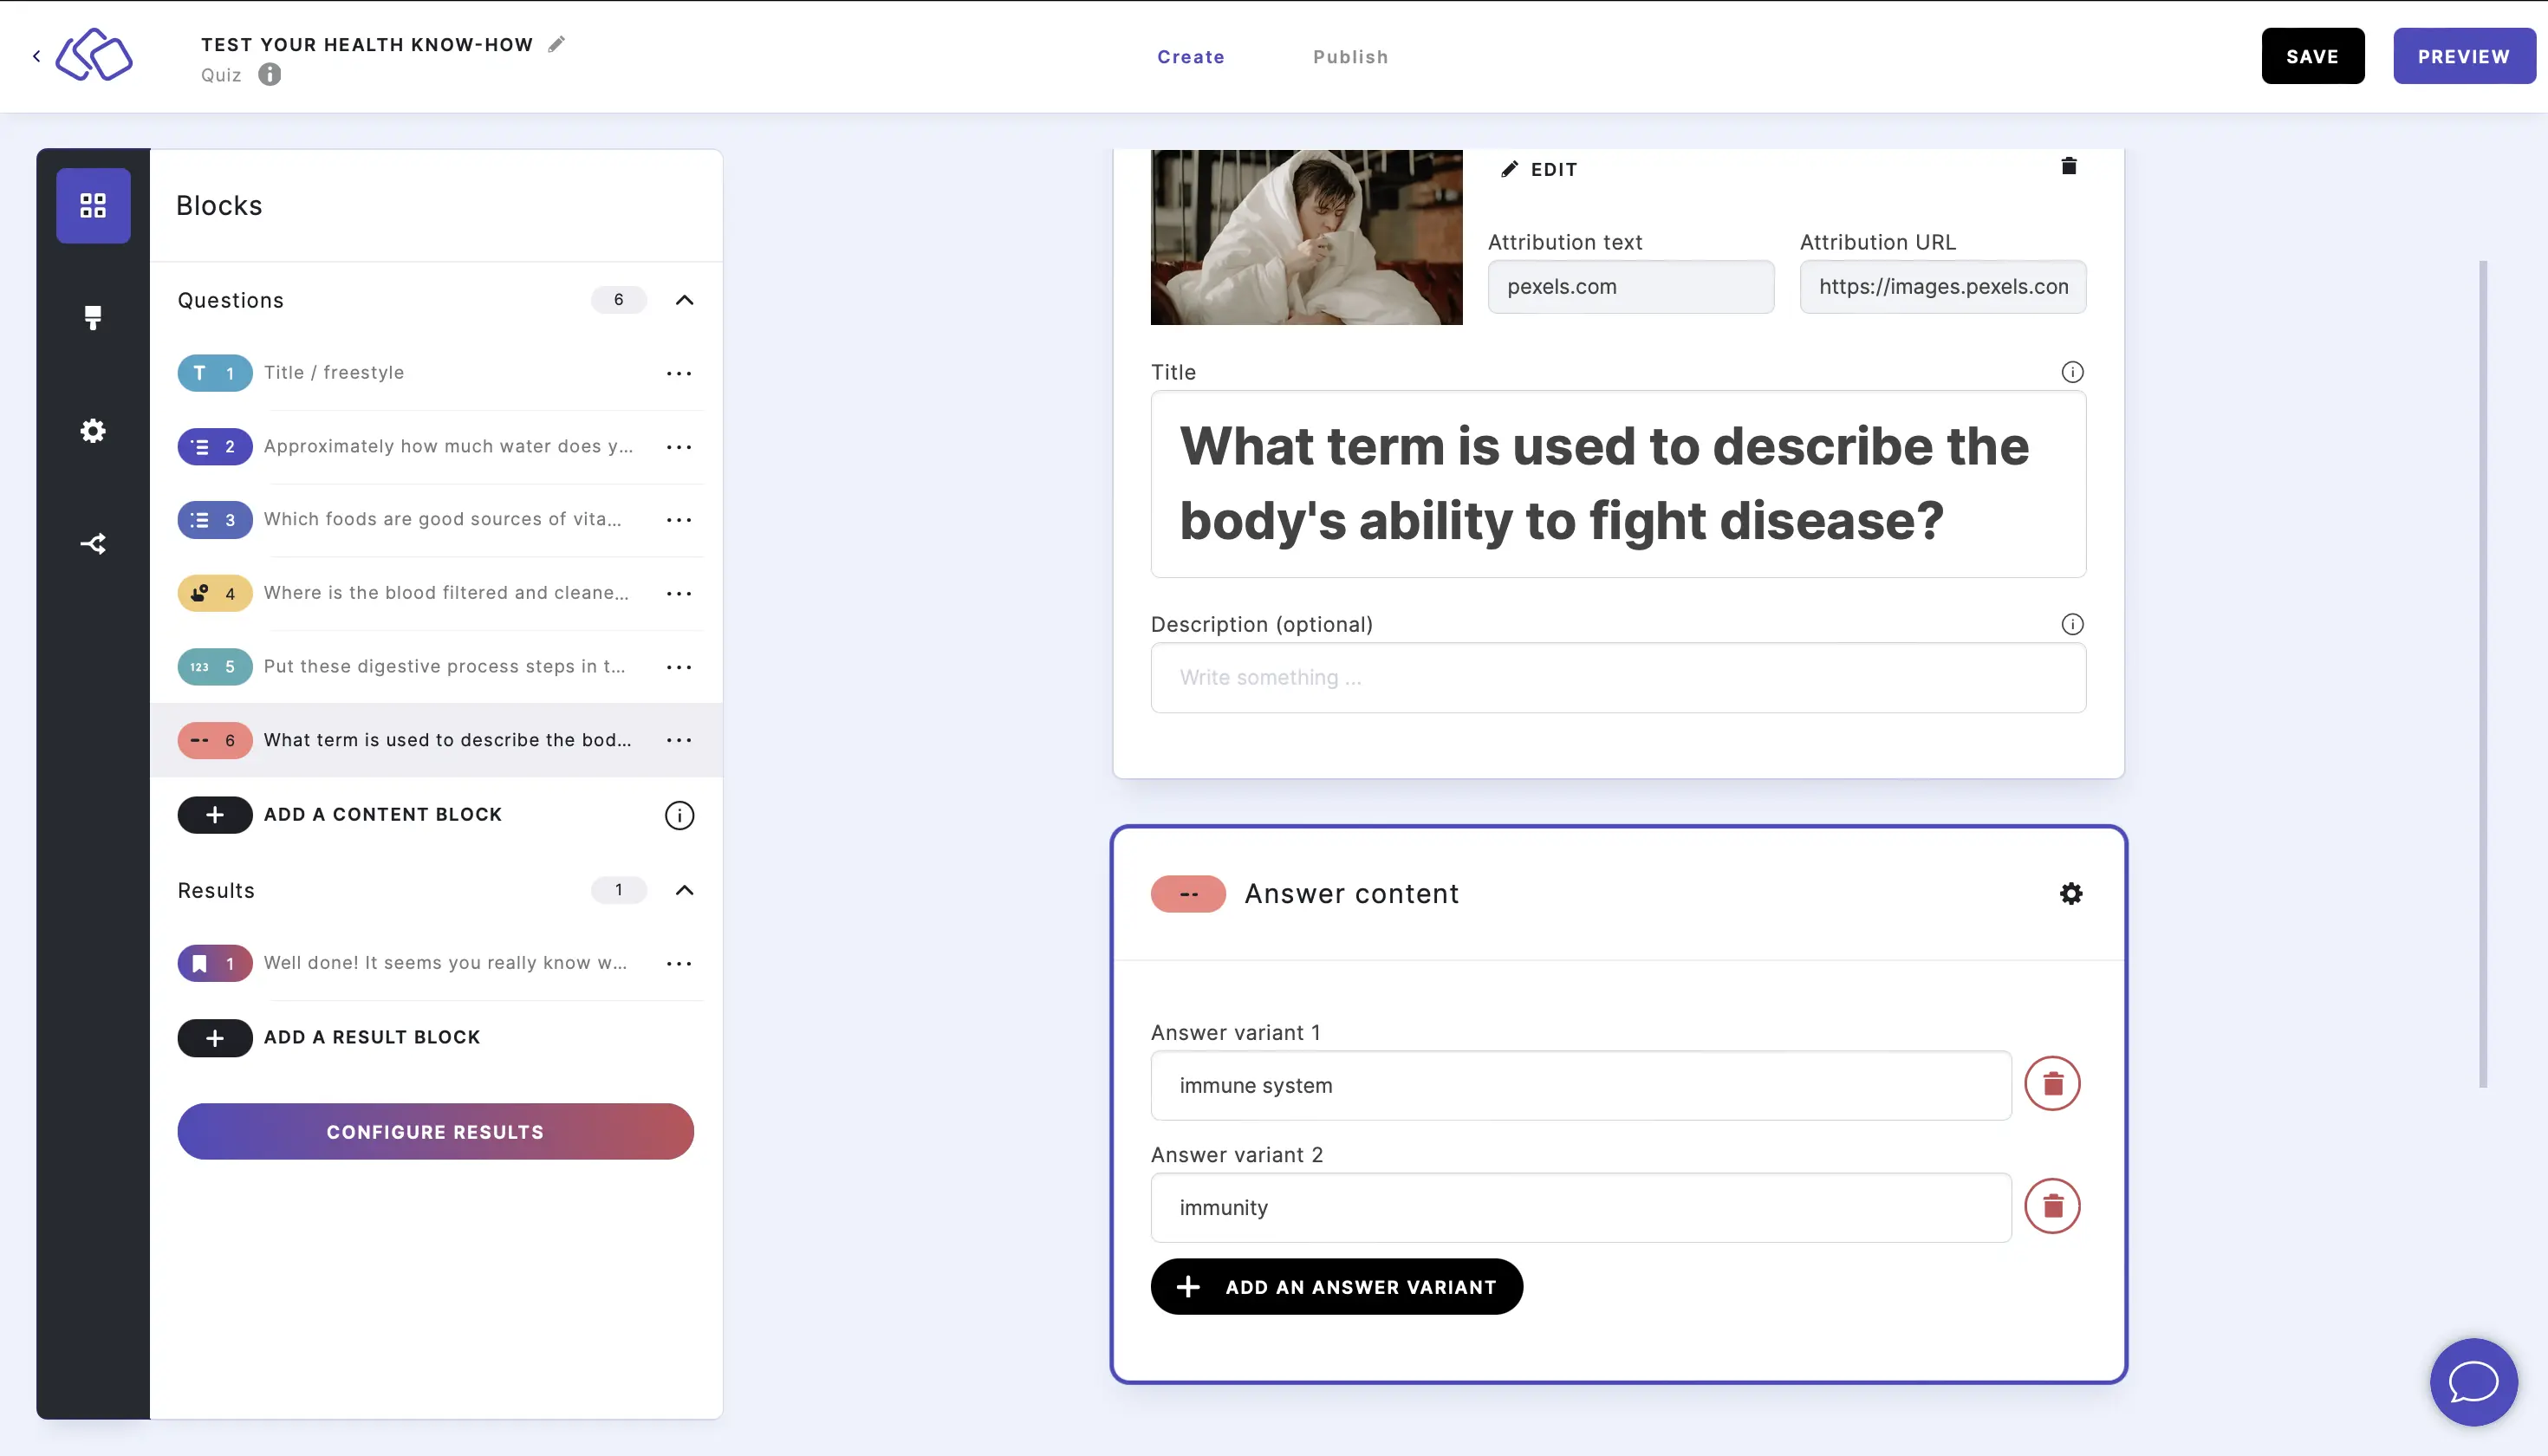
- Insert explanations into the Answer explanations field(s) (optional).
SET SPELLING OPTIONS:
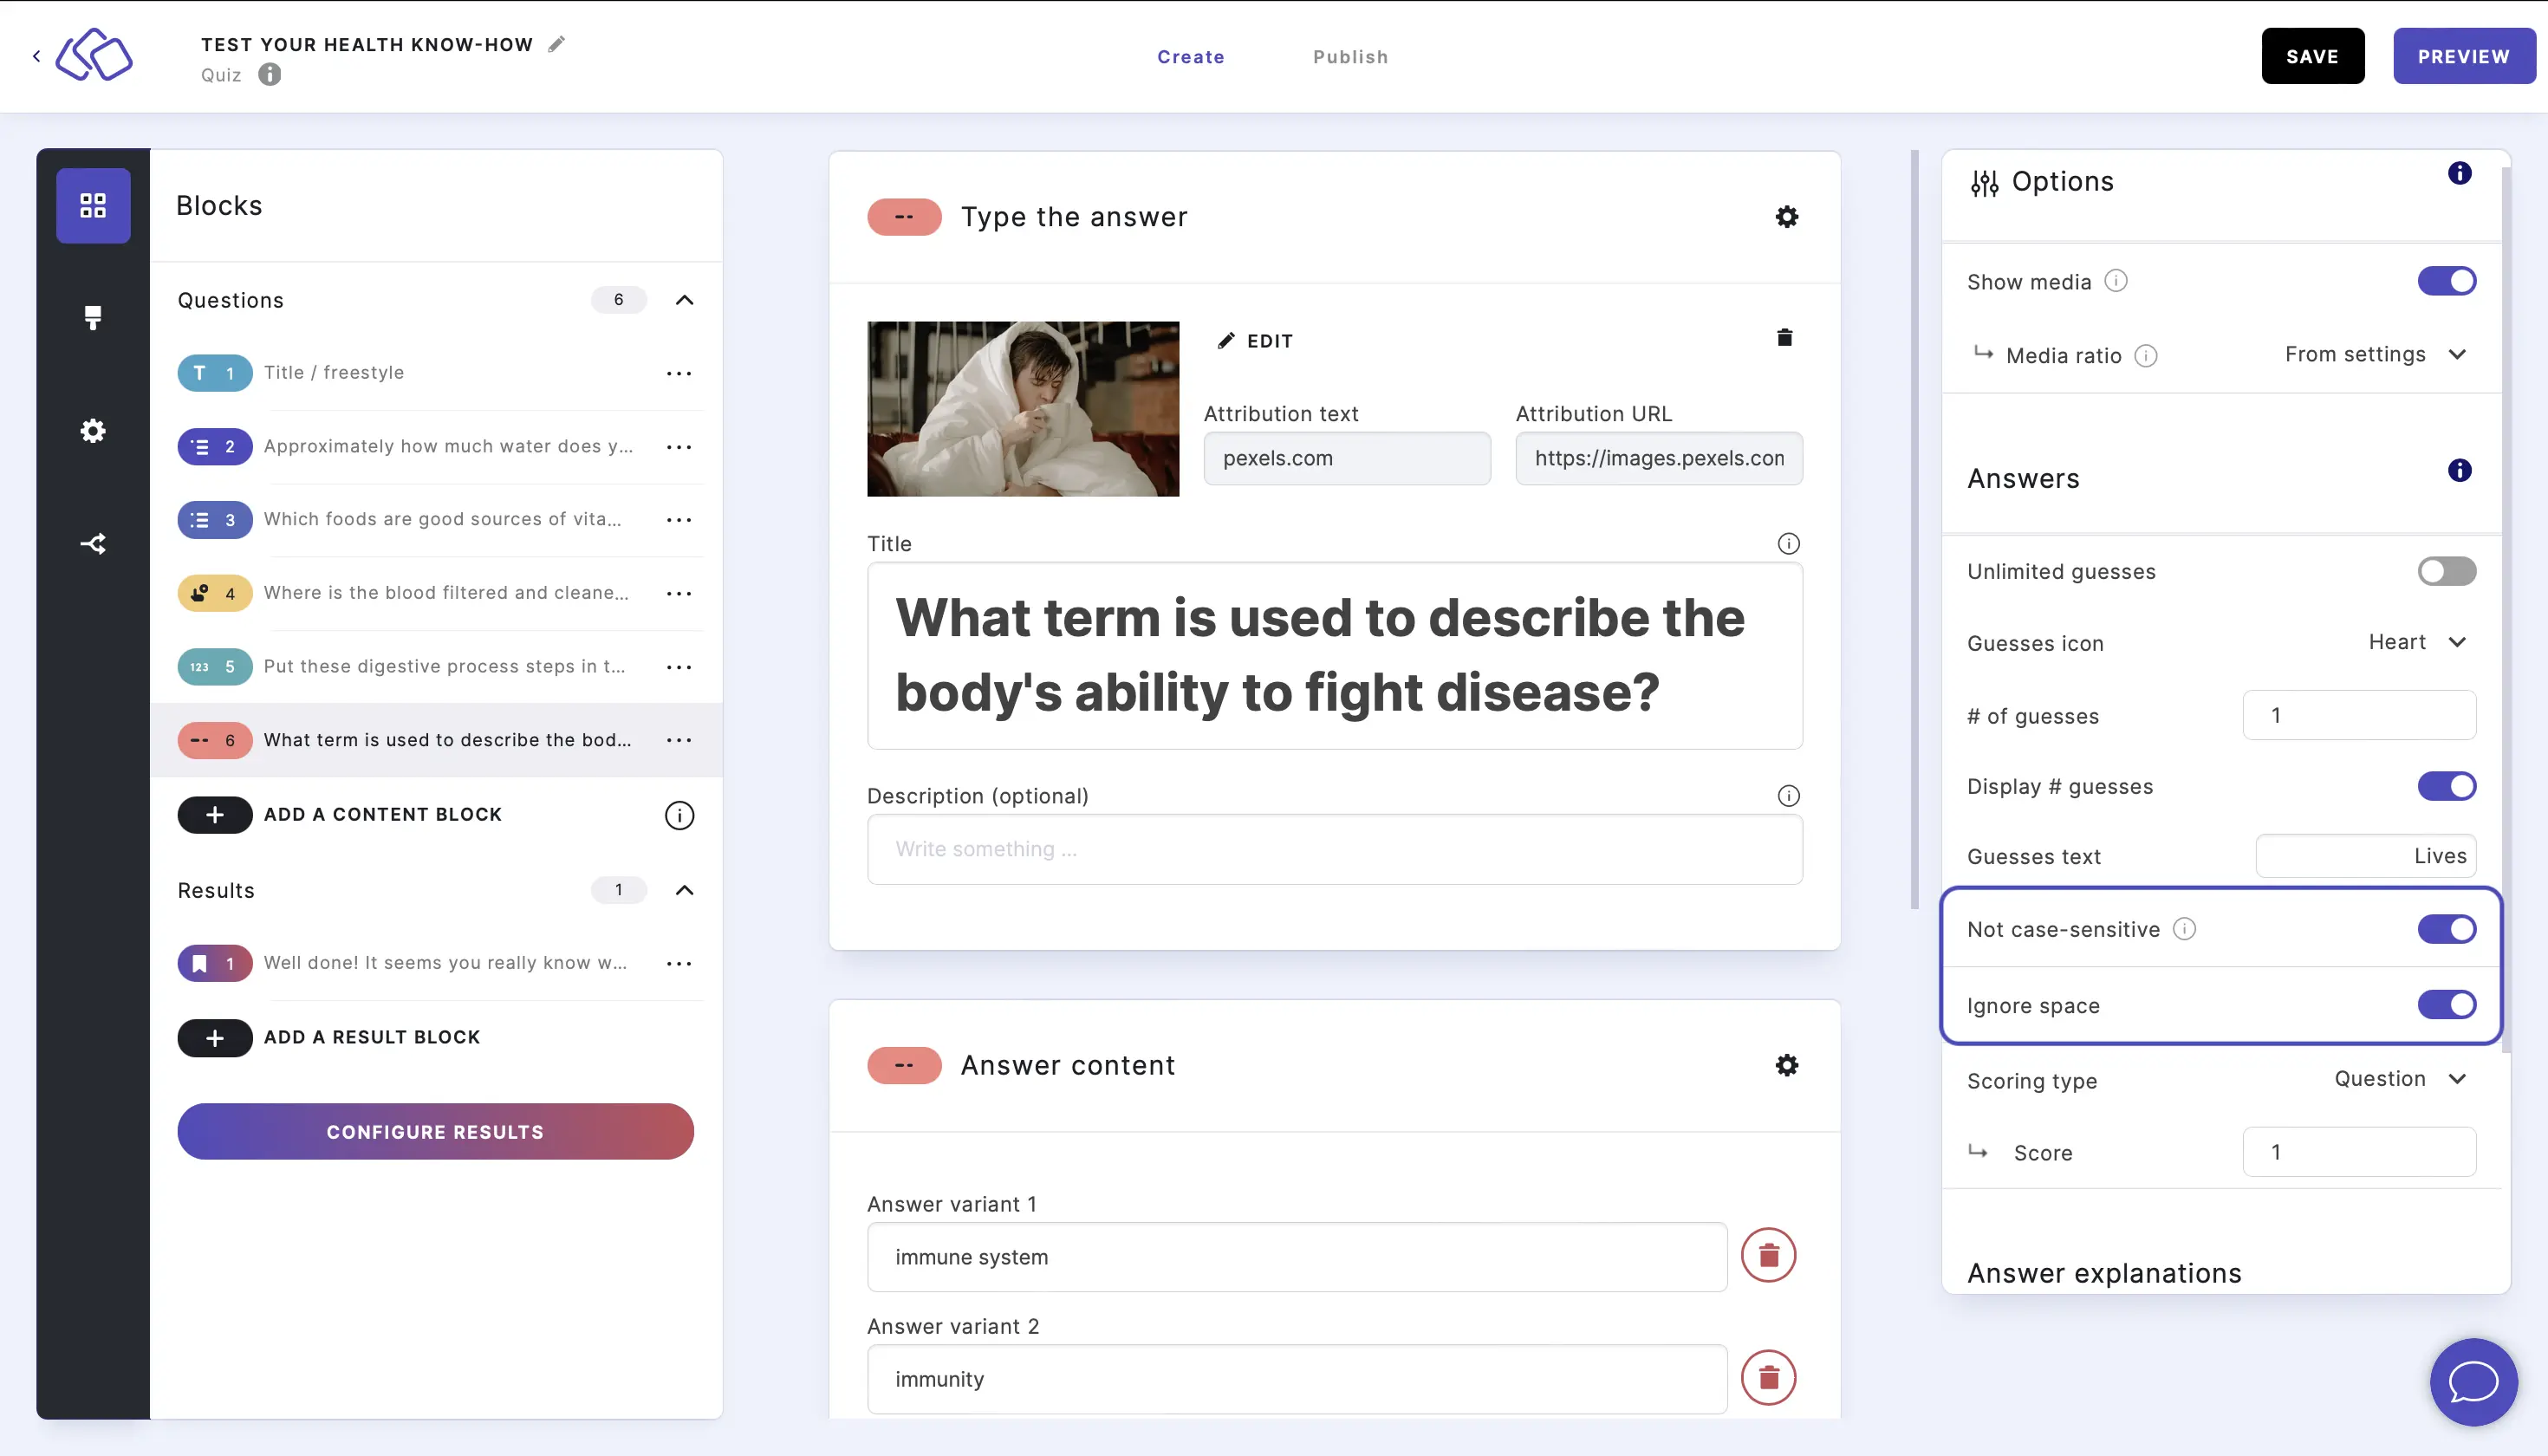
Go to the options icon on the right of Answer Content and enable Not case-sensitive and/or Ignore space.
HINTS: You can add hints in the HINT (OPTIONAL) field. Users can choose to reveal the hint at any time.
6. Spot the difference
Users can compare two images and have to spot the differences between them.
- Click on ADD A BLOCK and select Spot the difference.
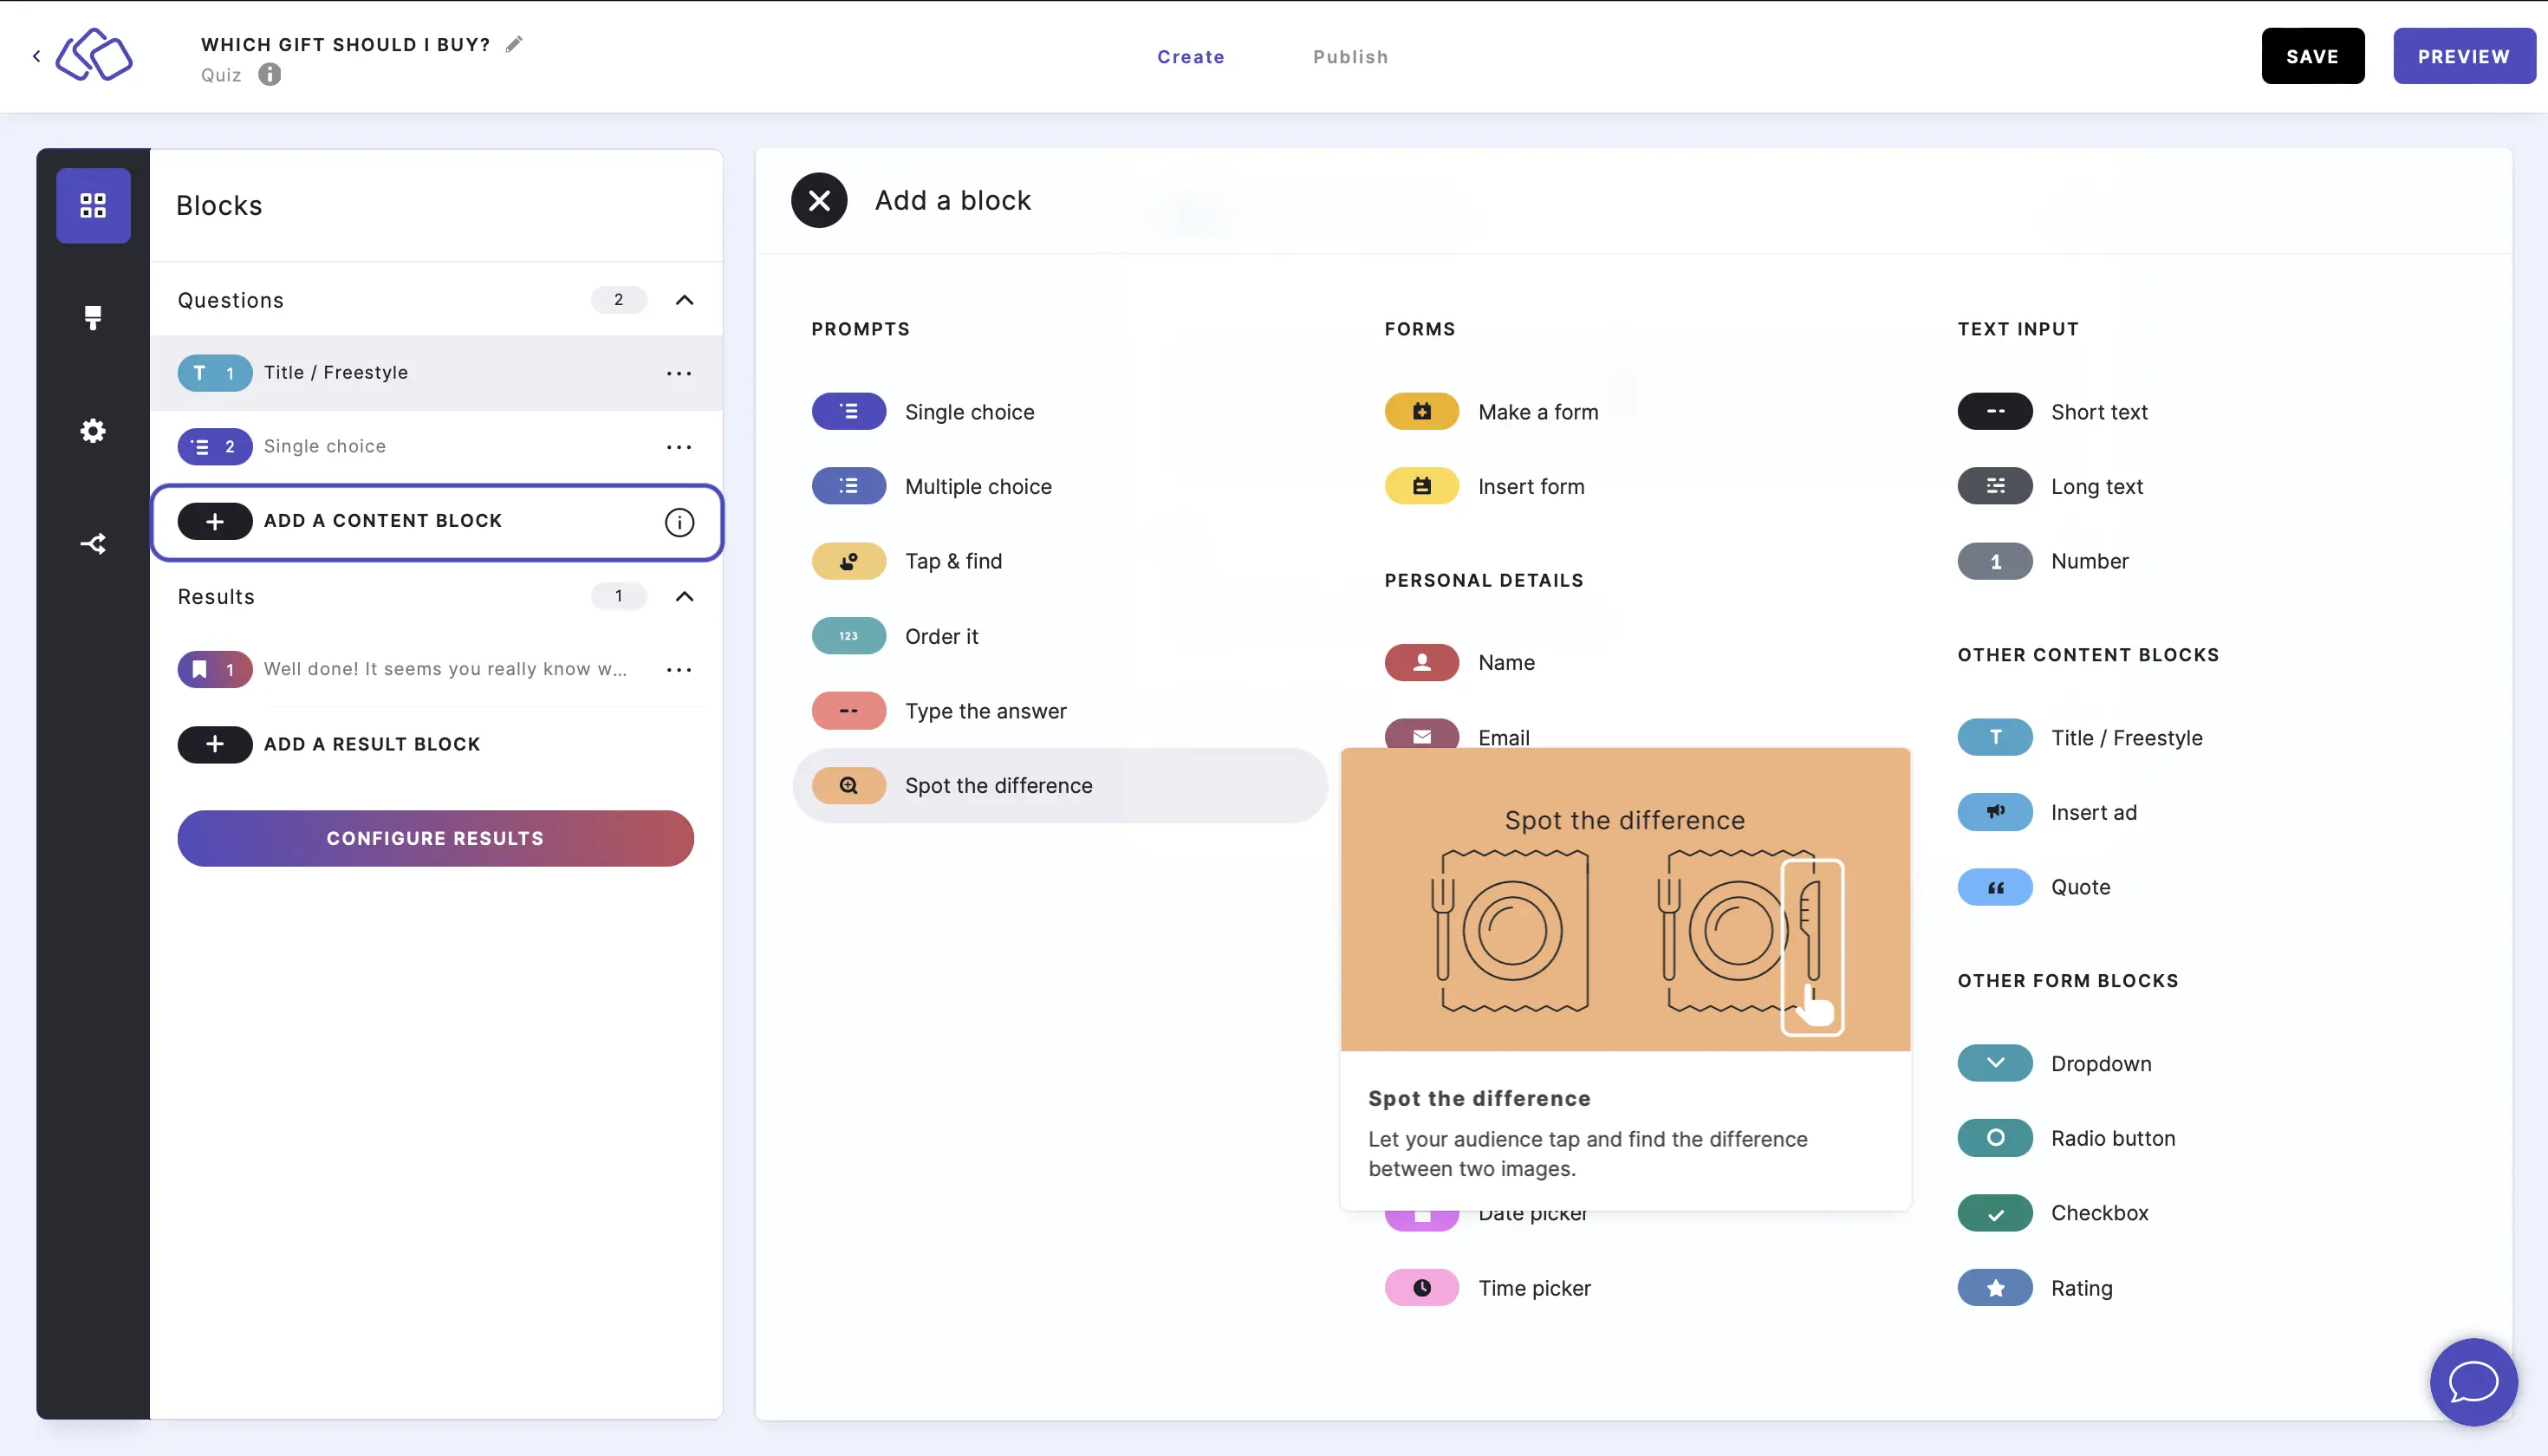
- Insert a question into the Title field.

- Insert an image into the Original image box.
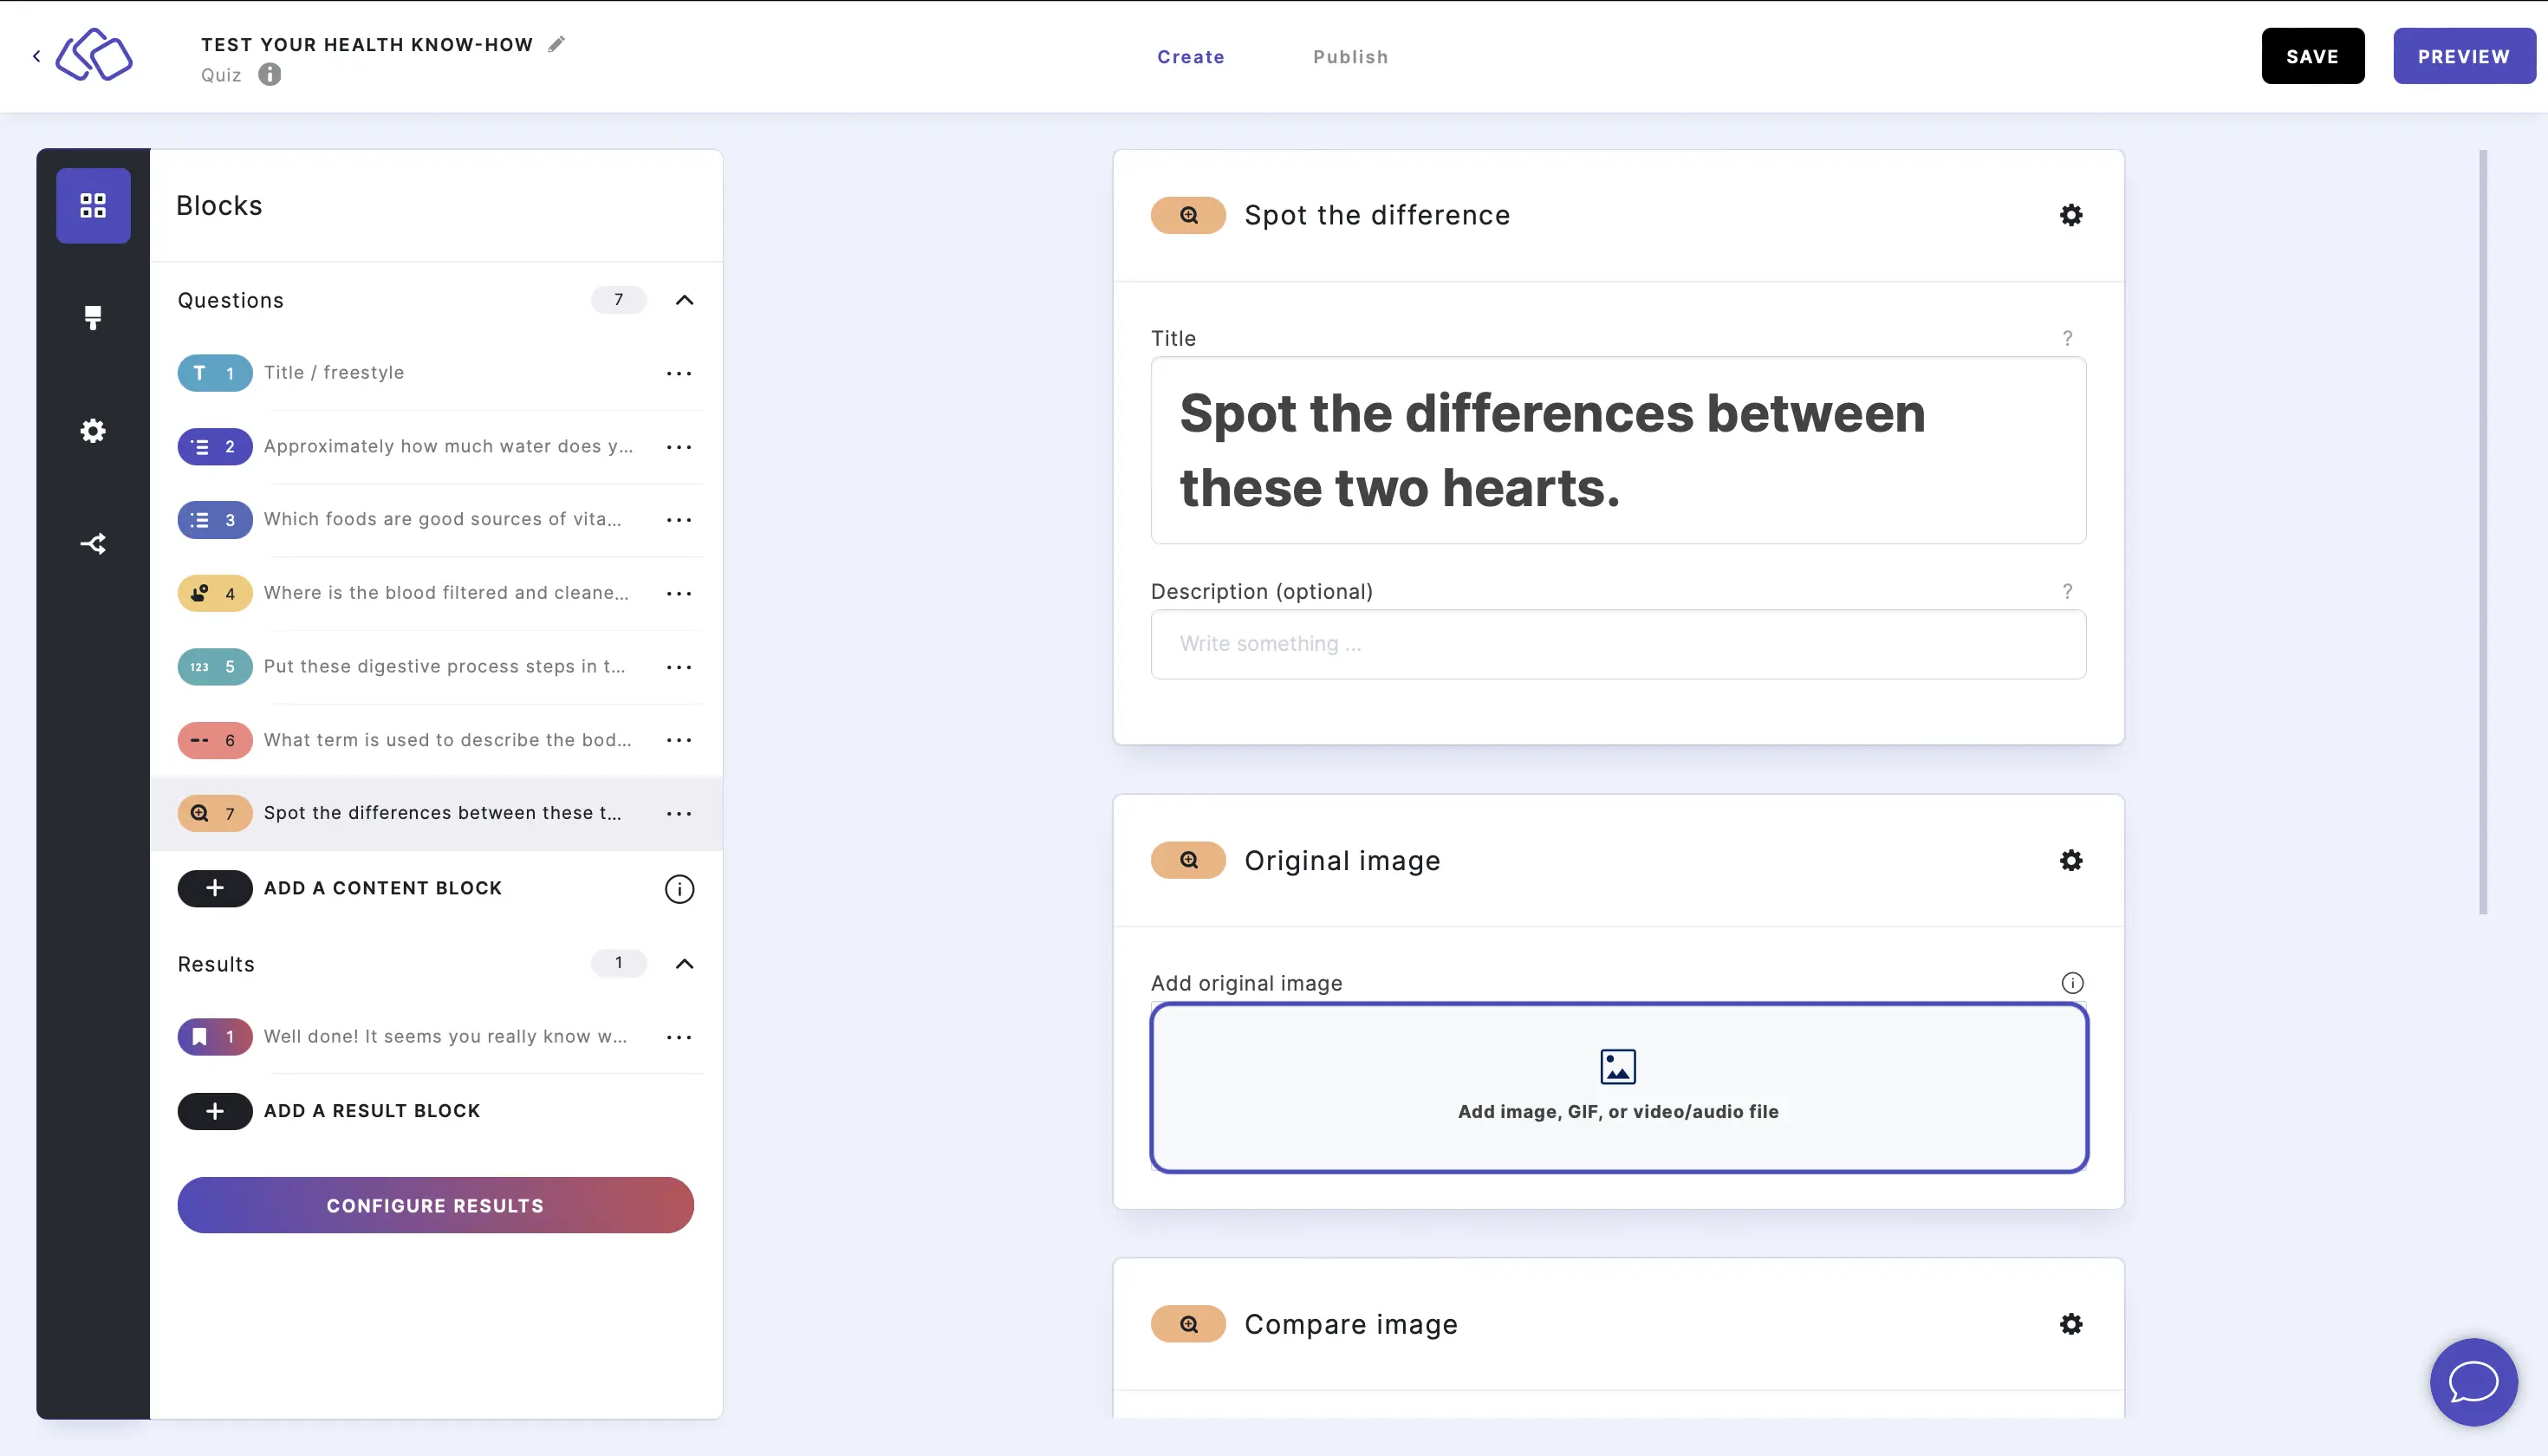
- Insert an image into the Compare image box.
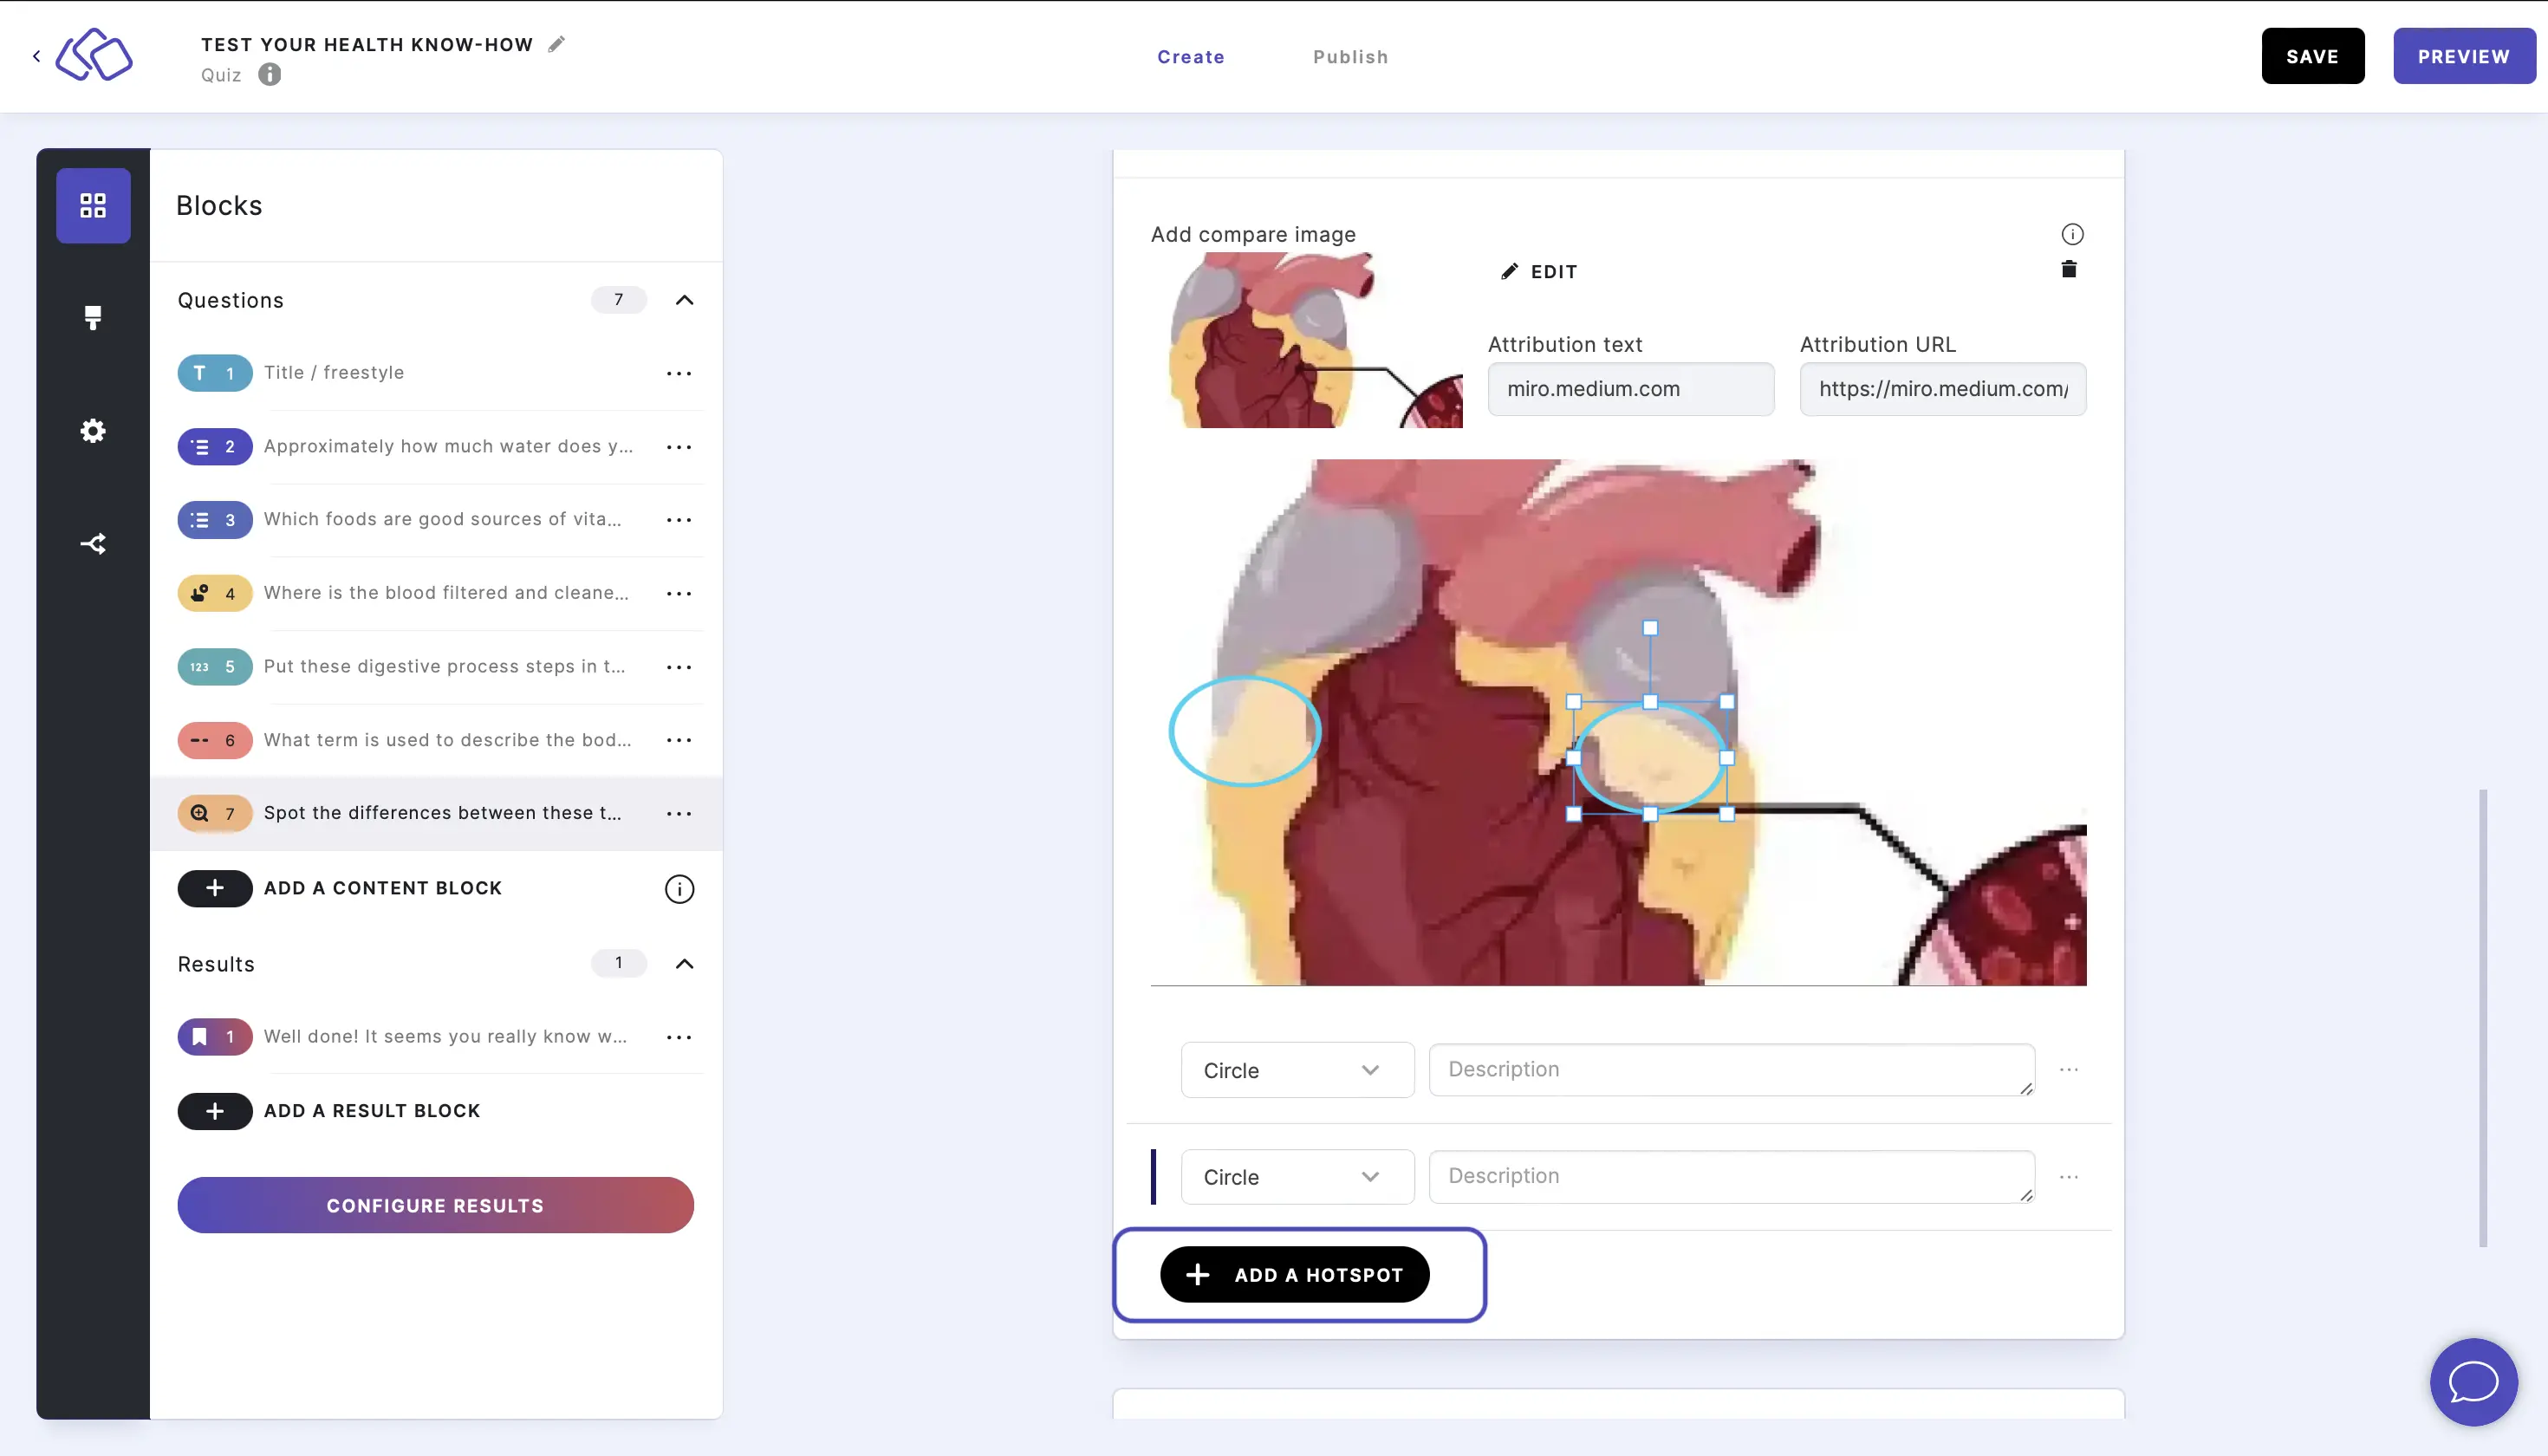
A circular hotspot will appear which you can click and drag to the right place in one of the images for a correct answer. The corresponding hotspot in the other picture will move with it automatically.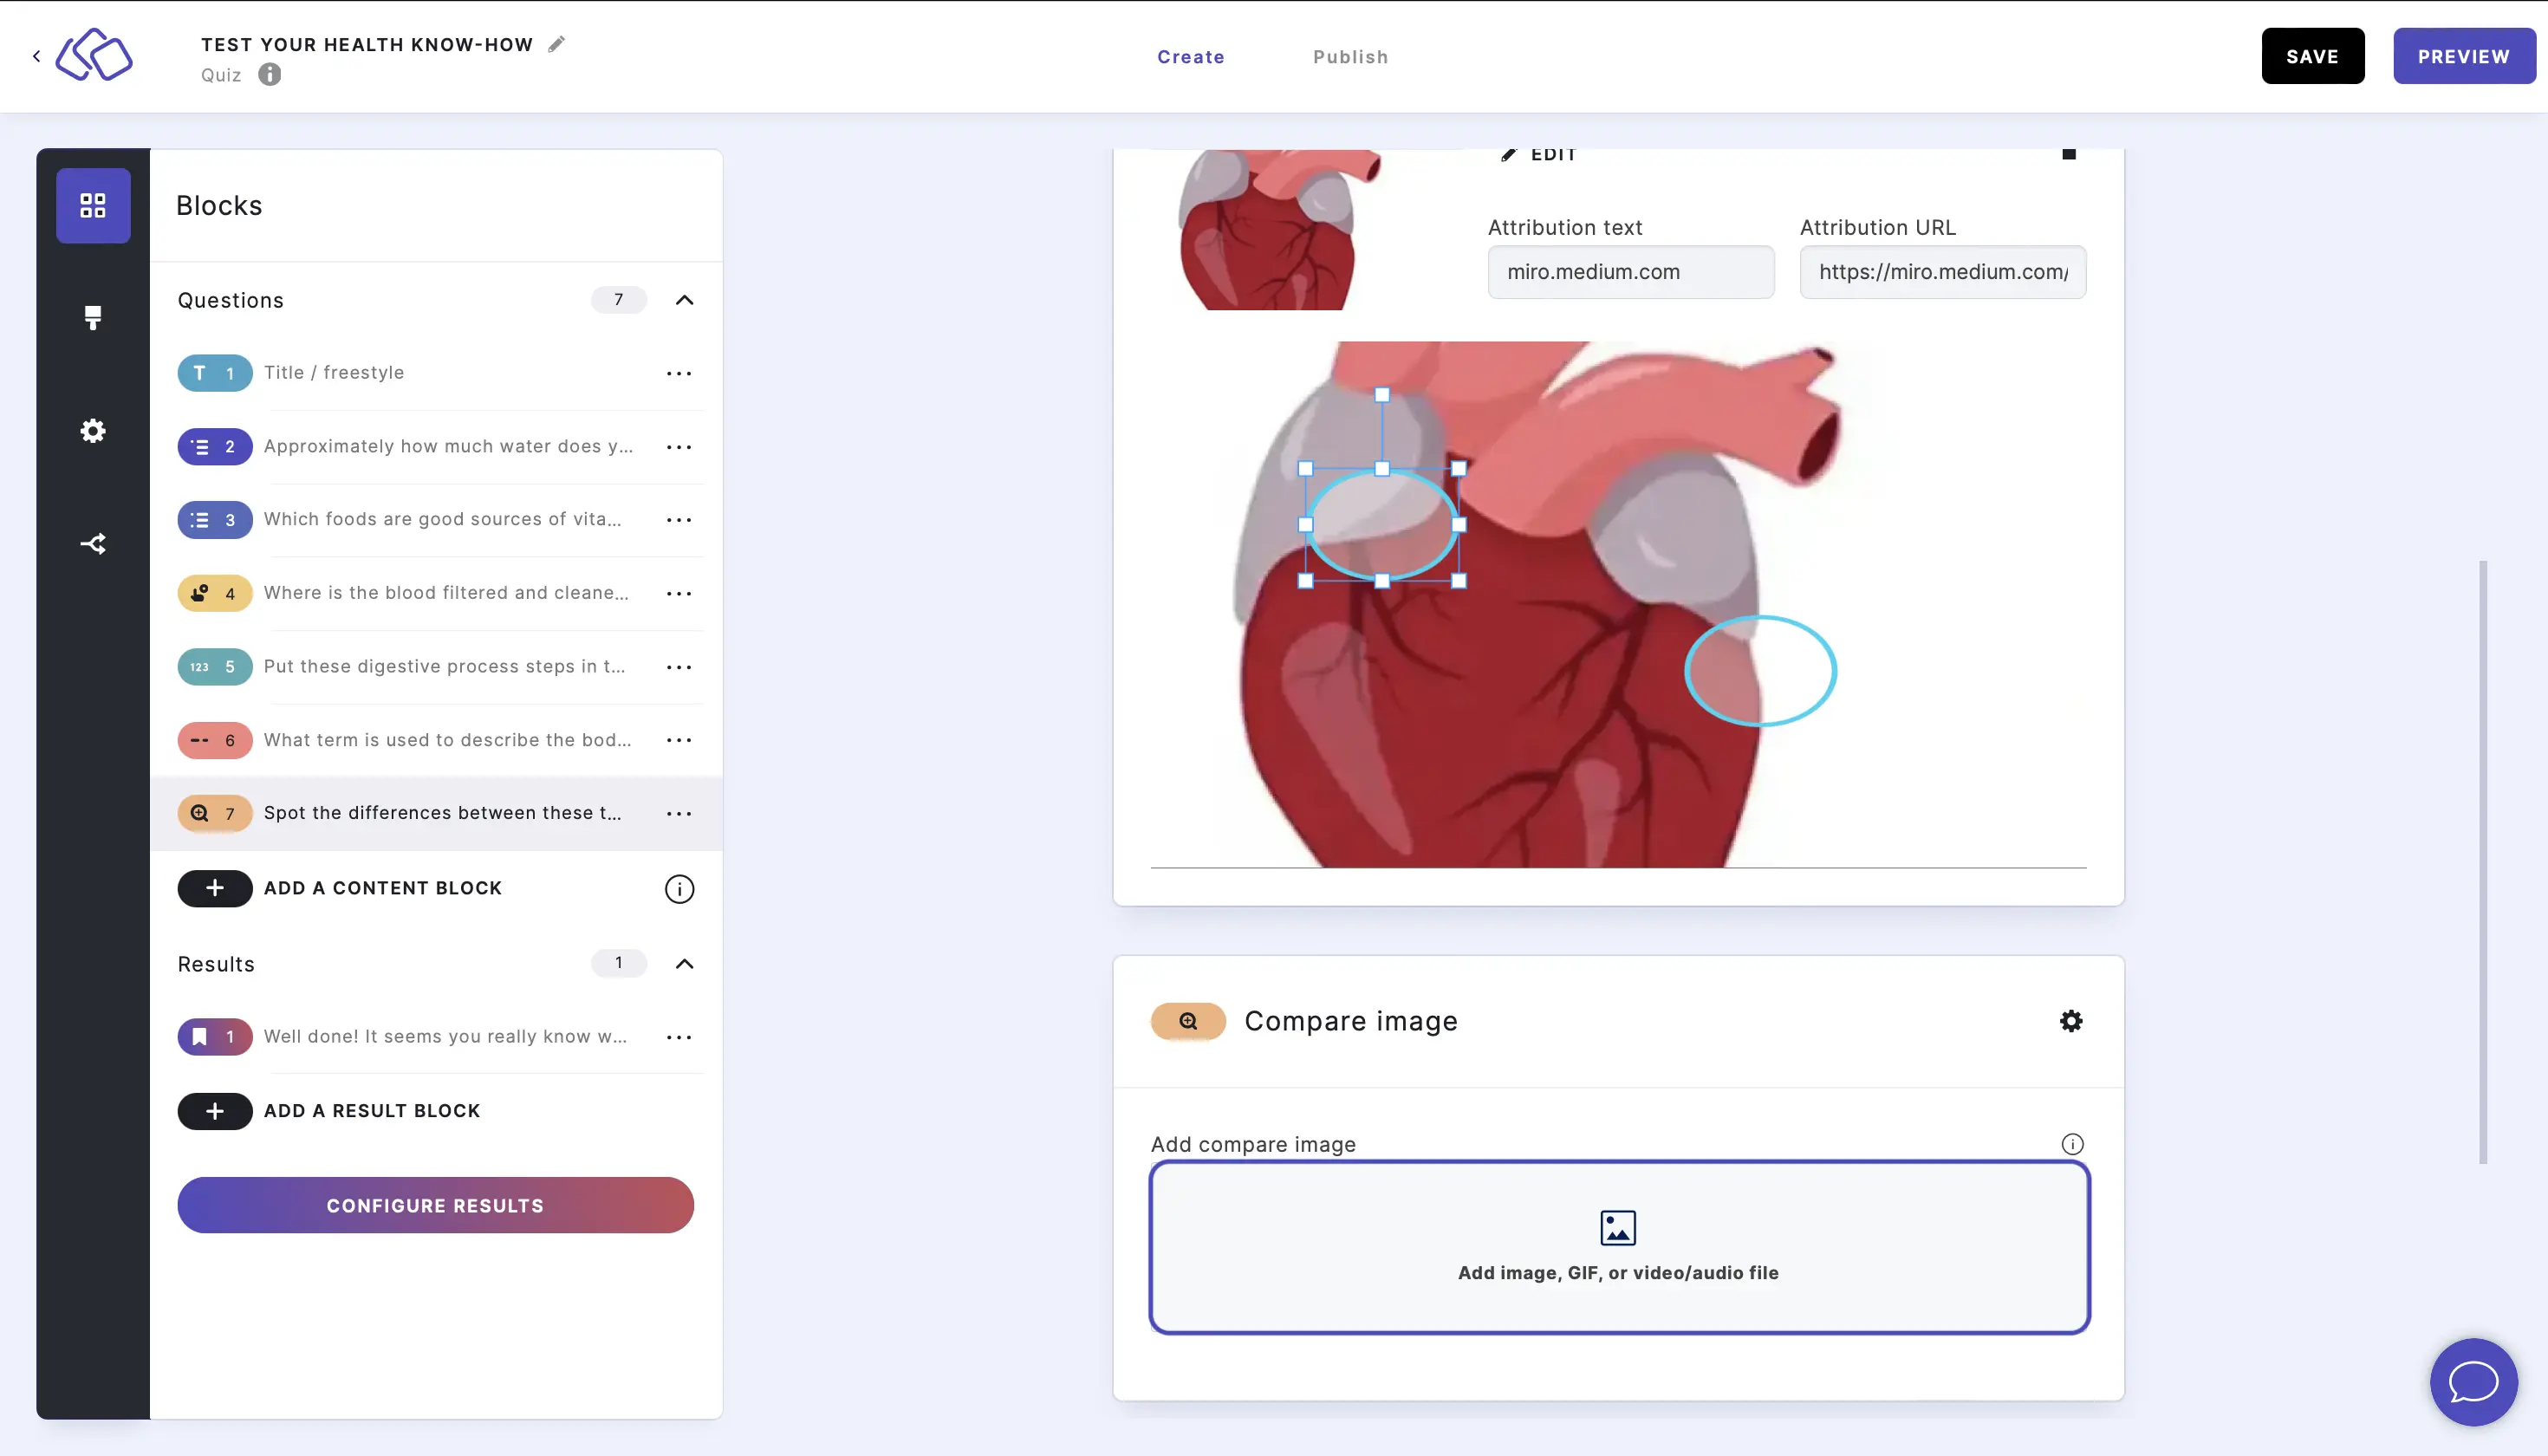
- Click on Add a hotspot and repeat the process for as many points on the picture as you like. To delete a hotspot, click on the three dots next to the hotspot and then DELETE.
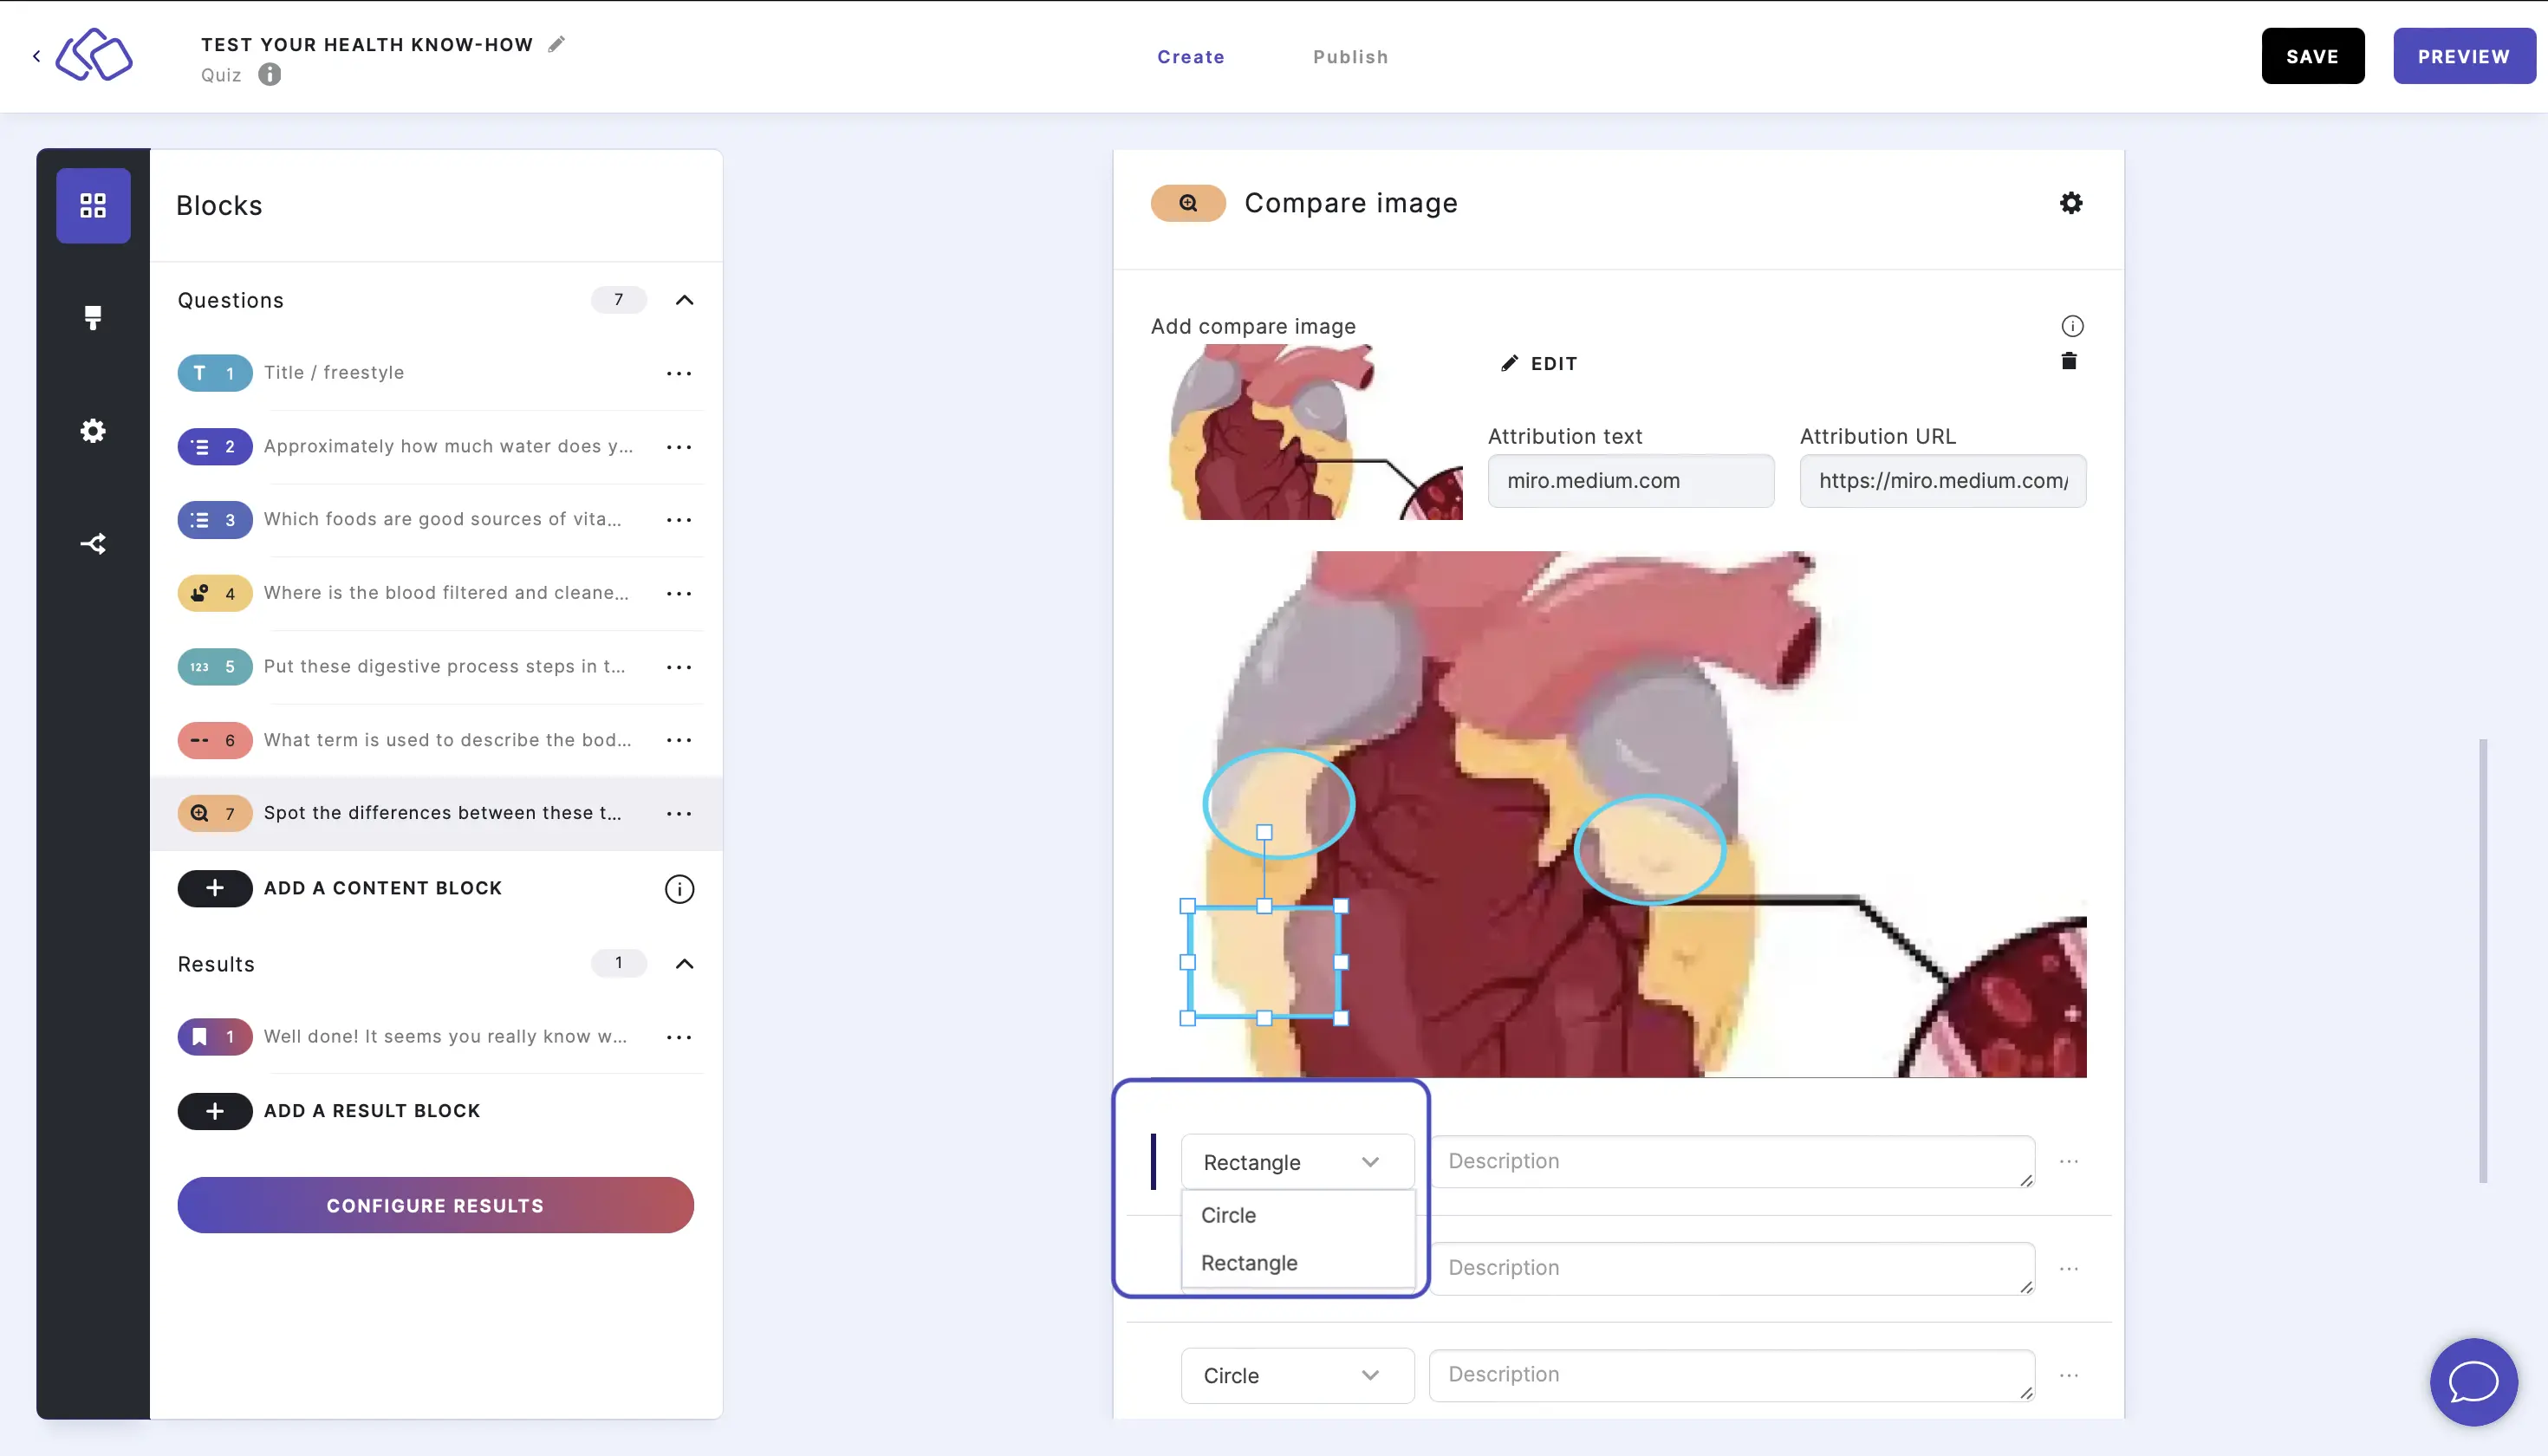
- Change the hotspot from a circle to a rectangle by selecting Rectangle from the dropdown menu under the image.
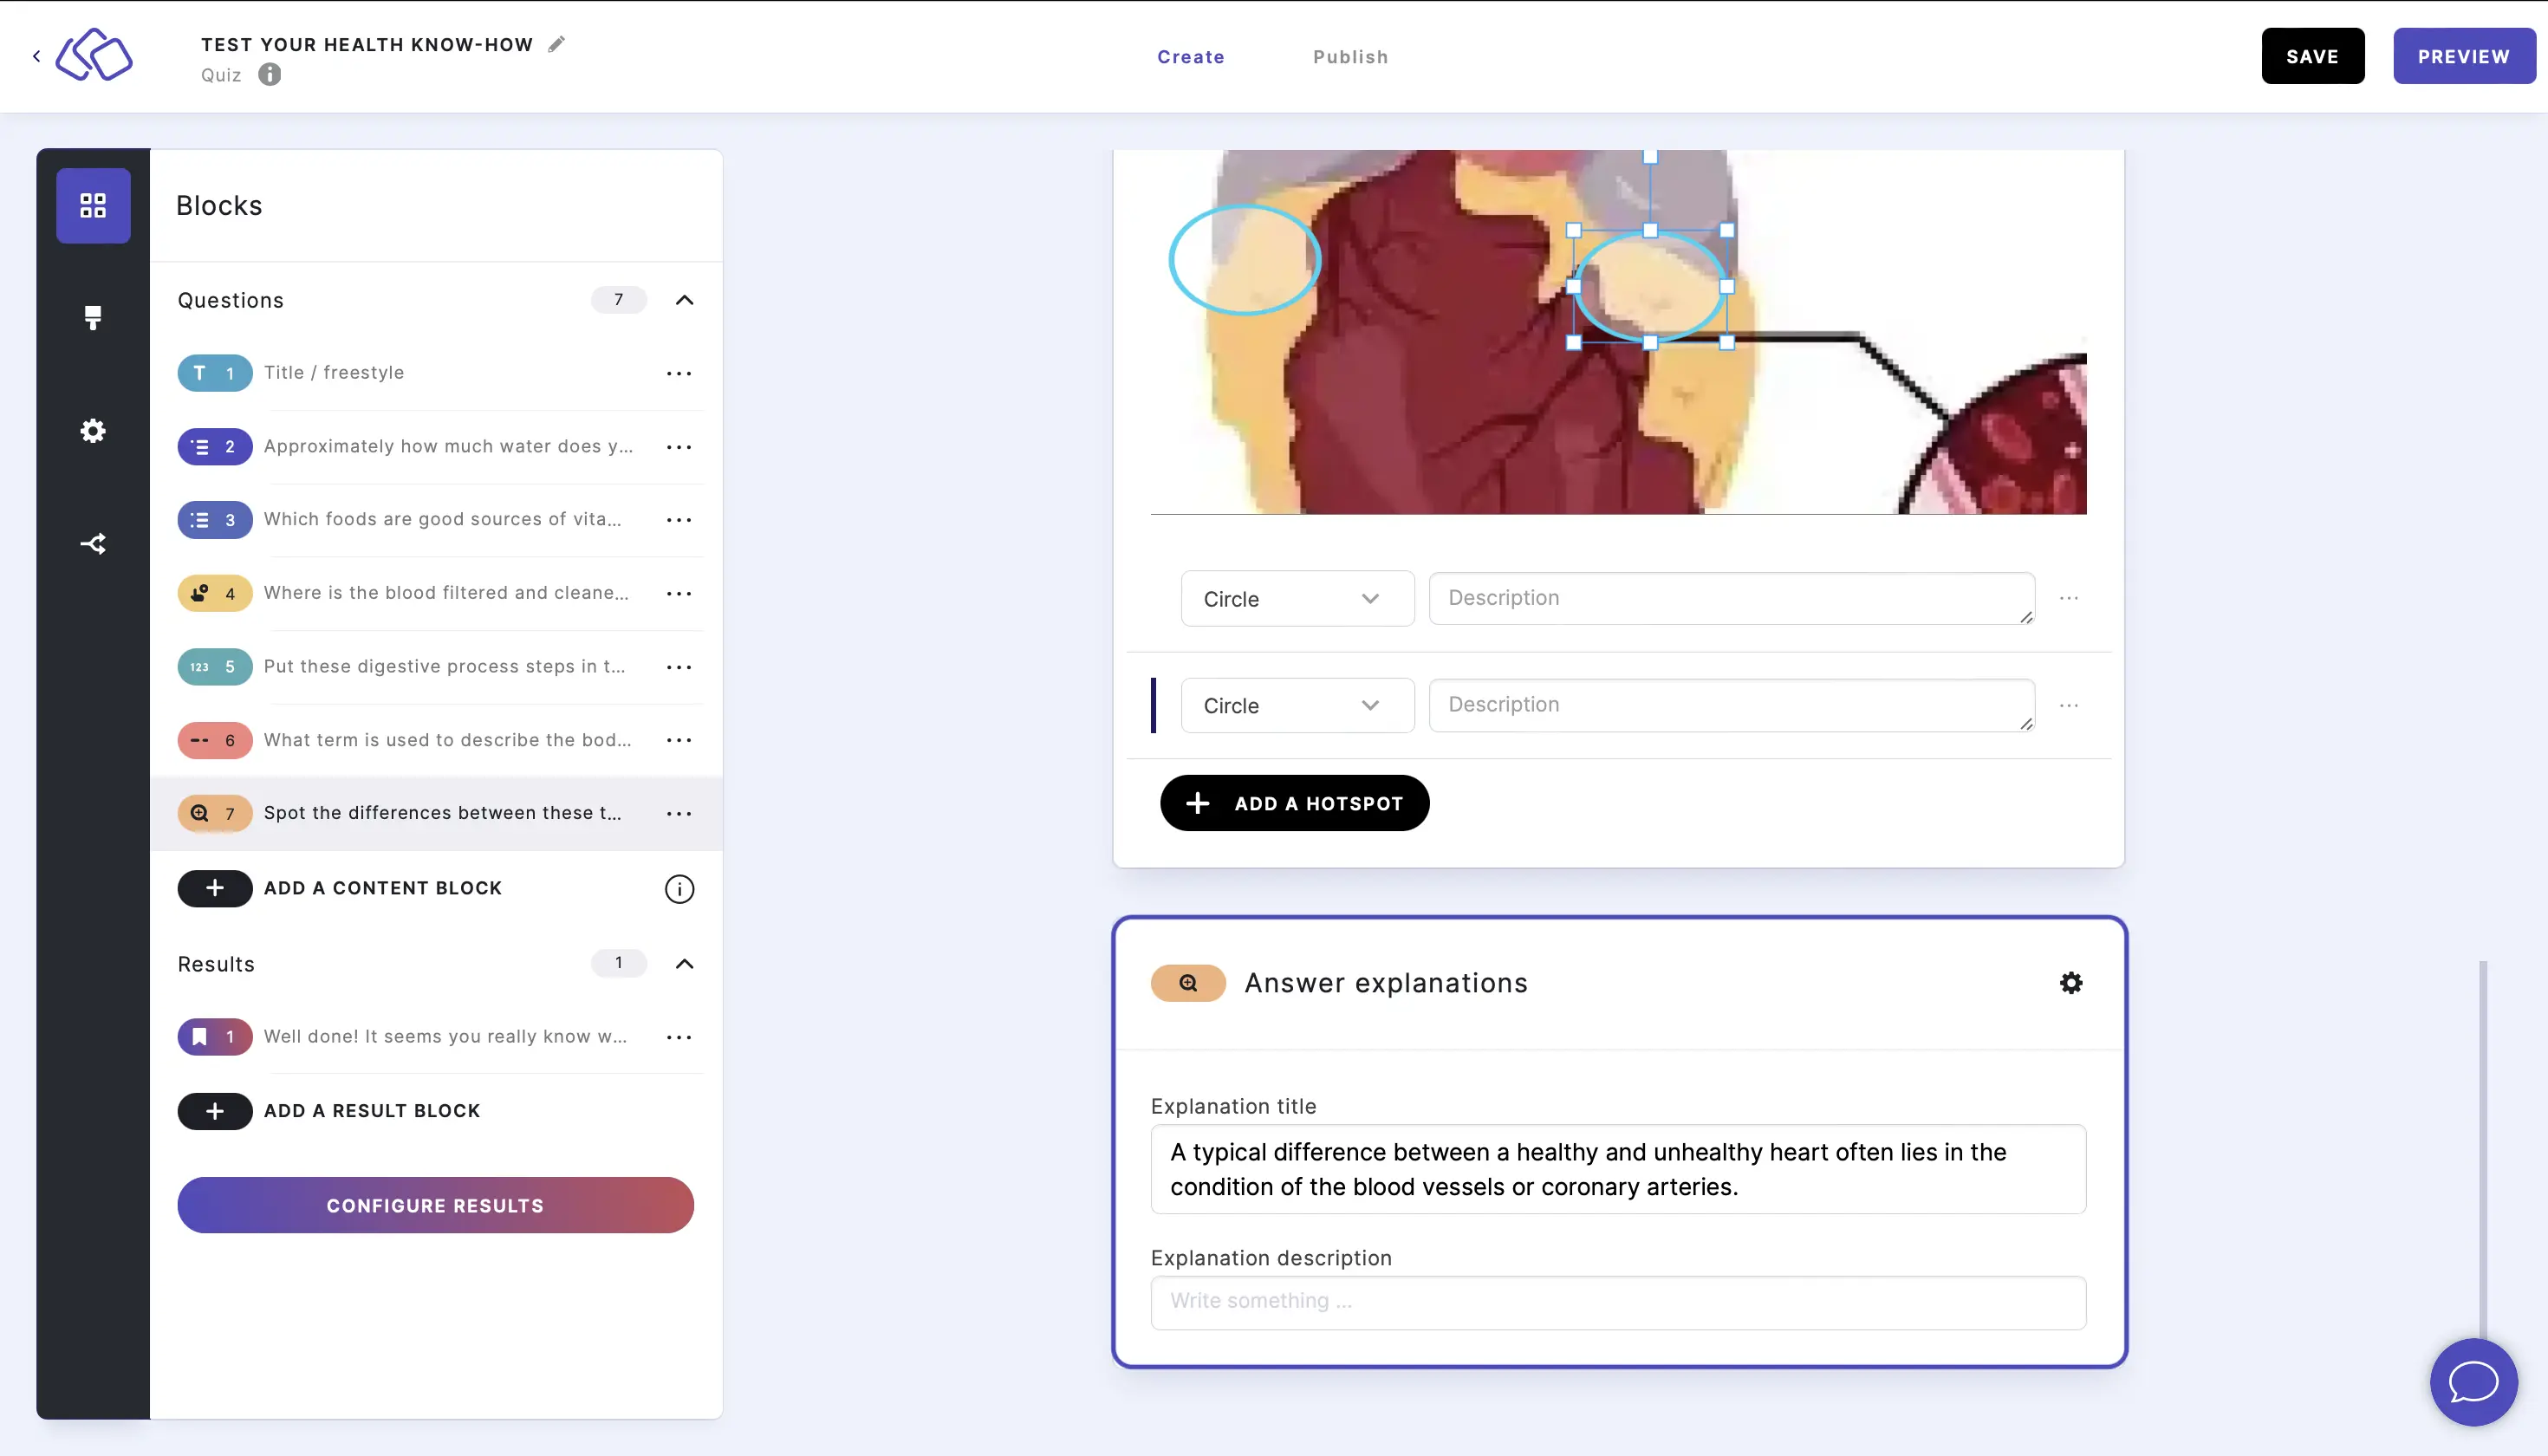
- Insert explanations into the Answer explanations field(s) (optional).
GUESSES:
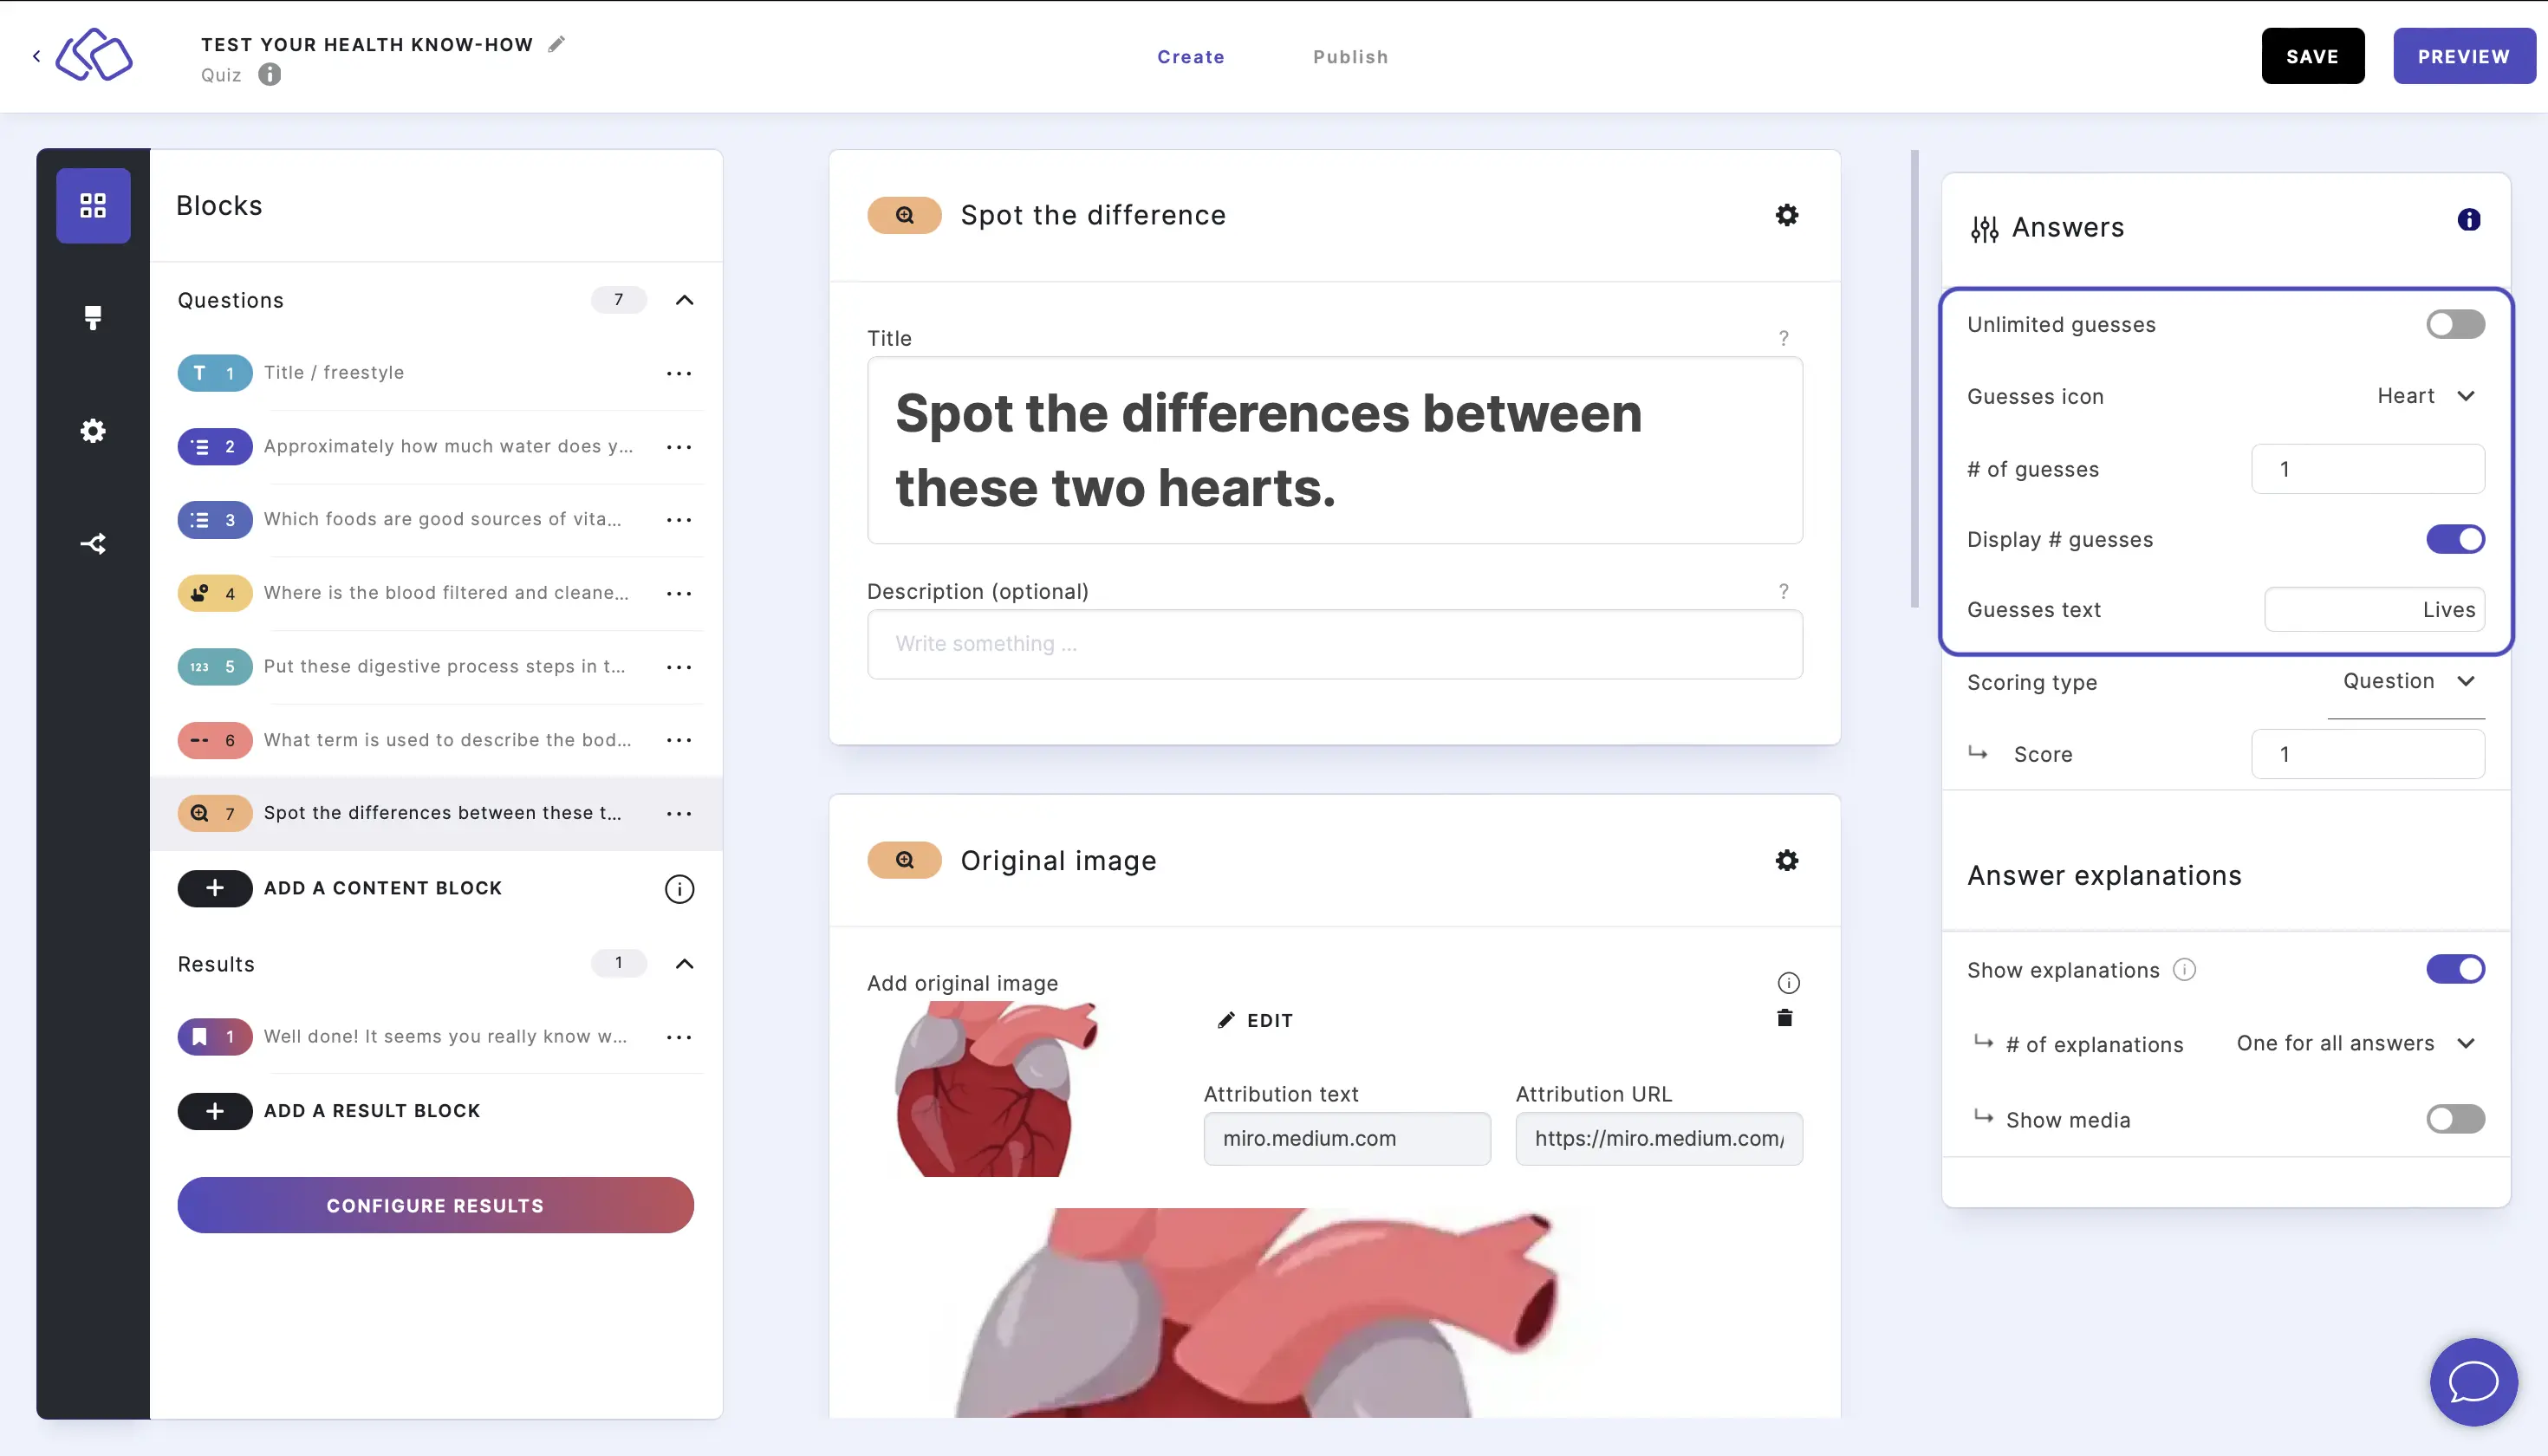
By default, your audience has one guess. To change this, go to the options icon on the right of Answer Content.
To change the number of guesses, type a number in the # of guesses or enable Unlimited guesses. To change the icon or text, select a Guesses icon and enter a Guesses text.
HINTS: You can add hints in the HINT (OPTIONAL) field. Users can choose to reveal the hint at any time.
7. Flashcard
Encourage self-directed learning with interactive flashcards.
- Click on ADD A BLOCK and select Flashcard.
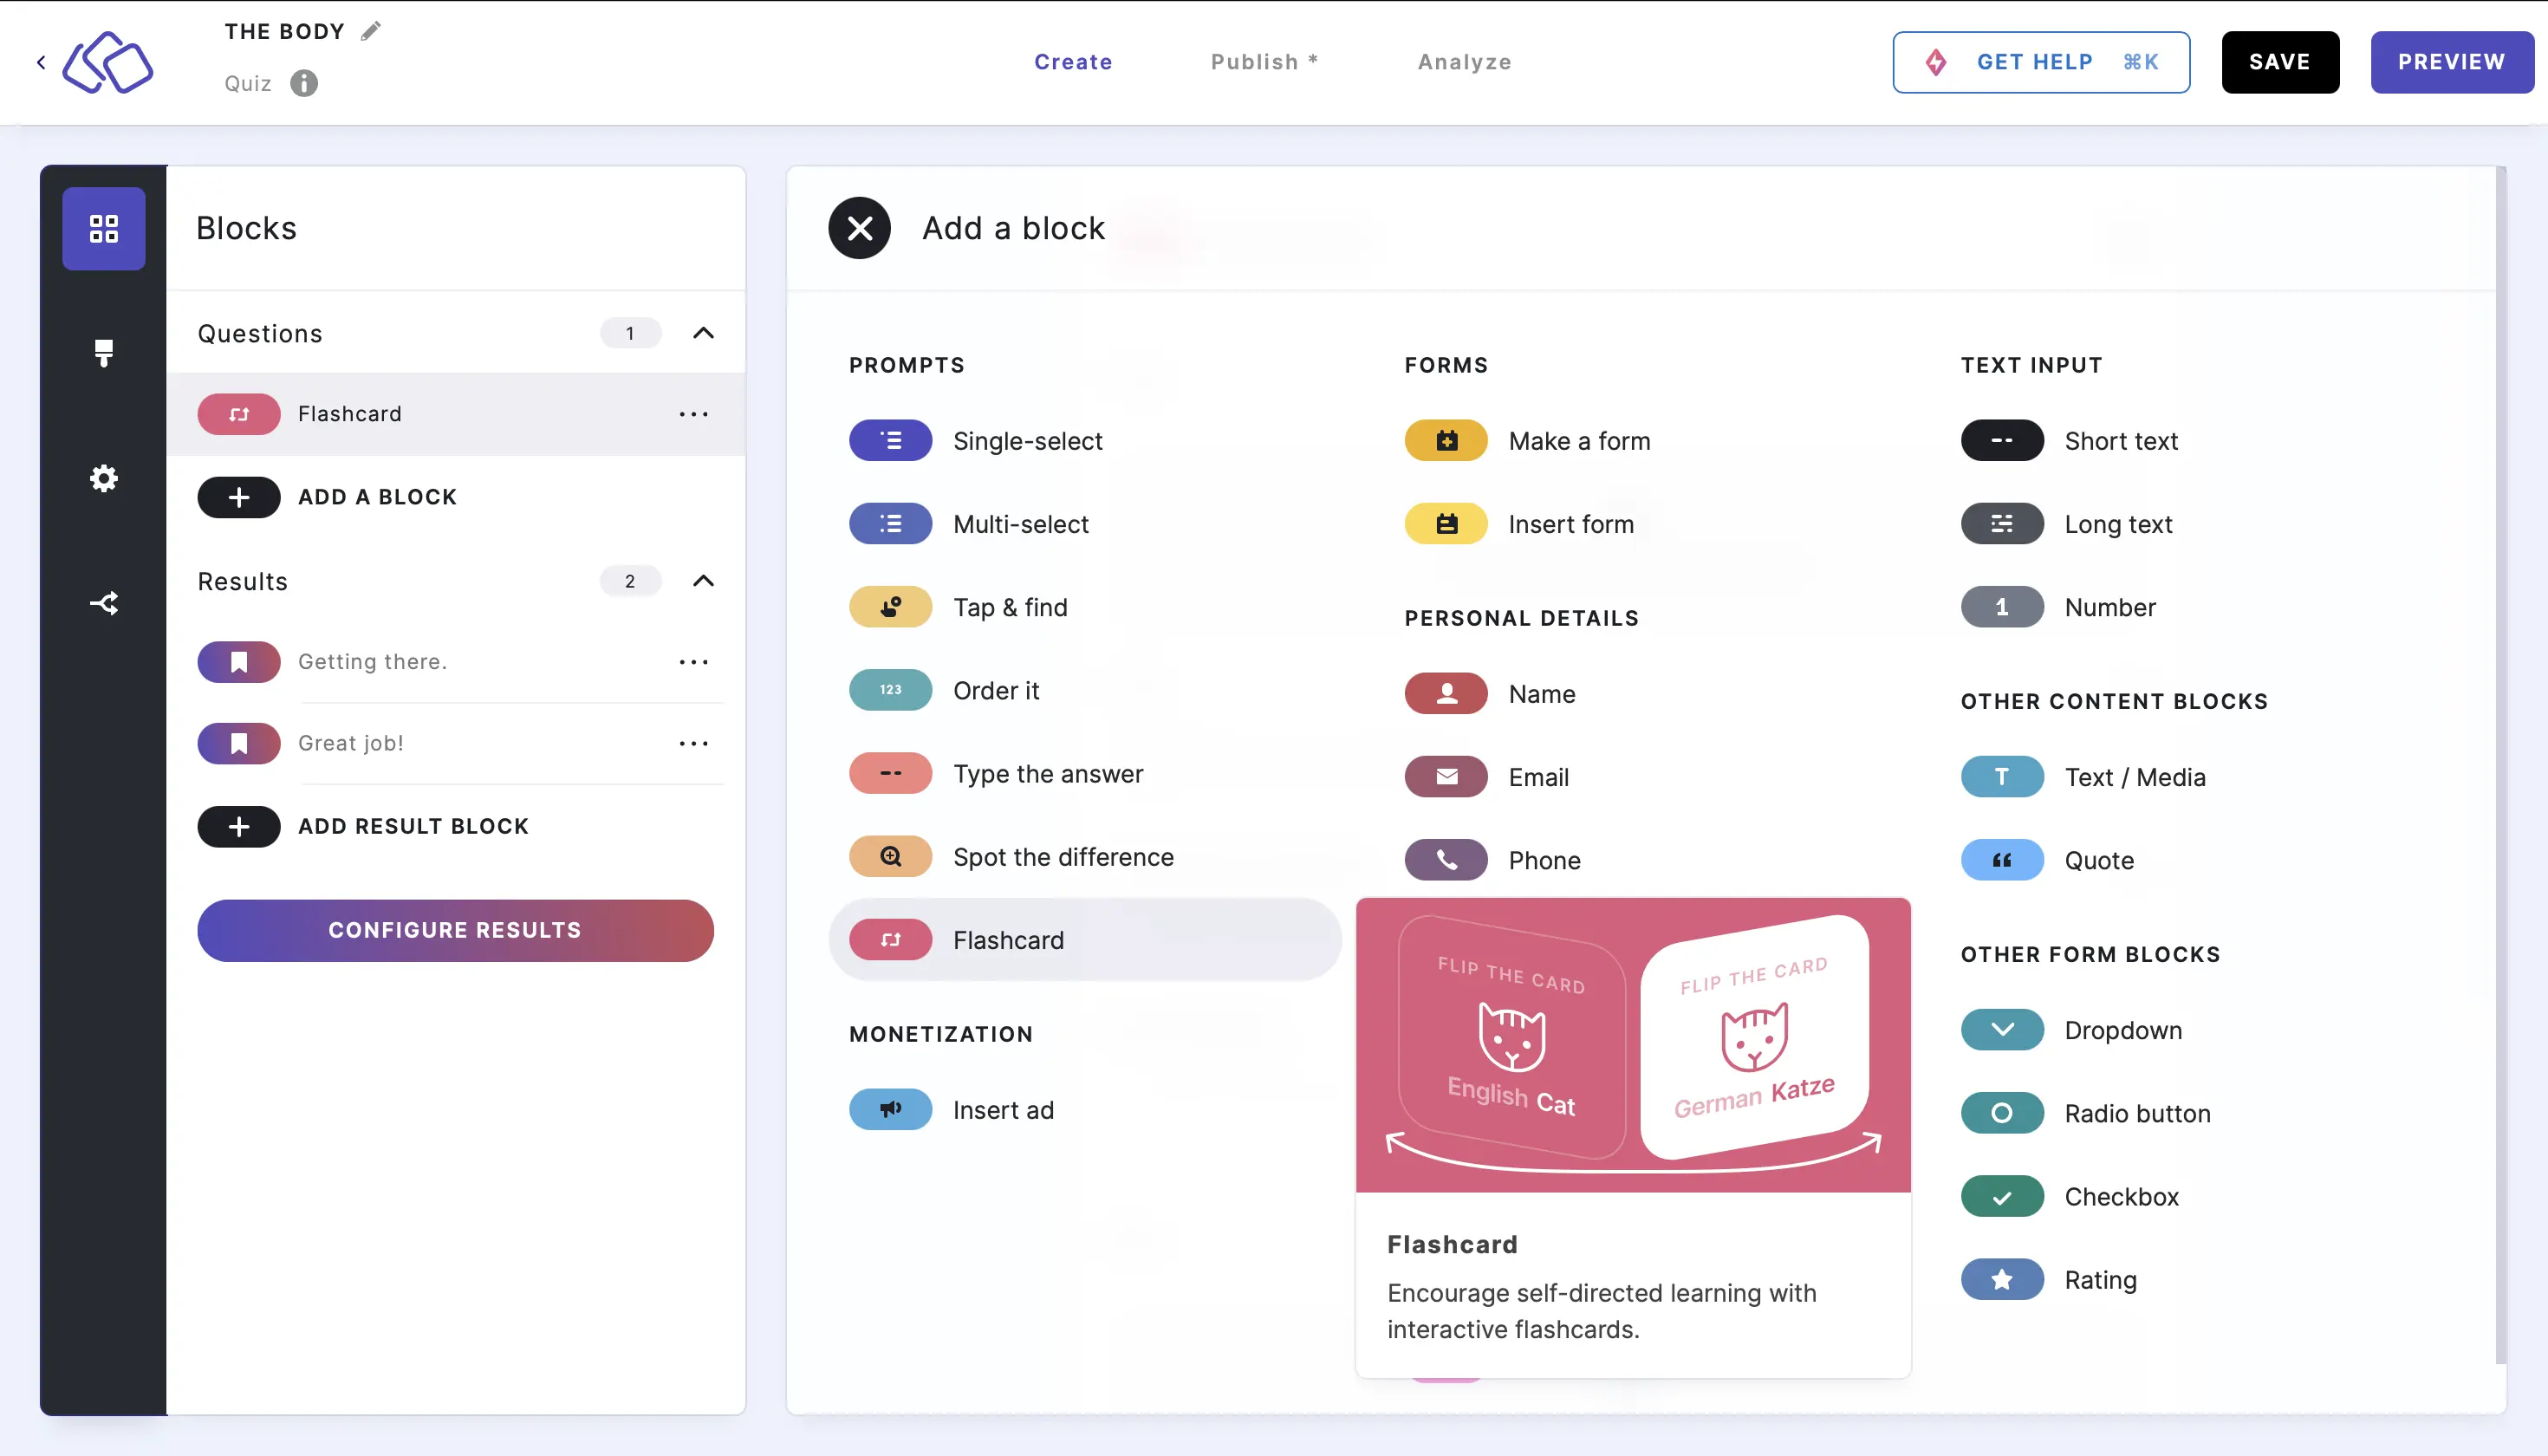
- Fill in the front of the flashcard by inserting a question or phrase into the Title field. Enter an optional Description and Hint.
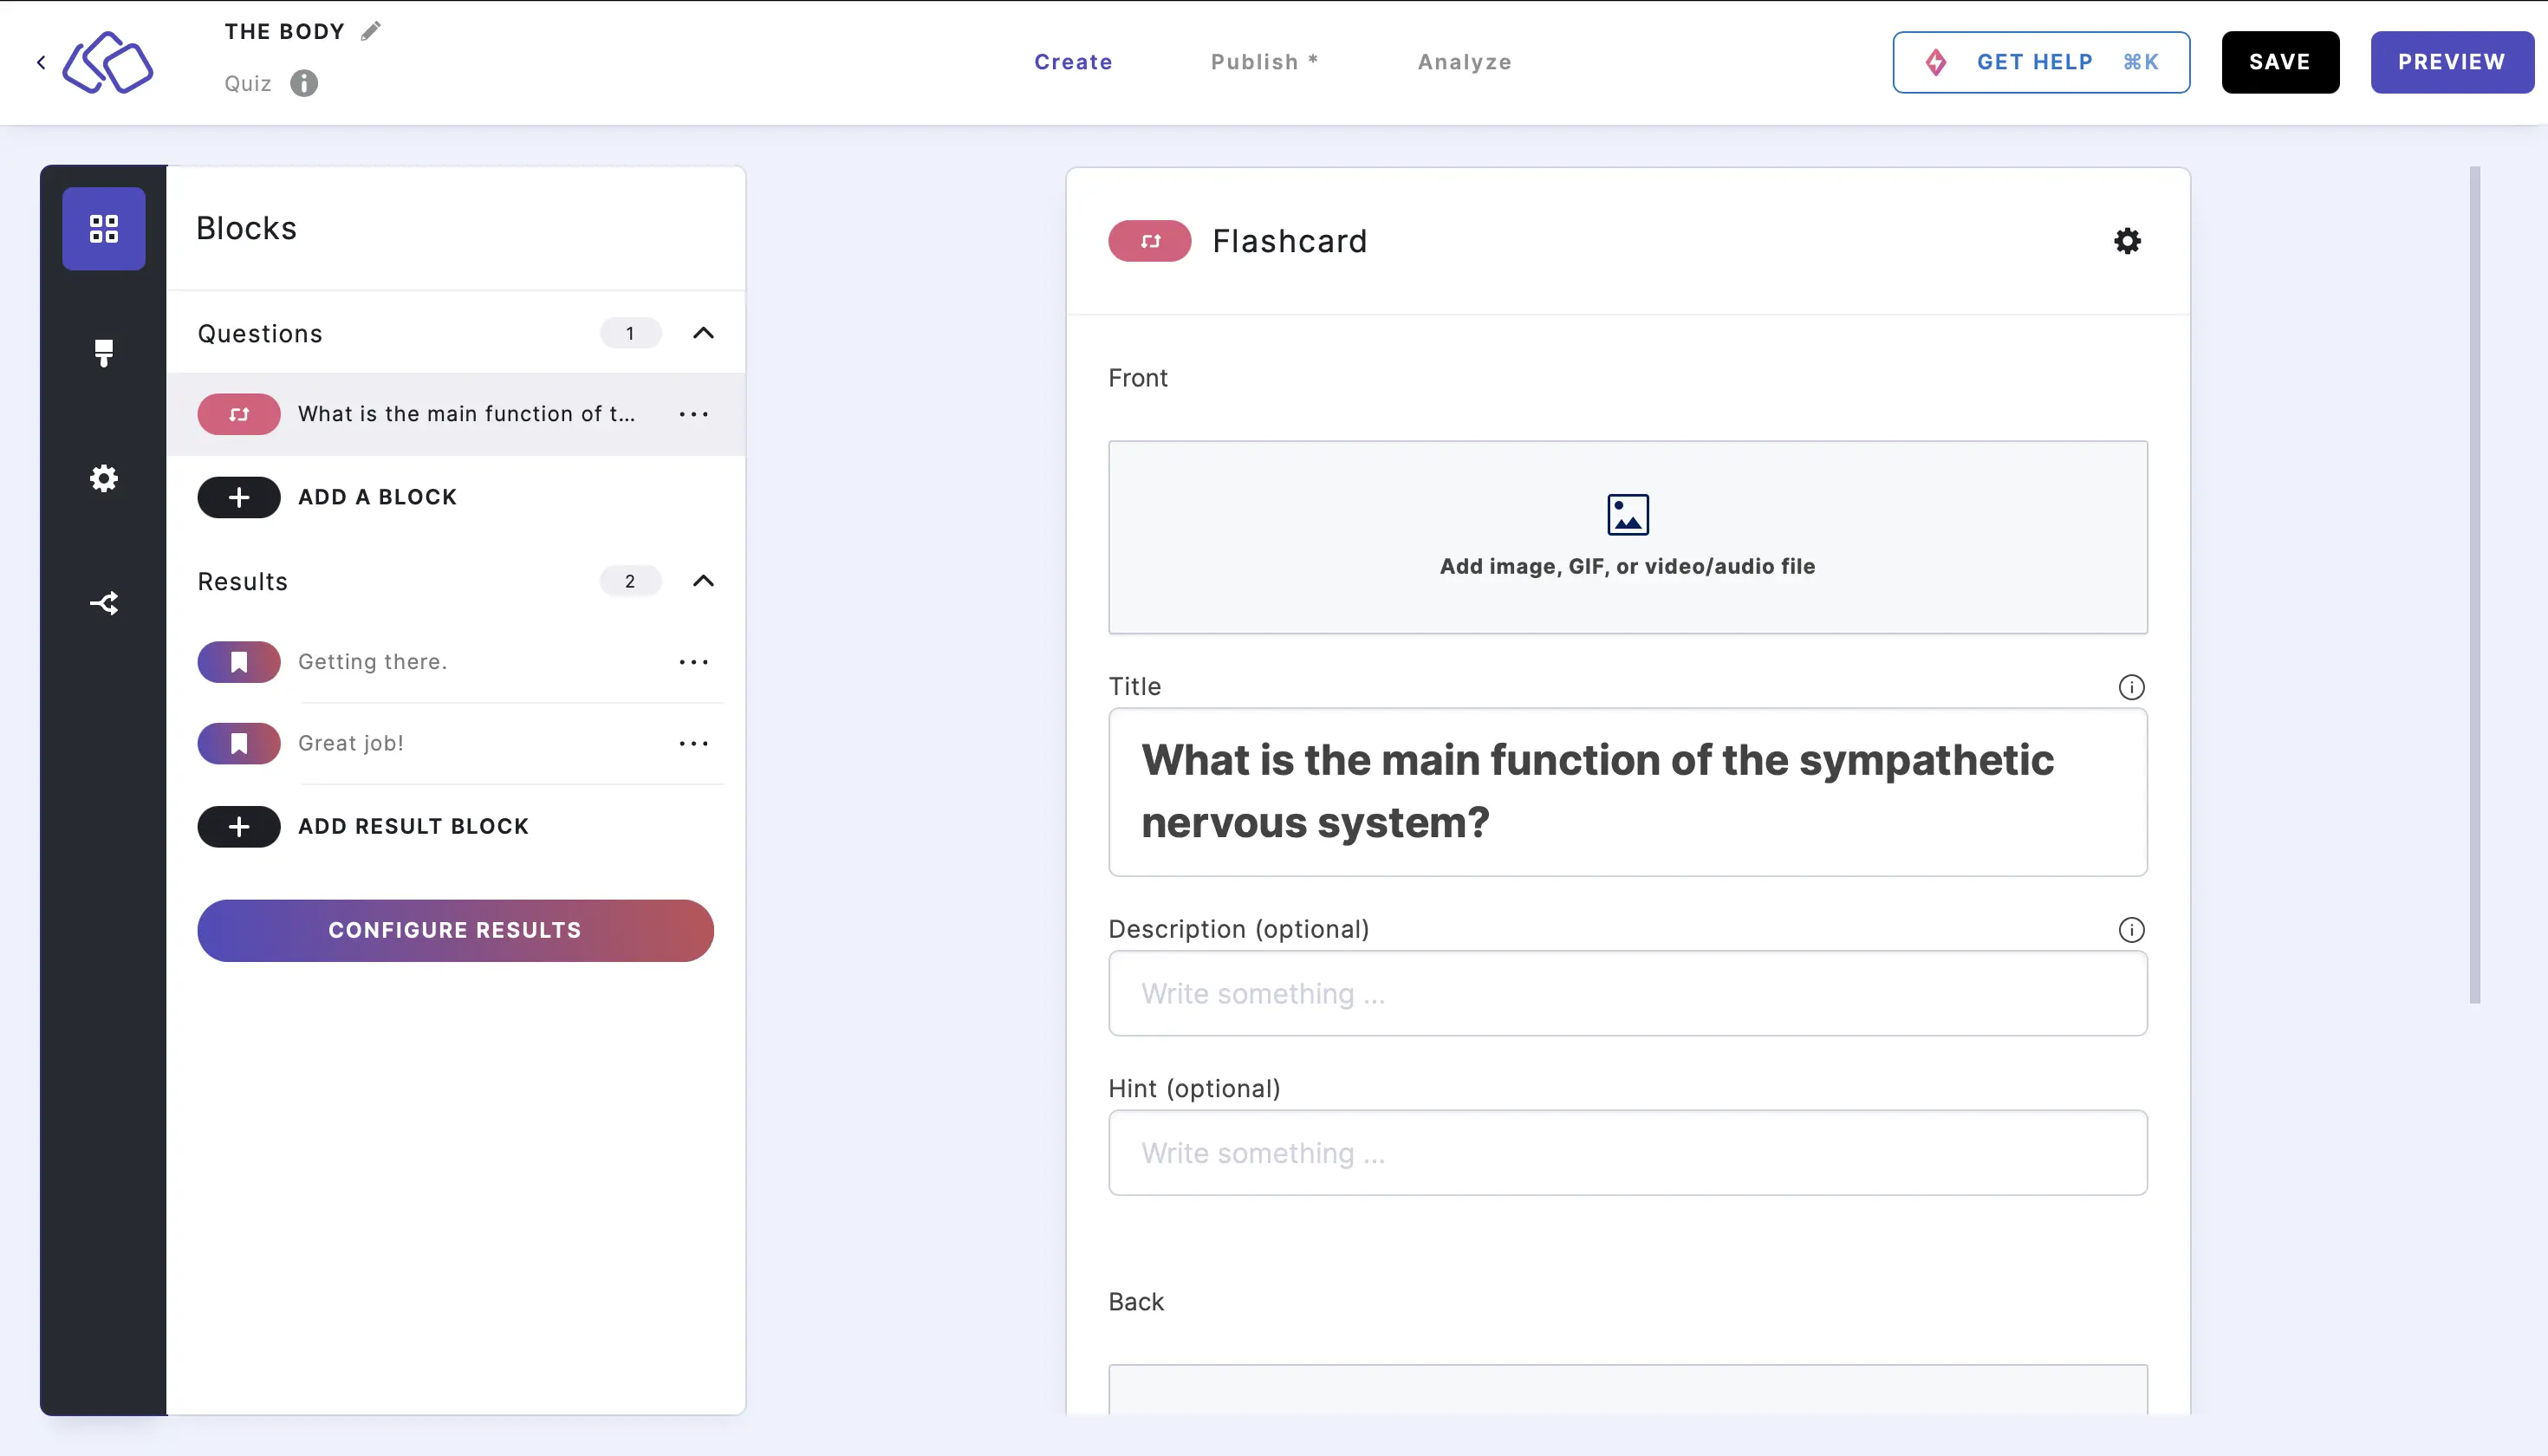
- Add an image to the front by clicking on Add image, GIF, or video/audio file.
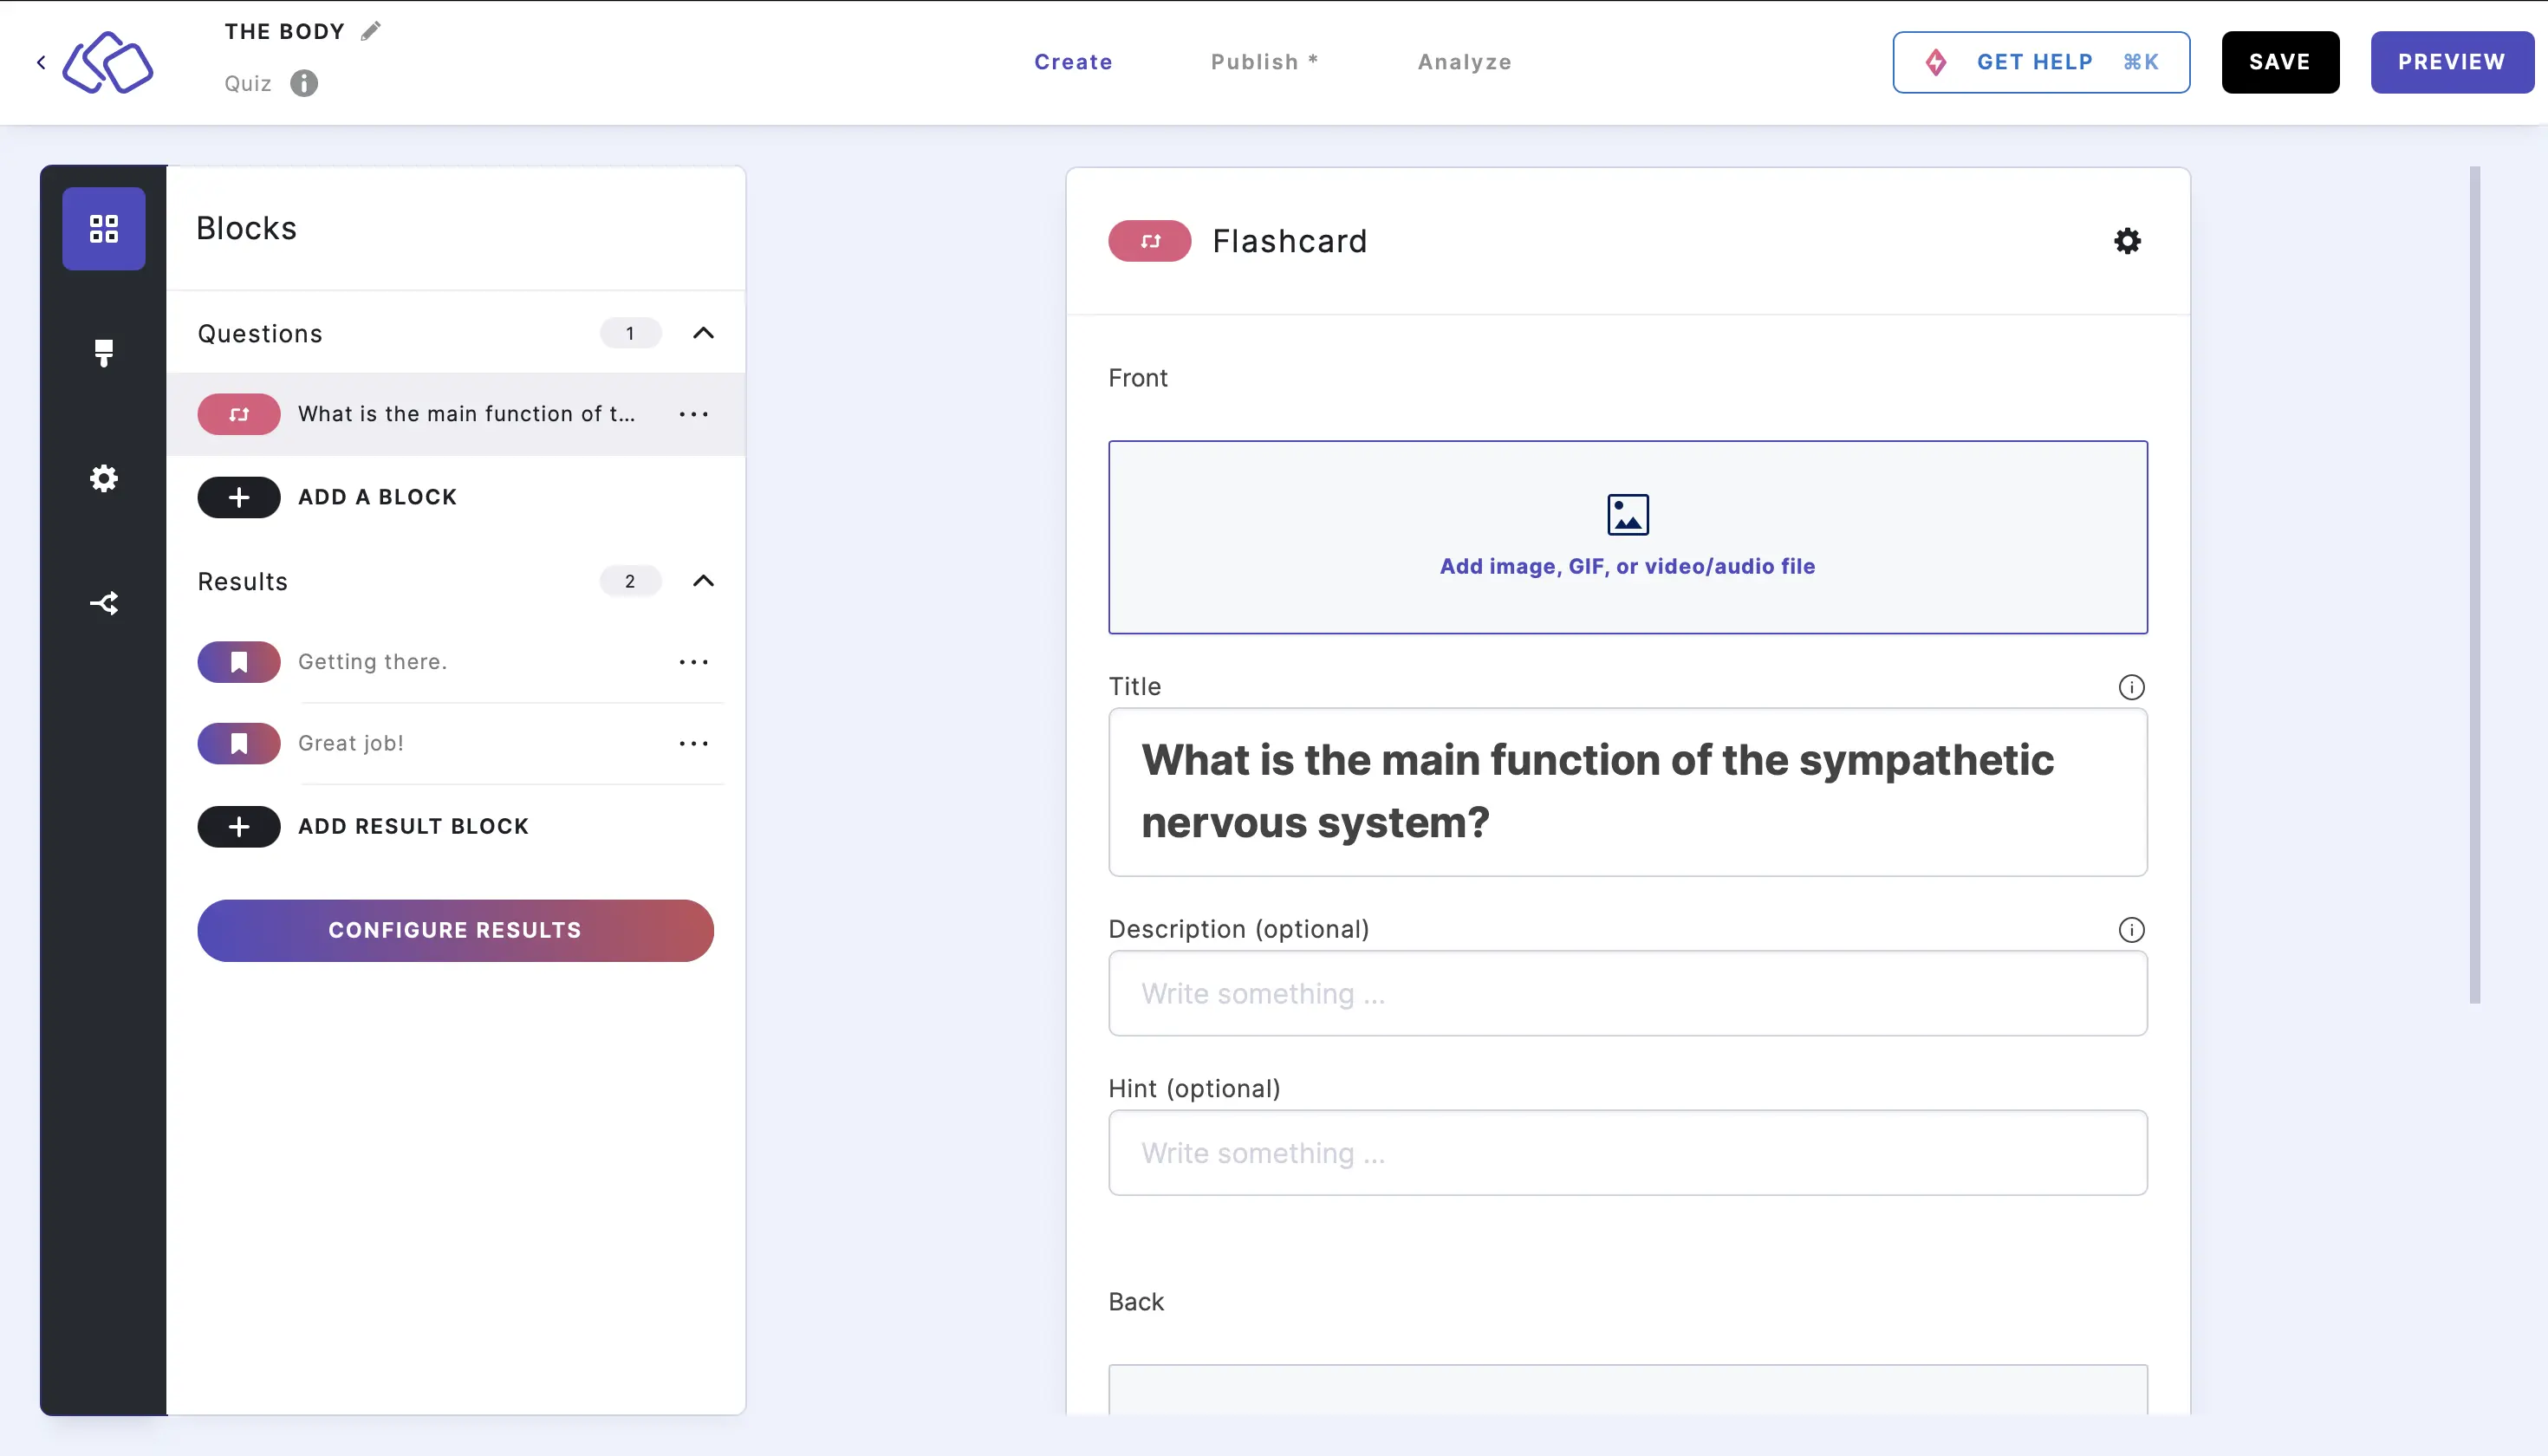
- Fill in the back of the flashcard by inserting a question or phrase into the Title field. Enter an optional Description.
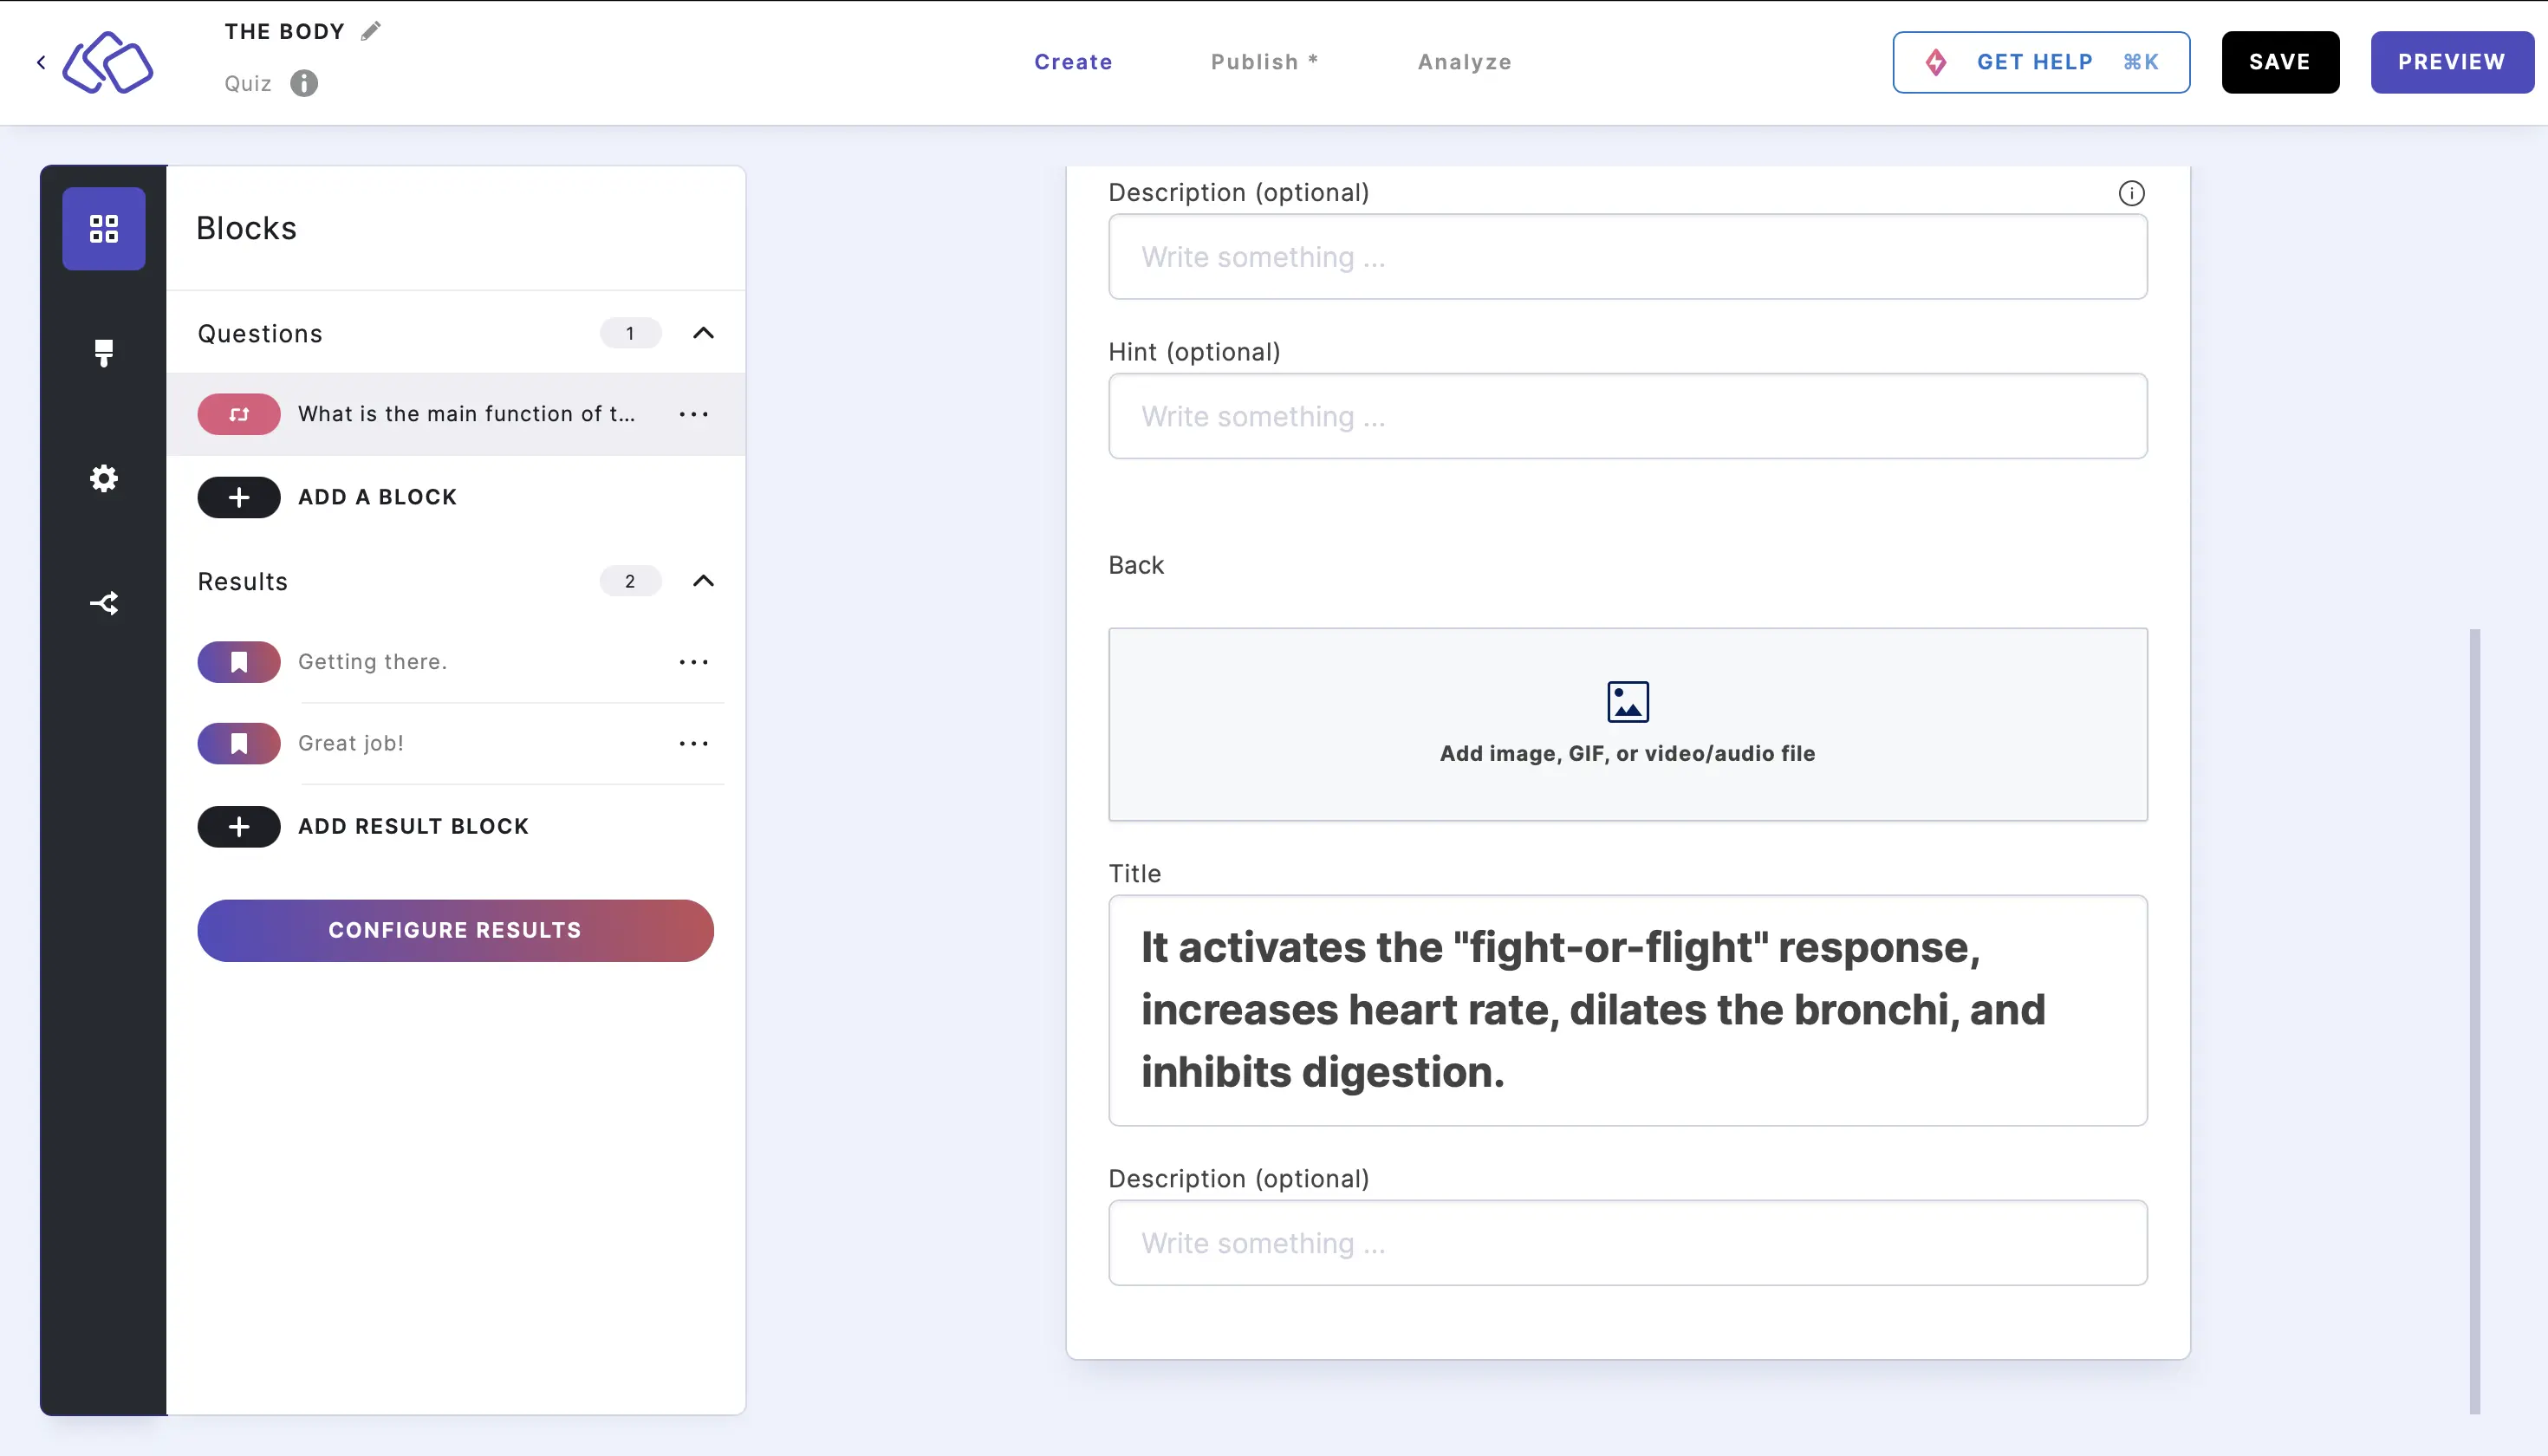
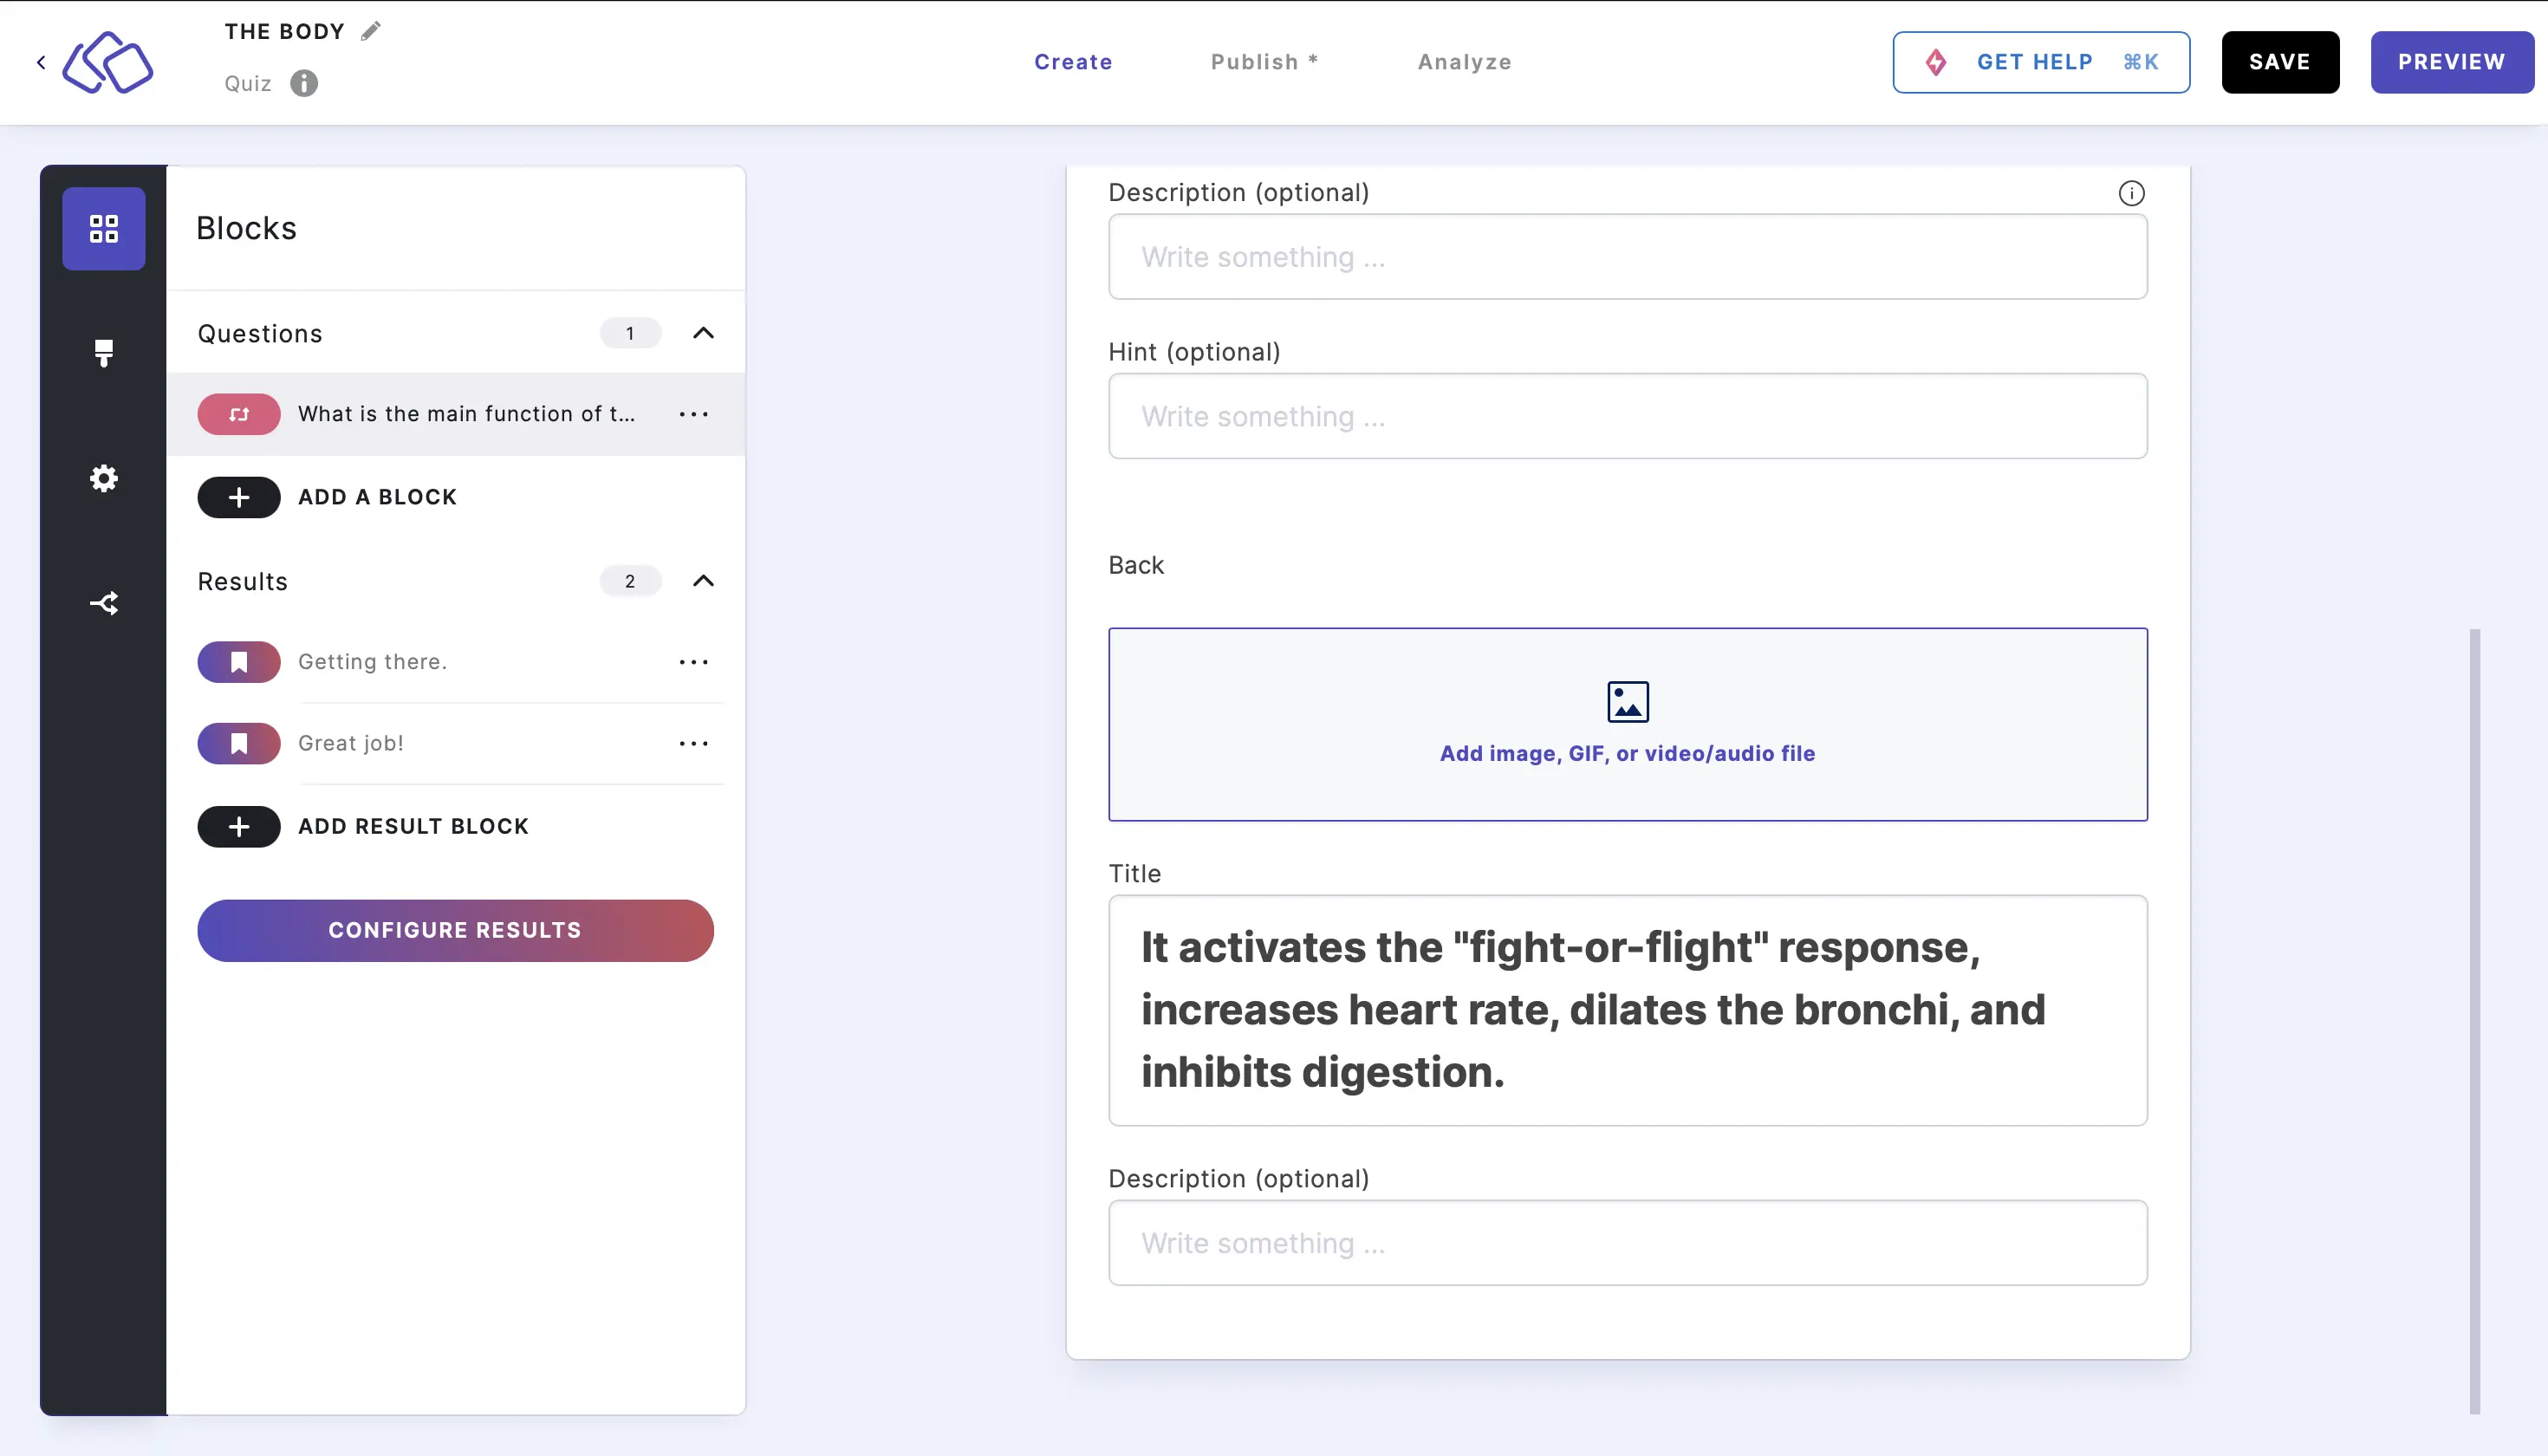
- Add an image to the back by clicking on Add image, GIF, or video/audio file.
- To change the score for the flashcard, click on the options icon on the right of Flashcard, and enter the number of points you want to assign for a "learnt" flashcard. The default score is one.
QUIZ NAVIGATION WITH FLASHCARDS
Quiz navigation changes when it contains at least one flashcard.
- Remember user OFF
- The user can vote and proceed to the next question in the predefined order. The last question leads to the result.
- The Back button takes the user to the previous question [not flashcard]. Re-voting is not possible. The Next button takes the user to the next question in the predefined order. The last question leads to the result.
- The Back button takes the user to the previous question [flashcard]. Re-voting is possible.
- The Next [flashcard] takes the user to the next unanswered flashcard question. If there are no more unanswered questions, the Next button leads to the next question in the predefined order. The last question leads to the result.
- Special case:
Block 1: Flashcard – Marked as unanswered and forwarded to the next block.
Block 2: Other block – The Back button is pressed. Still unanswered.
Block 1: Flashcard – Next navigation is triggered.
Block 3: Flashcard – Still unanswered.
In this case, the user is not directed to the next unanswered flashcard question but rather to the next unseen/unanswered block. This can be a general, form, or quiz block. - Play again button: Checks if there is an unanswered question. If yes, it is displayed. If not, the first question is shown. The current status remains unchanged.
- Reset flashcards button: The Riddle is completely restarted, just like with the Play again button.
- Note:
Forms that were automatically submitted (without the user noticing during the process) will not be re-submitted when navigating back. However, they will be displayed as answered/disabled.
- Remember user ON - permission required
Same behavior as when "Remember user" is OFF, but the user is asked on the first flashcard or the first form whether they agree to store the data.
If the user gives their consent, see Remember User ON – permission not required. - Remember user ON - permission not required
Same behavior as when "Remember User" is OFF, plus:- Page reload: Same behavior as Next navigation. The user is directed to the next unanswered question. If there are no unanswered questions left, the user is redirected to the first question in the quiz. The status remains unchanged.
- One vote per browser ON
Standard behavior, independent of flashcards. - Riddle timer
Normal timer behavior, plus:- When the timer expires, the current status does not change. The user is redirected to the first block and can restart and continue as described above.
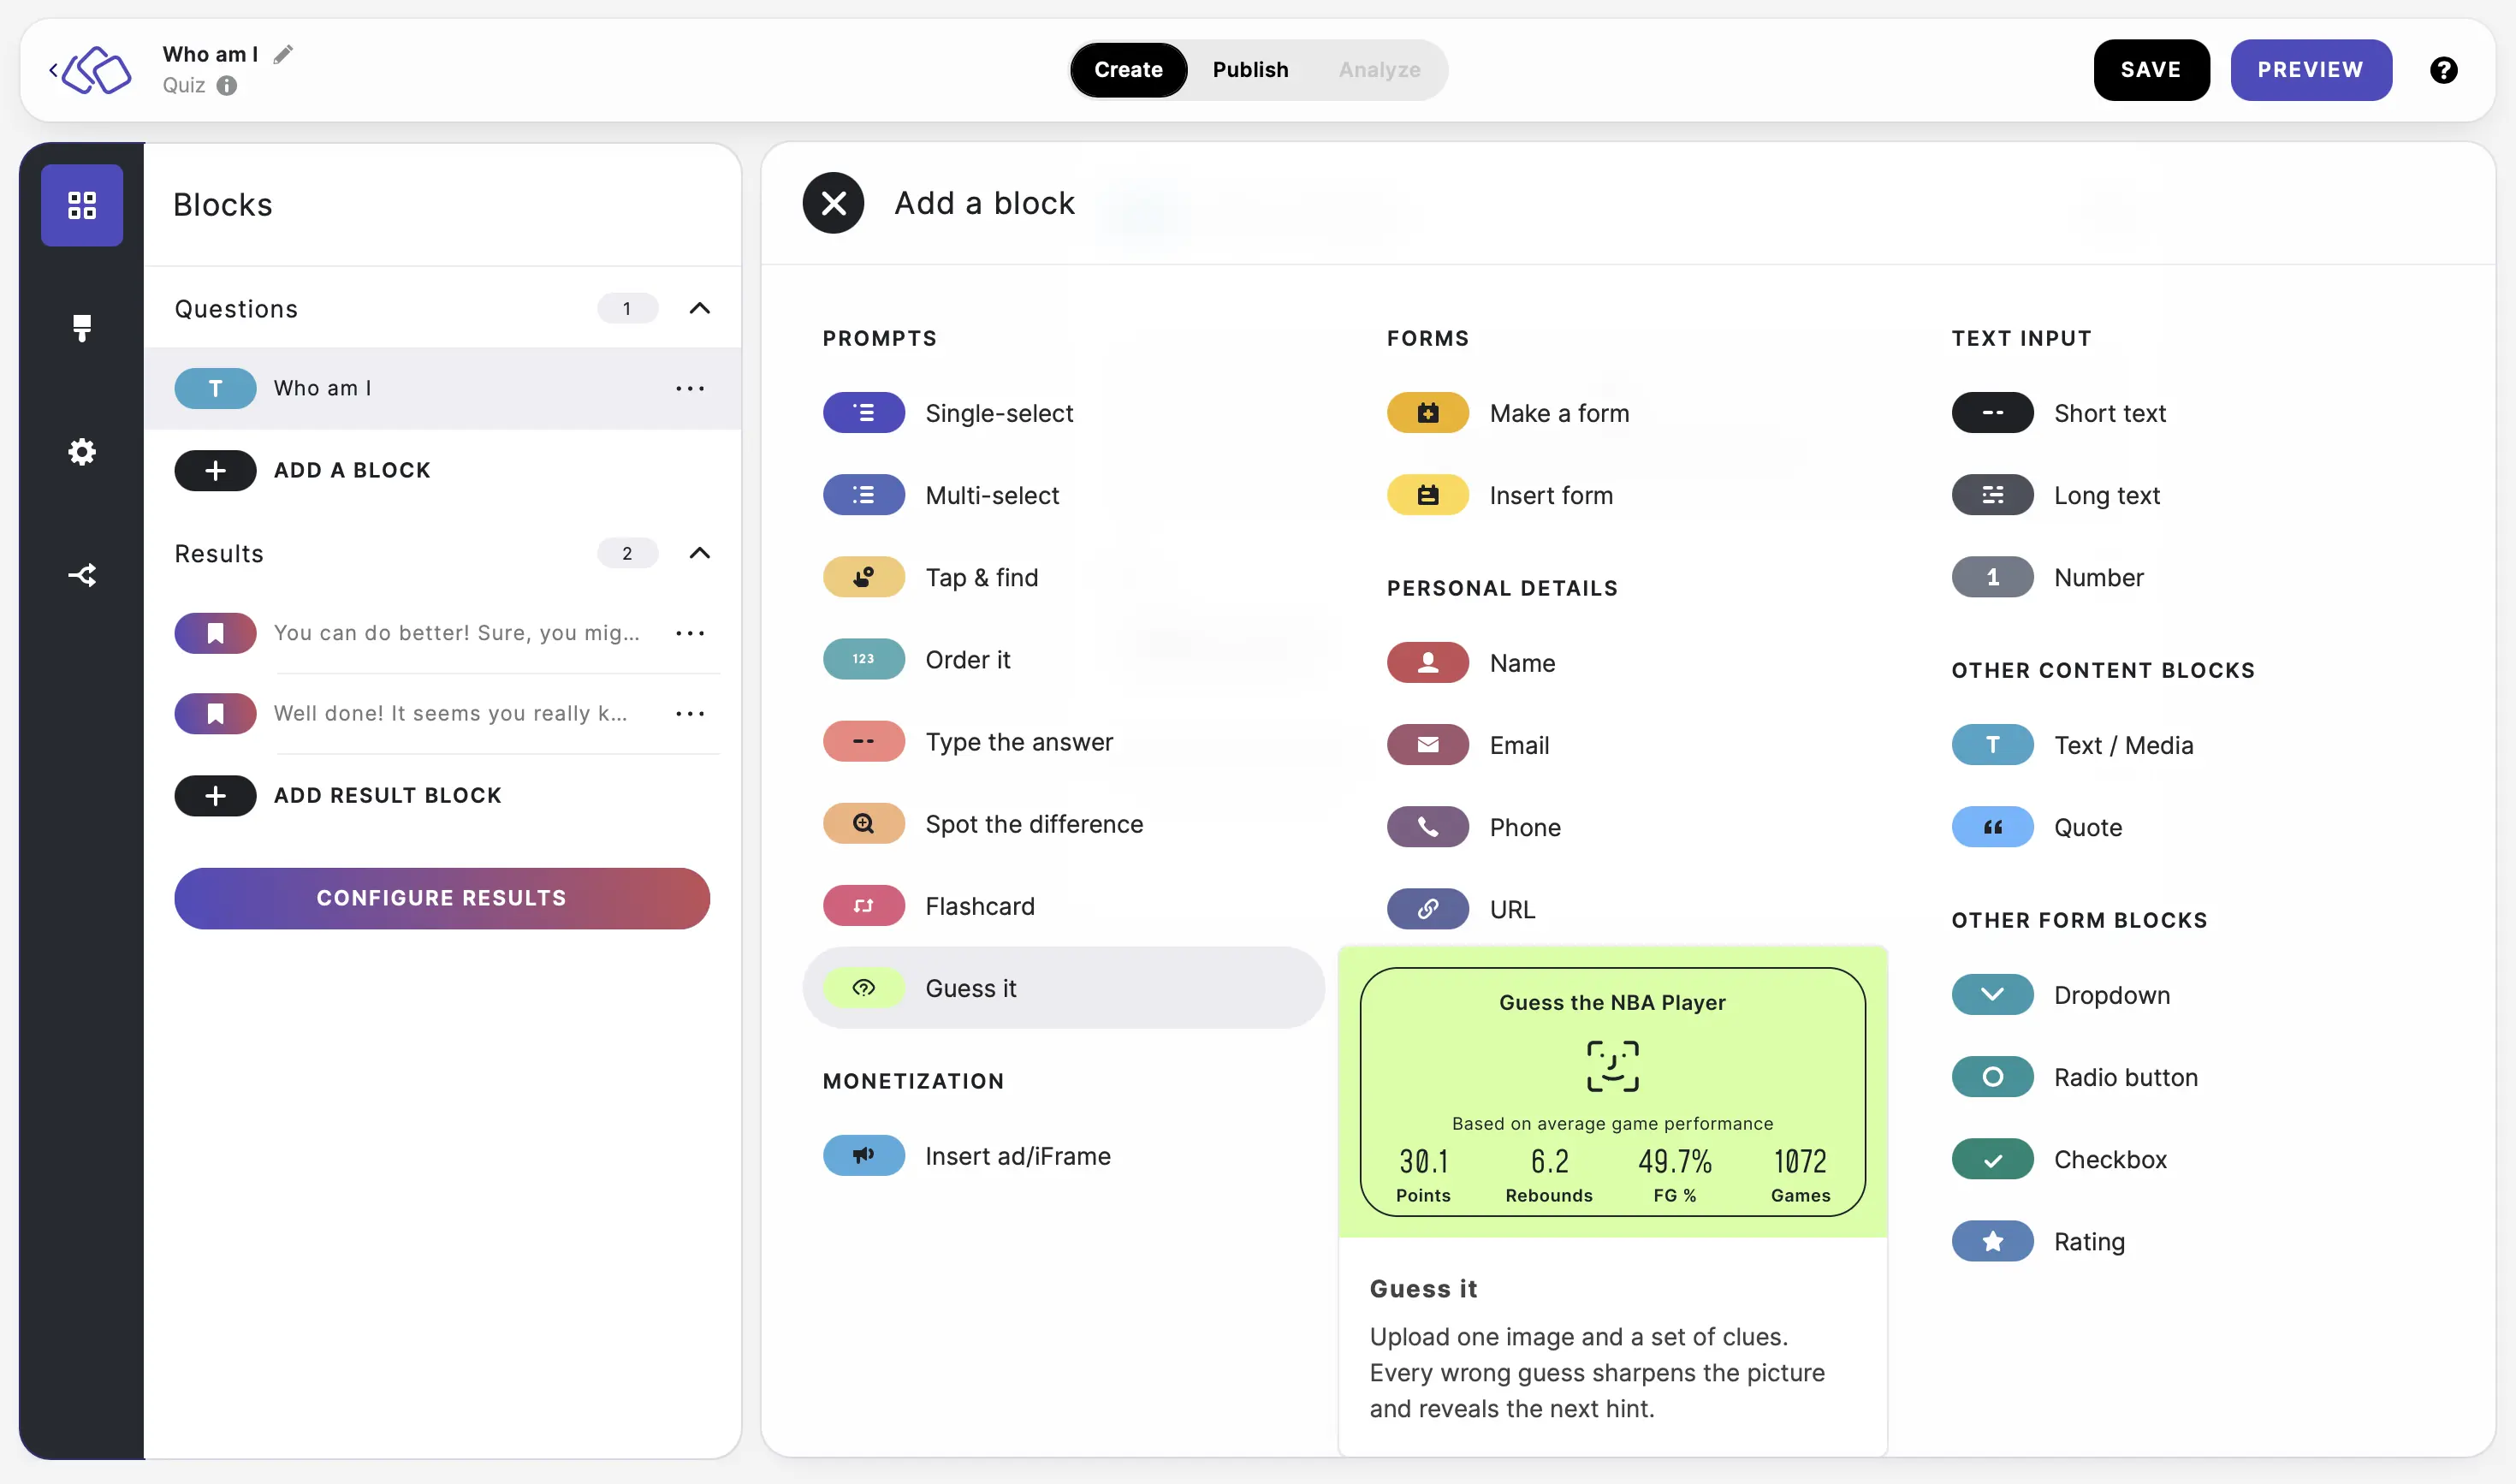
8. Guess it
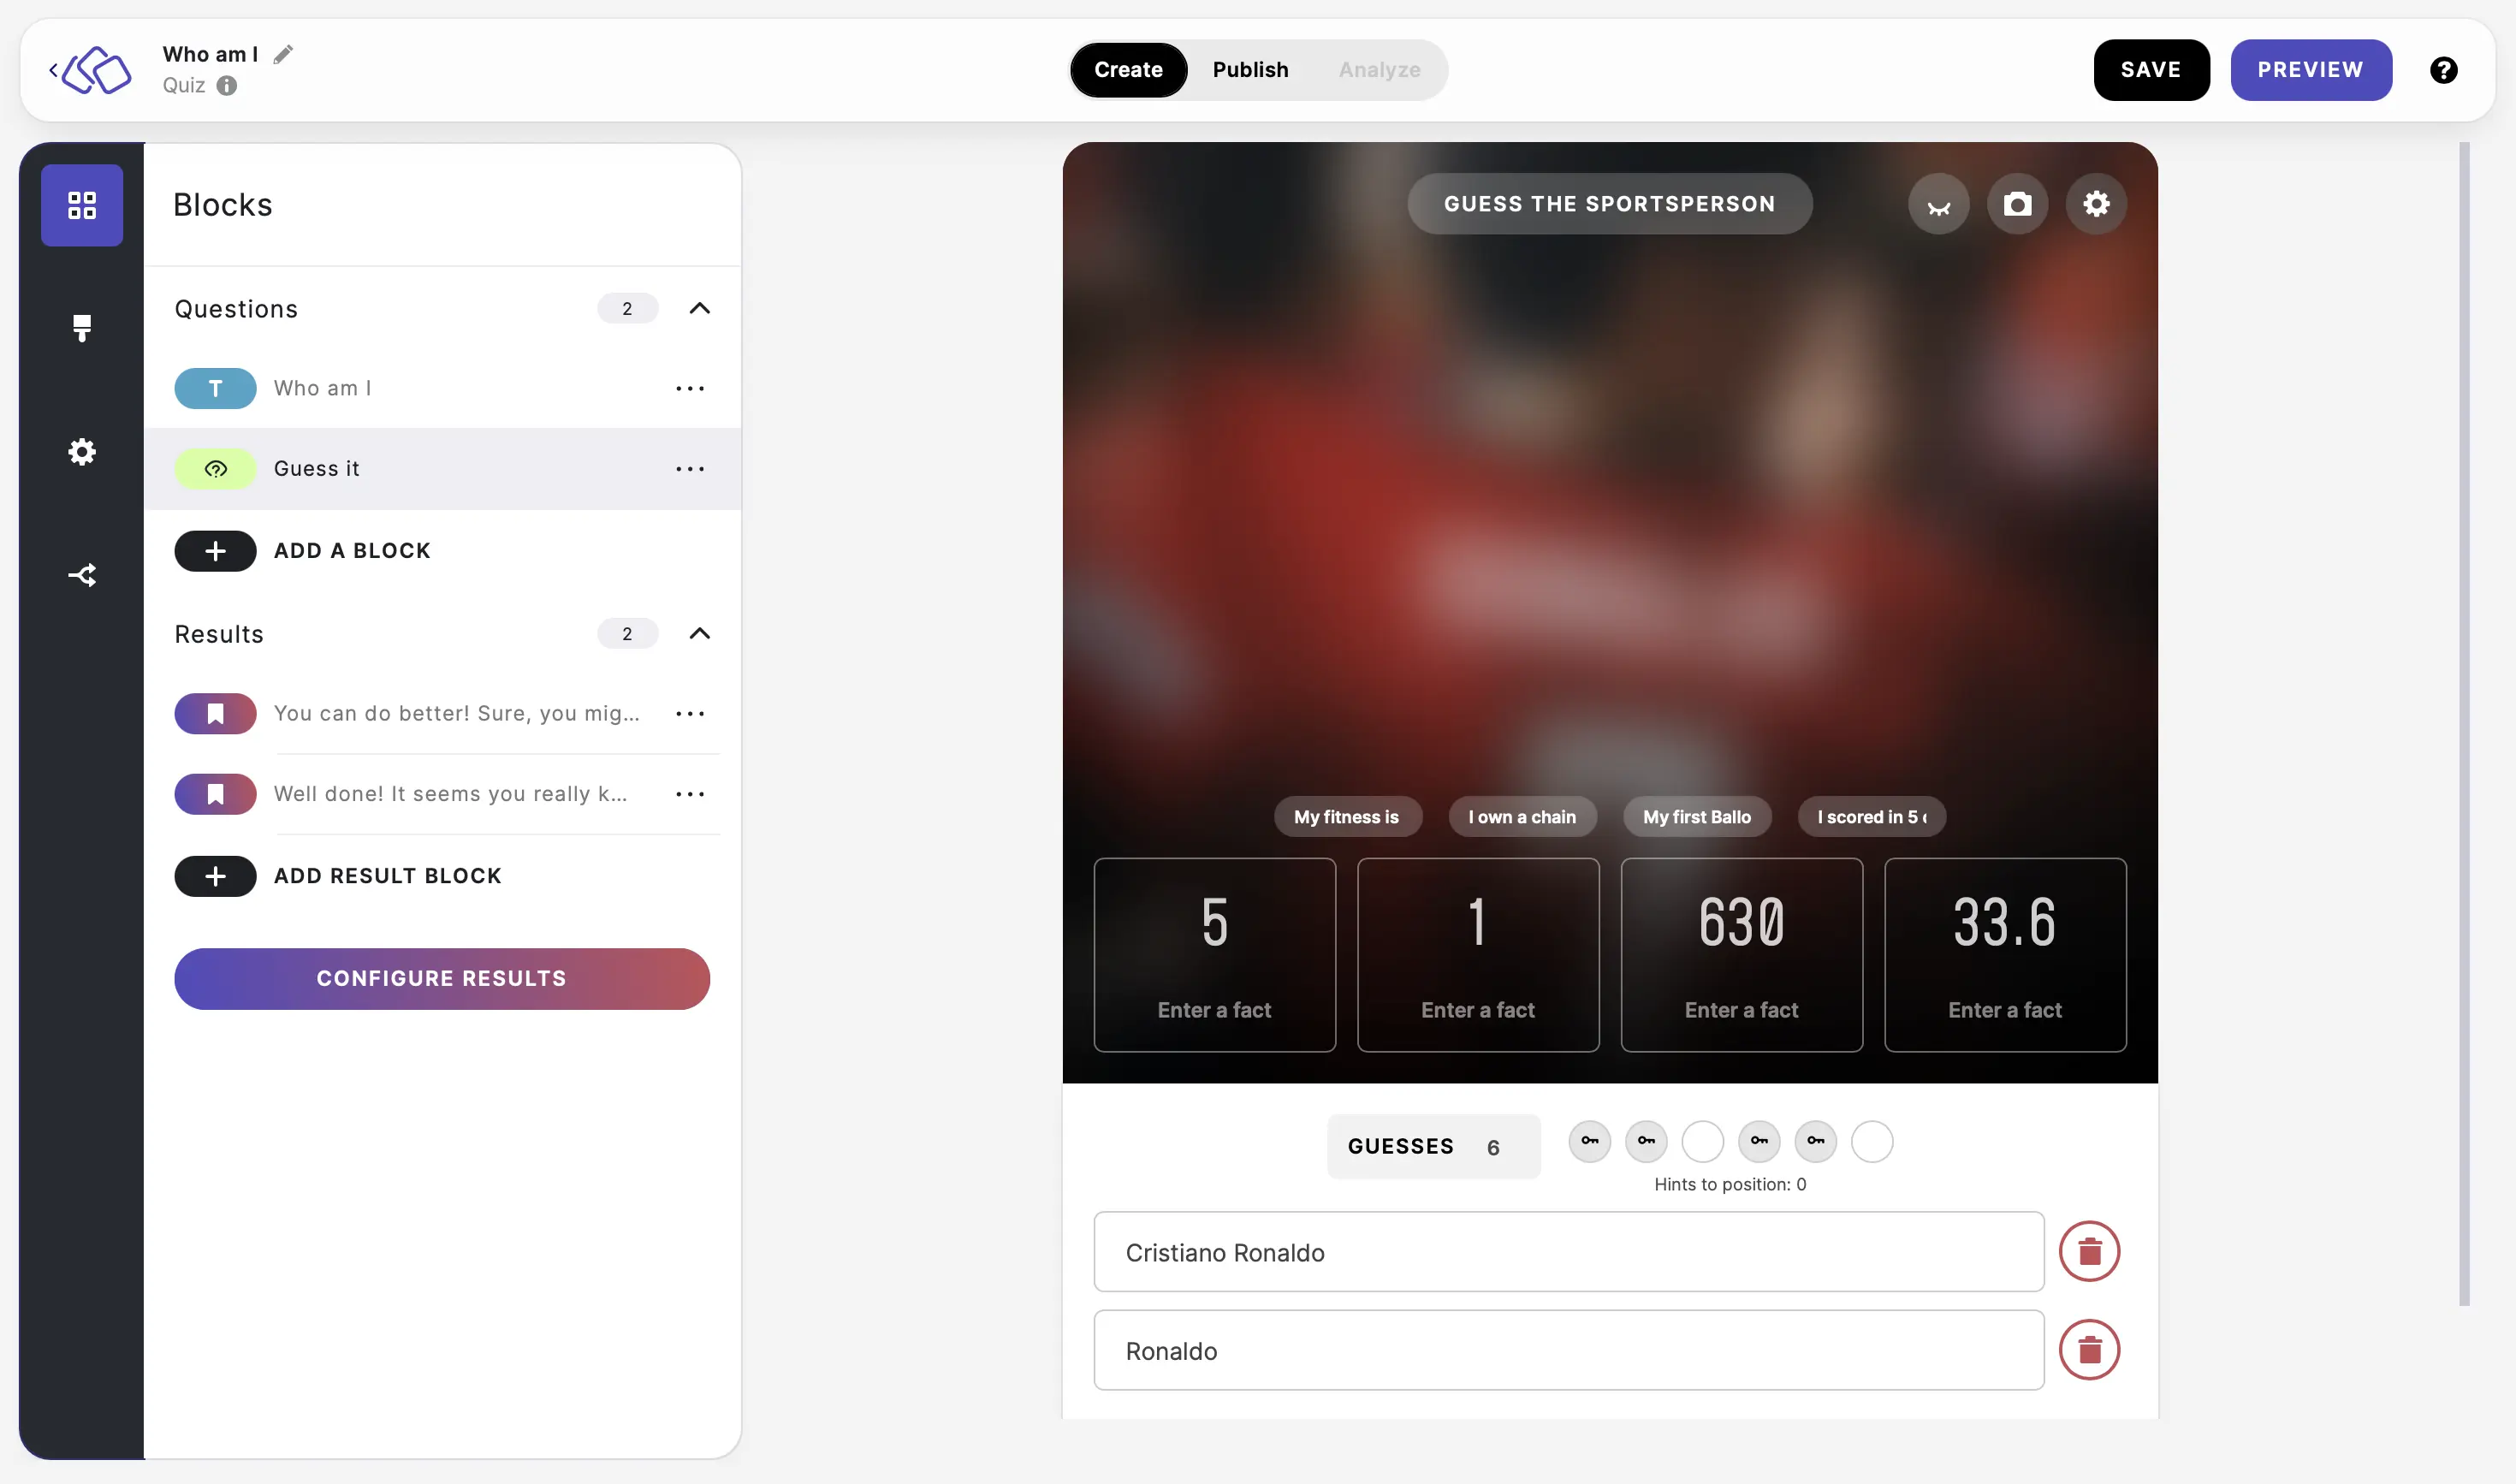
Users have to work out a person, place, or thing based on a blurred image and a set of clues. Every wrong guess sharpens the picture and reveals the next hint.
- Click on ADD A BLOCK and select Guess it.
- Fill in the GUESS THE... title field to give your audience a framework.
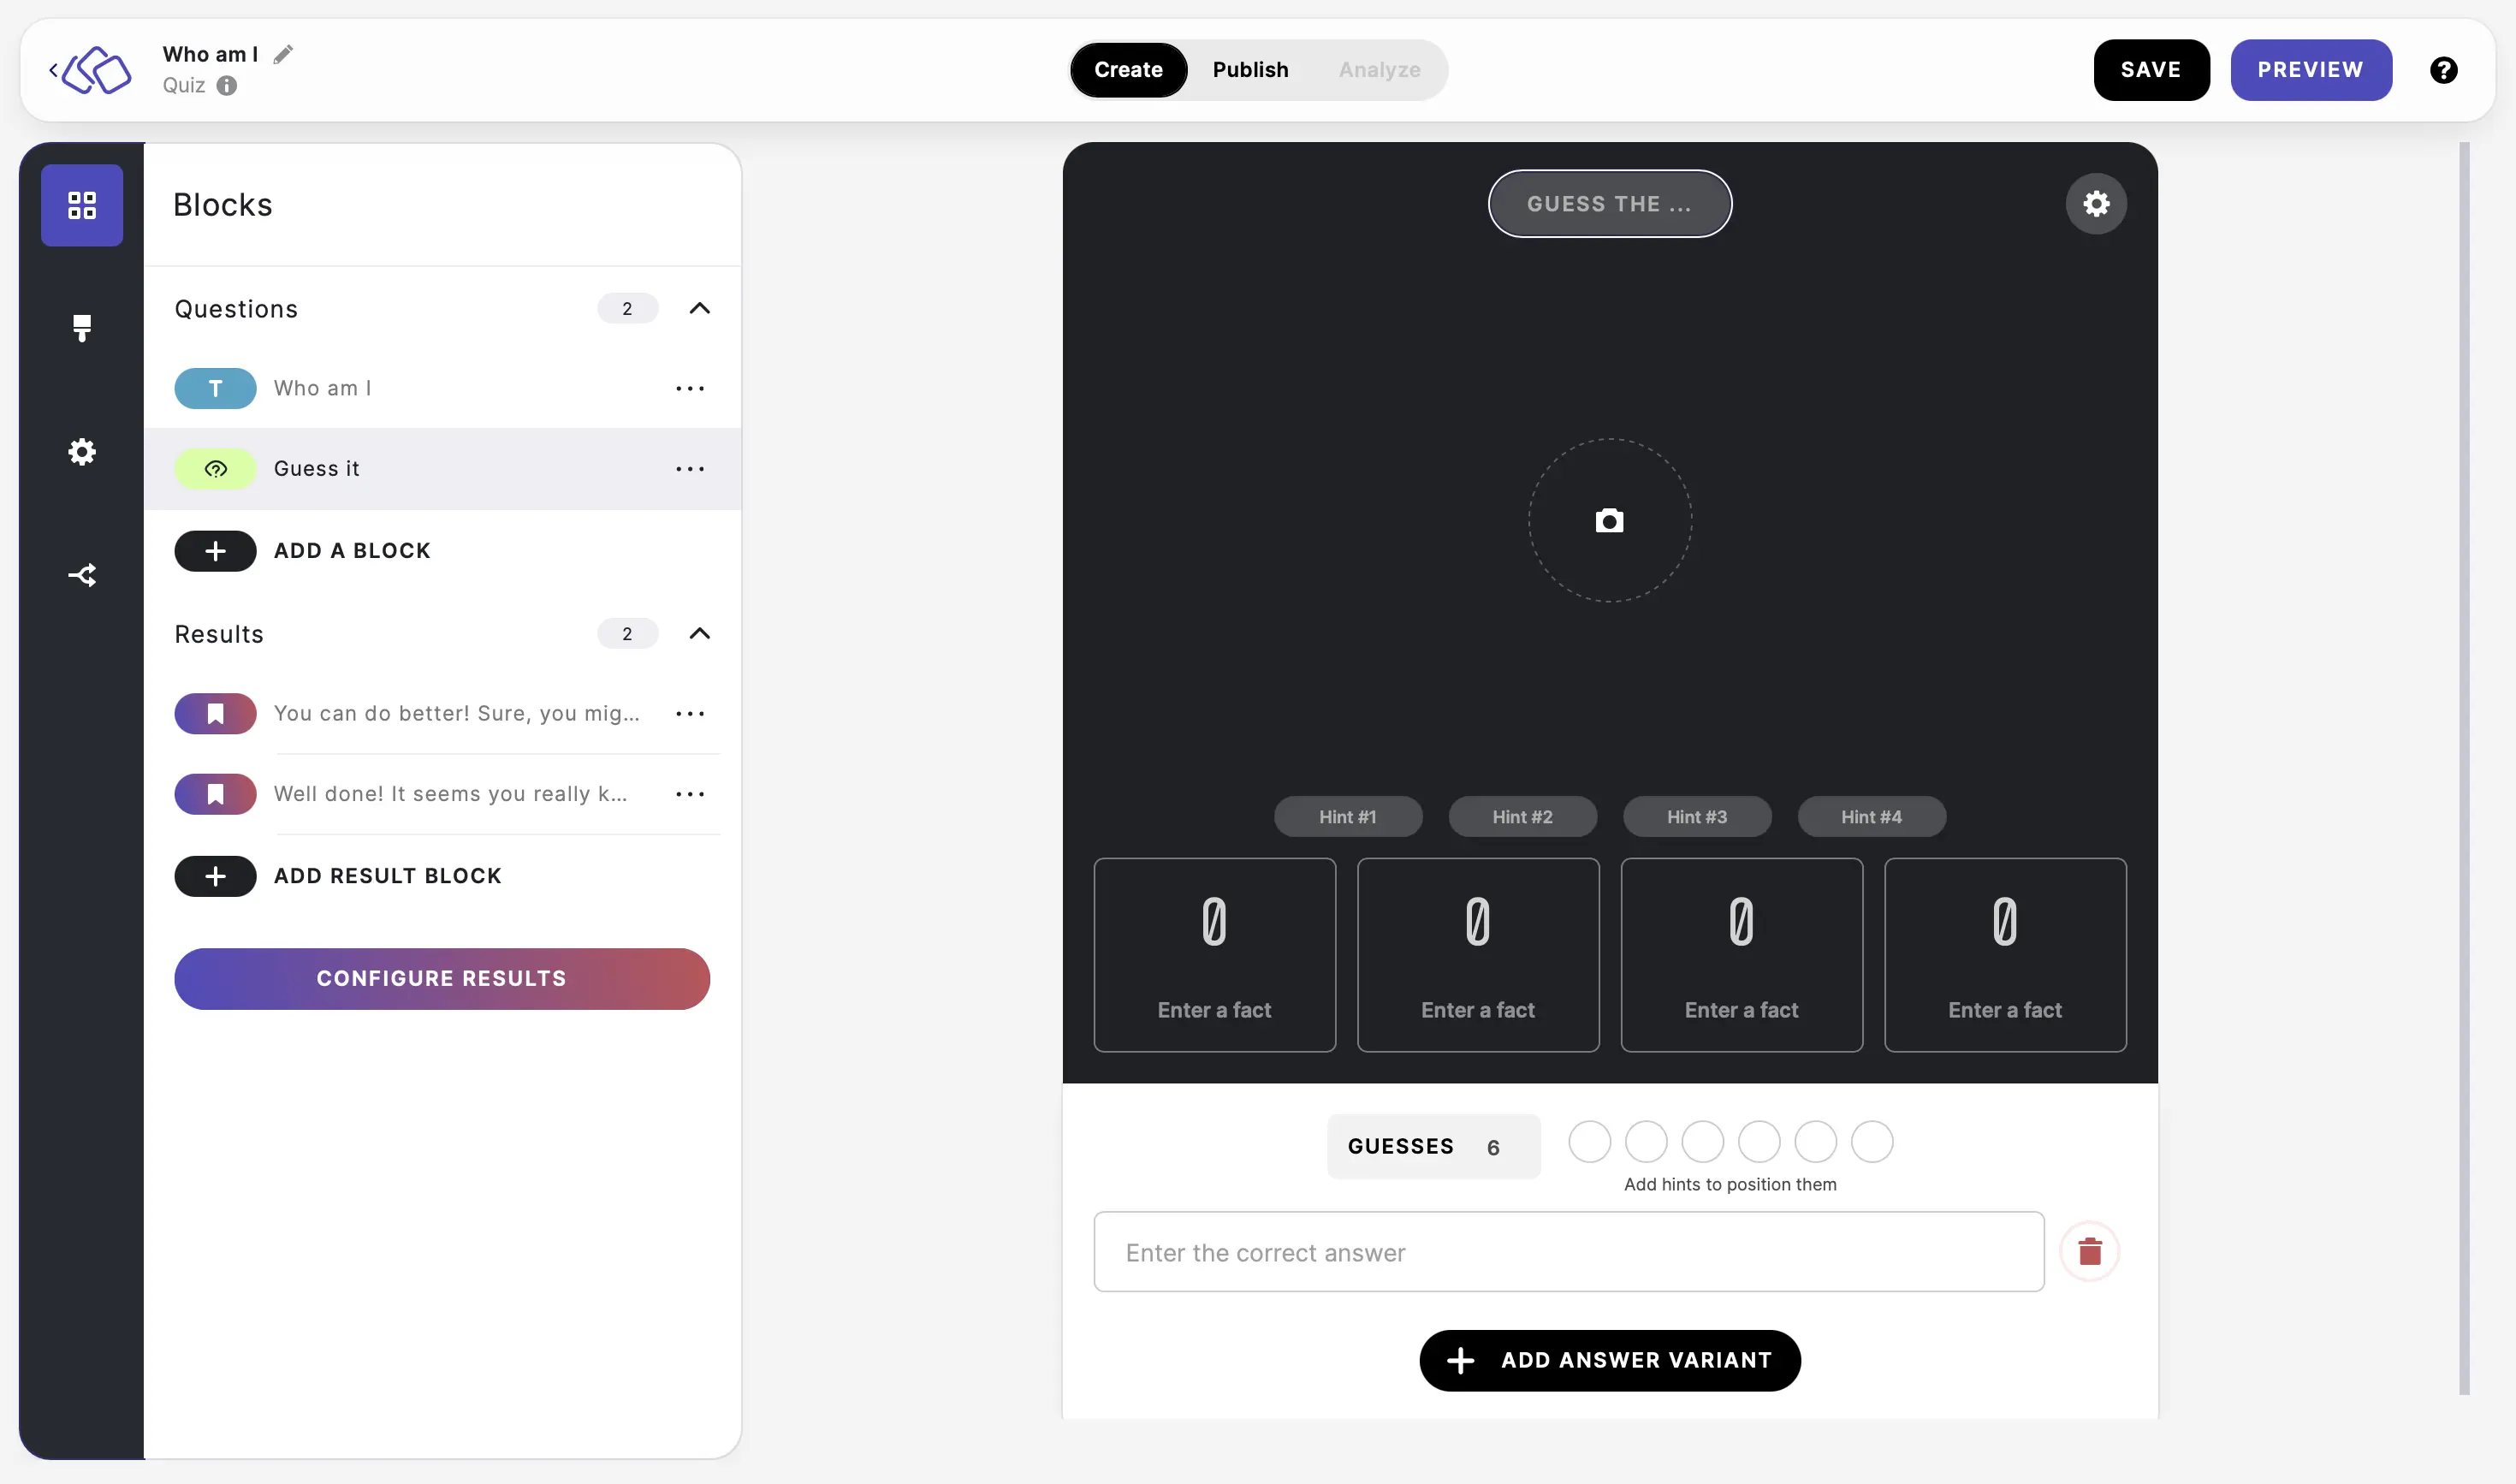
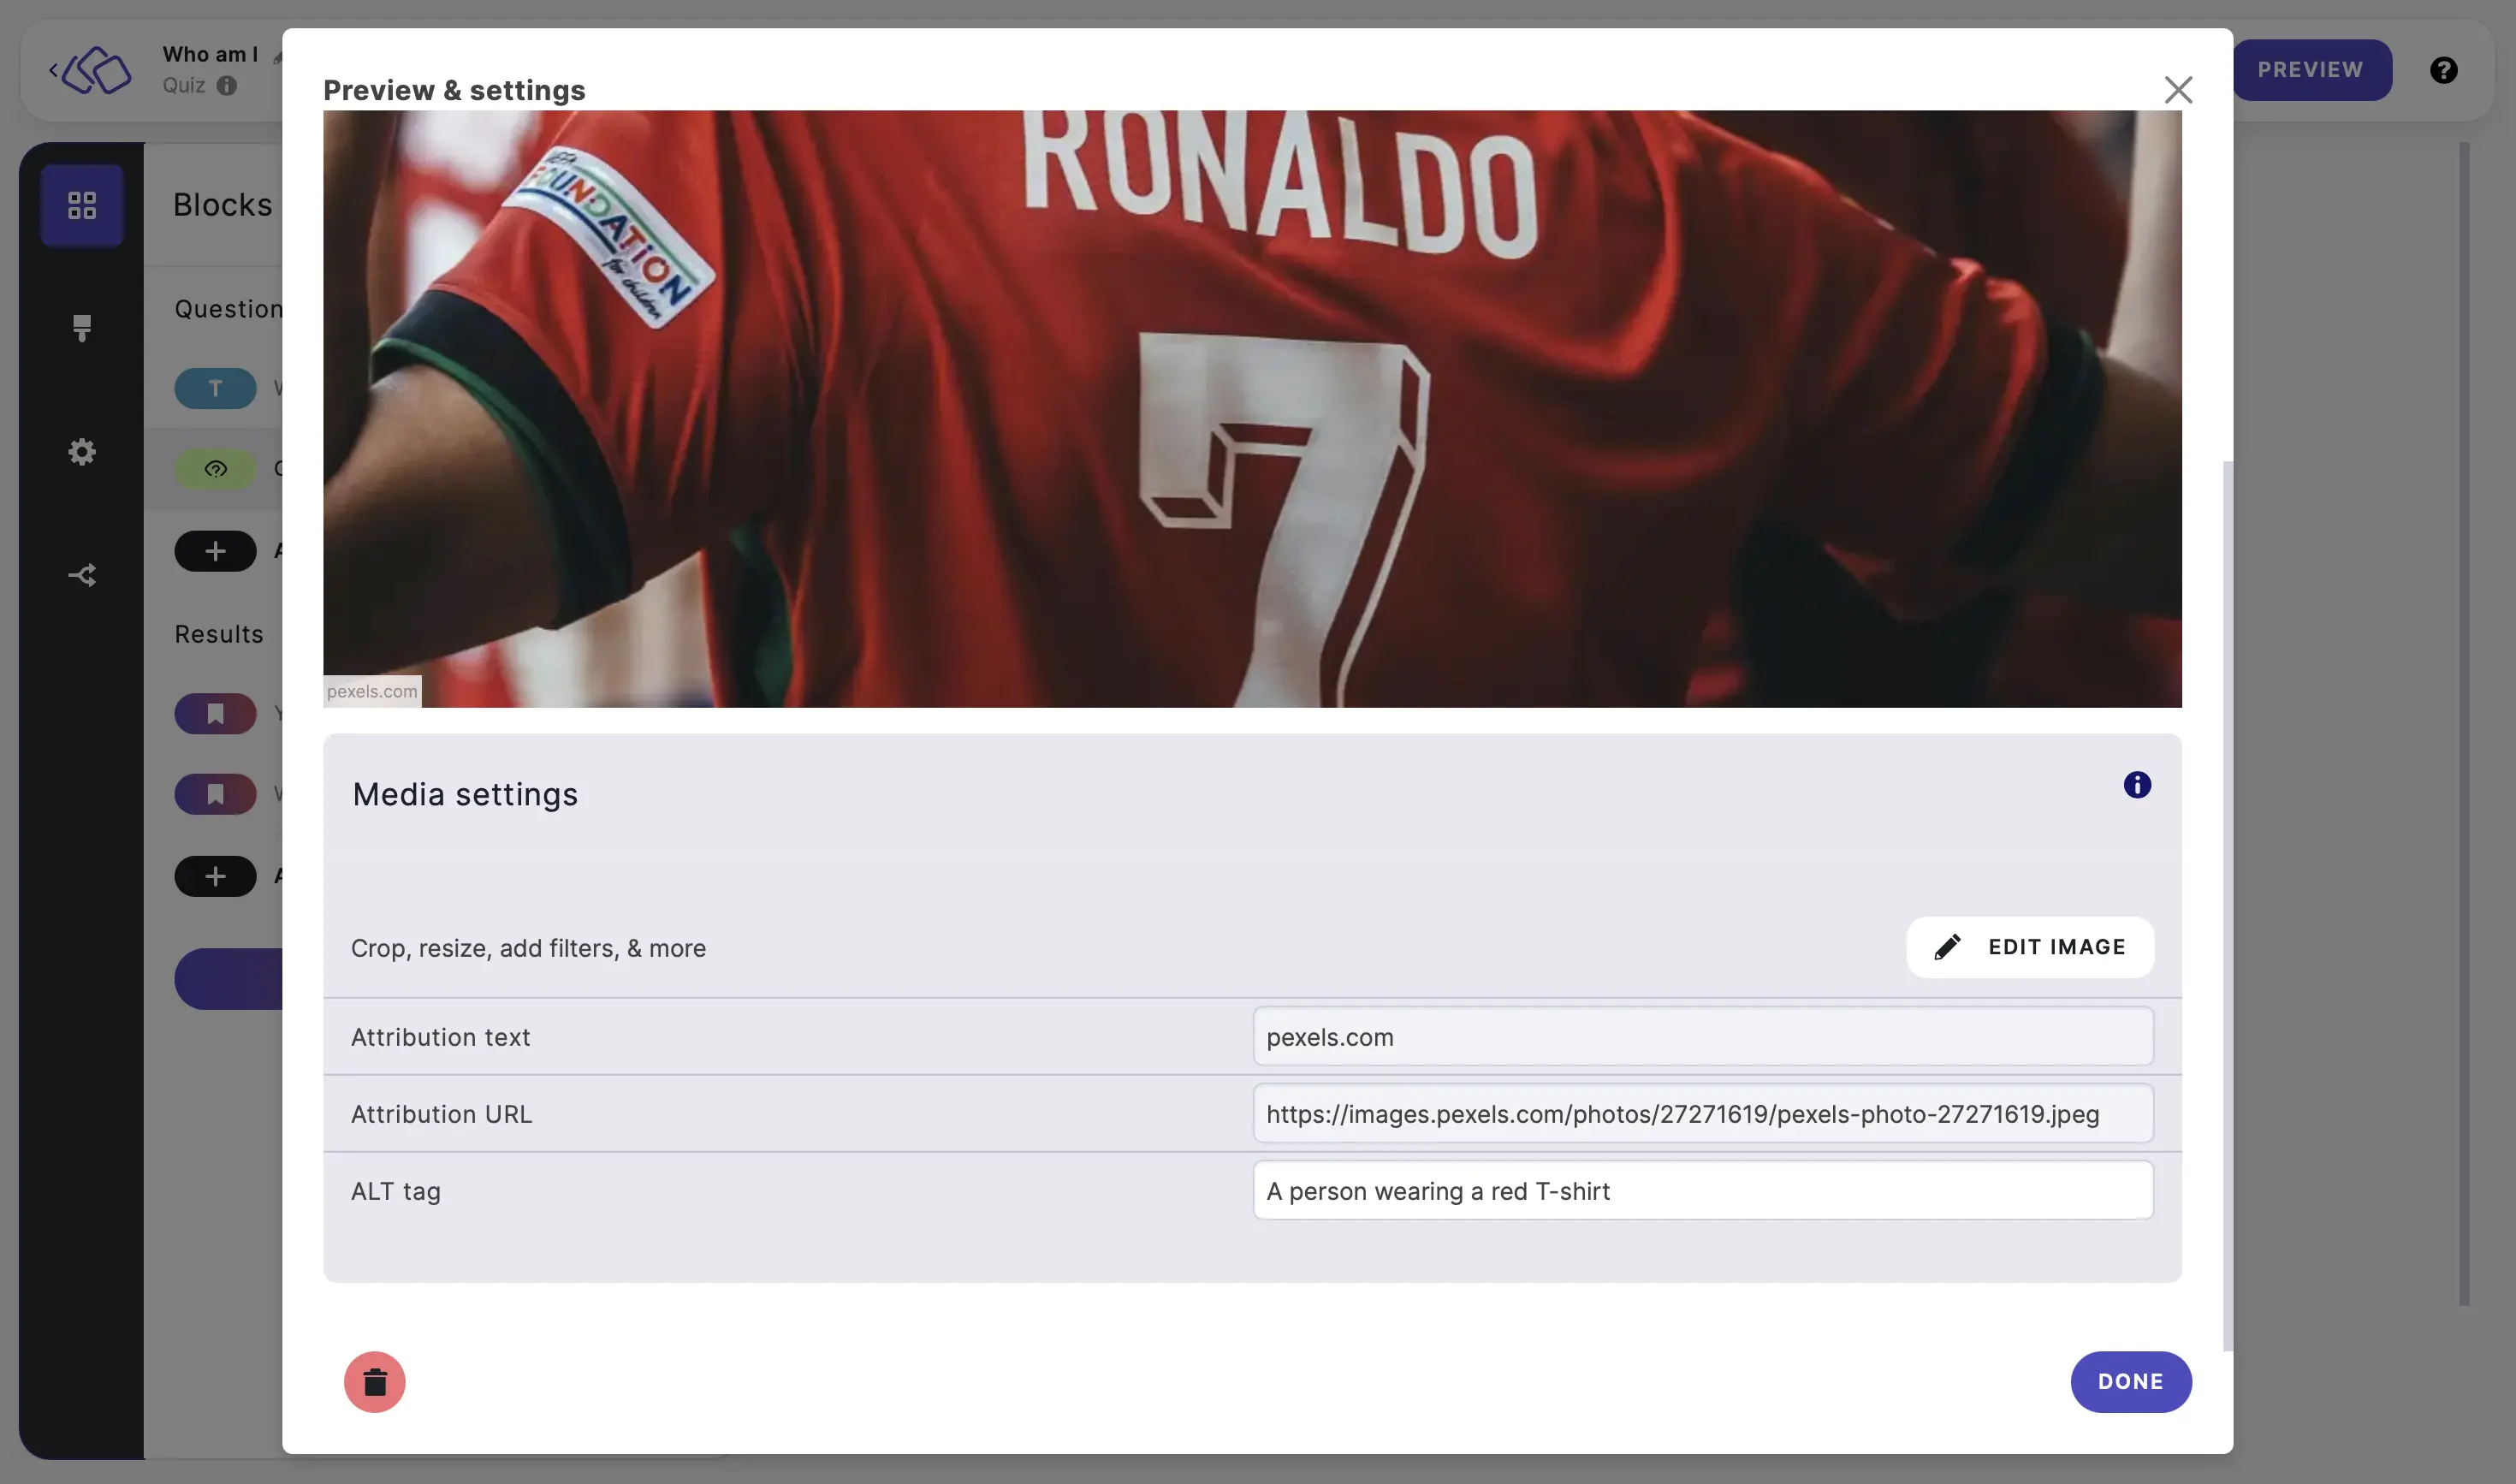
- Click on the camera icon to upload an image via upload, Your Media Library, Google, or Pexels.
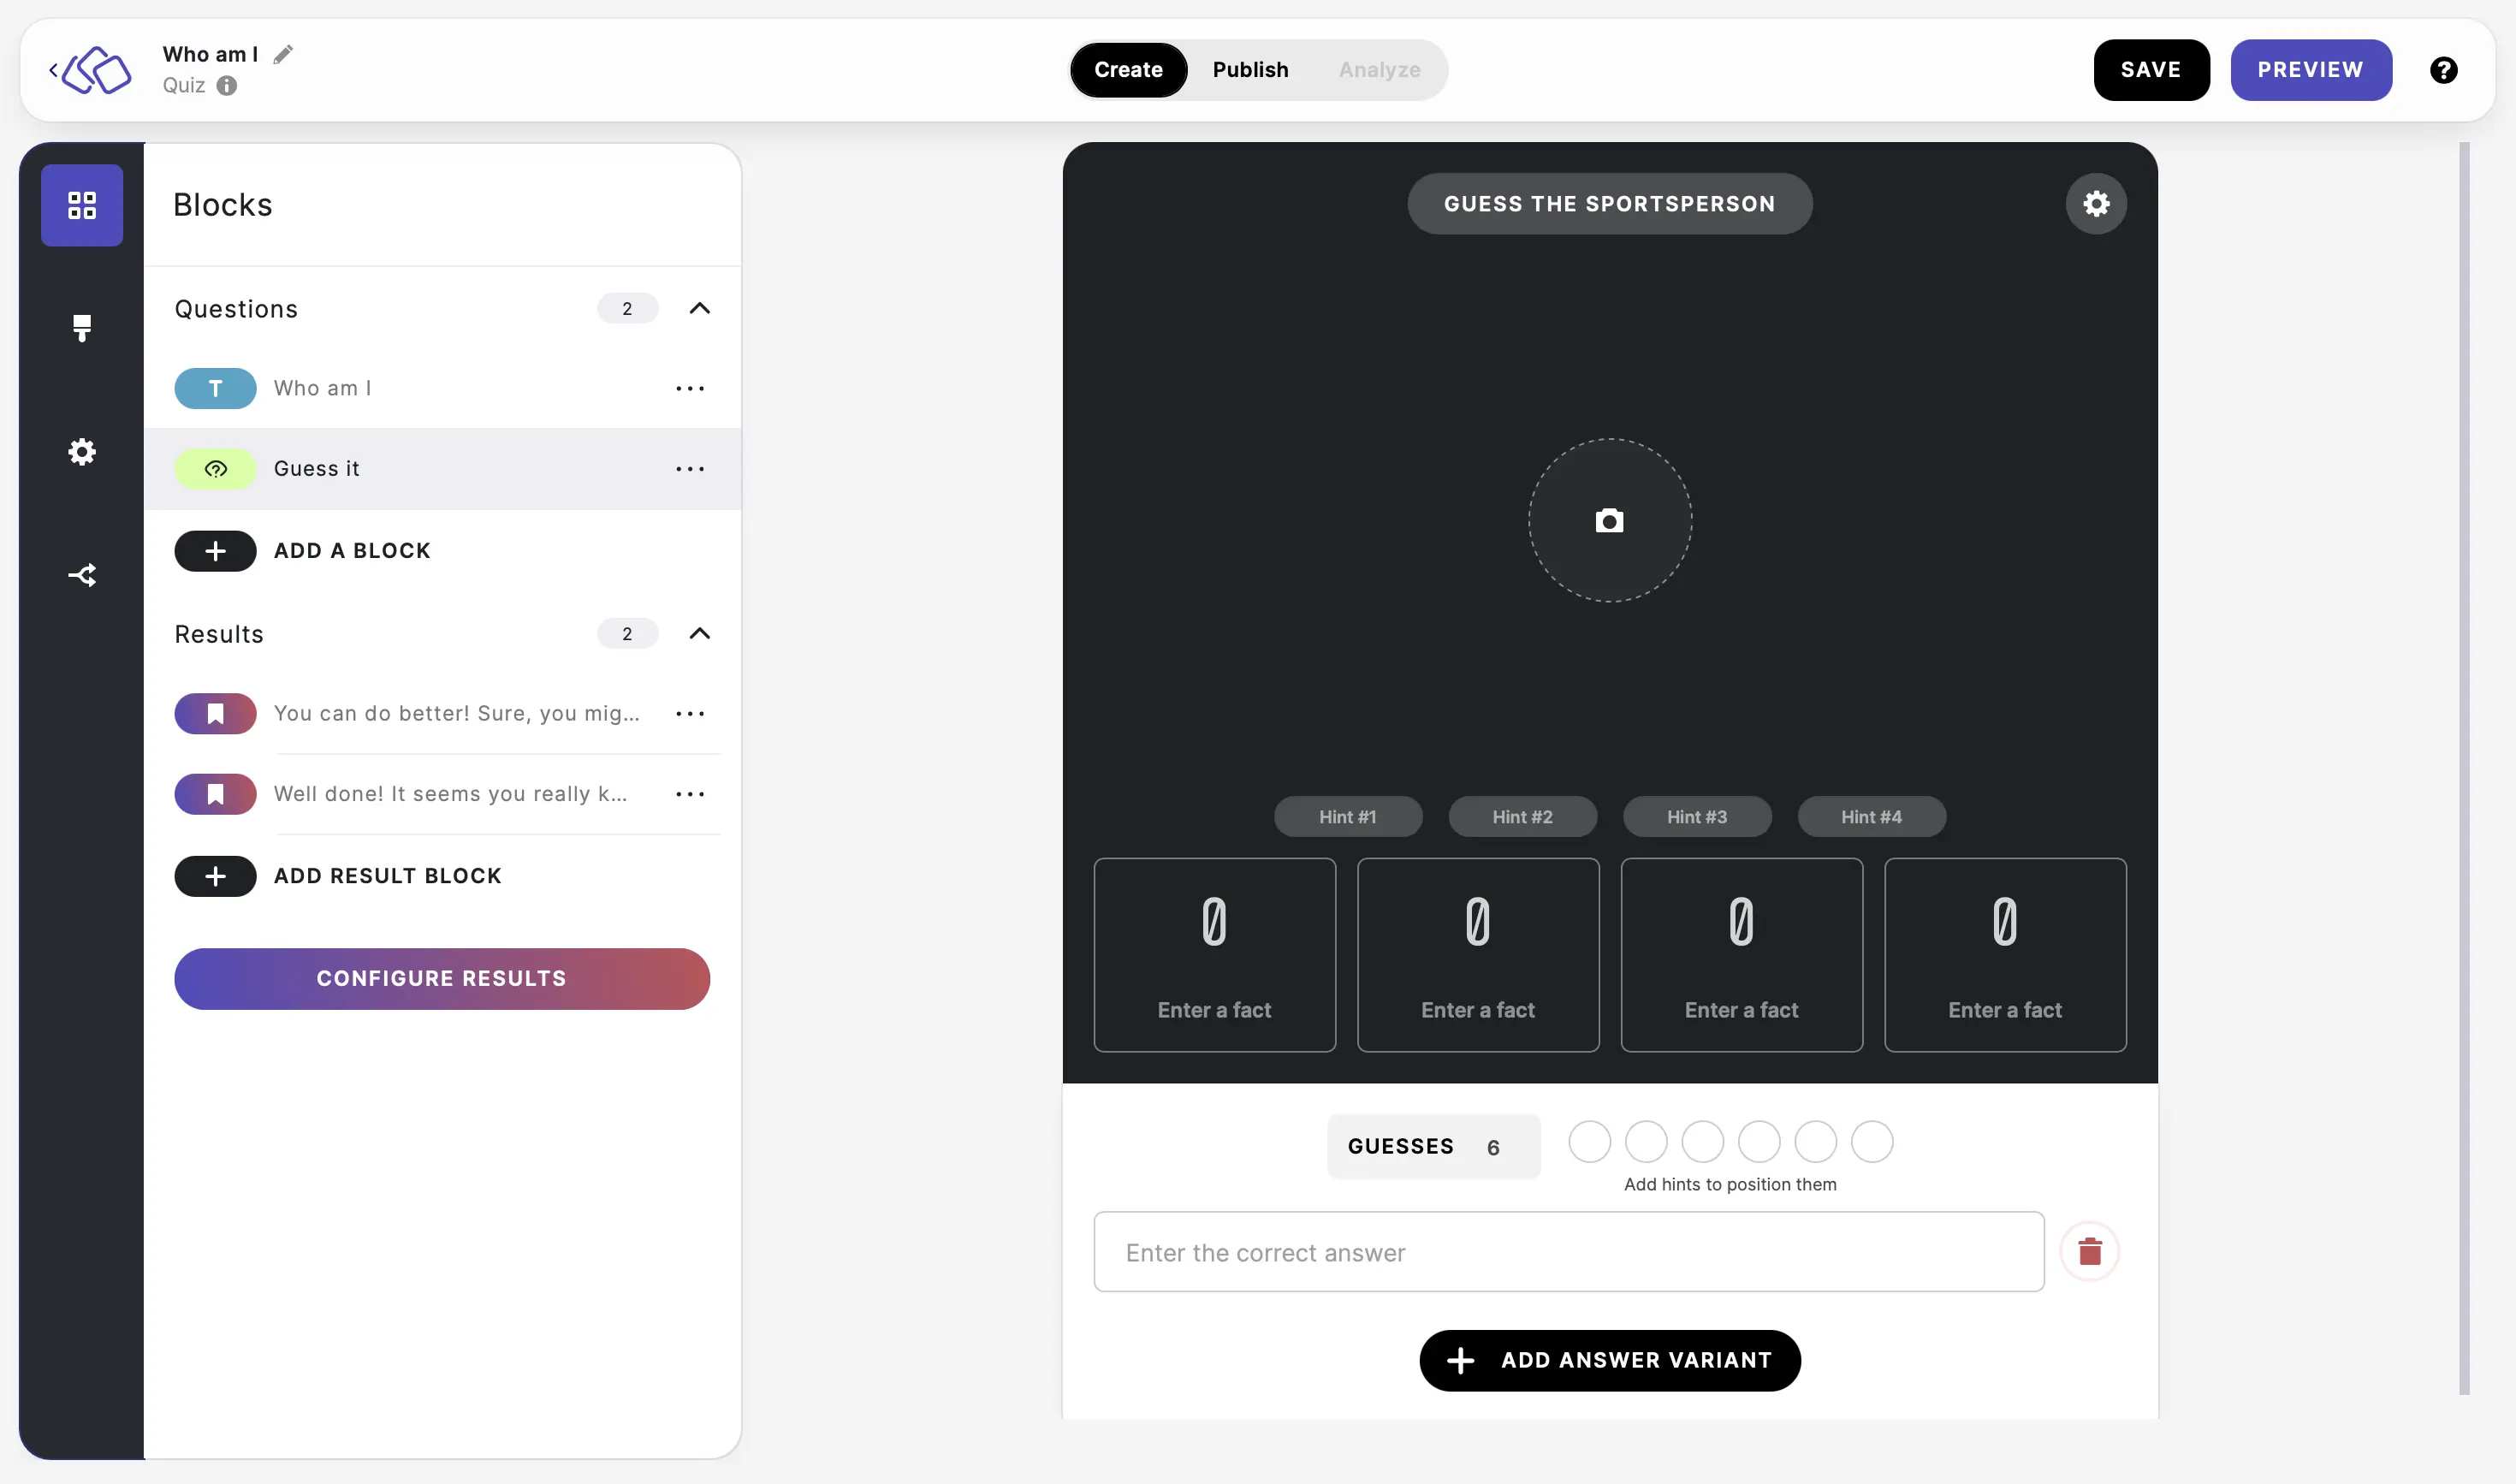
- To make this block accessible, add an alt tag, describing the image without giving away the answer. This means screen readers can inform the participant of the colors and so on without giving them the answer. E.g. If you have titled the block "Guess the player" and use a picture of Cristiano Renaldo, enter an alt tag like "blurred image of a player wearing a red shirt".
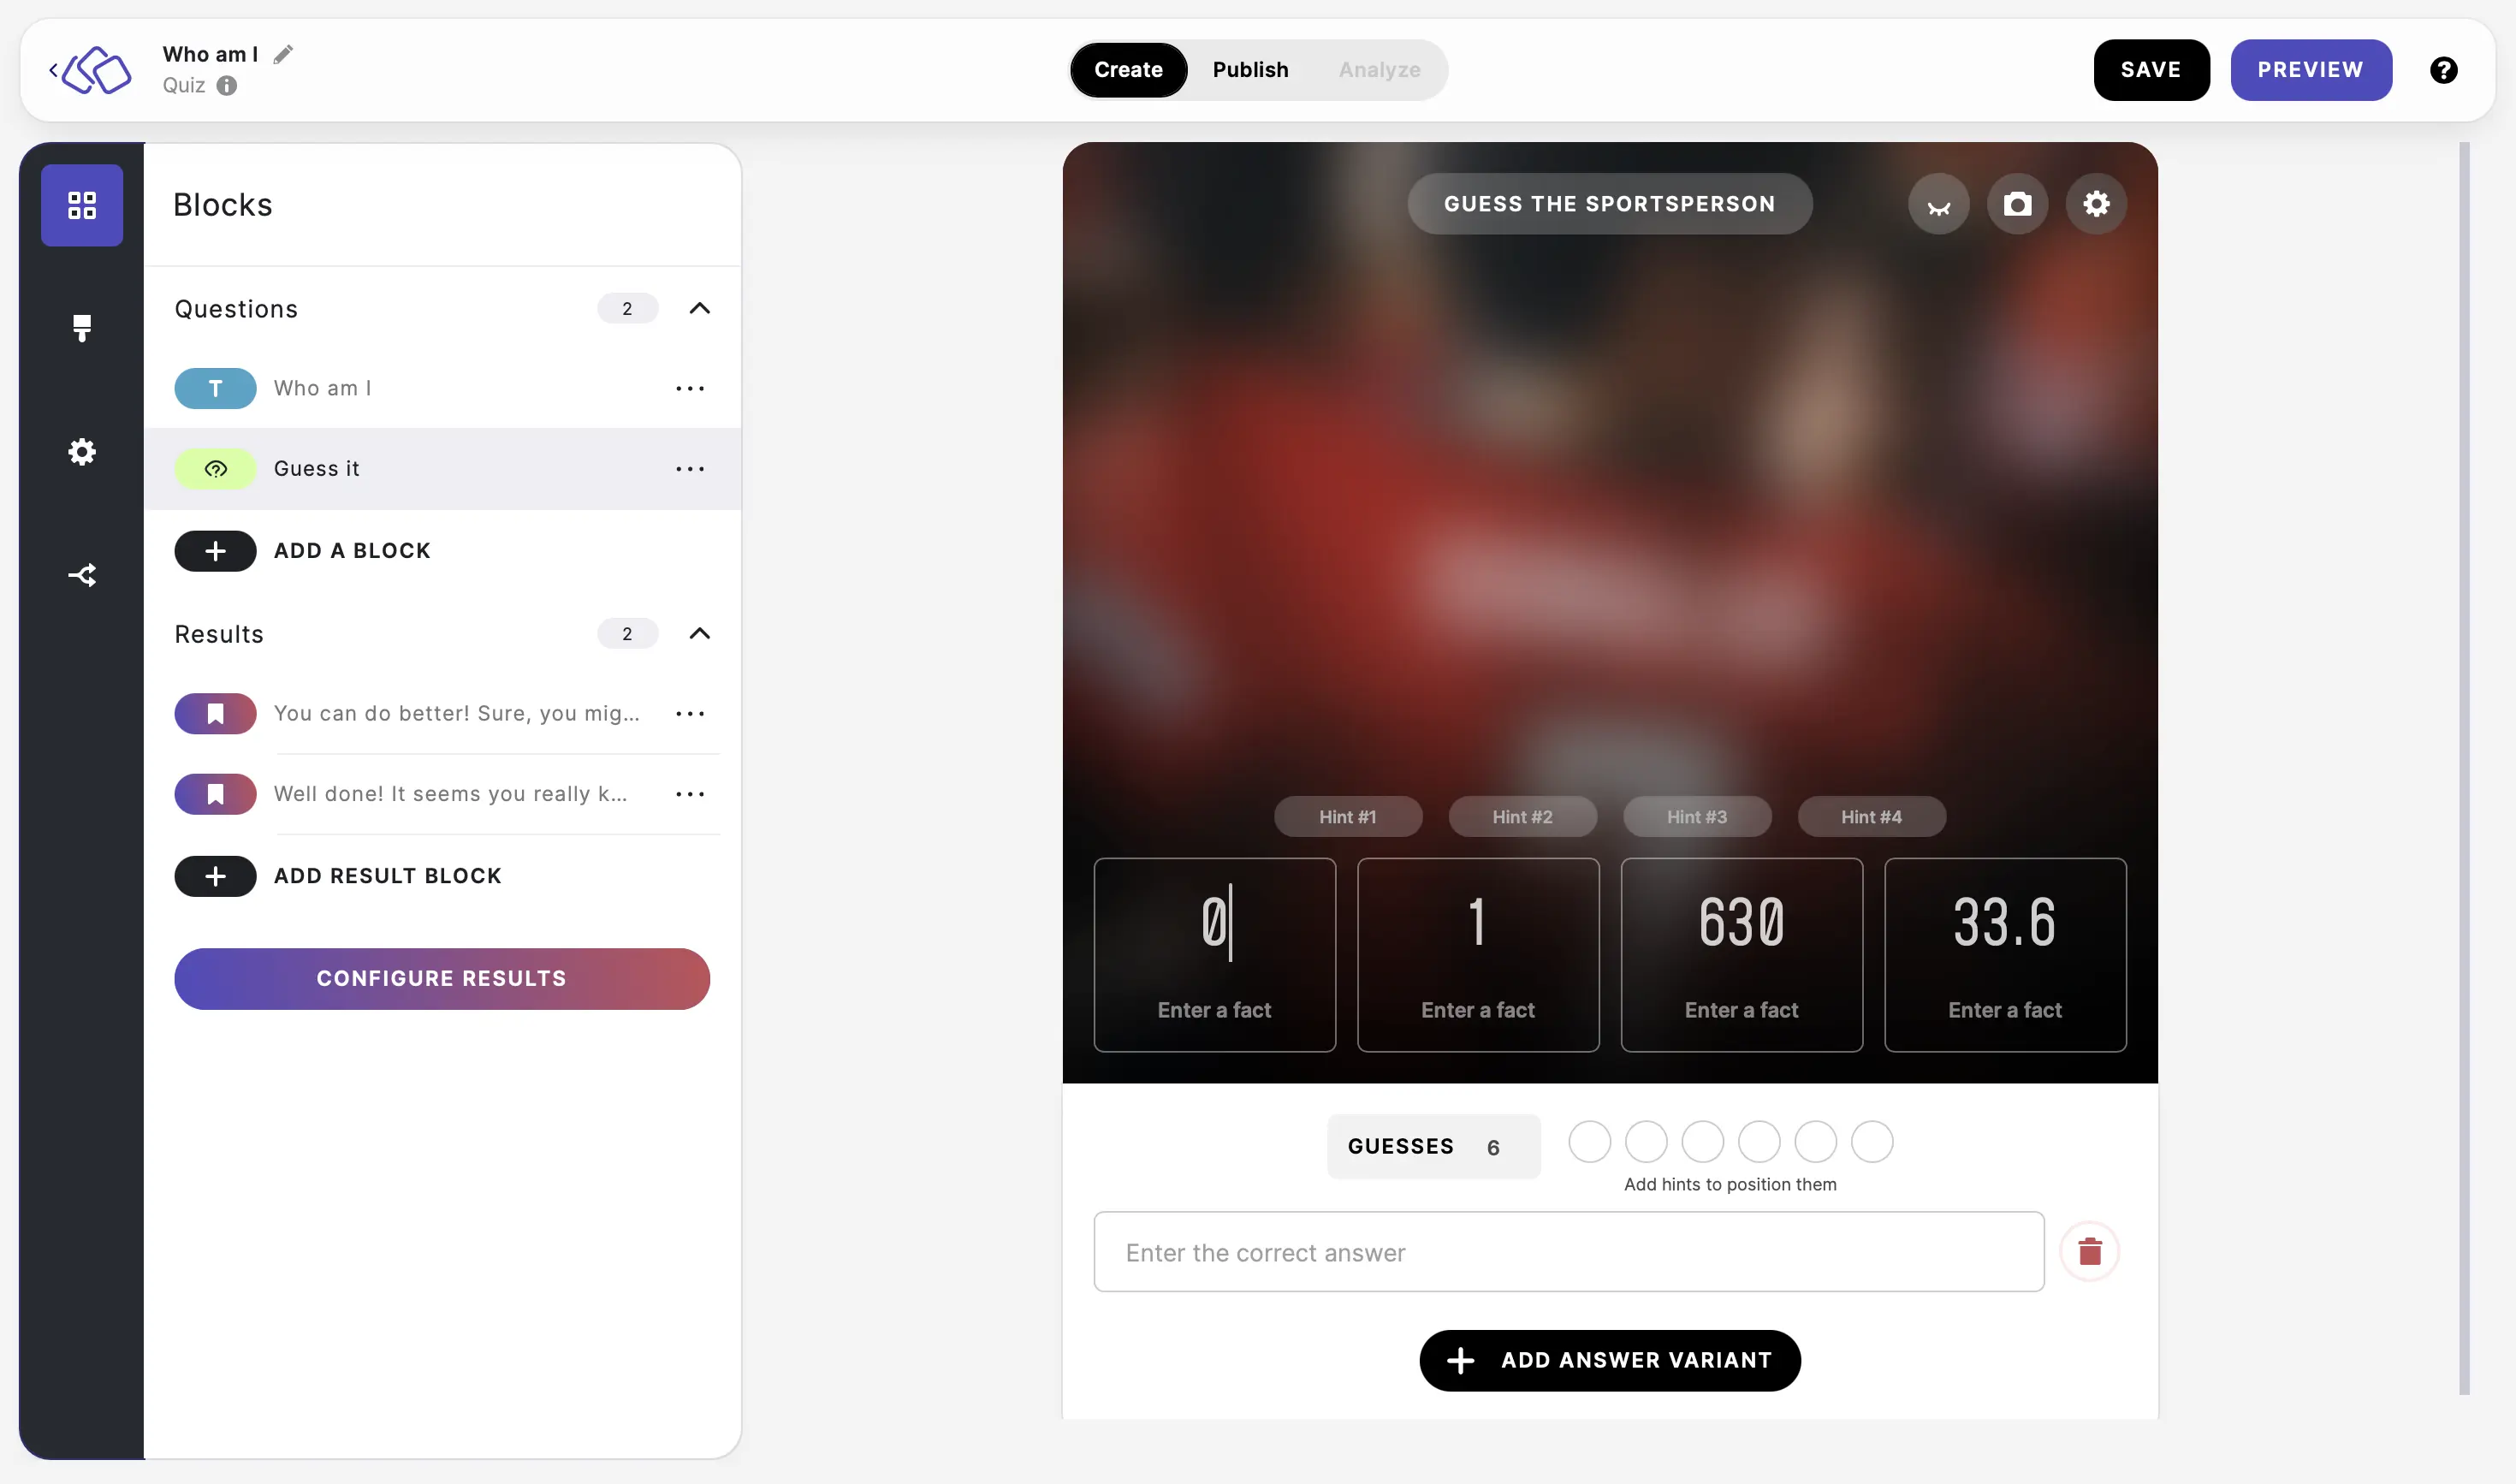
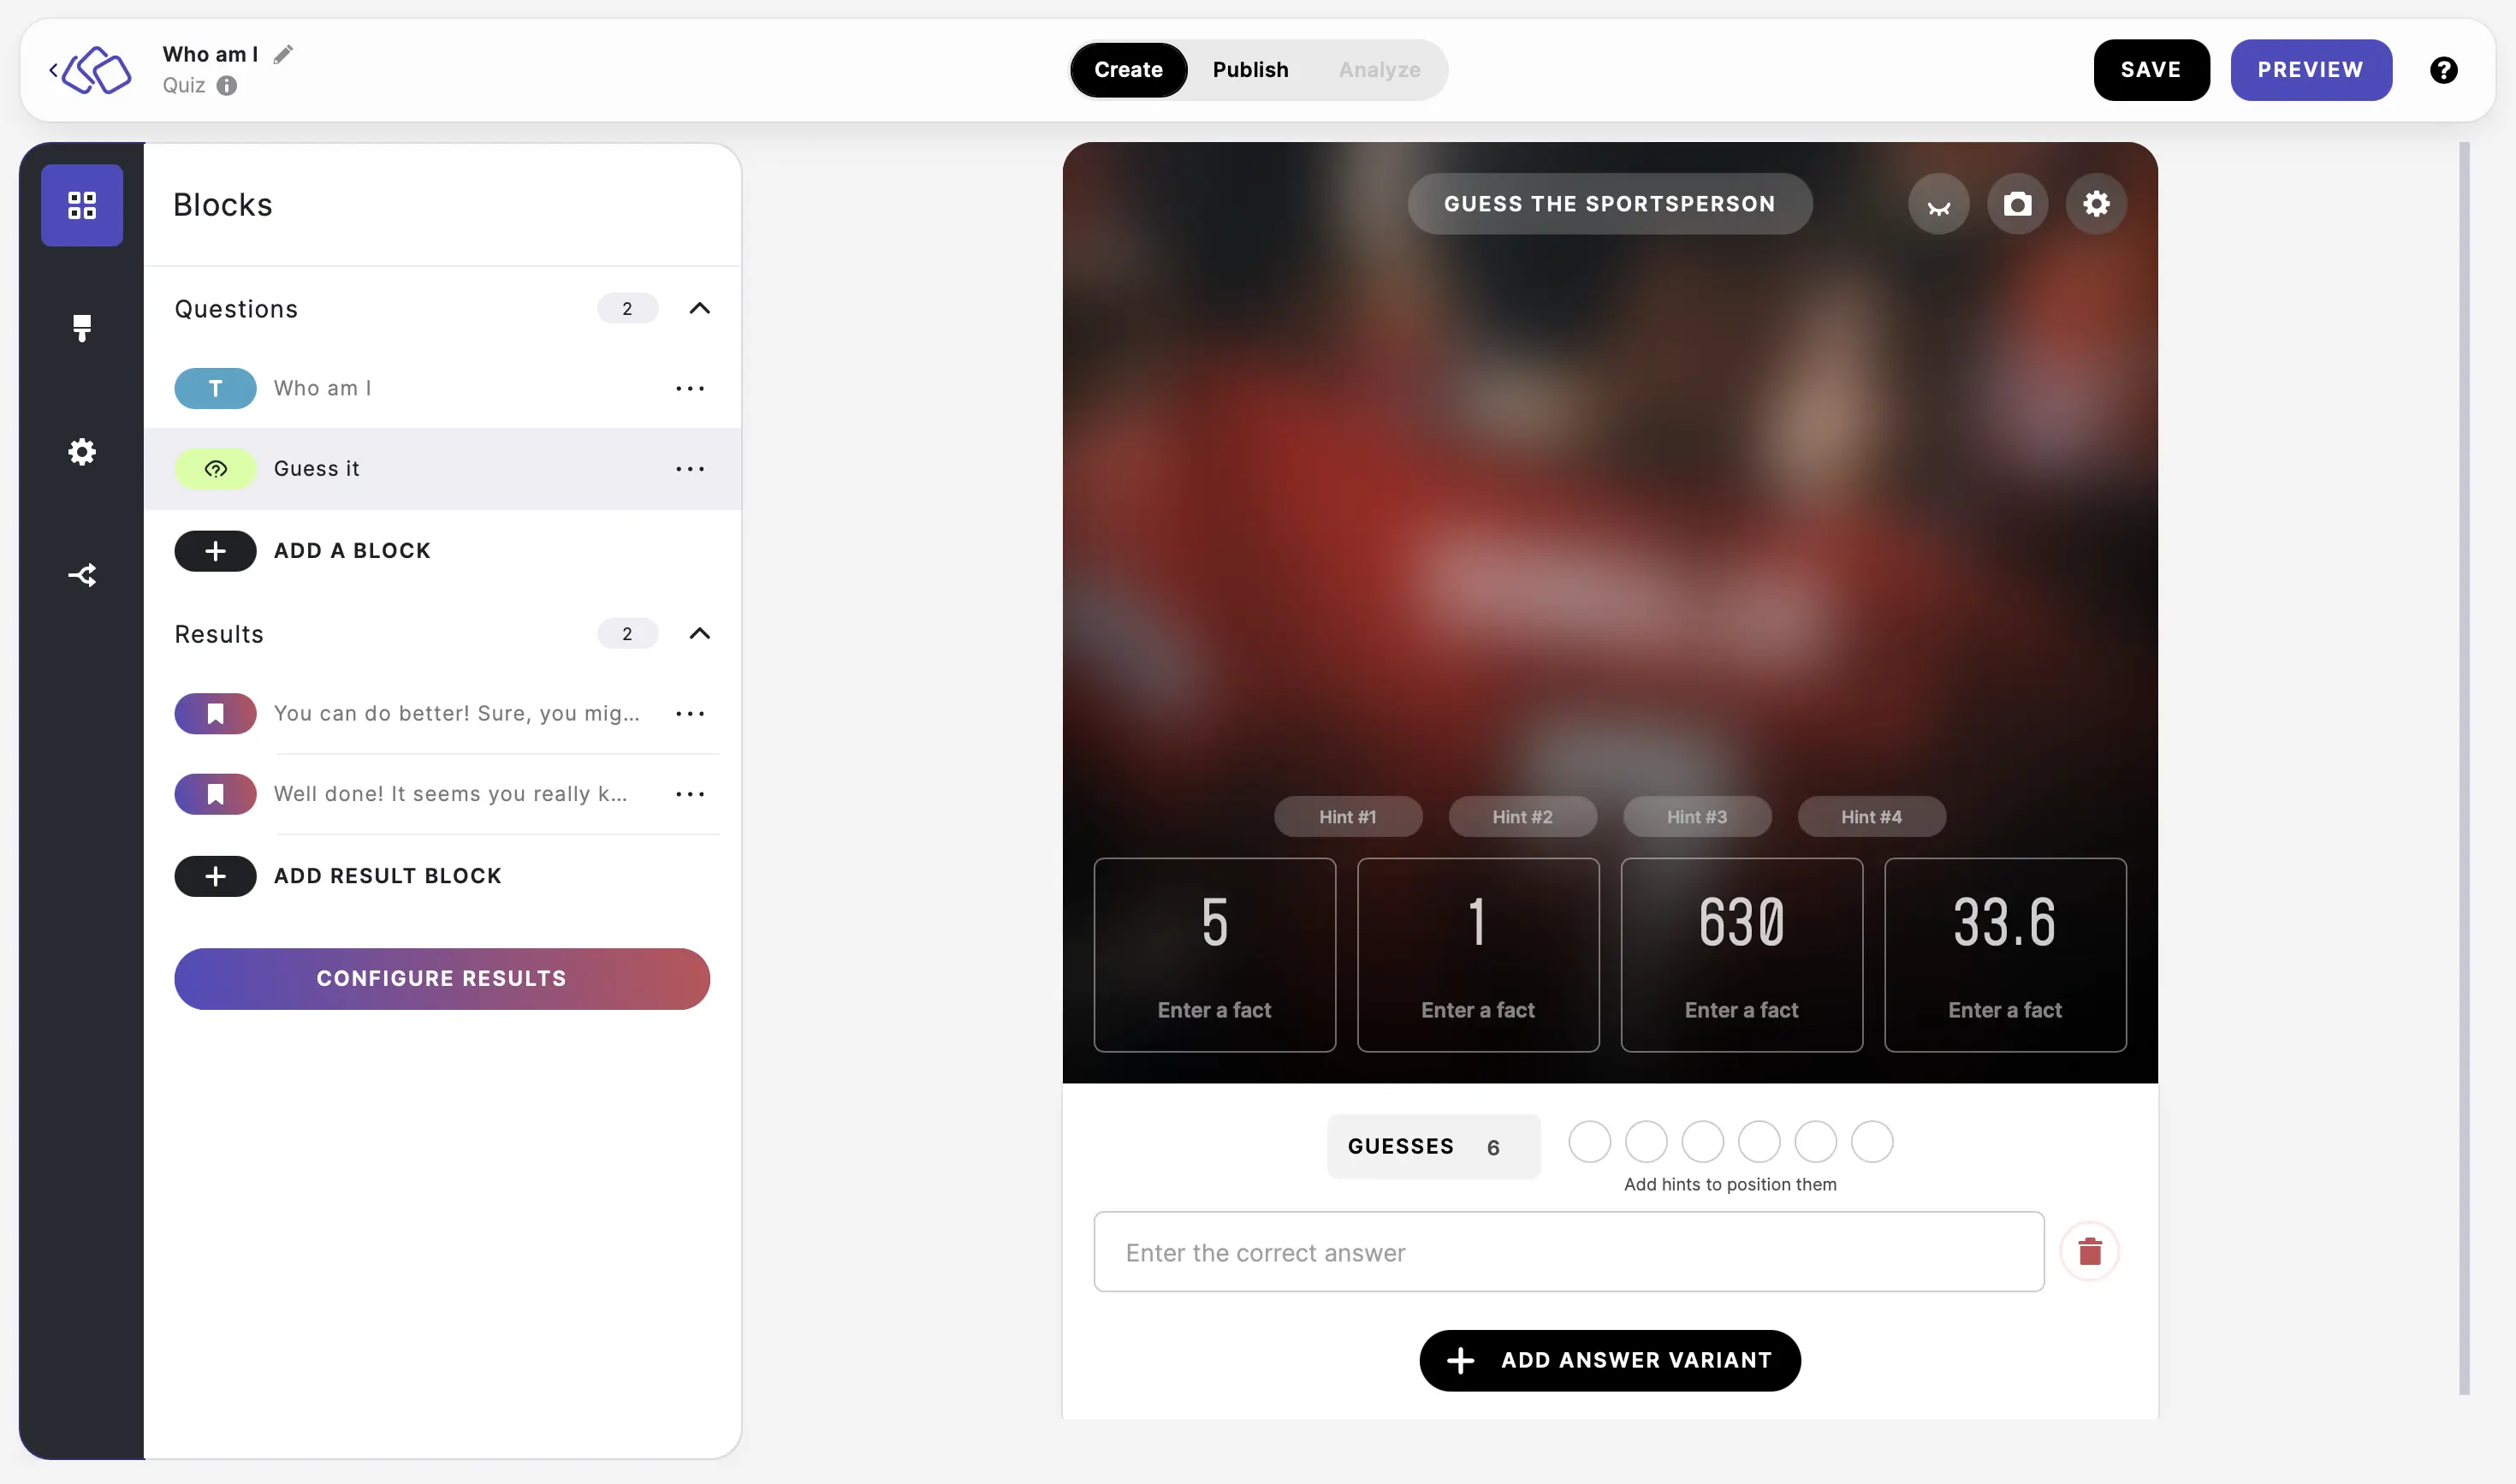
- Enter figures/texts* about the person or thing in the number/text fields*, replacing the default zeros, and a corresponding piece of information in the Enter a fact fields, e.g. 5 and Ballon d'Or Awards.
- Enter hints in the Hint #1-4 boxes, e.g. This person's fitness is legendary.
- Enter a number of guesses between 1 and 6. 6 is the default.
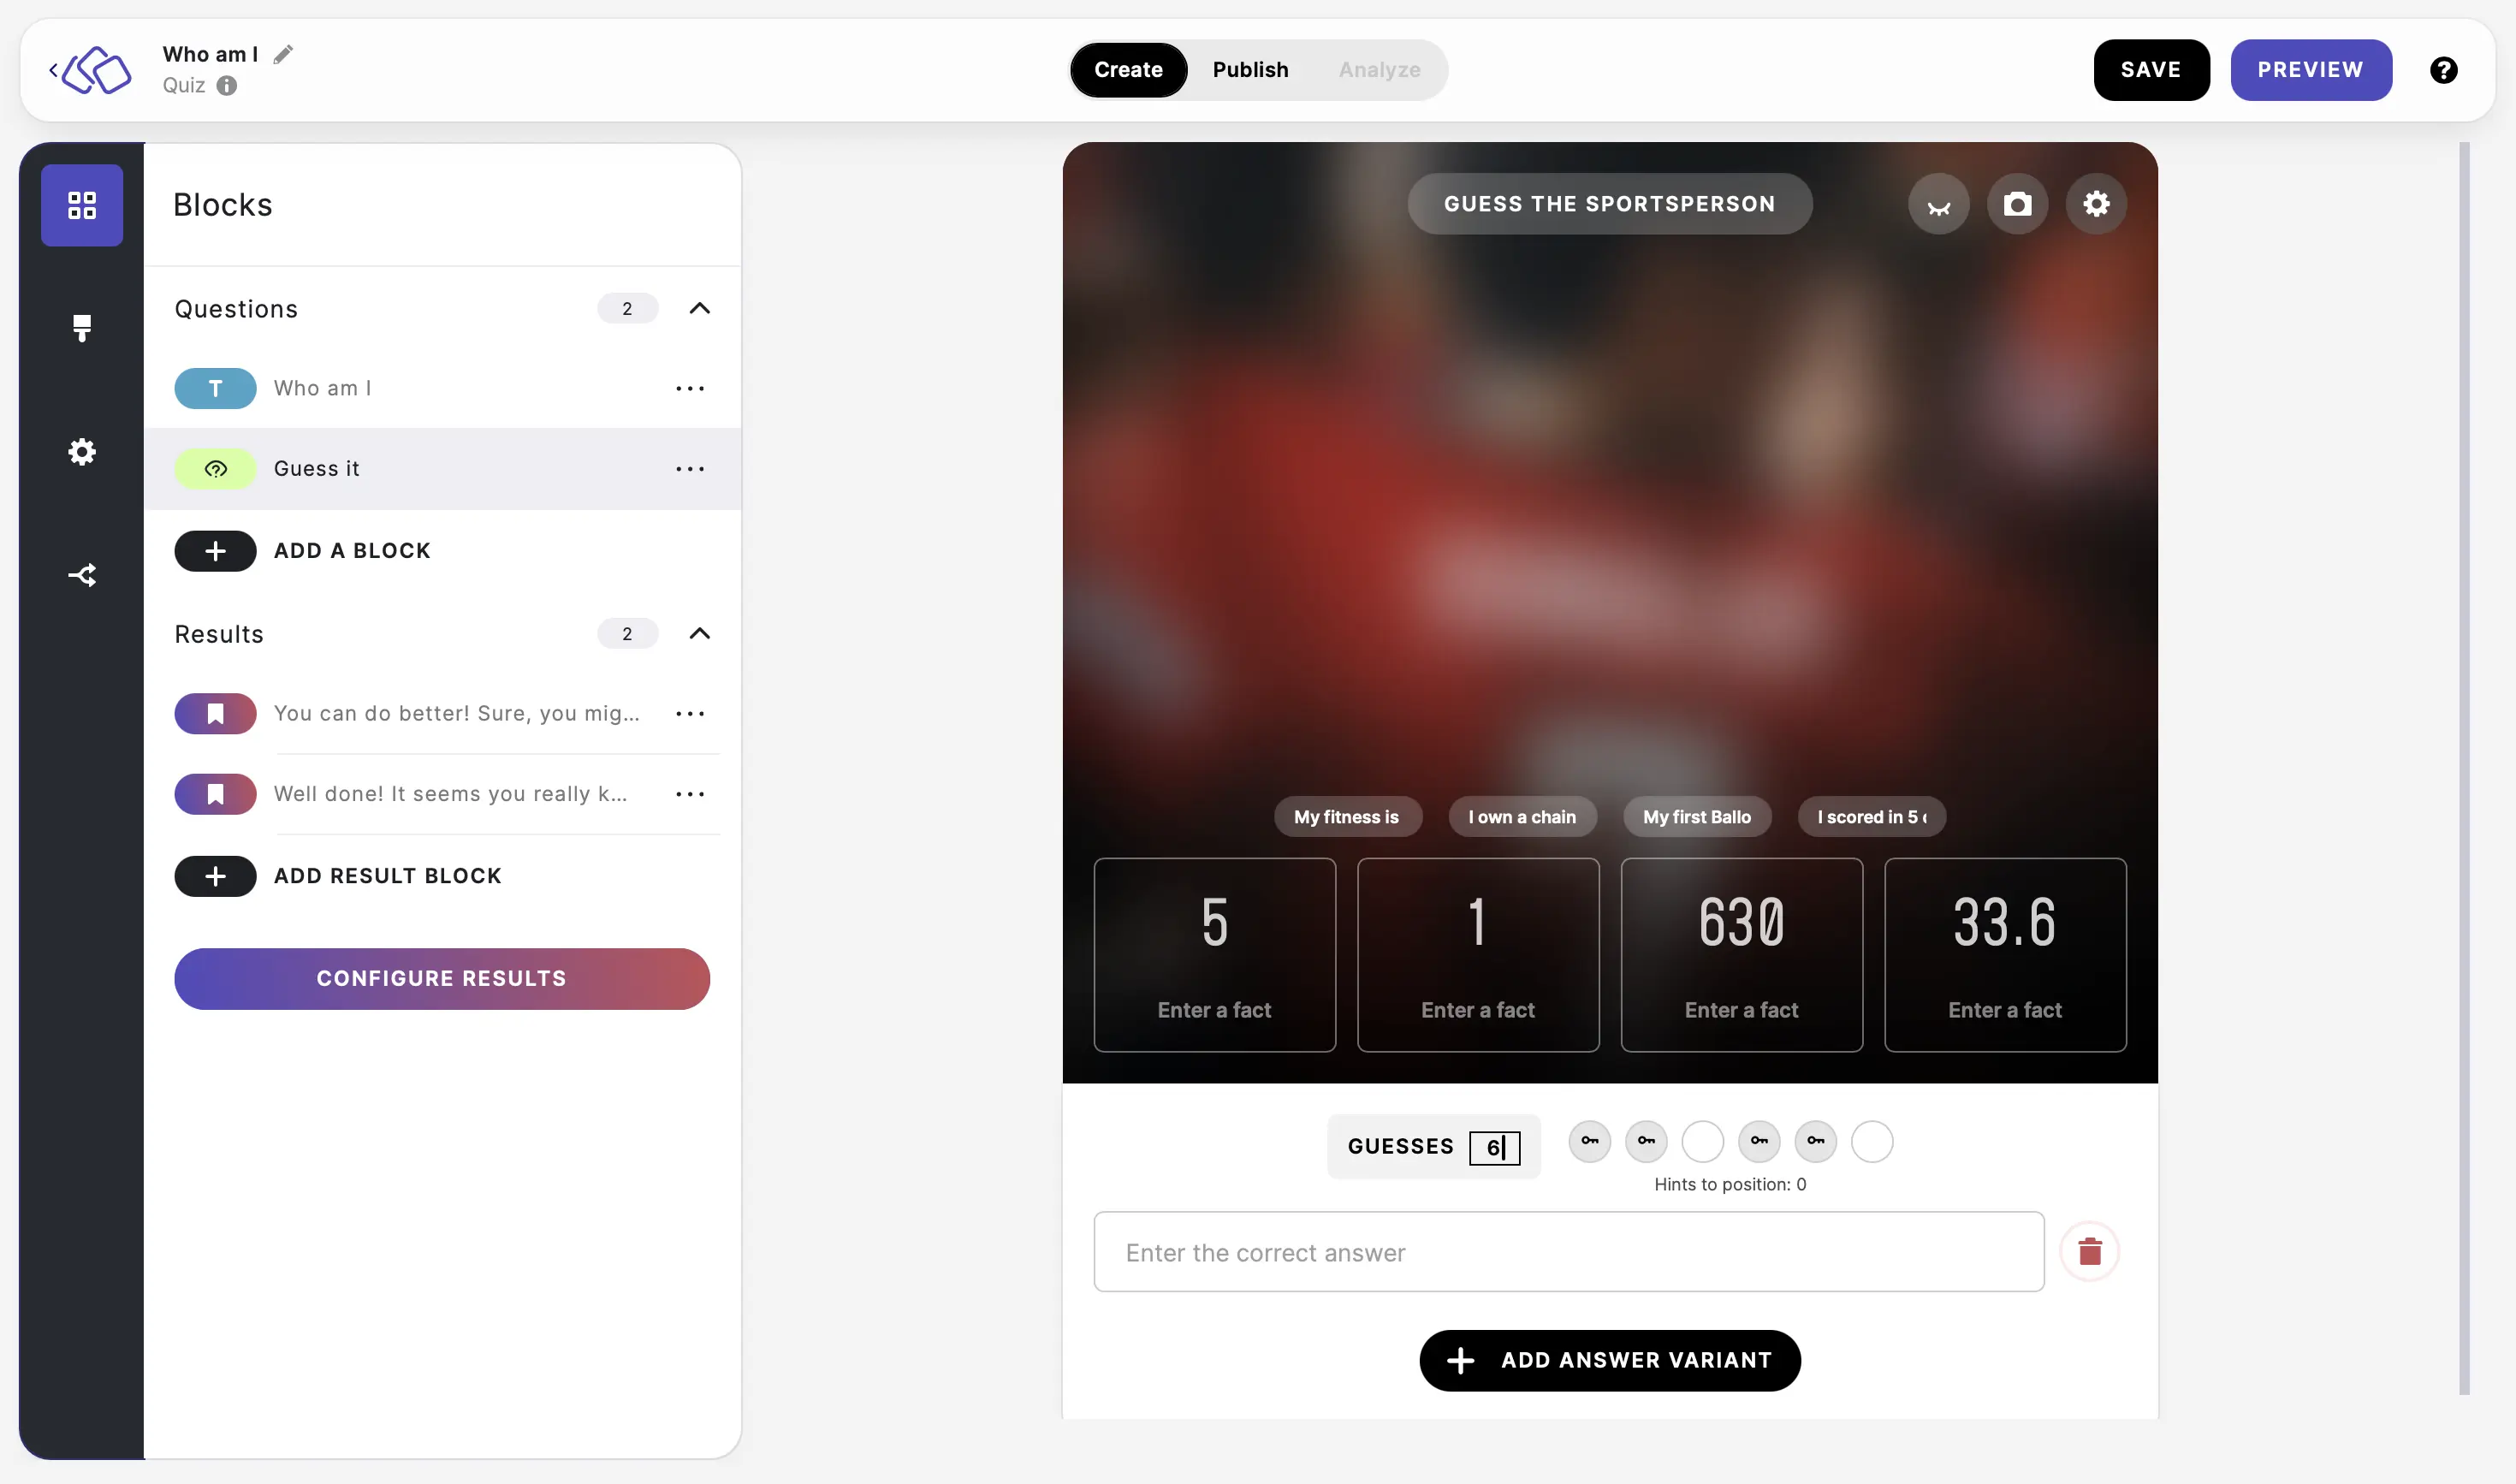
- Reposition the hints on the line of guesses using the circles and key icons (optional). Click on a key icon to select a hint and then click on a white circle to assign it a new position.
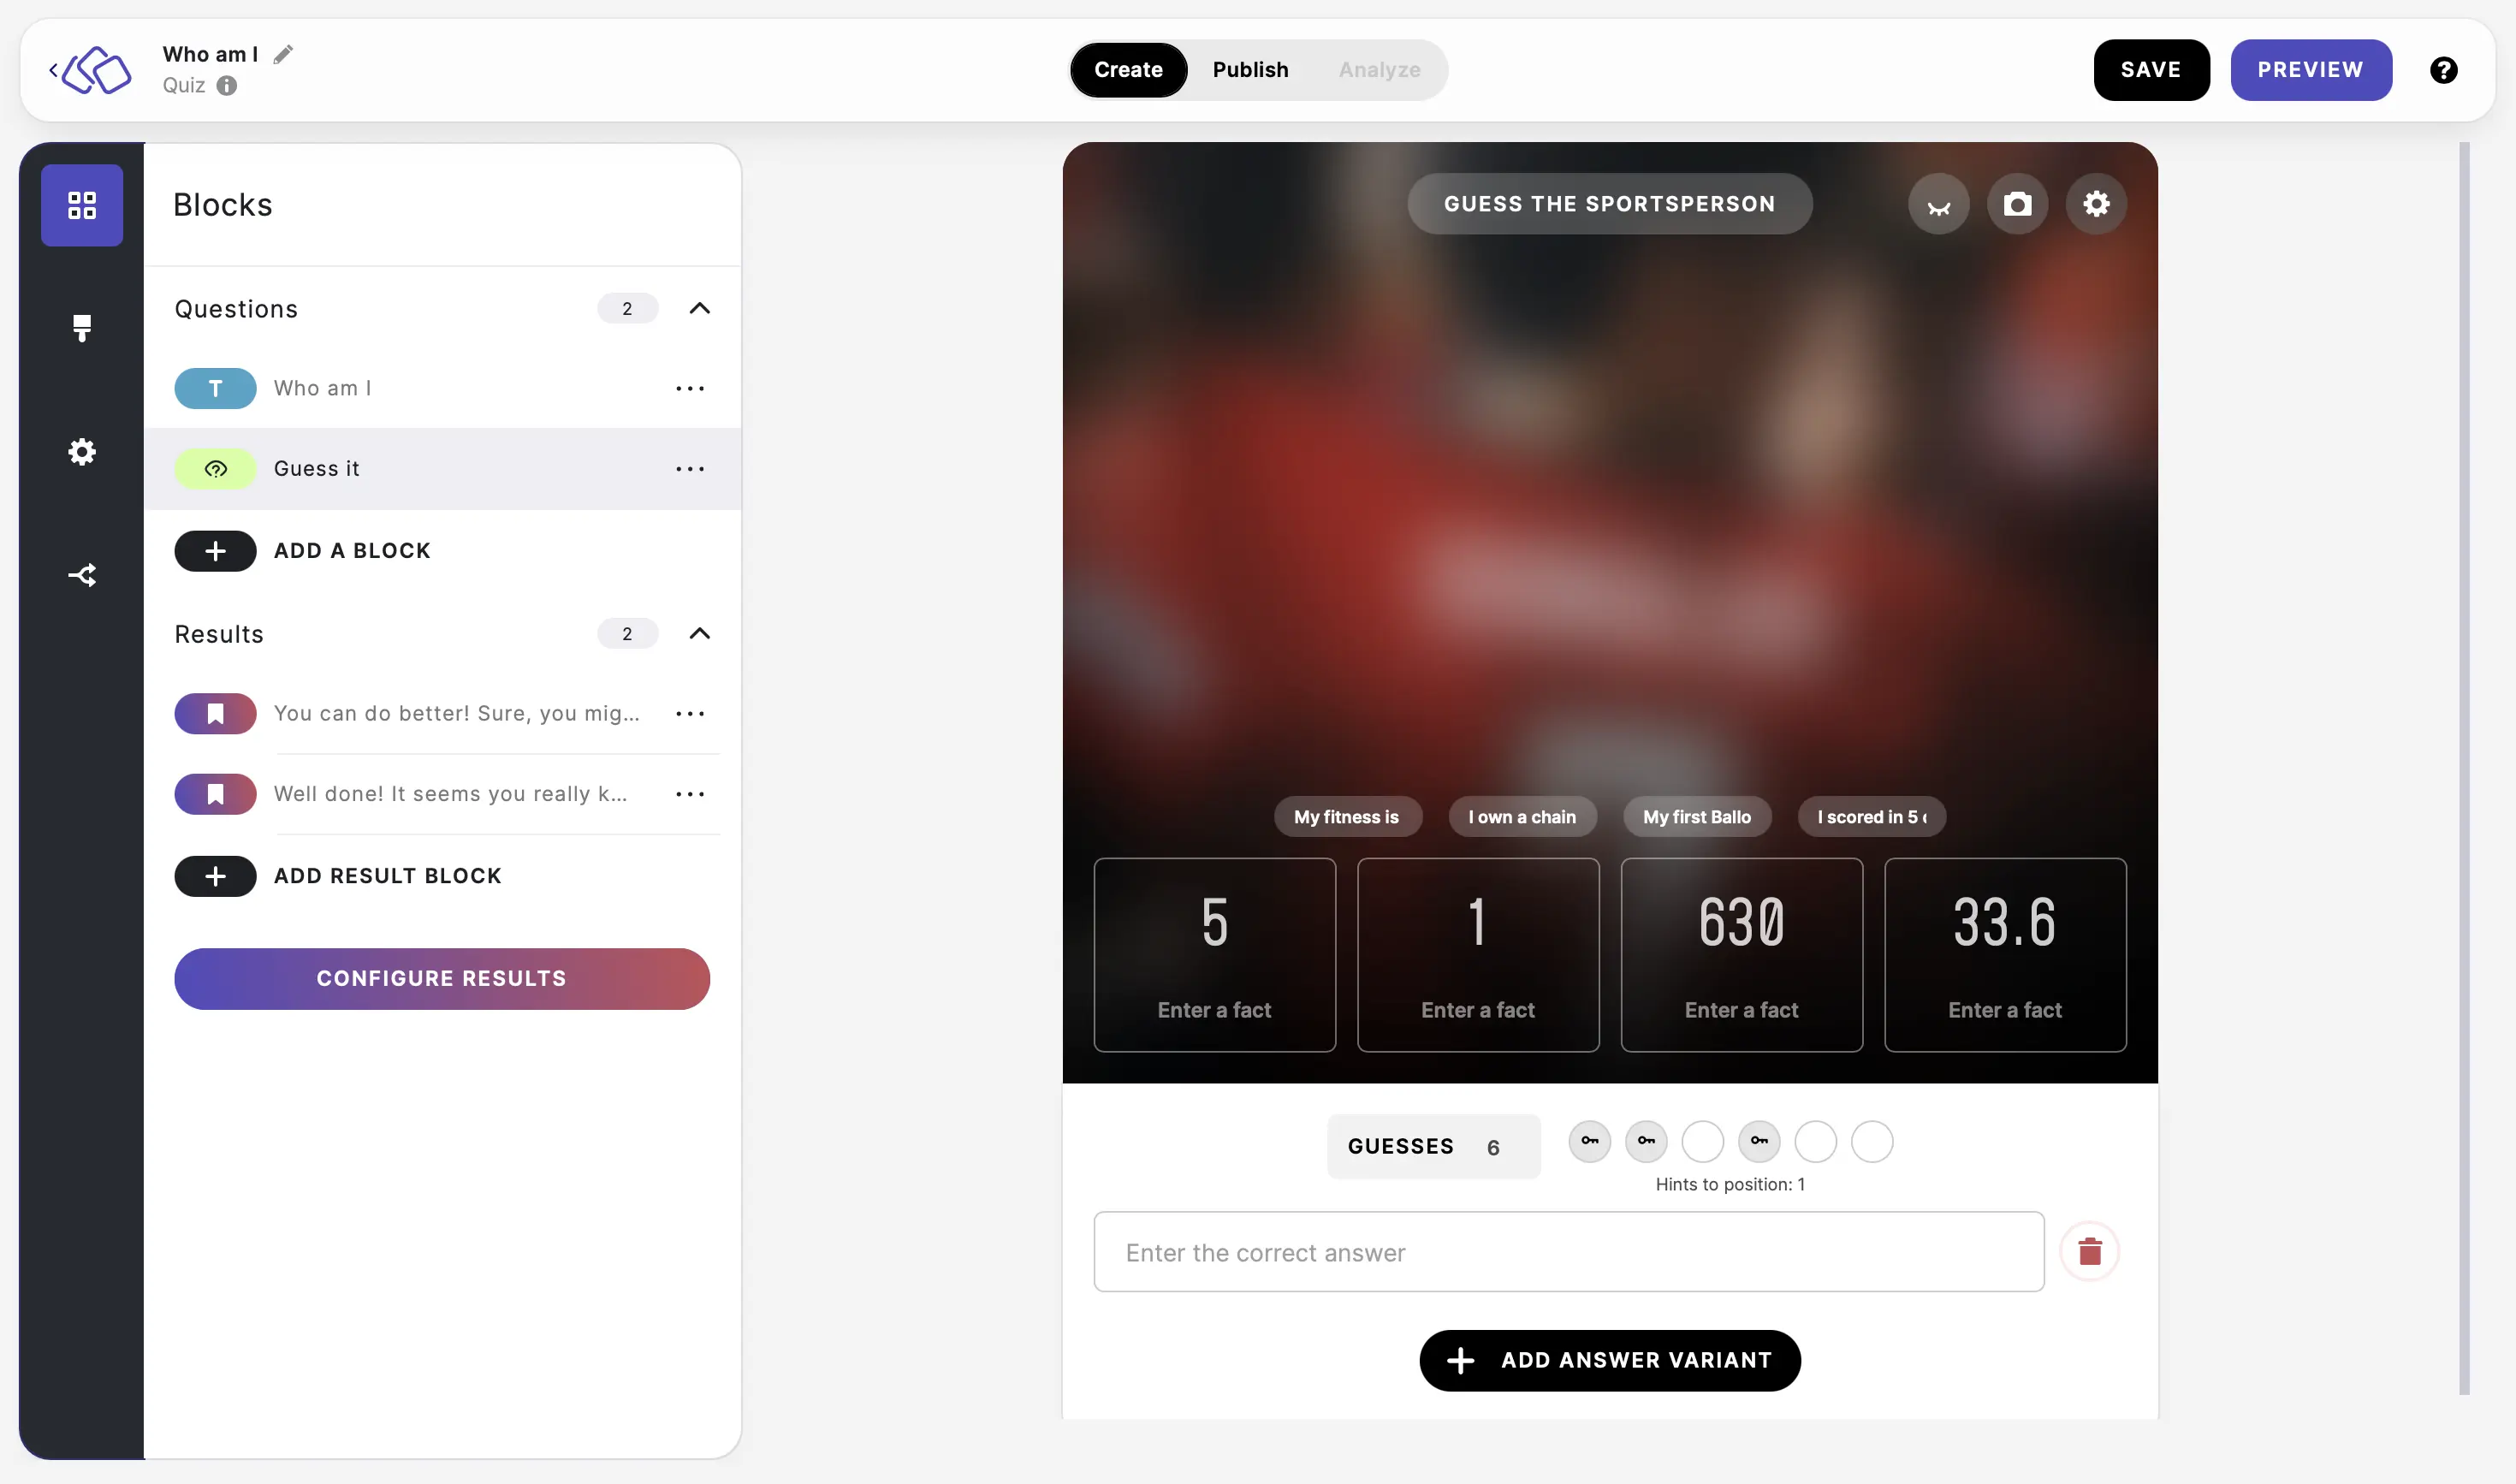
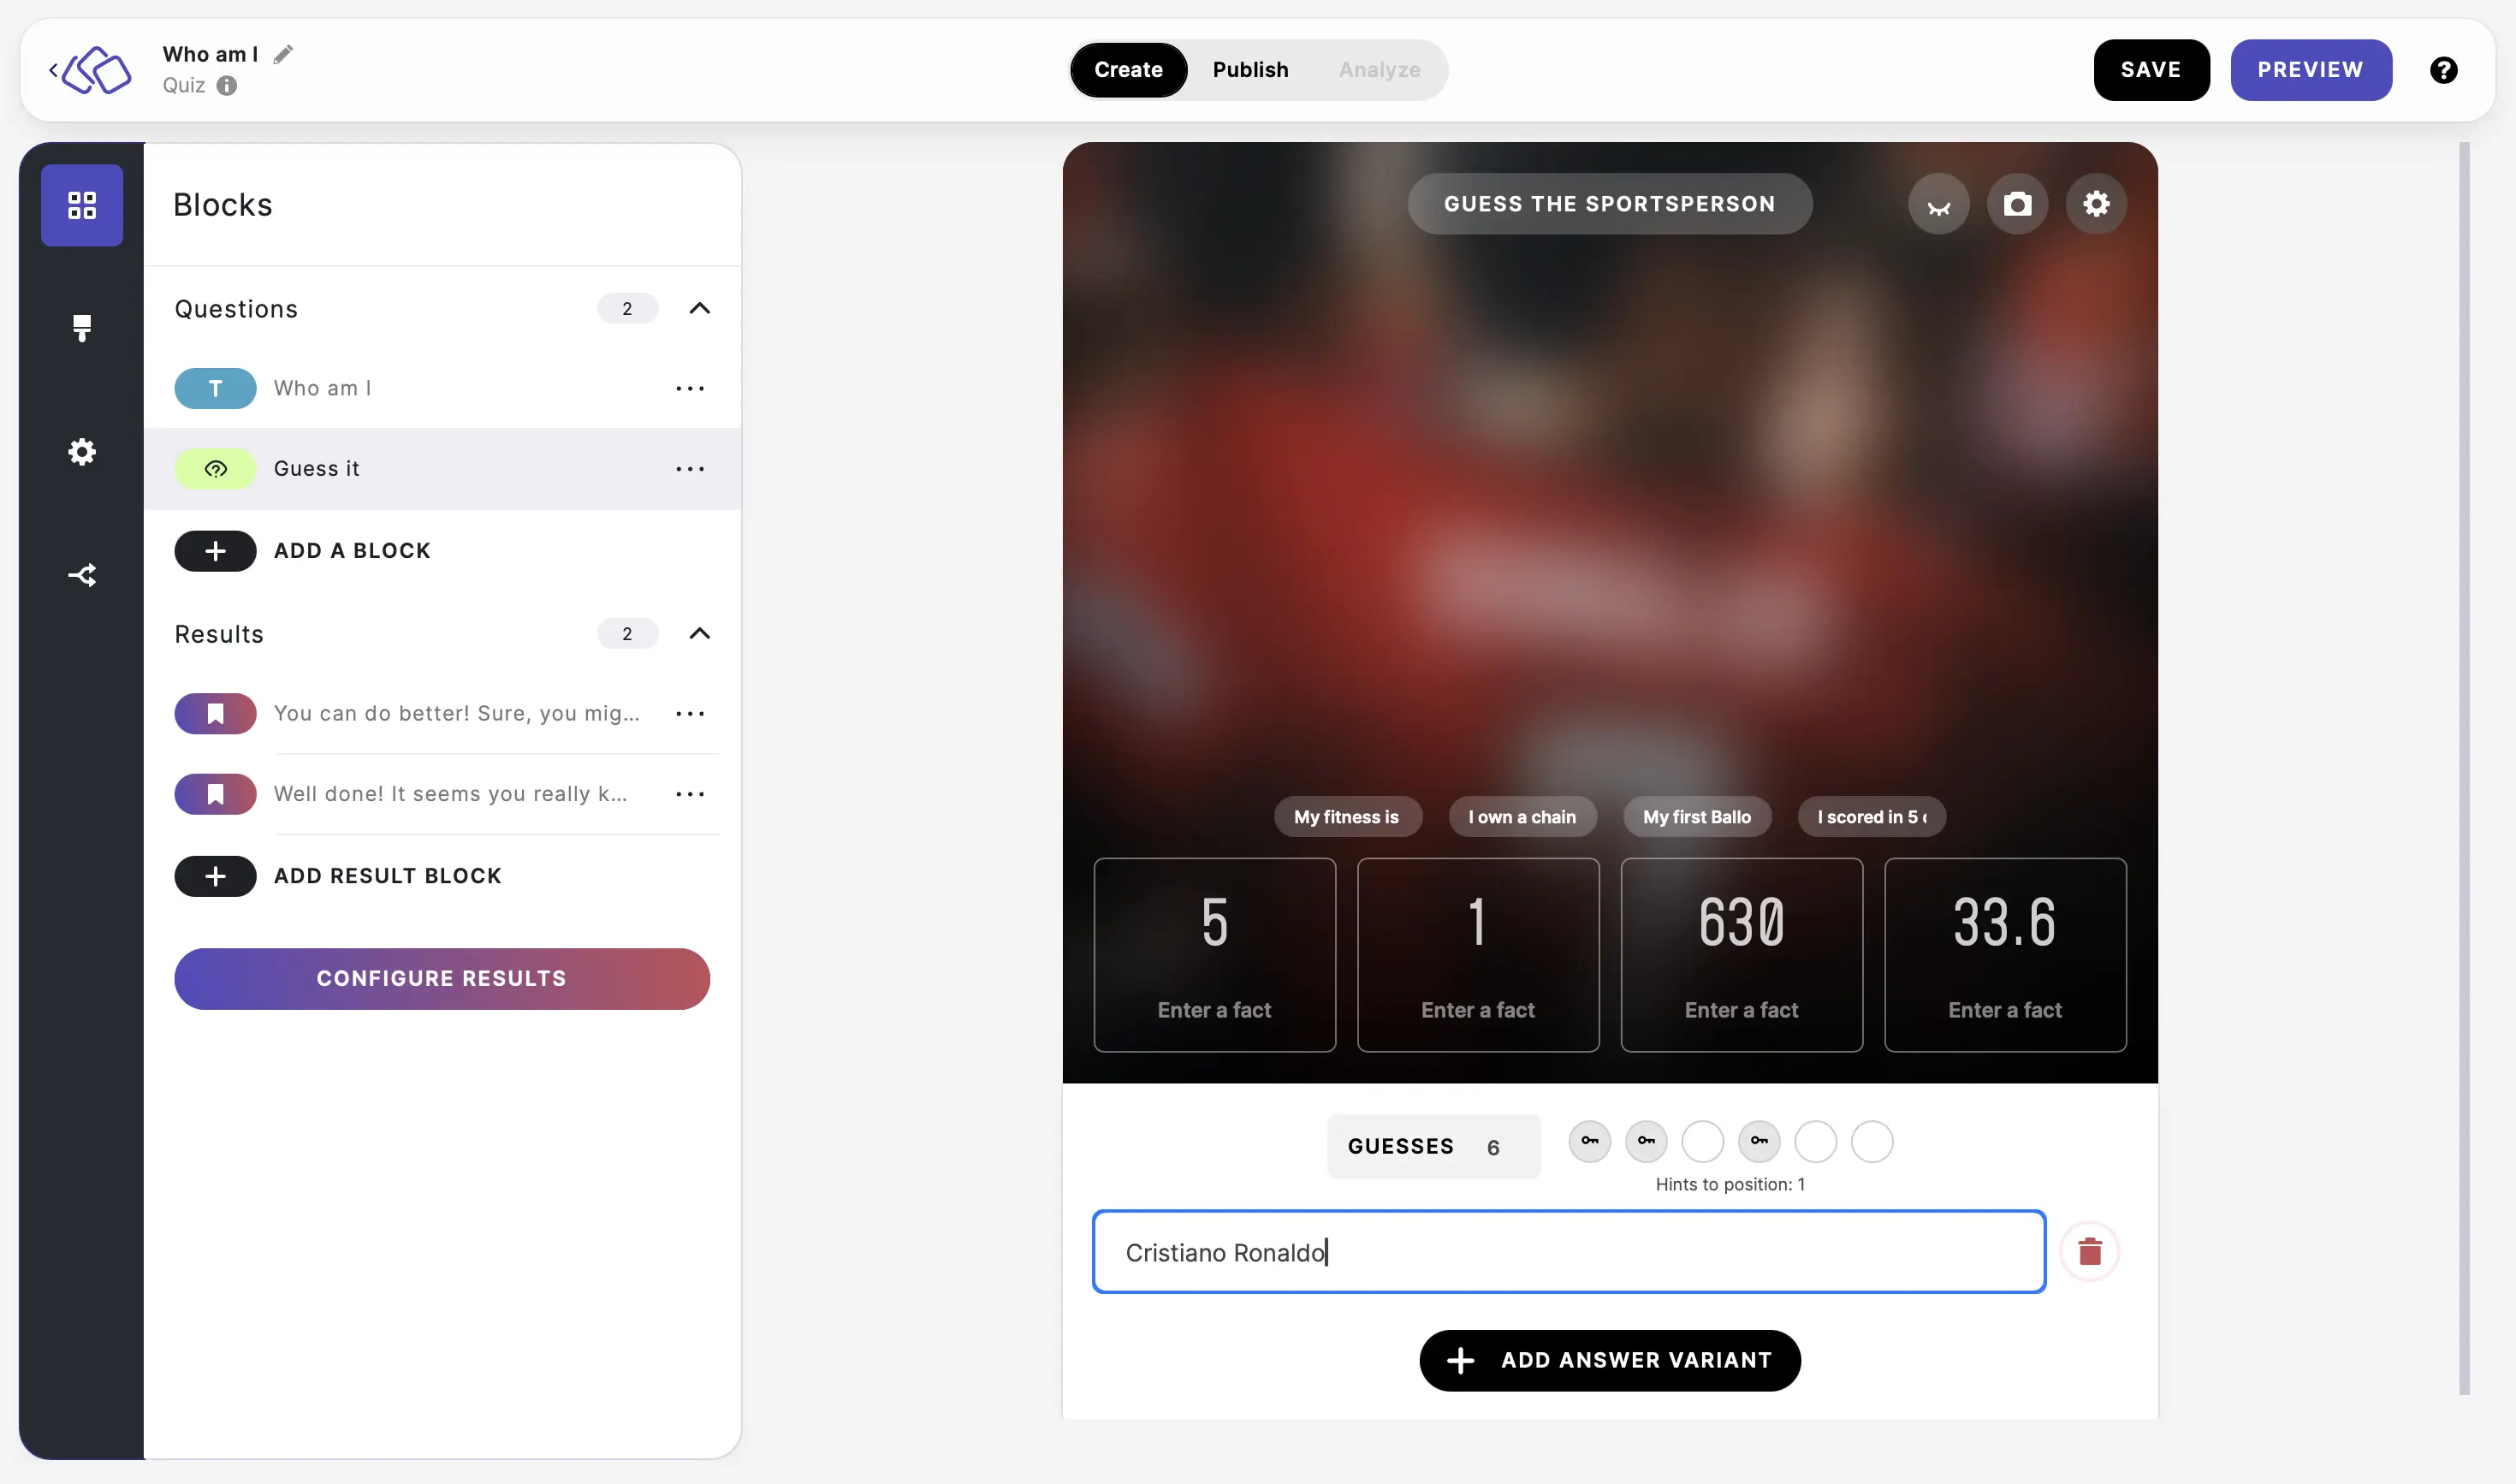
- Enter the correct answer.
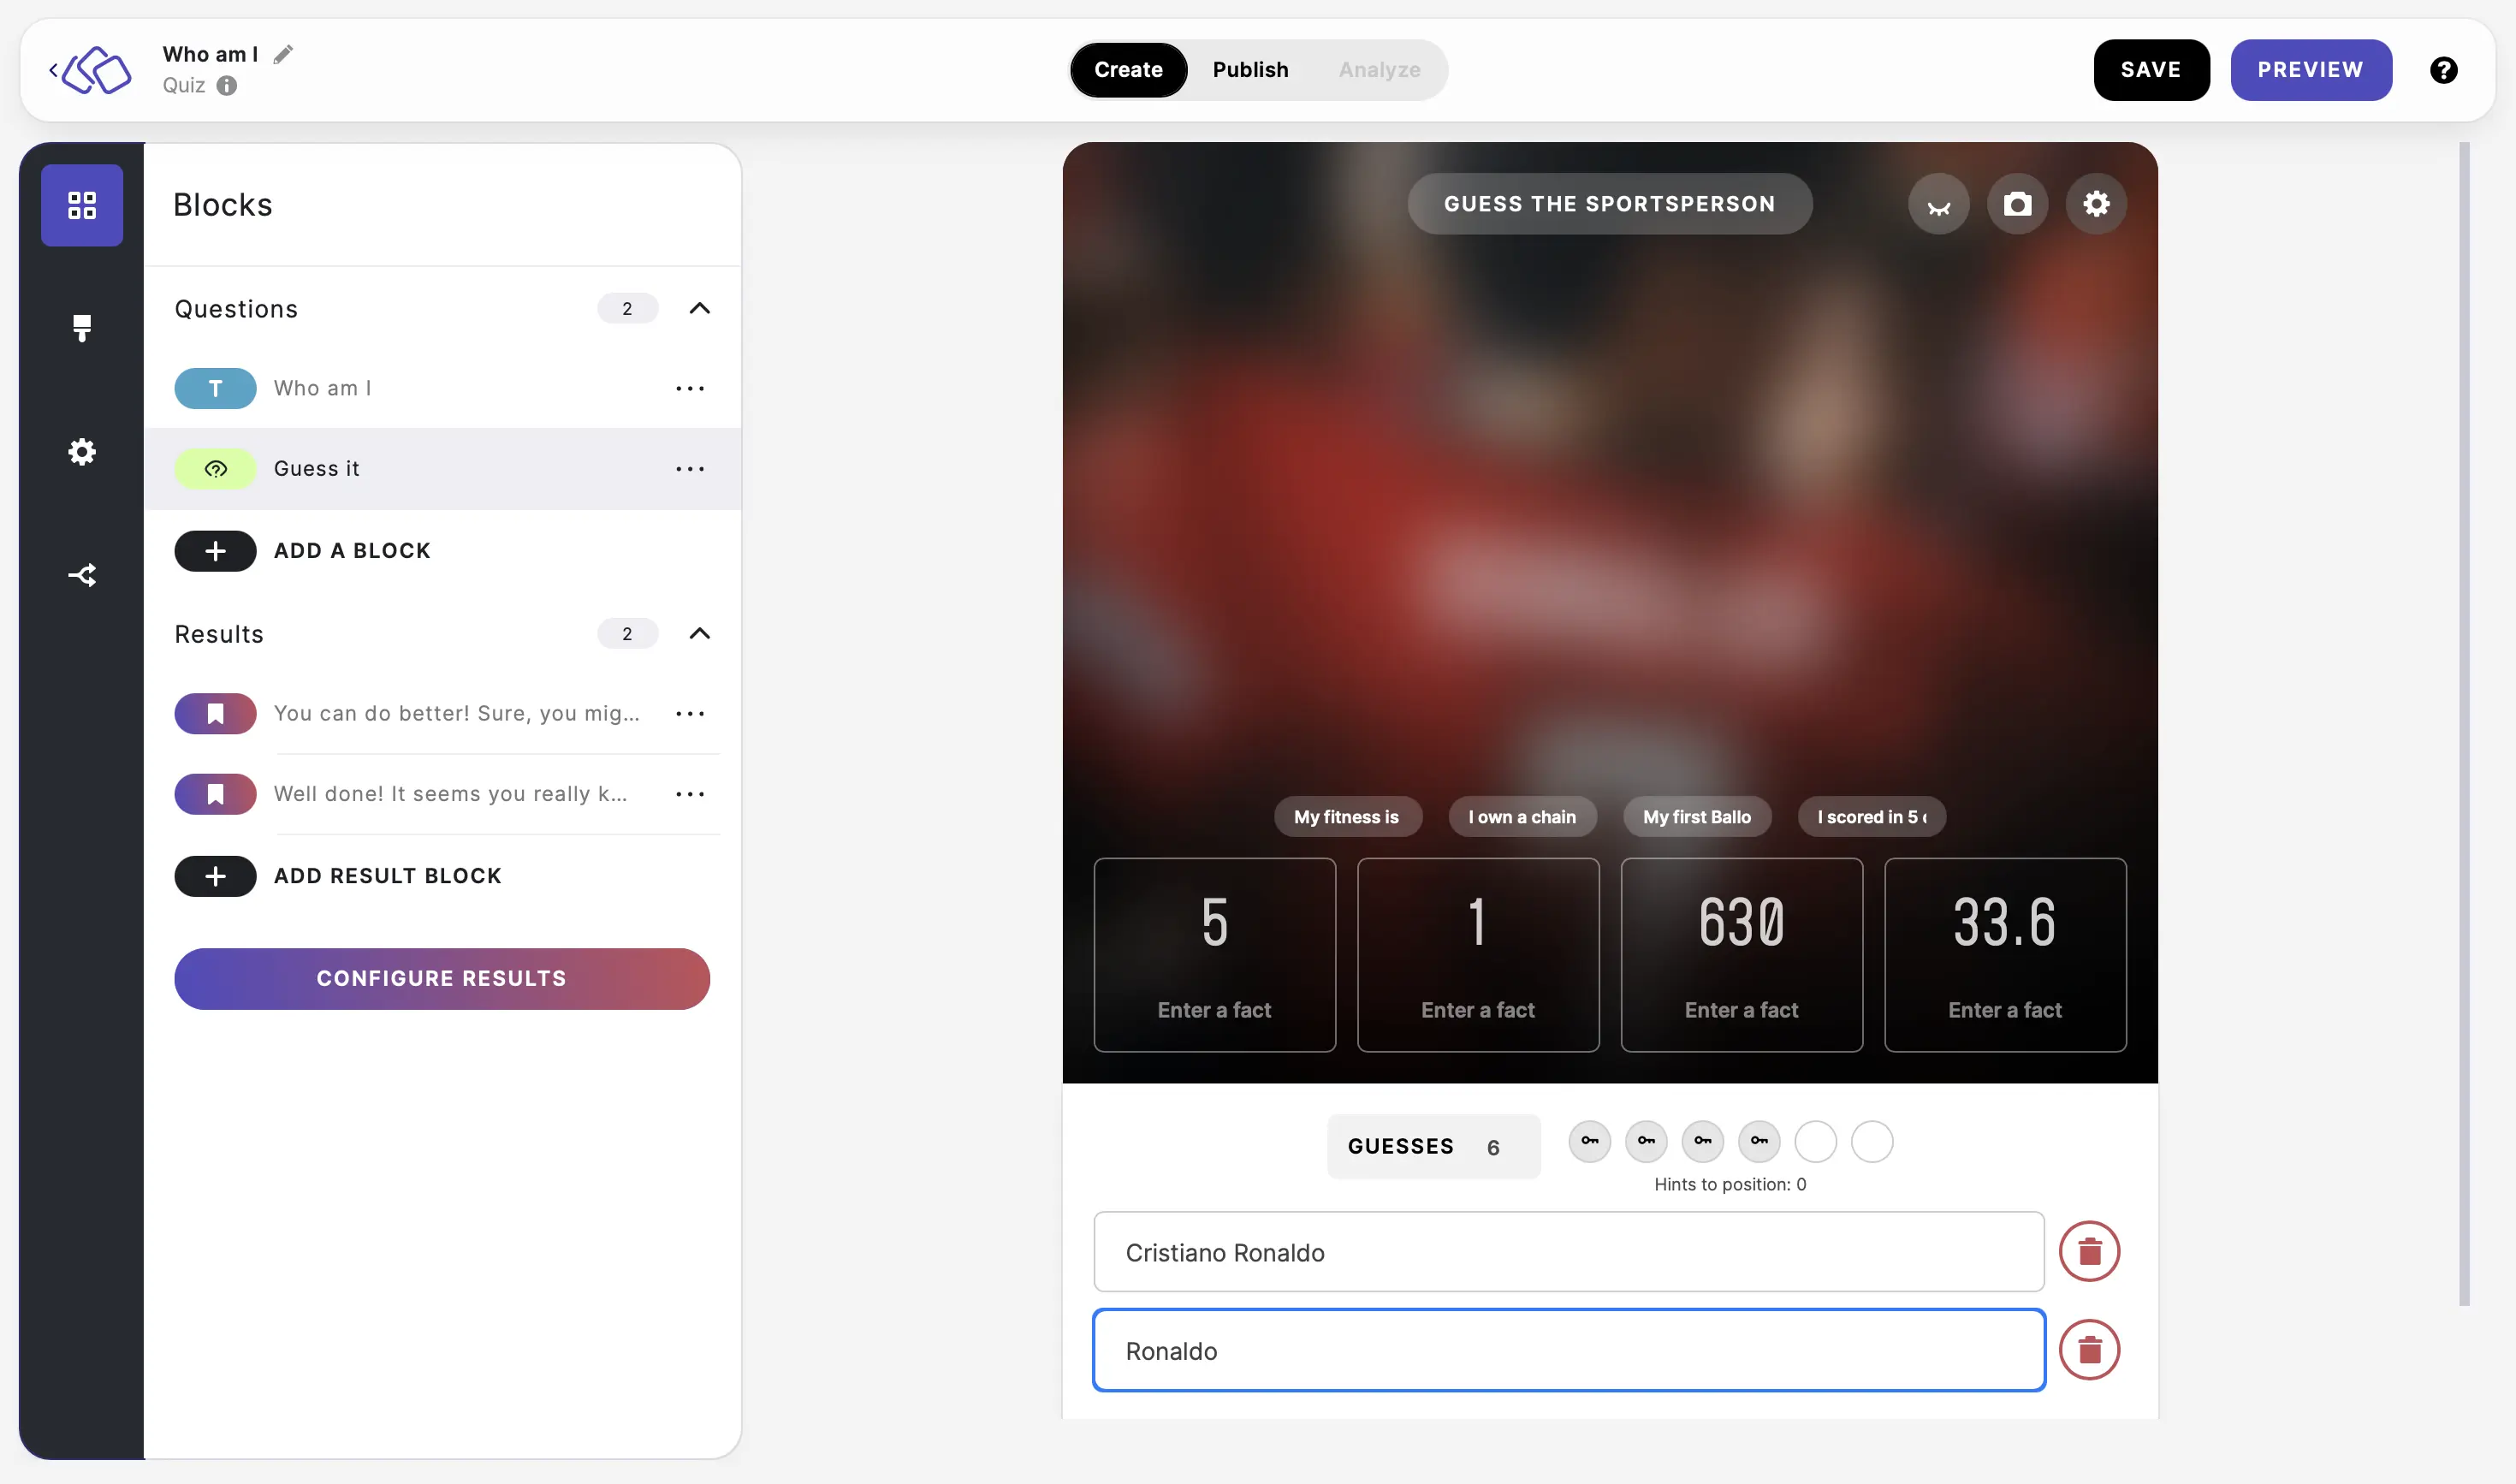
- Click on ADD ANSWER VARIANT and enter a variant in the new field that is created, if necessary.
- Click on the eyelid icon to see what the fully revealed image will look like.
*CHANGE FACT TYPE
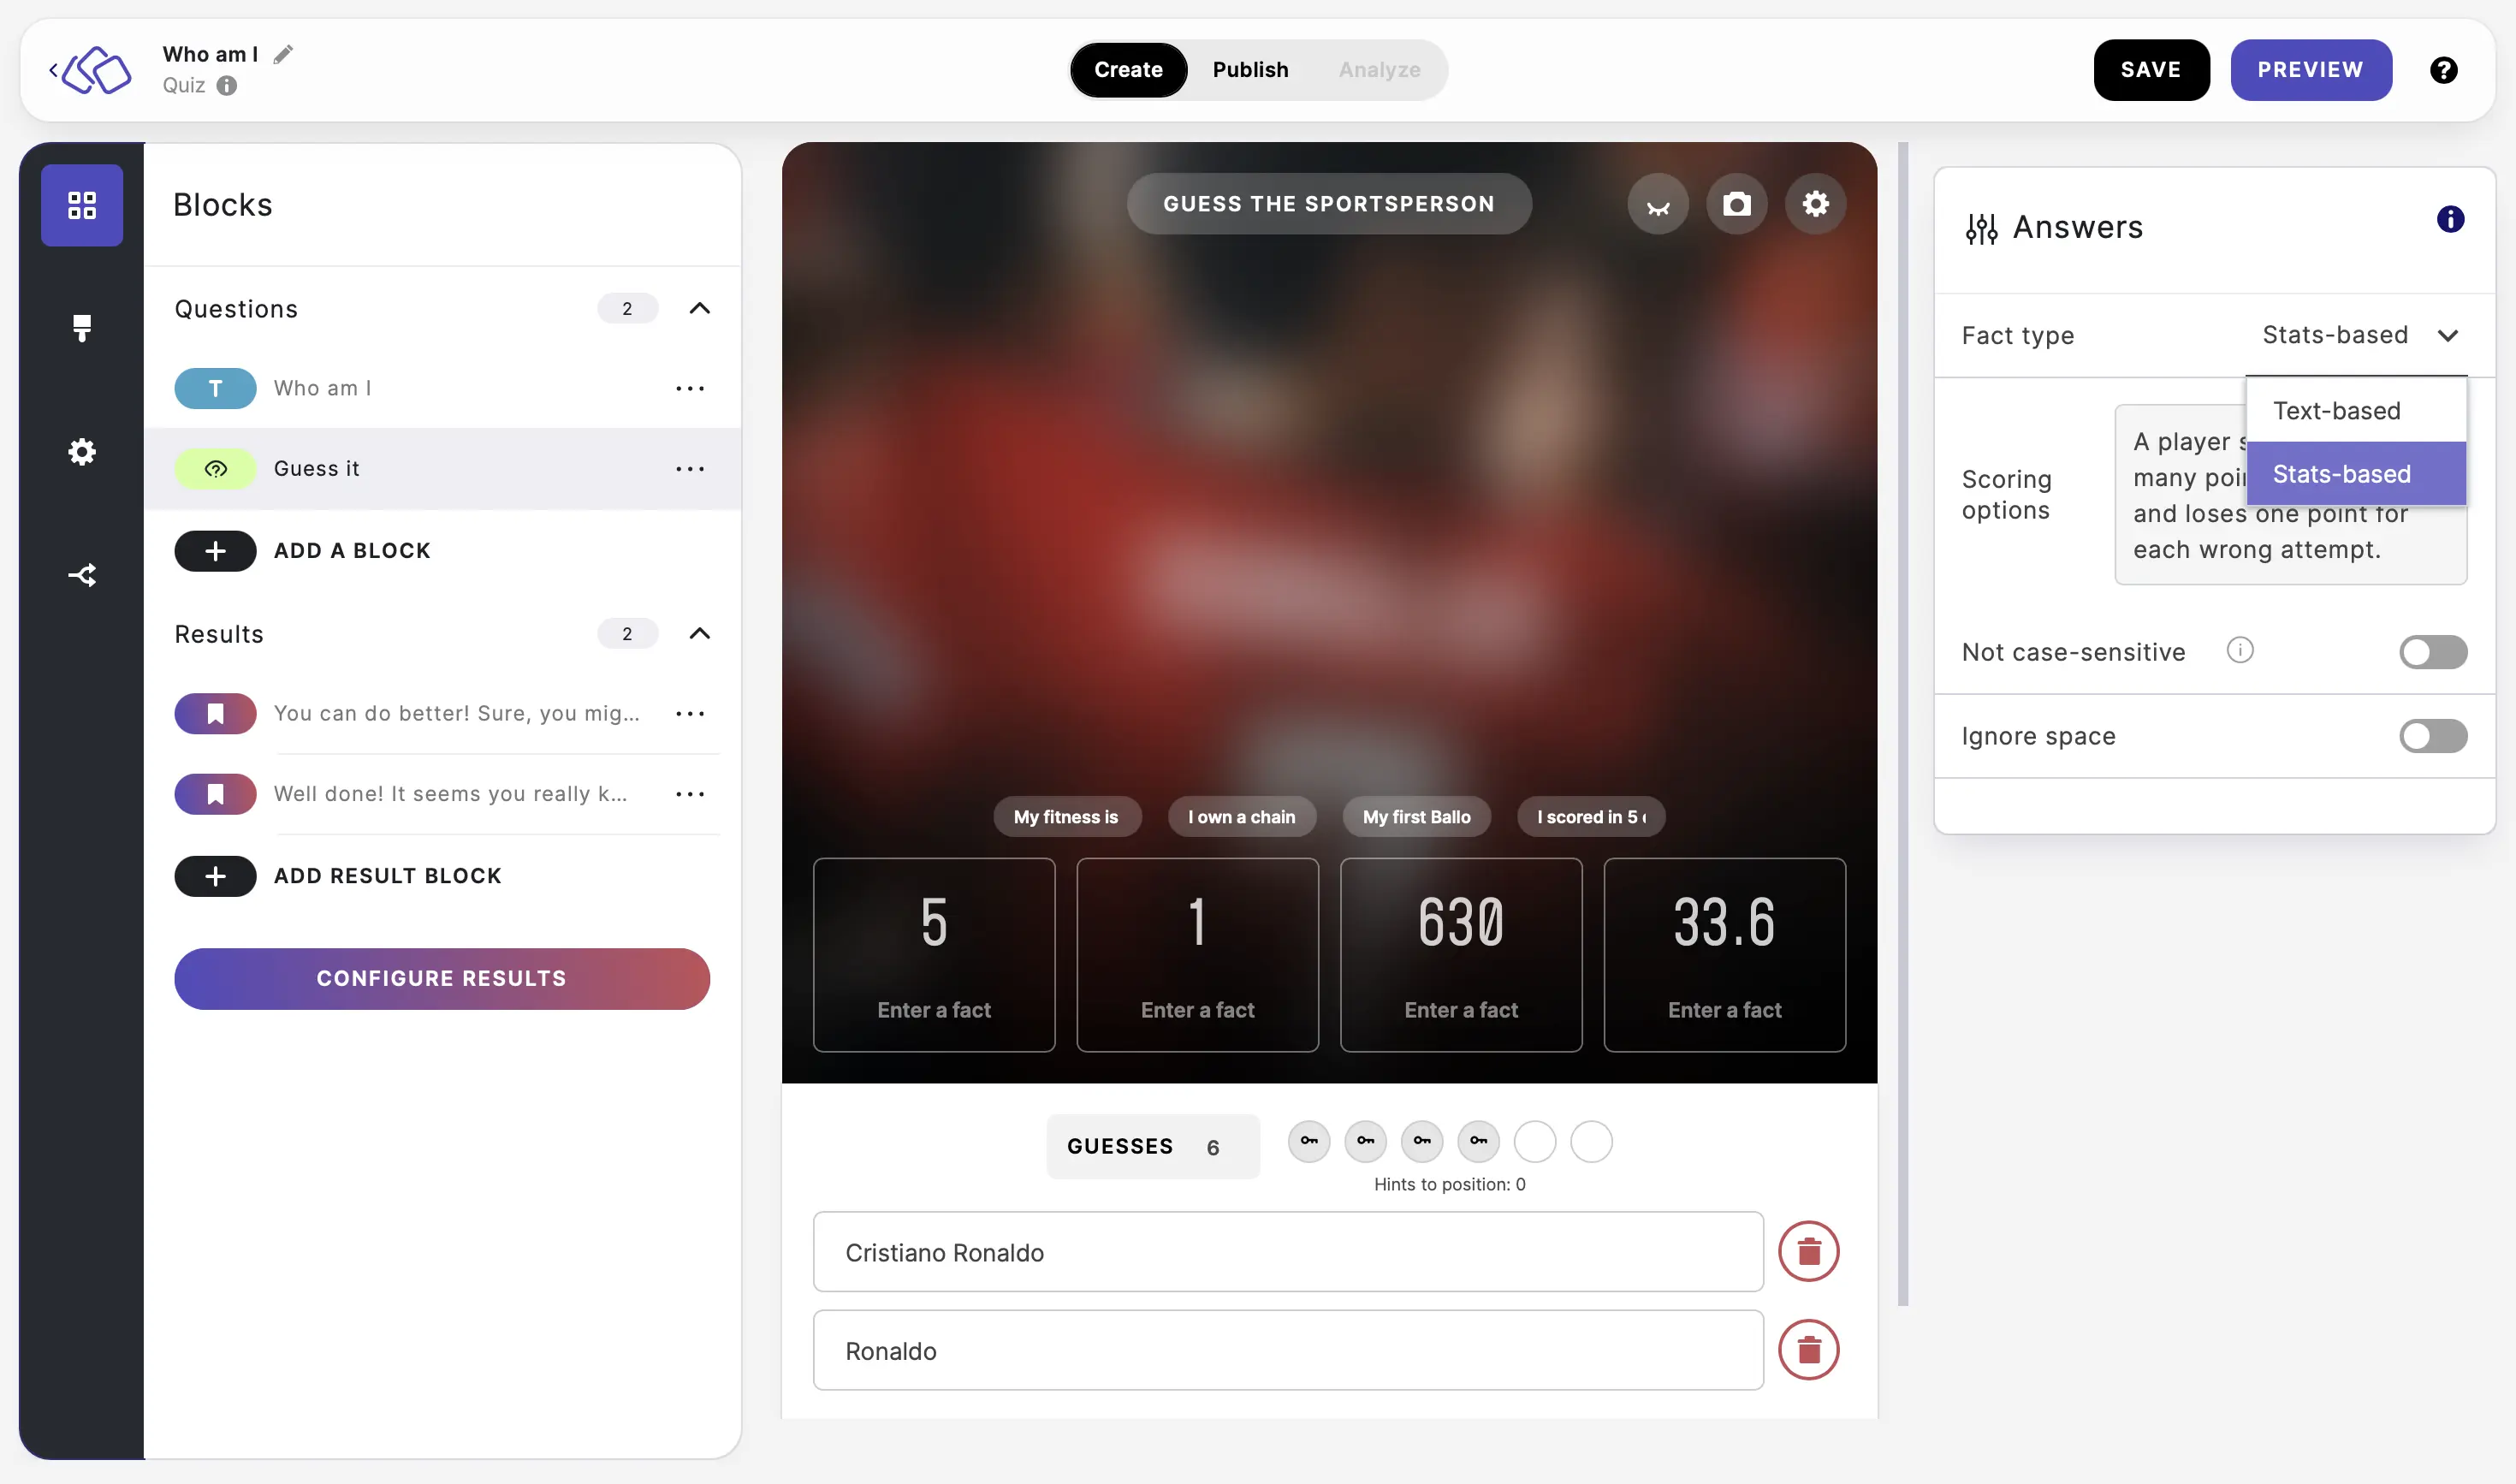
The facts are stats-based by default. To change the facts to be text-based, click on the options icon in the top right of the Guess it card, and select Text-based from the dropdown menu next to Fact type.
SET SPELLING OPTIONS
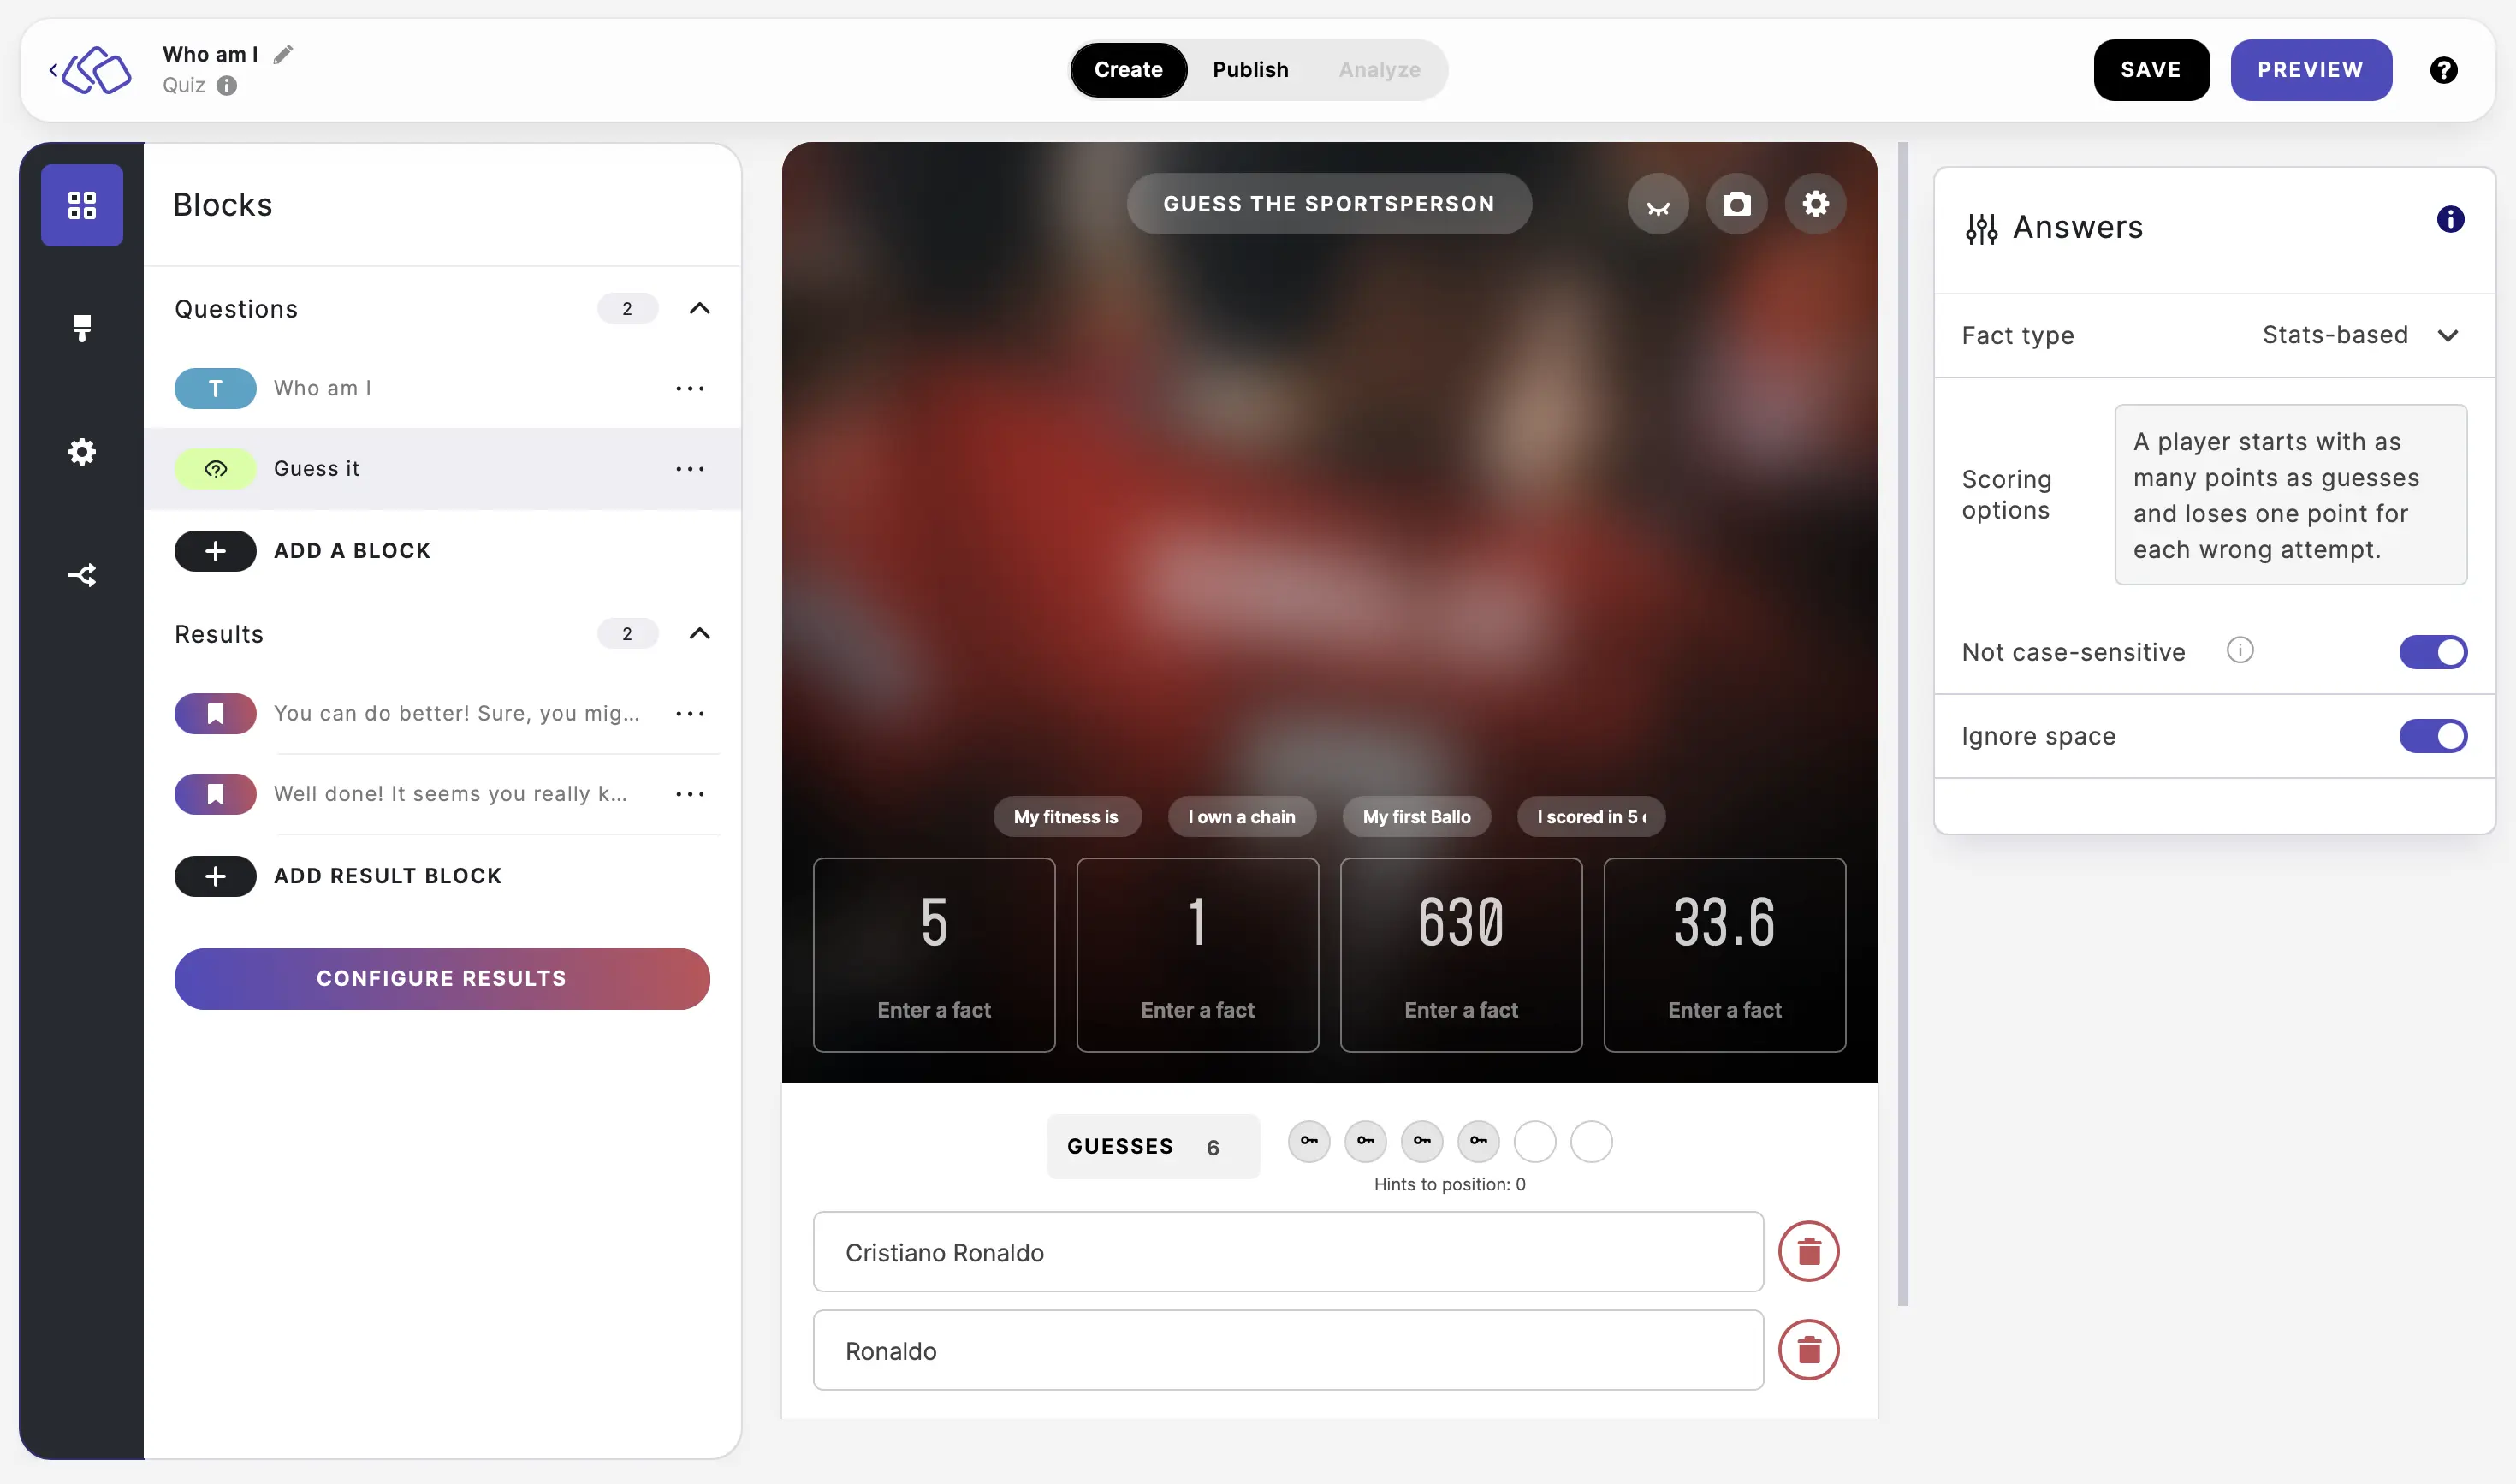
Go to the options icon in the top right corner of the Guess it card and enable Not case-sensitive and/or Ignore space.
Please note: Data input in this block is saved in the front end to be able to auto submit answers and finish the Riddle.
9. Typerush
Ask a categorical question. Users type in as many answers as they can as quickly as possible.
- Click on ADD A BLOCK and select Typerush.
- Insert a question into the Title field.
- Insert all correct answers to your question. Each answer can have multiple variants (to account for typos or different spelling). Add variants by hitting enter after each variant. Add as many answers as you want by clicking on Add an answer.
- Add hints for each answer, to make it easier for your users
SHOW HINTS: You can hide hints if you don't want to show hints
SHOW ROW NUMBERS: Showing row numbers makes sense if your answers are in any logical order
SHOW ANSWER MEDIA: Answer media can be shown additional to hints, or replacing them entirely.
IGNORE SPACE & NOT CASE SENSITIVE: Allow variants of the correct answer with wrong spacing and capitalization.
SCORING TYPE: Award points per right answer or only if the whole block was solved
REVEAL ALL ANSWERS AFTER BLOCK TIMER EXPIRES / USER GIVES UP: It is recommended to use a block timer on Typerush blocks to add an extra level of engagement. Users can choose to give up if they feel they have answered as much as they could. You can choose to show unsolved answers to the user once the timer expires or users give up.
10. Question Bank
Use a Question Bank to display a random assortment of questions from a pre-built database. This is ideal for keeping your audience engaged with fresh content daily without needing to manually create new quizzes every time.
Before you can use a Question Bank in your quiz, you need to create and publish a Question Bank.
Implement the Bank in a Quiz
To use your bank in a quiz:
- Click on ADD A BLOCK and select Question Bank.
- Select Your Bank: Choose the Question Bank you've already created and published.
- Set Parameters: Filter by category or difficulty level, then choose how many questions to display at once (e.g., 5 general knowledge questions and 5 science questions).
Configure Refresh Intervals
The real power of the Question Bank lies in its ability to automatically update the quiz for your users.
- Time-Based Refresh: Select the gear icon, open options, and choose Time-Based refresh.
- Set the Interval: Choose how often the questions should change—such as every hour, every 10 hours, or every 24 hours.
- Pro Tip: For the best results, create a "large and deep" dataset so the refresh interval always provides a truly new experience for the user.
Use Case Idea: Combine the Question Bank with the Leaderboard function. You can show a new set of questions every day, allowing users to return daily to earn more points and climb the rankings.

